Page 29 of 520
29
1
Before driving
1-2. Opening, closing and locking the doors
Wireless remote control
■Operation signals
Doors: A buzzer sounds and the emergency flashers flash to indicate that
the doors have been locked/unlocked. (Locked: Once; Unlocked:
Twice)
Back window: A buzzer sounds to indicate that the back window has been opened.
■ Panic mode
The wireless remote control can be used to lock and unlock the vehi-
cle from outside the vehicle.
Locks all doors
Unlocks all doors
Pressing the button unlocks
the driver’s door. Pressing the
button again within 3 seconds
unlocks the other doors.
Open the back window
(push and hold)
Sounds alarm
(push and hold)
When PANIC switch is pushed for longer
than about one second, an alarm will
sound for about 60 seconds and the vehi-
cle lights will flash to deter any person
from trying to break into or damage your
vehicle.
To stop the alarm, push any button on the
wireless remote control.
Page 71 of 520
71
1-3. Adjustable components (s
eats, mirrors, steering wheel)
1
Before driving
■To prevent sensor error (vehicles with auto anti-glare inside rear view
mirror)
Auto anti-glare inside rear view mirror
In automatic mode, sensors are used to detect the headlights of
vehicles behind and automatical ly reduces the reflected light.
Press the button for longer
than 3 seconds to turn auto
mode ON/OFF.
The indicator comes on when
automatic mode is turned on.
The mirror will revert to the
automatic mode each time the
engine switch is turned on.
To ensure that the sensors operate prop-
erly, do not touch or cover them.
Page 91 of 520
91
1-6. Theft deterrent system
1
Before driving
■
Items to check before locking the vehicle
To prevent unexpected triggering of the alarm and vehicle theft, make sure
of the following.
●Nobody is in the vehicle.
● The windows and moon roof are closed before the alarm is set.
● No valuables or other personal items are left in the vehicle.
■ Triggering of the alarm
The alarm may be triggered in the following situations.
(Stopping the alarm deactivates the system.)
●A person inside the vehicle opens a door or hood.
● The battery is recharged or replaced when the vehicle is locked.
■ Panic mode
P. 2 9
■ When the battery is disconnected
Be sure to cancel the alarm system.
If the battery is discharged before canceling the alarm, the system may be
triggered when the battery is reconnected.
Page 129 of 520

129
1-7. Safety information
1
Before driving
CAUTION
■
When installing a booster seat
Do not fully extend the shoulder belt to prevent the belt from going to ALR
lock mode. ( P. 65)
ALR mode causes the belt to tighten only which could cause injury or dis-
comfort to the child.
■ When installing a child restraint system
Follow the directions given in the child restraint system installation manual
and fix the child restraint system securely in place.
If the child restraint system is not correctly fixed in place, the child or other
passengers may be seriously injured or even killed in the event of sudden
braking or an accident.
●Vehicles with third seats: When installing a child restraint system in the
second center position, adjust both seatbacks at the same angle. Other-
wise, the child restraint system cannot be securely restrained and this may
cause death or serious injuries in an accident.
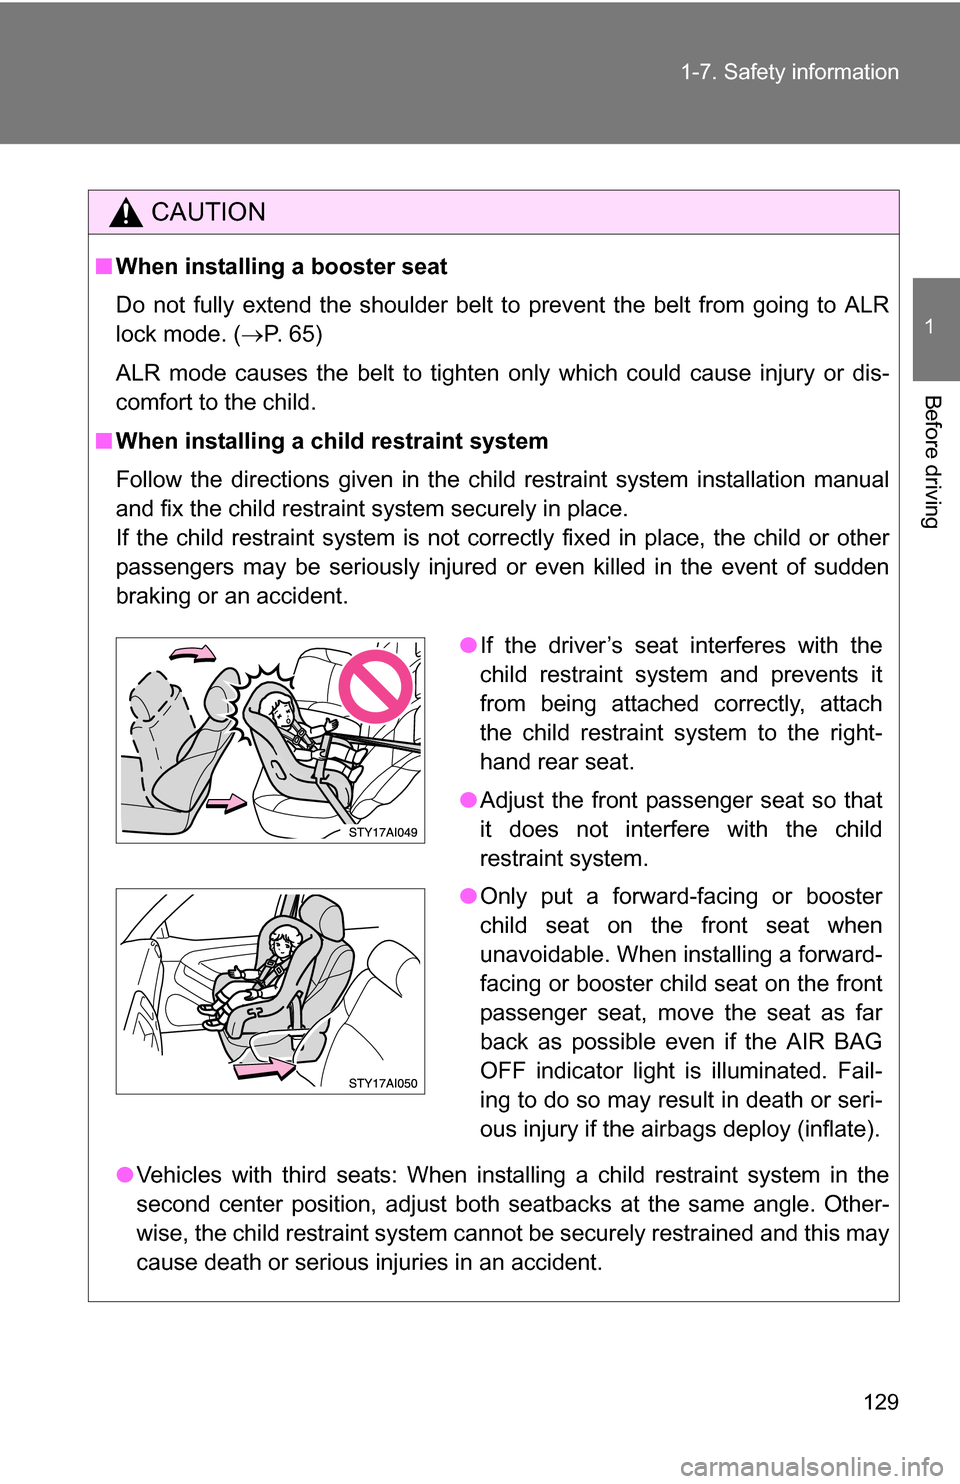
●If the driver’s seat interferes with the
child restraint system and prevents it
from being attached correctly, attach
the child restraint system to the right-
hand rear seat.
● Adjust the front passenger seat so that
it does not interfere with the child
restraint system.
● Only put a forward-facing or booster
child seat on the front seat when
unavoidable. When installing a forward-
facing or booster child seat on the front
passenger seat, move the seat as far
back as possible even if the AIR BAG
OFF indicator light is illuminated. Fail-
ing to do so may result in death or seri-
ous injury if the airbags deploy (inflate).
Page 156 of 520

156 2-2. Instrument cluster
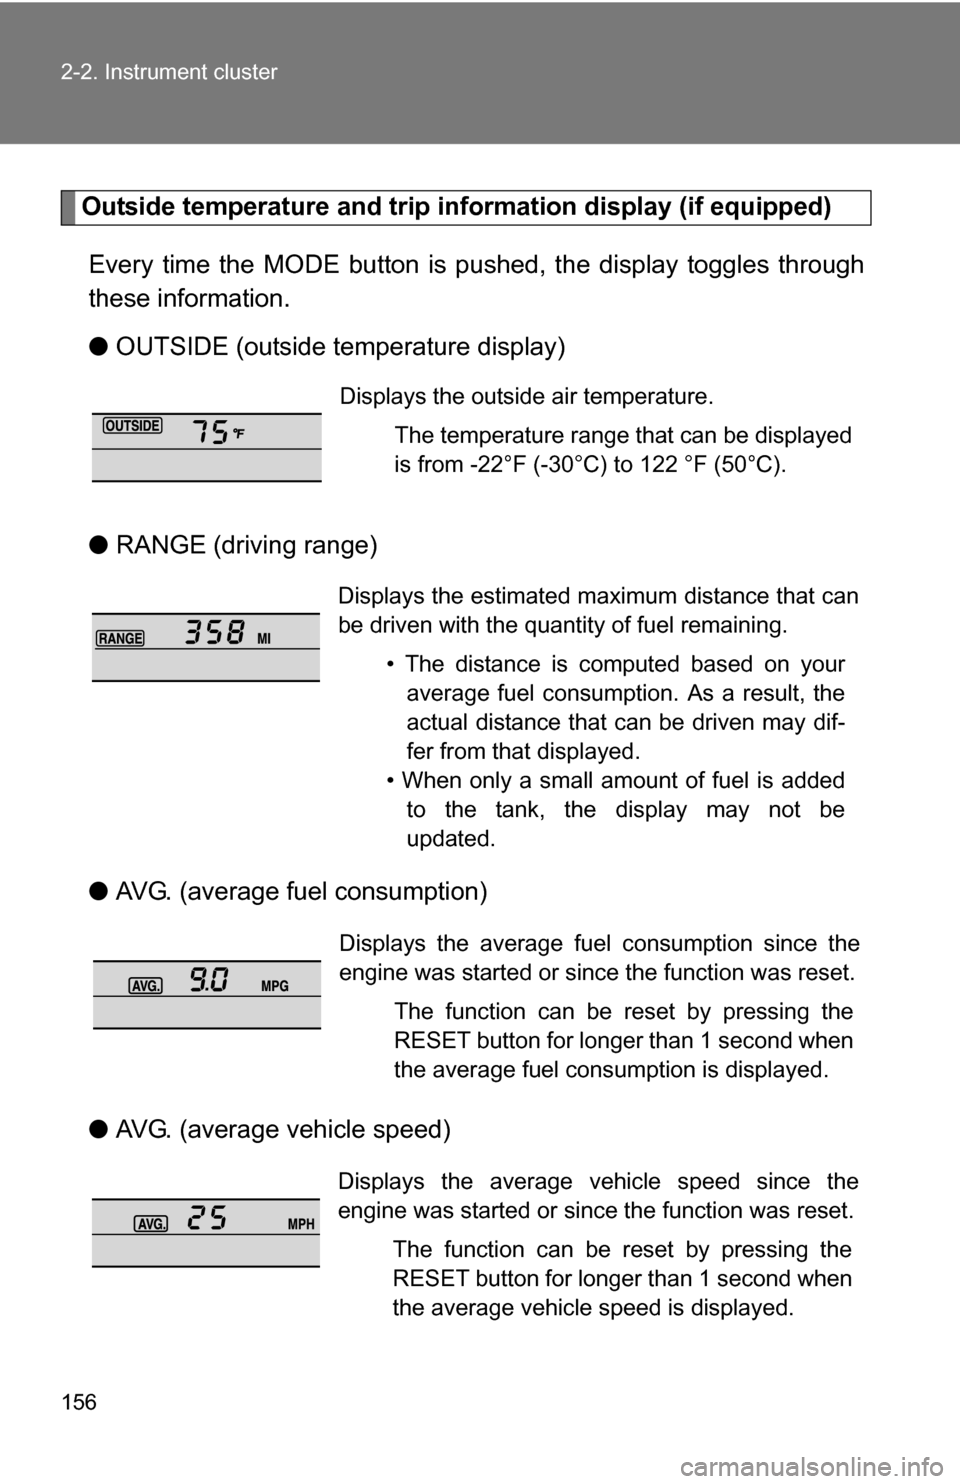
Outside temperature and trip information display (if equipped)
Every time the MODE button is pushed, the display toggles through
these information.
● OUTSIDE (outside temperature display)
● RANGE (driving range)
● AVG. (average fuel consumption)
● AVG. (average vehicle speed)
Displays the outside air temperature.
The temperature range that can be displayed
is from -22°F (-30°C) to 122 °F (50°C).
Displays the estimated maximum distance that can
be driven with the quantity of fuel remaining.• The distance is computed based on youraverage fuel consumption. As a result, the
actual distance that can be driven may dif-
fer from that displayed.
• When only a small amount of fuel is added to the tank, the display may not be
updated.
Displays the average fuel consumption since the
engine was started or since the function was reset.
The function can be reset by pressing the
RESET button for longer than 1 second when
the average fuel consumption is displayed.
Displays the average vehicle speed since the
engine was started or since the function was reset.The function can be reset by pressing the
RESET button for longer than 1 second when
the average vehicle speed is displayed.
Page 173 of 520

173
2-4. Using other
driving systems
2
When driving
CAUTION
■The electronically modulated air susp ension must be turned off in the
following circumstances:
Otherwise, the automatic leveling function may cause the vehicle’s height to
change, resulting in an unexpected accident.
● When driving through water such as shallow streams (Put the vehicle
height in HI mode and turn off the electronically modulated air suspension.
Drive at 18 mph [30 km/h] or slower.)
● When jacking up the vehicle, installing tire chains or tying the vehicle with
chains/wires for transportation via flat bed truck (Turn the system off and
stop the engine.)
● When the vehicle must be towed (Put the vehicle height in N mode and
turn the system off.)
● When the vehicle gets stuck (Turn the system off.)
● When disconnecting a trailer (Put the vehicle height in LO mode and turn
the system off.)
■ Selecting the correct height mode
Observe the following precautions to prevent accidents.
Failure to do so may cause damage to parts of the vehicle, as well as dan-
gerous handling characteristics, which may lead to fatal or injury accidents.
●Before you lower the vehicle’s height, check under the vehicle to make
sure that no one is there.
● The HI mode should be used for off-road driving conditions.
As the vehicle’s center of gravity is higher in this setting, the vehicle may
become unstable when turning abruptly.
● Do not select HI mode when you load cargo on the roof luggage carrier.
This may result in a loss of control or vehicle rollover.
Page 188 of 520

188
2-4. Using other driving systems
Driving assist systems
To help enhance driving safety and performance, the following sys-
tems operate automatically in res ponse to various driving situations.
Be aware, however, that these systems are supplementary and
should not be relied upon too h eavily when operating the vehicle.
■ABS (Anti-lock Brake System)
Helps to prevent wheel lock when the brakes are applied suddenly, or if
the brakes are applied while driving on a slippery road surface.
■Brake Assist
Generates an increased level of braking force after the brake pedal is
depressed, when the system detects a panic stop situation.
■VSC (Vehicle Stability Control)
Helps the driver to control skidding when swerving suddenly or turning
on slippery road surfaces.
■TRAC (Traction Control)
Maintains drive power and prevents the rear wheels (2WD models and
H2 mode on Multi-mode 4WD models) or all wheels (4WD models
except on L4 mode) from spinning when starting the vehicle or acceler-
ating on slippery roads.
■A-TRAC (Active Traction Contro l) for L4 mode on 4WD mod-
els (vehicles with the A-TRAC switch except when the cen-
ter differential lock is locked)
Maintains drive power and prevents the all wheels from spinning when
starting the vehicle or accelerating on slippery roads.
■ Hill-start assist control (if equipped)
Helps prevent the vehicle from rolling backwards when starting on an
incline or slippery slope. It operates for approximately 5 seconds at
maximum.
Page 191 of 520
191
2-4. Using other
driving systems
2
When driving
■VSC OFF mode
Stop the vehicle completely, and
press the VSC OFF switch for
more than 3 seconds.
The slip and VSC OFF indicators
will come on.
The system is in TRAC off, AUTO
LSD off and VSC off mode.