2009 SUBARU FORESTER mirror
[x] Cancel search: mirrorPage 6 of 384

Vehicle symbols
There are some of the symbols you may
see on your vehicle.Mark Name
WARNING
CAUTION
Power door lock and unlock
Passengers ’windows lock
and unlock
Fuel
Front fog lights
Hazard warning flasher
Engine hood Mark Name
Seat heater
Child restraint top tether an- chorages
Child restraint lower an- chorages
Horn
Windshield wiper deicer
Wiper intermittent
Windshield wiper and washer
Windshield wiper mist (for
single wipe)
Rear window wiper
Rear window washer
LightsMark Name
Tail lights, license plate light
and instrument panel illumi-nation
Headlights
Turn signal
Illumination brightness
Fan speed
Instrument panel outlets
Instrument panel outlets and
foot outlets
Foot outlets
Windshield defroster and foot outlets
Windshield defroster
Rear window defogger/Out-
side mirror defogger3
– CONTINUED –
Page 17 of 384

14 &Instrument panel
1) Door locks (page 2-4)
2) Outside mirror switch (page 3-35)
3) Illumination brightness control
(page 3-26)
4) Light control lever (page 3-24)
5) Combination meter (page 3-5)
6) Wiper control lever (page 3-28)
7) Hazard warning flasher switch (page 3-5)
8) Audio (page 5-1)
9) Shift lever (MT) (page 7-13)/ Selector lever (AT) (page 7-15)
10) Climate control (page 4-1)
11) Cruise control (page 7-34)
12) Horn (page 3-38)
13) SRS airbag (page 1-34)
14) Tilt/telescopic steering (page 3-36/ page 3-37)
15) Audio control buttons (page 5-26)
16) Fuse box (page 11-44)
17) Vehicle Dynamics Control OFF switch (page 7-29)
18) Hood lock release knob (page 11-5)
19) Power windows (page 2-19)
Page 65 of 384

1-40Seat, seatbelt and SRS airbags
WARNING
Do not attach accessories to the
windshield, or fit an extra-wide mir-
ror over the rear view mirror. If the
SRS airbag deploys, those objects
could become projectiles that could
seriously injure vehicle occupants.
! Driver ’s SRS frontal airbag
The driver ’s SRS frontal airbag uses a
dual stage inflator. The inflator operates in
different ways depending on the severity
of impact.
Have the system inspected by your
SUBARU dealer immediately if the SRS
airbag system warning light illuminates. NOTE
The driver
’s SRS side airbag, SRS
curtain airbag and seatbelt preten-
sioner are not controlled by the
SUBARU advanced frontal airbag sys-tem. ! Front passenger ’s SRS frontal air-
bag
The front passenger ’s SRS frontal airbag
uses a dual stage inflator. The inflator
operates in different ways depending on
the severity of impact.
The total load on the seat is monitored by
the occupant detection system ’s weight
sensor located under the seat.
The system has another sensor that
monitors the tension of the front passen-
ger seatbelt. Using the total seat load and
seatbelt tension data from the sensors,
the occupant detection system determines
whether the front passenger ’s SRS frontal
airbag should or should not be inflated.
The occupant detection system may not
inflate the front passenger ’s SRS frontal
airbag even when the driver ’s SRS frontal
airbag deploys. This is normal.
Observe the following precautions. Failure
to do so may prevent the SUBARU
advanced frontal airbag system from
functioning correctly or cause the system
to fail. .
Do not apply any strong impact to the
front passenger ’s seat such as by kicking.
. Do not spill liquid on the front passen-
ger ’s seat. If liquid is spilled, wipe it off
immediately. . Do not remove or disassemble the front
passenger ’s seat.
. Do not install any accessory (such as
an audio amplifier) other than a genuine
SUBARU accessory under the front pas-senger ’s seat.
. Do not place anything (shoes, umbrel-
la, etc.) under the front passenger ’s seat.
. The front passenger ’s seat must not be
used with the head restraint removed. . Do not leave any article including a
child restraint system on the front passen- ger ’s seat or the seatbelt tongue and
buckle engaged when you leave yourvehicle. . Do not place a magnet near the
seatbelt buckle and the seatbelt retractor.. Do not use front seats with their back-
ward-forward position and seatback not
being locked into place securely. If any of
them are not locked securely, adjust them
again. For adjusting procedure, refer tothe “Front seats ”section in this chapter.
If the seatbelt buckle switch and/or frontpassenger ’s occupant detection system
have failed, the SRS airbag system
Page 113 of 384

Instruments and controlsTurn signal lever ................................................ 3-26
Illumination brightness control ......................... 3-26
Front fog light switch (if equipped) .................. 3-27
Wiper and washer .............................................. 3-28
Windshield wiper and washer switches ............... 3-29
Rear window wiper and washer switch ................ 3-30
Rear window defogger button ........................... 3-31Windshield wiper deicer (if equipped)
.............. 3-32
Mirrors ................................................................ 3-33
Inside mirror ...................................................... 3-33
Outside mirrors ................................................. 3-35
Tilt steering wheel (if equipped) ....................... 3-36
Tilt/telescopic steering wheel (if equipped) ..... 3-37
Horn .................................................................... 3-38
Page 143 of 384

3-32Instruments and controls
following. .If the battery voltage drops below the
permissible level within 15 minutes of
depression of the button, continuous
operation is canceled and the rear window
defogger stops operating 15 minutes later. . If the battery voltage drops below the
permissible level after the rear window
defogger has, following depression of the
button, operated for 15 minutes, stopped
operating for 2 minutes, and started
operating again, the rear window defogger
immediately stops operating.
CAUTION
. Do not use sharp instruments or
window cleaner containing abra-
sives to clean the inner surface
of the rear window. They may
damage the conductors printed
on the window.
. To prevent the battery from being
discharged, do not operate the
defogger continuously for any
longer than necessary.
NOTE . If your vehicle is equipped with the
outside mirror defogger, the outside
mirror defogger operates while the rear window defogger is operating..
Turn on the rear window defogger if
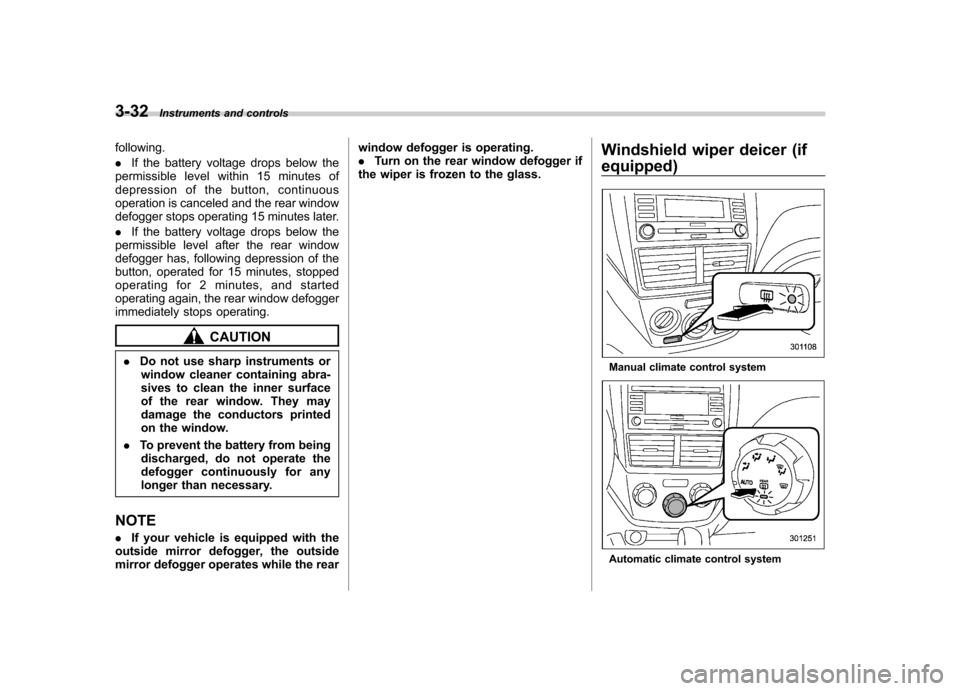
the wiper is frozen to the glass. Windshield wiper deicer (if
equipped)
Manual climate control system
Automatic climate control system
Page 144 of 384

The windshield wiper deicer operates only
when the ignition switch is in the“ON ”
position. The windshield wiper deicer is
activated by pushing the same button
used for the rear window defogger.
Before turning on the windshield wiper
deicer, remove any snow from the wind-
shield. To turn on the windshield wiper
deicer, push the button.
The windshield wiper deicer will automa-
tically shut off after approximately 15
minutes. If the windshield wiper blades
have been deiced completely before that
time, push the button to turn it off. It also
turns off when the ignition switch is turned
to the “Acc ”or “LOCK ”position. If deicing
is not complete when you restart your
vehicle, you have to push the button to
turn the deicer on again.
Your SUBARU dealer can set your wind-
shield wiper deicer for continuous opera-
tion. Contact your SUBARU dealer fordetails.
Once the windshield wiper deicer has
been set for continuous operation, press-
ing the button results in continuous opera-
tion. The windshield wiper deicer auto-
matically stops operating if any one of the
following conditions occurs during contin-
uous operation. .
The outside temperature becomes
41 8F(5 8C) or higher.
. The vehicle speed remains at 9 mph
(15 km/h) or lower for 15 minutes. . The battery voltage decreases below
the permissible level.
CAUTION
To prevent the battery from being
discharged, do not operate the
windshield wiper deicer continu-
ously for any longer than necessary.
NOTE
If your vehicle is equipped with the
outside mirror defogger, the outside
mirror defogger operates while the
windshield wiper deicer is operating. Mirrors
Always check that the inside and outside
mirrors are properly adjusted before you
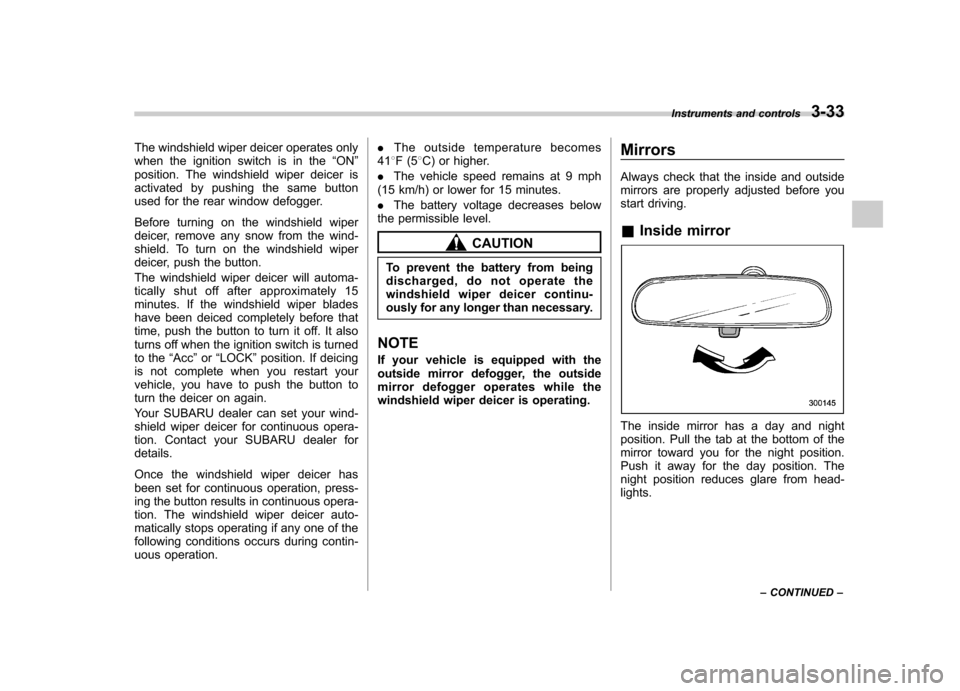
start driving. &
Inside mirror
The inside mirror has a day and night
position. Pull the tab at the bottom of the
mirror toward you for the night position.
Push it away for the day position. The
night position reduces glare from head-lights. Instruments and controls
3-33
– CONTINUED –
Page 145 of 384

3-34Instruments and controls
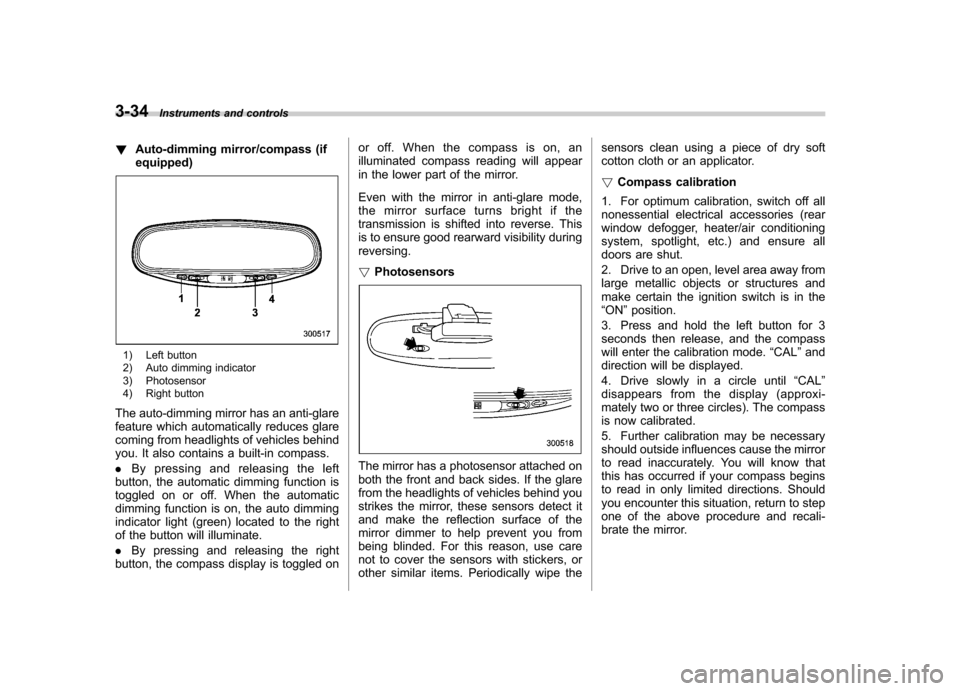
! Auto-dimming mirror/compass (if equipped)
1) Left button
2) Auto dimming indicator
3) Photosensor
4) Right button
The auto-dimming mirror has an anti-glare
feature which automatically reduces glare
coming from headlights of vehicles behind
you. It also contains a built-in compass. . By pressing and releasing the left
button, the automatic dimming function is
toggled on or off. When the automatic
dimming function is on, the auto dimming
indicator light (green) located to the right
of the button will illuminate. . By pressing and releasing the right
button, the compass display is toggled on or off. When the compass is on, an
illuminated compass reading will appear
in the lower part of the mirror.
Even with the mirror in anti-glare mode,
the mirror surface turns bright if the
transmission is shifted into reverse. This
is to ensure good rearward visibility duringreversing. !
Photosensors
The mirror has a photosensor attached on
both the front and back sides. If the glare
from the headlights of vehicles behind you
strikes the mirror, these sensors detect it
and make the reflection surface of the
mirror dimmer to help prevent you from
being blinded. For this reason, use care
not to cover the sensors with stickers, or
other similar items. Periodically wipe the sensors clean using a piece of dry soft
cotton cloth or an applicator. !
Compass calibration
1. For optimum calibration, switch off all
nonessential electrical accessories (rear
window defogger, heater/air conditioning
system, spotlight, etc.) and ensure all
doors are shut.
2. Drive to an open, level area away from
large metallic objects or structures and
make certain the ignition switch is in the“ ON ”position.
3. Press and hold the left button for 3
seconds then release, and the compass
will enter the calibration mode. “CAL ”and
direction will be displayed.
4. Drive slowly in a circle until “CAL ”
disappears from the display (approxi-
mately two or three circles). The compass
is now calibrated.
5. Further calibration may be necessary
should outside influences cause the mirror
to read inaccurately. You will know that
this has occurred if your compass begins
to read in only limited directions. Should
you encounter this situation, return to step
one of the above procedure and recali-
brate the mirror.
Page 146 of 384

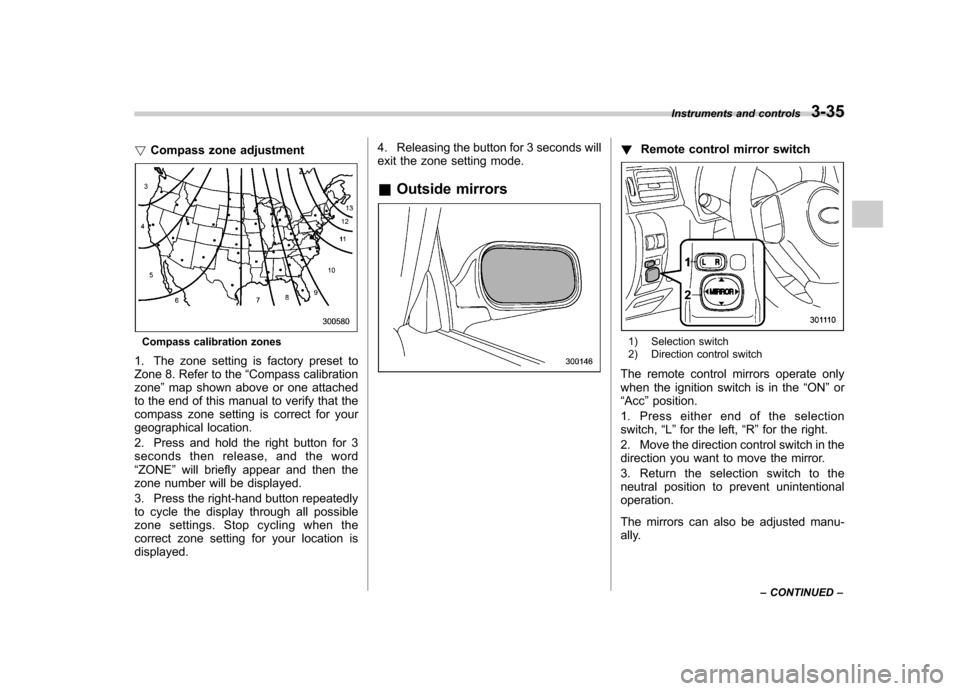
!Compass zone adjustment
Compass calibration zones
1. The zone setting is factory preset to
Zone 8. Refer to the “Compass calibration
zone ”map shown above or one attached
to the end of this manual to verify that the
compass zone setting is correct for your
geographical location.
2. Press and hold the right button for 3
seconds then release, and the word“ ZONE ”will briefly appear and then the
zone number will be displayed.
3. Press the right-hand button repeatedly
to cycle the display through all possible
zone settings. Stop cycling when the
correct zone setting for your location isdisplayed. 4. Releasing the button for 3 seconds will
exit the zone setting mode.
& Outside mirrors
! Remote control mirror switch
1) Selection switch
2) Direction control switch
The remote control mirrors operate only
when the ignition switch is in the “ON ”or
“ Acc ”position.
1. Press either end of the selectionswitch, “L ” for the left, “R ”for the right.
2. Move the direction control switch in the
direction you want to move the mirror.
3. Return the selection switch to the
neutral position to prevent unintentionaloperation.
The mirrors can also be adjusted manu-
ally. Instruments and controls
3-35
– CONTINUED –