2009 SUBARU FORESTER key battery
[x] Cancel search: key batteryPage 25 of 384

22
Function settings
A SUBARU dealer can change the settings of the functions shown in the following table to meet your personal requirements. Contact
the nearest SUBARU dealer for details. If your vehicle is equipped with a navigation system, the settings for some of these functions
can be changed using the monitor. For details, please refer to the Owner’s Manual supplement for the monitor.
Item Function Possible settings Default setting Page
Alarm system Alarm system Operation/Non-operation Operation 2-14 Monitoring start delay time (after closure
of doors) 0 second/30 seconds 30 seconds 2-15
Impact sensor operation (only vehicles
with shock sensors (dealer option)) Operation/Non-operation Non-operation 2-18
Passive arming Operation/Non-operation Non-operation 2-16
Dome light illumination ON/OFF OFF 2-14
Remote keyless entry sys- tem Hazard warning flasher Operation/Non-operation Operation 2-7
Audible signal Operation/Non-operation Operation 2-9
Key lock-in prevention Key lock-in prevention Operation/Non-operation Operation 2-6
Remote engine start system
(dealer option) Horn chirp confirmation ON/OFF ON 7-11
Rear window defogger Rear window defogger Operation for 15 minutes/Con- tinuous operationOperation for 15 minutes 3-31
Windshield wiper deicer (if
equipped) Windshield wiper deicer Operation for 15 minutes/Con-
tinuous operationOperation for 15 minutes 3-32
Map light/Dome light Operation in conjunction with remote keyless entry system OFF/Short/Normal/Long Normal 6-2
Battery drainage preventionfunction Battery drainage prevention function Operation/Non-operation Operation 2-5
Seatbelt warning Sounds a chime while driving Operation/Non-operation Operation 1-12
Page 88 of 384

Keys..................................................................... 2-2
Key number plate ................................................ 2-2
Immobilizer .......................................................... 2-2
Security ID plate .................................................. 2-3
Security indicator light ........................................ 2-3
Key replacement ................................................. 2-4
Door locks ........................................................... 2-4
Locking and unlocking from the outside .. ............ 2-4
Locking and unlocking from the inside ................ 2-5
Battery drainage prevention function ................... 2-5
Power door locking switches ............................. 2-6
Key lock-in prevention function ........................... 2-6
Remote keyless entry system ............................ 2-7
Locking the doors ............................................... 2-8
Unlocking the doors ............................................ 2-8
Unlocking the rear gate ....................................... 2-9
Illuminated entry ................................................. 2-9
Vehicle finder function ......................................... 2-9
Sounding a panic alarm ....................................... 2-9
Selecting audible signal operation ....................... 2-9
Replacing the battery ......................................... 2-10 Replacing lost transmitters
................................ 2-10
Alarm system ..................................................... 2-14
System operation ............................................... 2-14
Activating and deactivating the alarm system ..... 2-14
If you have accidentally triggered the alarm system ............................................................ 2-14
Arming the system ............................................ 2-15
Disarming the system ........................................ 2-16
Valet mode ........................................................ 2-16
Passive arming .................................................. 2-16
Tripped sensor identification .............................. 2-17
Shock sensors (dealer option).. .......................... 2-18
Child safety locks .............................................. 2-18
Windows ............................................................. 2-19
Power windows ................................................. 2-19
Rear gate ............................................................ 2-21
Moonroof (if equipped) ...................................... 2-22
To open the moonroof ....................................... 2-23
To close the moonroof ....................................... 2-23
Anti-entrapment function .................................... 2-23
Sun shade ......................................................... 2-23 Keys and doors
2
Page 92 of 384

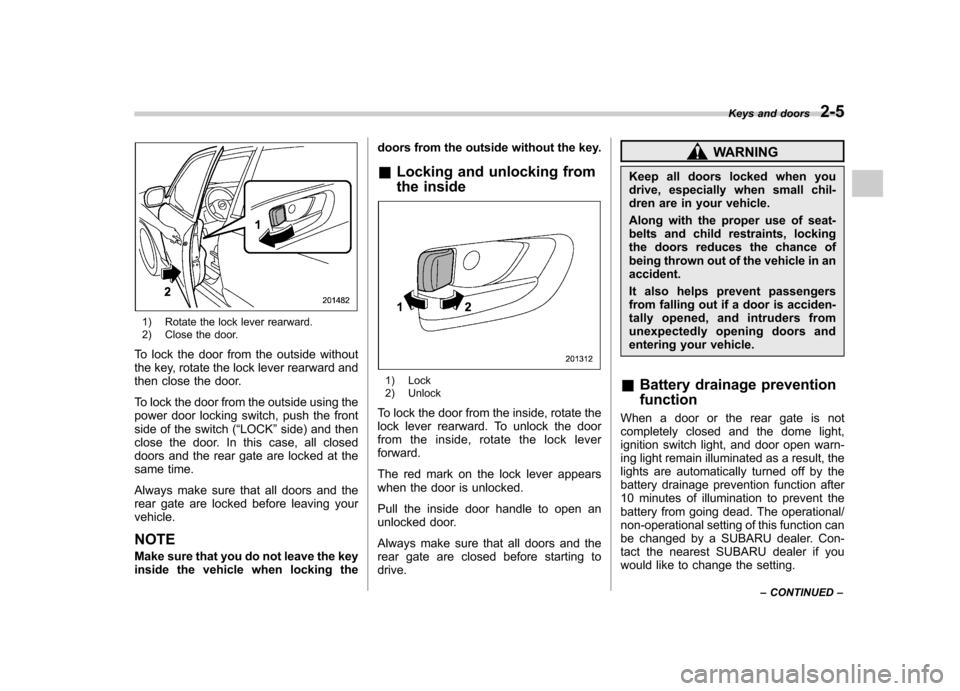
1) Rotate the lock lever rearward.
2) Close the door.
To lock the door from the outside without
the key, rotate the lock lever rearward and
then close the door.
To lock the door from the outside using the
power door locking switch, push the front
side of the switch ( “LOCK ”side) and then
close the door. In this case, all closed
doors and the rear gate are locked at the
same time.
Always make sure that all doors and the
rear gate are locked before leaving yourvehicle. NOTE
Make sure that you do not leave the key
inside the vehicle when locking the doors from the outside without the key.
& Locking and unlocking from
the inside
1) Lock
2) Unlock
To lock the door from the inside, rotate the
lock lever rearward. To unlock the door
from the inside, rotate the lock leverforward.
The red mark on the lock lever appears
when the door is unlocked.
Pull the inside door handle to open an
unlocked door.
Always make sure that all doors and the
rear gate are closed before starting todrive.
WARNING
Keep all doors locked when you
drive, especially when small chil-
dren are in your vehicle.
Along with the proper use of seat-
belts and child restraints, locking
the doors reduces the chance of
being thrown out of the vehicle in anaccident.
It also helps prevent passengers
from falling out if a door is acciden-
tally opened, and intruders from
unexpectedly opening doors and
entering your vehicle.
& Battery drainage prevention function
When a door or the rear gate is not
completely closed and the dome light,
ignition switch light, and door open warn-
ing light remain illuminated as a result, the
lights are automatically turned off by the
battery drainage prevention function after
10 minutes of illumination to prevent the
battery from going dead. The operational/
non-operational setting of this function can
be changed by a SUBARU dealer. Con-
tact the nearest SUBARU dealer if you
would like to change the setting. Keys and doors
2-5
– CONTINUED –
Page 93 of 384

2-6Keys and doors
NOTE .When leaving the vehicle, please
make sure that all doors and the rear
gate are completely closed.. The battery drainage prevention
function does not operate while the
key is in the ignition switch. Power door locking switches
1) Lock
2) Unlock
All doors and the rear gate can be locked
and unlocked by the power door locking
switches located at the driver ’s side and
the front passenger ’s side doors.
To lock the doors, push the front side of
the switch.
To unlock the doors, push the rear side of
the switch.
When you close the doors after you set
the door locks, the doors remain locked.
NOTE
Make sure that you do not leave the key
inside the vehicle before locking the doors from the outside using the power
door locking switches. &
Key lock-in prevention func- tion
This function prevents the doors from
being locked with the key still in the
ignition switch. ! Behavior with key lock-in preven-
tion function operational
With the driver ’s door open, the doors are
automatically kept unlocked even if the
door locking switch is pushed to the front( “LOCK ”) position.
! Behavior with key lock-in preven-
tion function non-operational
. If the lock lever is turned to the rear
( “ LOCK ”) position with the driver ’s door
open and the driver ’s door is then closed
with the lock lever in that position, thedriver ’s door is locked.
. If the spare key is used to lock the
driver ’s door from the outside of the
vehicle, the door is locked.
The setting of this function to operational/
non-operational status can be changed by
a SUBARU dealer. Contact a SUBARU
dealer for details.
Page 97 of 384

2-10Keys and doors
the audible signal off.
Do the following to deactivate the audible
signal. You can also use the same steps
to restore the function.
1. Sit in the driver ’s seat and shut all
doors and the rear gate.
2. Hold down the UNLOCK side of the
power door locking switch.
3. While holding down the “UNLOCK ”
side of the power door locking switch, pull
the key out and re-insert it into the ignition
switch at least 6 times within 10 seconds
after Step 2.
4. Open and close the driver ’s door once
within 10 seconds after Step 3.
5. The turn signal lights flash 3 times to
indicate completion of the setting.
You may have the above settings done by
your SUBARU dealer.
& Replacing the battery
CAUTION
Do not let dust, oil or water get on or
in the transmitter when replacing
the battery.
When the transmitter battery begins to get
weak, transmitter range will begin to
decrease. Replace the battery as soon as possible.
To replace the battery:
1. Open the transmitter case using a flat-
head screwdriver.
2. Remove the old battery from the
holder.
1) Negative (
�) side facing up
3. Replace with a new battery (type
CR2025 or equivalent) making sure to
install the new battery with the negative( � ) side facing up.
4. Refit the removed half of the transmit-
ter case.
After the battery is replaced, the trans-
mitter must be synchronized with the
keyless entry system ’s control unit.
Press either the “
”or “”button six
times to synchronize the unit. & Replacing lost transmitters
If you lose a transmitter or want to
purchase additional transmitters (up to
four can be programmed), you should re-
program all of your transmitters for secur-
Page 103 of 384

2-16Keys and doors
flashing rapidly. After rapid flashing for 30
seconds (standby time), the indicator
lights will then flash slowly (twice approxi-
mately every 2 seconds), indicating that
the system has been armed for surveil-lance. NOTE . The system can be armed even if the
engine hood, the windows and/or
moonroof (if equipped) are open. Al-
ways make sure that they are fully
closed before arming the system.. The 30-second standby time can be
eliminated if you prefer. Have it per-
formed by your SUBARU dealer.. The system is in the standby mode
for a 30-second period after locking the
doors with the remote transmitter. The
security indicator light will flash at
short intervals during this period.. If any of the following actions are
done during the standby period, the
system will not switch to the surveil-
lance state.
–Doors are unlocked using the
remote transmitter. – Any door (including the rear
gate) is opened.– Ignition switch is turned to the
“ ON ”position. &
Disarming the system
Briefly press the “
”button (for less than
2 seconds) on the remote transmitter. The driver ’s door will unlock, an electronic
chirp will sound twice, the turn signal
lights will flash twice. The flashing of the
security indicator light will then change
slowly (once approximately every 3 sec-
onds from twice approximately every 2
seconds), indicating that the alarm system
has been disarmed. NOTE
After disarming the alarm system,
briefly press the “
”button a second
time within 5 seconds to unlock all
other doors and the rear gate. ! Emergency disarming
If you cannot disarm the system using the
transmitter (i.e. the transmitter is lost,
broken or the transmitter battery is too
weak), you can disarm the system without
using the transmitter.
The system can be disarmed as follows. . Turn the ignition switch from the
“ LOCK ”to the “ON ”position with a
registered key.
& Valet mode
When you choose the valet mode, the
alarm system does not operate. In valet mode, the remote transmitter is used only
for locking and unlocking the doors and
rear gate and panic activation.
To enter the valet mode, change the
setting of your vehicle
’s alarm system for
deactivation mode. Refer to “Activating
and deactivating the alarm system ”in this
section. The security indicator light will
continue to flash once every 3 seconds
indicating that the system is in the valetmode.
To exit valet mode, change the setting of
your vehicle ’s alarm system for activation
mode. Refer to “Activating and deactivat-
ing the alarm system ”in this section.
& Passive arming
When passive arming mode has been
programmed by the dealer, arming of the
system is automatically accomplished
without using the remote transmitter. Note
that in this mode, DOORS MUST BE
MANUALLY LOCKED. ! To enter the passive mode
If you wish to program the passive arming
mode, have it done by your SUBARU
dealer.
Page 108 of 384

Rear gate
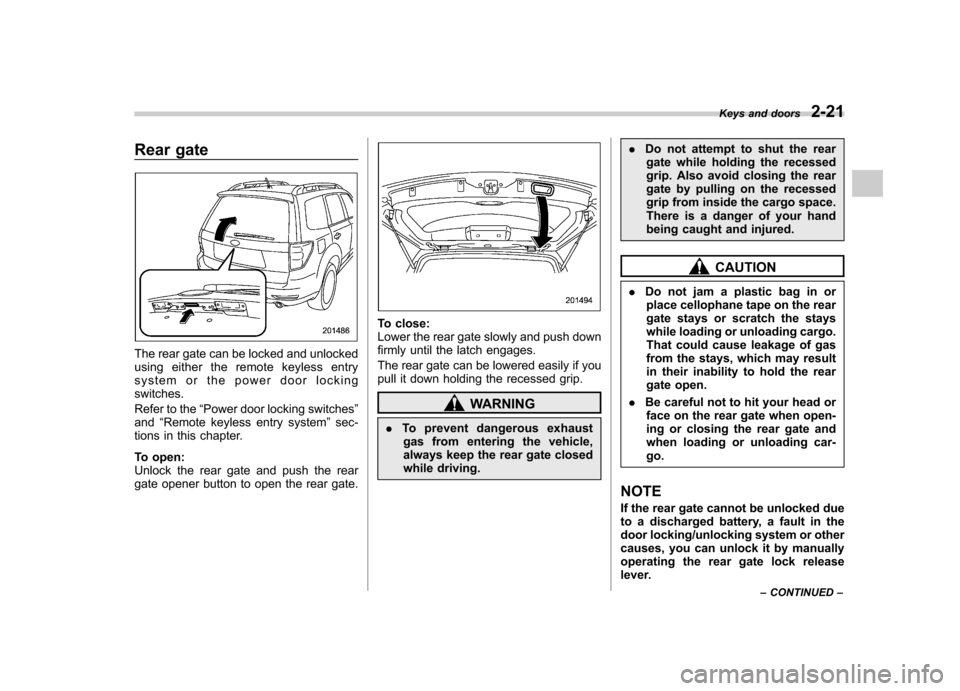
The rear gate can be locked and unlocked
using either the remote keyless entry
system or the power door lockingswitches.
Refer to the“Power door locking switches ”
and “Remote keyless entry system ”sec-
tions in this chapter.
To open:
Unlock the rear gate and push the rear
gate opener button to open the rear gate.
To close:
Lower the rear gate slowly and push down
firmly until the latch engages.
The rear gate can be lowered easily if you
pull it down holding the recessed grip.
WARNING
. To prevent dangerous exhaust
gas from entering the vehicle,
always keep the rear gate closed
while driving. .
Do not attempt to shut the rear
gate while holding the recessed
grip. Also avoid closing the rear
gate by pulling on the recessed
grip from inside the cargo space.
There is a danger of your hand
being caught and injured.
CAUTION
. Do not jam a plastic bag in or
place cellophane tape on the rear
gate stays or scratch the stays
while loading or unloading cargo.
That could cause leakage of gas
from the stays, which may result
in their inability to hold the rear
gate open.
. Be careful not to hit your head or
face on the rear gate when open-
ing or closing the rear gate and
when loading or unloading car-go.
NOTE
If the rear gate cannot be unlocked due
to a discharged battery, a fault in the
door locking/unlocking system or other
causes, you can unlock it by manually
operating the rear gate lock release
lever. Keys and doors
2-21
– CONTINUED –
Page 114 of 384

Ignition switch
WARNING
. Never turn the ignition switch to
“ LOCK ”while the vehicle is
being driven or towed because
that will lock the steering wheel,
preventing steering control. And
when the engine is turned off, it
takes a much greater effort than
usual to steer.
. Before leaving the vehicle, al-
ways remove the key from the
ignition switch for safety and
never allow an unattended child
to remain in the vehicle. Failure
to follow this procedure could
result in injury to a child or
others. Children could operate
the power windows, the moon-
roof or other controls or even
make the vehicle move.
CAUTION
Do not attach a large key holder or
key case to either key. If it banged
against your knees or hands while
you are driving, it could turn the
ignition switch from the “ON ”posi- tion to the
“Acc ”or “LOCK ”posi-
tion, thereby stopping the engine.
Also, if the key is attached to a
keyholder or to a large bunch of
other keys, centrifugal force may act
on it as the vehicle moves, resulting
in unwanted turning of the ignitionswitch.
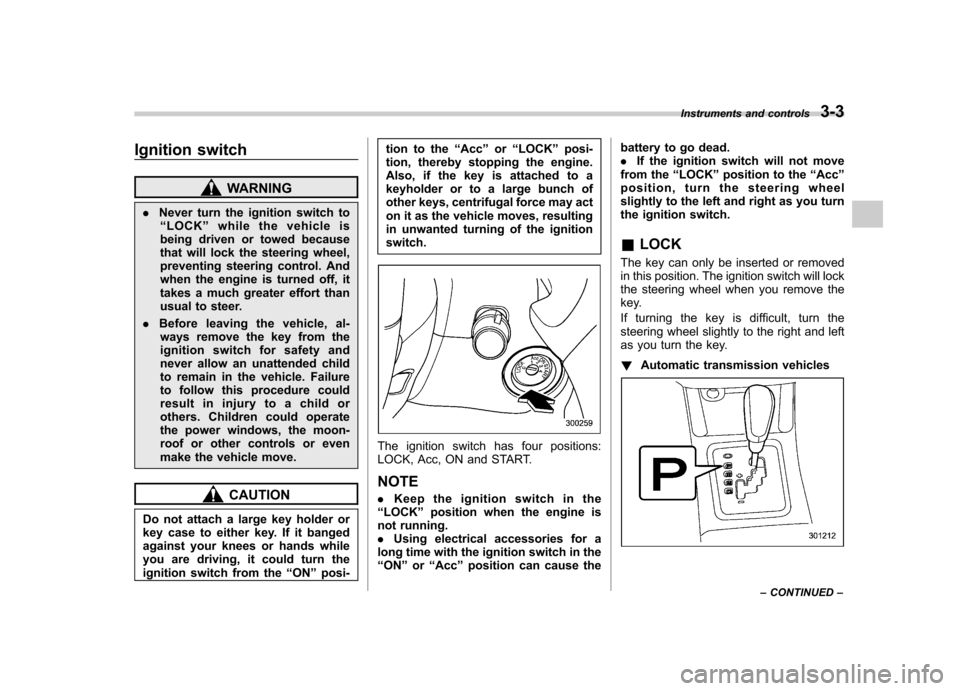
The ignition switch has four positions:
LOCK, Acc, ON and START. NOTE . Keep the ignition switch in the
“ LOCK ”position when the engine is
not running. . Using electrical accessories for a
long time with the ignition switch in the“ ON ”or “Acc ”position can cause the battery to go dead..
If the ignition switch will not move
from the “LOCK ”position to the “Acc ”
position, turn the steering wheel
slightly to the left and right as you turn
the ignition switch. & LOCK
The key can only be inserted or removed
in this position. The ignition switch will lock
the steering wheel when you remove the
key.
If turning the key is difficult, turn the
steering wheel slightly to the right and left
as you turn the key. ! Automatic transmission vehicles
Instruments and controls 3-3
– CONTINUED –