2009 SUBARU FORESTER wheel
[x] Cancel search: wheelPage 147 of 384
3-36Instruments and controls
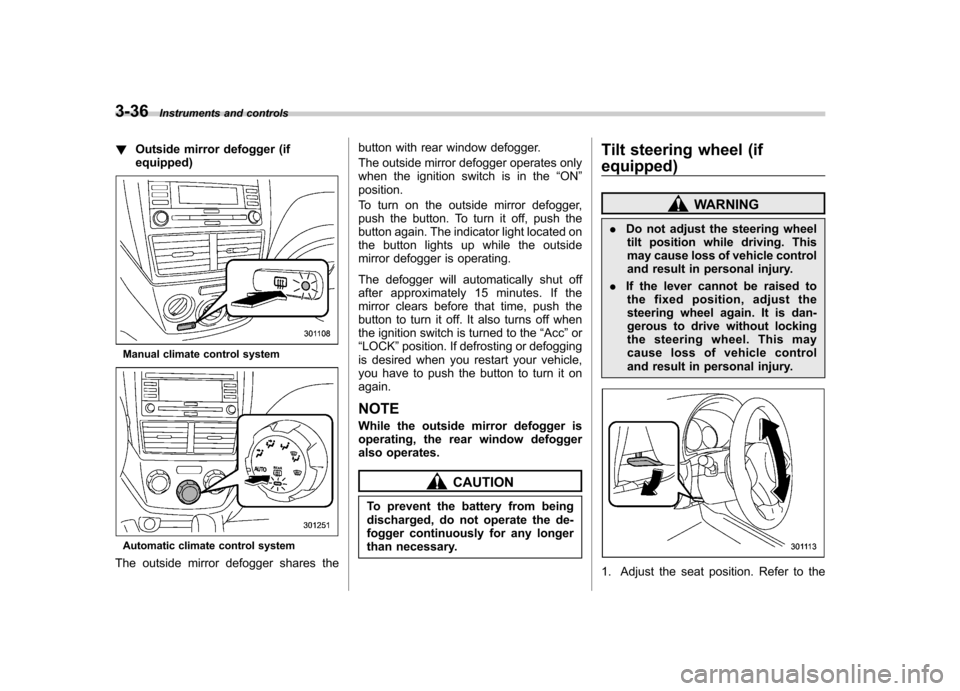
!Outside mirror defogger (if equipped)
Manual climate control system
Automatic climate control system
The outside mirror defogger shares the button with rear window defogger.
The outside mirror defogger operates only
when the ignition switch is in the
“ON ”
position.
To turn on the outside mirror defogger,
push the button. To turn it off, push the
button again. The indicator light located on
the button lights up while the outside
mirror defogger is operating.
The defogger will automatically shut off
after approximately 15 minutes. If the
mirror clears before that time, push the
button to turn it off. It also turns off when
the ignition switch is turned to the “Acc ”or
“ LOCK ”position. If defrosting or defogging
is desired when you restart your vehicle,
you have to push the button to turn it onagain.
NOTE
While the outside mirror defogger is
operating, the rear window defogger
also operates.
CAUTION
To prevent the battery from being
discharged, do not operate the de-
fogger continuously for any longer
than necessary. Tilt steering wheel (if
equipped)
WARNING
. Do not adjust the steering wheel
tilt position while driving. This
may cause loss of vehicle control
and result in personal injury.
. If the lever cannot be raised to
the fixed position, adjust the
steering wheel again. It is dan-
gerous to drive without locking
the steering wheel. This may
cause loss of vehicle control
and result in personal injury.
1. Adjust the seat position. Refer to the
Page 148 of 384
“Front seats ”section in chapter 1.
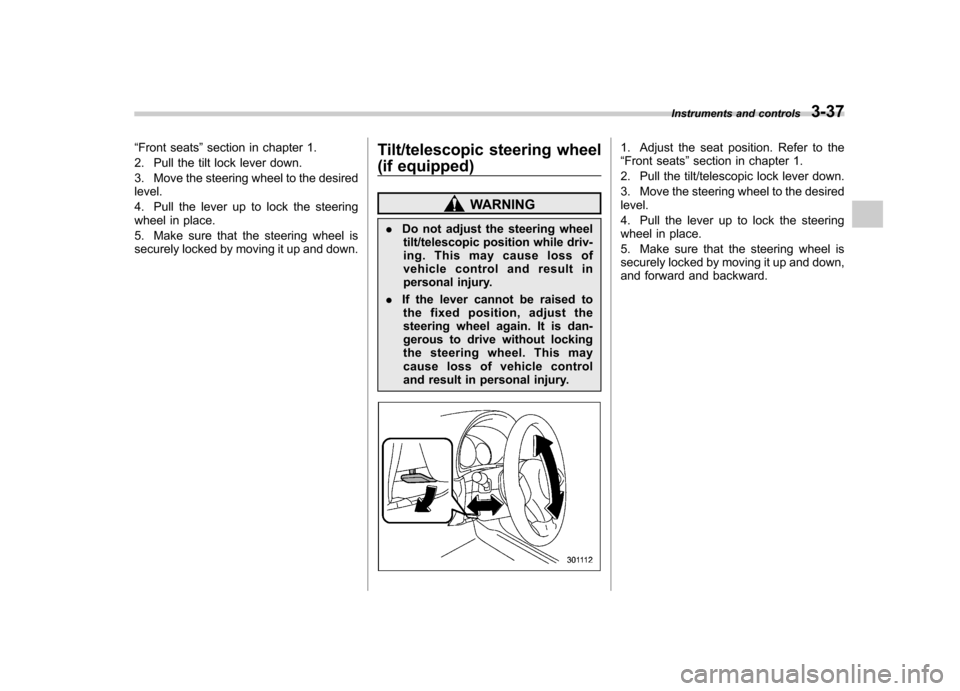
2. Pull the tilt lock lever down.
3. Move the steering wheel to the desired level.
4. Pull the lever up to lock the steering
wheel in place.
5. Make sure that the steering wheel is
securely locked by moving it up and down. Tilt/telescopic steering wheel
(if equipped)
WARNING
. Do not adjust the steering wheel
tilt/telescopic position while driv-
ing. This may cause loss of
vehicle control and result in
personal injury.
. If the lever cannot be raised to
the fixed position, adjust the
steering wheel again. It is dan-
gerous to drive without locking
the steering wheel. This may
cause loss of vehicle control
and result in personal injury.
1. Adjust the seat position. Refer to the “ Front seats ”section in chapter 1.
2. Pull the tilt/telescopic lock lever down.
3. Move the steering wheel to the desired level.
4. Pull the lever up to lock the steering
wheel in place.
5. Make sure that the steering wheel is
securely locked by moving it up and down,
and forward and backward. Instruments and controls
3-37
Page 152 of 384

&Center and side ventilators
! Center ventilators
Move the tab up and down or right and left
to adjust the flow direction. !
Side ventilators
1) Open
2) Close
3) Thumb-wheel
Move the tab up and down or right and left
to adjust the flow direction.
To open or close the ventilator, turn the
thumb-wheel up or down. Manual climate control sys-
tem (if equipped) &
Control panel
1) Temperature control dial
2) Fan speed control dial
3) Air flow control dial
4) Rear window defogger button (Refer to
the“Rear window defogger button ”sec-
tion in chapter 3.)
5) Air conditioner button
6) Air inlet selection button
! Temperature control dial
This dial regulates the temperature of air
flow from the air outlets over a range from
the blue side (cool) to red side (warm). Climate control
4-3
– CONTINUED –
Page 154 of 384
WARNING
Continued operation with the air
inletselectionbuttonintheON
position may fog up the windows.
Switch to the OFF position as soon
as the outside dusty conditionclears.
& Heater operation
! Defrosting or defogging the wind-shield
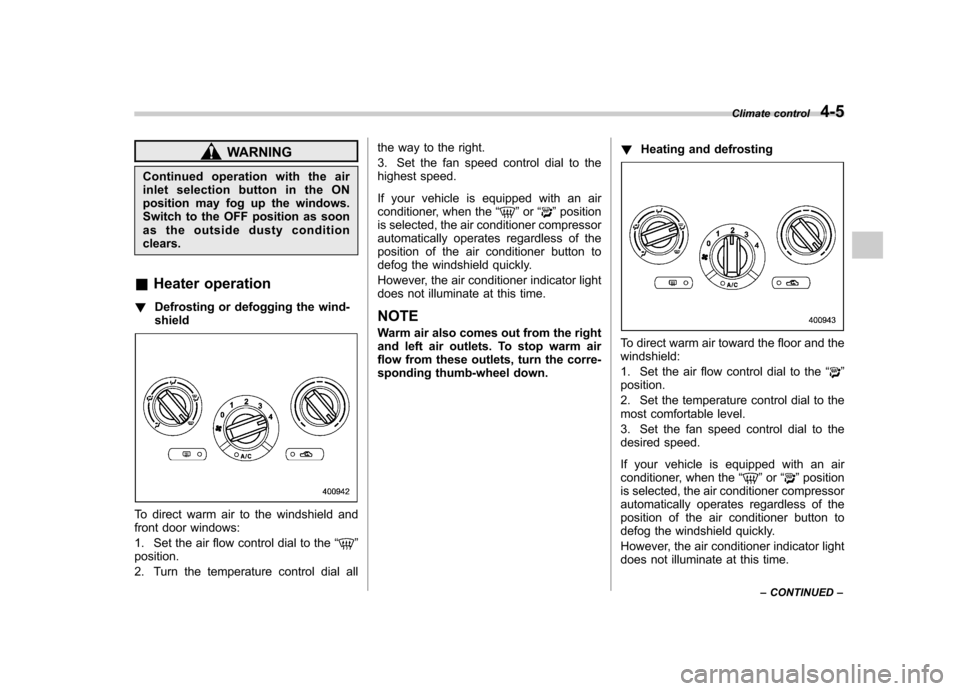
To direct warm air to the windshield and
front door windows:
1. Set the air flow control dial to the “
”
position.
2. Turn the temperature control dial all the way to the right.
3. Set the fan speed control dial to the
highest speed.
If your vehicle is equipped with an air
conditioner, when the
“
”or “”position
is selected, the air conditioner compressor
automatically operates regardless of the
position of the air conditioner button to
defog the windshield quickly.
However, the air conditioner indicator light
does not illuminate at this time. NOTE
Warm air also comes out from the right
and left air outlets. To stop warm air
flow from these outlets, turn the corre-
sponding thumb-wheel down. !
Heating and defrosting
To direct warm air toward the floor and the windshield:
1. Set the air flow control dial to the “
”
position.
2. Set the temperature control dial to the
most comfortable level.
3. Set the fan speed control dial to the
desired speed.
If your vehicle is equipped with an air
conditioner, when the “
”or “”position
is selected, the air conditioner compressor
automatically operates regardless of the
position of the air conditioner button to
defog the windshield quickly.
However, the air conditioner indicator light
does not illuminate at this time. Climate control
4-5
– CONTINUED –
Page 155 of 384

4-6Climate control
NOTE
Warm air also comes out from the right
and left air outlets. To stop warm air
flow from these outlets, turn the corre-
sponding thumb-wheel down. ! Heating
To direct warm air toward the floor:
1. Set the air inlet selection button to the
OFF position.
2. Set the air flow control dial to the “
”
position.
3. Set the temperature control dial to the
most comfortable level.
4. Set the fan speed control dial to the
desired speed. NOTE
Warm air also comes out from the right
and left air outlets. To stop warm air
flow from these outlets, turn the corre-
sponding thumb-wheel down. !
Bi-level heating
This setting allows you to direct air of
different temperatures from the instrument
panel and foot outlets. The air from the
foot outlets is slightly warmer than from
the instrument panel outlets.
1. Set the air inlet selection button to the
OFF position.
2. Set the air flow control dial to the “
”
position.
3. Set the temperature control dial to the
desired temperature level.
4. Set the fan speed control dial to the desired speed.
Setting the temperature control dial fully
turned to the red area or blue area
decreases the temperature difference
between the air from the instrument panel
outlets and the air from the foot outlets. !
Ventilation
To force outside air through the instrument
panel outlets:
1. Set the air inlet selection button to the
OFF position.
2. Set the air flow control dial to the “
”
position.
3. Set the temperature control dial all the
way left.
4. Set the fan speed control dial to the
desired speed.
Page 191 of 384
5-26Audio
&AUX inputs selection button
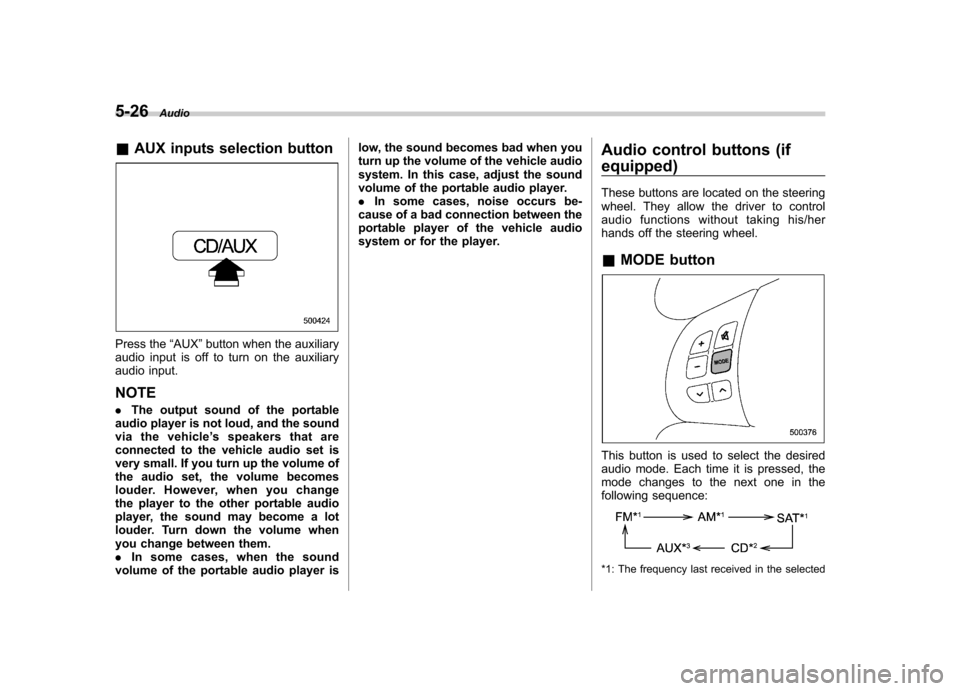
Press the “AUX ”button when the auxiliary
audio input is off to turn on the auxiliary
audio input. NOTE . The output sound of the portable
audio player is not loud, and the sound
via the vehicle ’s speakers that are
connected to the vehicle audio set is
very small. If you turn up the volume of
the audio set, the volume becomes
louder. However, when you change
the player to the other portable audio
player, the sound may become a lot
louder. Turn down the volume when
you change between them.. In some cases, when the sound
volume of the portable audio player is low, the sound becomes bad when you
turn up the volume of the vehicle audio
system. In this case, adjust the sound
volume of the portable audio player..
In some cases, noise occurs be-
cause of a bad connection between the
portable player of the vehicle audio
system or for the player. Audio control buttons (if
equipped)
These buttons are located on the steering
wheel. They allow the driver to control
audio functions without taking his/her
hands off the steering wheel. &
MODE button
This button is used to select the desired
audio mode. Each time it is pressed, the
mode changes to the next one in the
following sequence:
*1: The frequency last received in the selected
Page 215 of 384

7-6Starting and operating
State emission testing (U.S. only)
At state inspection time, remember to
tell your inspection or service station in
advance not to place your SUBARU
AWD vehicle on a two-wheel dynam-
ometer. Otherwise, serious transmis-
sion damage will result.
Some states have started using dynam-
ometers in their state inspection programs
in order to meet their obligation under
federal law to implement stricter vehicle
emission standards to reduce air pollution
from vehicles. A dynamometer is a tread-
mill or roller-like testing device that allows
your vehicle ’s wheels to turn while the
vehicle remains in one place. Depending
on the severity of a state ’s air pollution
problems, the states must adopt either a“ basic ”or “enhanced ”vehicle emission
inspection test. Normally, a portion of the
basic emission test consists of an emis-
sion inspector inserting an analyzer probe
into the exhaust pipe of an idling vehicle
for a short period of time. States with more
severe air pollution problems are required
to adopt an enhanced vehicle emission
test. This test simulates actual driving
conditions on a dynamometer and permits
more accurate measurement of tailpipe
emitted pollution than the basic emission test.
The U.S. Environmental Protection
Agency (EPA) and states using two-wheel
dynamometers in their emission testing
programs have
EXEMPTEDSUBARU
AWD vehicles from the portion of the
testing program that involves a two-wheel
dynamometer.
There are some states that use four-wheel
dynamometers in their testing programs.
When properly used, that equipment will
not damage an AWD SUBARU vehicle.
Under no circumstances should the rear
wheels be jacked off the ground, nor
should the driveshaft be disconnected for
state emission testing.
WARNING
Testing of an All-Wheel Drive vehicle
must NEVER be performed on a
single two-wheel dynamometer. At-
tempting to do so will result in
uncontrolled vehicle movement and
may cause an accident or injuries to
persons nearby.
CAUTION
Resultant vehicle damage due to
improper testing is not covered
under the SUBARU Limited War-
ranty and is the responsibility of
the state inspection program or its
contractors or licensees.
The EPA has issued regulations for
inspecting the On-Board Diagnostic
(OBD) system as part of the state emis-
sions inspection. The OBD system is
designed to detect engine and transmis-
sion problems that might cause vehicle
emissions to exceed allowable limits.
These inspections apply to all 1996 model
year and newer passenger cars and light
trucks. Over 30 states plus the District of
Columbia have implemented the OBD
system inspection. . The inspection of the OBD system
consists of a visual operational check of the “CHECK ENGINE ”warning light/mal-
function indicator lamp (MIL) and an
examination of the OBD system with an
electronic scan tool while the engine isrunning. . Avehicle
passes the OBD system
inspection if proper illumination of the “ CHECK ENGINE ”warning light/MIL is
observed, there are nostored diagnostic
Page 218 of 384
6. Confirm that all warning and indicator
lights have gone out after the engine has
started. The fuel injection system auto-
matically lowers the idle speed as the
engine warms up.
While the engine is warming up, make
sure that the selector lever is at the“P ”or
“ N ”position and that the parking brake is
applied.
NOTE
The engine may be difficult to start
when the battery has been discon-
nected and reconnected (for mainte-
nance or other purposes). This diffi-
culty is caused by the electronically
controlled throttle ’s self-diagnosis
function. To overcome it, keep the
ignition switch in the “ON ”position
for approximately 10 seconds before
starting the engine.
CAUTION
If you restart the engine while the
vehicle is moving, shift the selector
lever into the “N ” position. Do not
attempt to place the selector lever of
a moving vehicle into the “P ” posi-
tion. Stopping the engine
The ignition switch should be turned off
only when the vehicle is stopped and the
engine is idling.
WARNING
Do not stop the engine when the
vehicle is moving. This will cause
loss of power to the power steering
and the brake booster, making steer-
ing and braking more difficult. It
could also result in accidental acti-
vation of the “LOCK ”position on the
ignition switch, causing the steering
wheel to lock. Remote engine start system
(dealer option)
WARNING
. Do not remote start a vehicle in
an enclosed environment (e.g., in
a closed garage). Prolonged op-
eration of a motor vehicle in an
enclosed environment can cause
a harmful build-up of Carbon
Monoxide. Carbon Monoxide is
harmful to your health. Exposure
to high levels of Carbon Monox-
ide can cause headaches, dizzi-
ness or in extreme cases uncon-
sciousness and/or death.
. Before performing any servicing
of the vehicle, temporarily place
the remote engine start system in
service mode to prevent the
system from unexpectedly start-
ing the engine. Starting and operating
7-9
– CONTINUED –