2009 SUBARU FORESTER window
[x] Cancel search: windowPage 76 of 384
WARNING
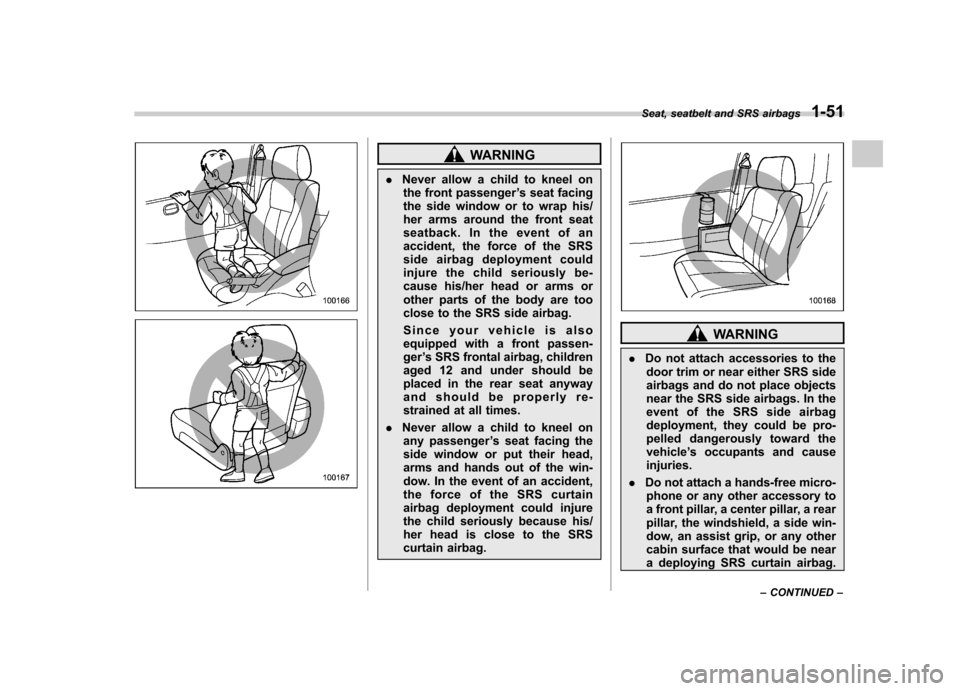
. Never allow a child to kneel on
the front passenger ’s seat facing
the side window or to wrap his/
her arms around the front seat
seatback. In the event of an
accident, the force of the SRS
side airbag deployment could
injure the child seriously be-
cause his/her head or arms or
other parts of the body are too
close to the SRS side airbag.
Since your vehicle is also
equipped with a front passen-ger ’s SRS frontal airbag, children
aged 12 and under should be
placed in the rear seat anyway
and should be properly re-
strained at all times.
. Never allow a child to kneel on
any passenger ’s seat facing the
side window or put their head,
arms and hands out of the win-
dow. In the event of an accident,
the force of the SRS curtain
airbag deployment could injure
the child seriously because his/
her head is close to the SRS
curtain airbag.
WARNING
. Do not attach accessories to the
door trim or near either SRS side
airbags and do not place objects
near the SRS side airbags. In the
event of the SRS side airbag
deployment, they could be pro-
pelled dangerously toward thevehicle ’s occupants and cause
injuries.
. Do not attach a hands-free micro-
phone or any other accessory to
a front pillar, a center pillar, a rear
pillar, the windshield, a side win-
dow, an assist grip, or any other
cabin surface that would be near
a deploying SRS curtain airbag.
Seat, seatbelt and SRS airbags
1-51
– CONTINUED –
Page 77 of 384
1-52Seat, seatbelt and SRS airbags
A hands-free microphone or
other accessory in such a loca-
tion could be propelled through
the cabin with great force by the
curtain airbag, or it could prevent
correct deployment of the curtain
airbag. In either case, the result
could be serious injuries.
. Never hang or place coat hangers
or other hard or pointed objects
near the side windows. If such
items are present when the SRS
curtain airbags deploy, they
could be thrown through the
passenger compartment and
cause serious injuries. They
could also prevent proper opera-
tion of the SRS curtain airbags.WARNING
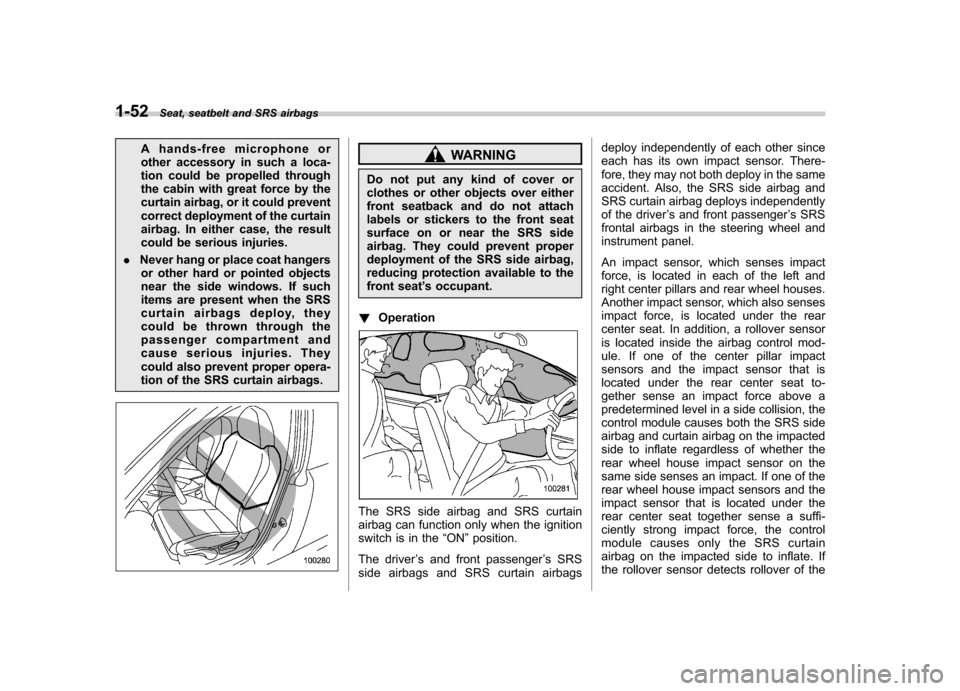
Do not put any kind of cover or
clothes or other objects over either
front seatback and do not attach
labels or stickers to the front seat
surface on or near the SRS side
airbag. They could prevent proper
deployment of the SRS side airbag,
reducing protection available to the
front seat ’s occupant.
! Operation
The SRS side airbag and SRS curtain
airbag can function only when the ignition
switch is in the “ON ”position.
The driver ’s and front passenger ’s SRS
side airbags and SRS curtain airbags deploy independently of each other since
each has its own impact sensor. There-
fore, they may not both deploy in the same
accident. Also, the SRS side airbag and
SRS curtain airbag deploys independently
of the driver
’s and front passenger ’s SRS
frontal airbags in the steering wheel and
instrument panel.
An impact sensor, which senses impact
force, is located in each of the left and
right center pillars and rear wheel houses.
Another impact sensor, which also senses
impact force, is located under the rear
center seat. In addition, a rollover sensor
is located inside the airbag control mod-
ule. If one of the center pillar impact
sensors and the impact sensor that is
located under the rear center seat to-
gether sense an impact force above a
predetermined level in a side collision, the
control module causes both the SRS side
airbag and curtain airbag on the impacted
side to inflate regardless of whether the
rear wheel house impact sensor on the
same side senses an impact. If one of the
rear wheel house impact sensors and the
impact sensor that is located under the
rear center seat together sense a suffi-
ciently strong impact force, the control
module causes only the SRS curtain
airbag on the impacted side to inflate. If
the rollover sensor detects rollover of the
Page 86 of 384
.Replacement of seat fabric or
leather
. Installation of additional fabric
or leather on the front seat
. Attachment of a hands-free
microphone or any other ac-
cessory to a front pillar, a
center pillar, a rear pillar, the
windshield, a side window, an
assist grip, or any other cabin
surface that would be near a
deploying SRS curtain airbag.
. Installation of additional elec-
trical/electronic equipment
such as a mobile two-way
radio on or near the SRS
airbag system components
and/or wiring is not advisable.
This could interfere with prop-
er operation of the SRS airbagsystem.CAUTION
Do not perform any of the following
modifications. Such modifications
can interfere with proper operation
of the SRS airbag system. . Attachment of any equipment
(bush bar, winches, snow plow,
skid plate, etc.) other than genu-
ine SUBARU accessory parts to
the front end.
. Modification of the suspension
system or front end structure.
. Installation of a tire of different
size and construction from the
tires specified on the vehicle
placard attached to the driver ’s
door pillar or specified for indivi-
dual vehicle models in this Own-er ’s Manual.
. Attachment of any equipment
(side steps or side sill protectors,
etc.) other than genuine SUBARU
accessory parts to the side body.
Always consult your SUBARU dealer if
you want to install any accessory parts on
your vehicle. Seat, seatbelt and SRS airbags
1-61
Page 88 of 384

Keys..................................................................... 2-2
Key number plate ................................................ 2-2
Immobilizer .......................................................... 2-2
Security ID plate .................................................. 2-3
Security indicator light ........................................ 2-3
Key replacement ................................................. 2-4
Door locks ........................................................... 2-4
Locking and unlocking from the outside .. ............ 2-4
Locking and unlocking from the inside ................ 2-5
Battery drainage prevention function ................... 2-5
Power door locking switches ............................. 2-6
Key lock-in prevention function ........................... 2-6
Remote keyless entry system ............................ 2-7
Locking the doors ............................................... 2-8
Unlocking the doors ............................................ 2-8
Unlocking the rear gate ....................................... 2-9
Illuminated entry ................................................. 2-9
Vehicle finder function ......................................... 2-9
Sounding a panic alarm ....................................... 2-9
Selecting audible signal operation ....................... 2-9
Replacing the battery ......................................... 2-10 Replacing lost transmitters
................................ 2-10
Alarm system ..................................................... 2-14
System operation ............................................... 2-14
Activating and deactivating the alarm system ..... 2-14
If you have accidentally triggered the alarm system ............................................................ 2-14
Arming the system ............................................ 2-15
Disarming the system ........................................ 2-16
Valet mode ........................................................ 2-16
Passive arming .................................................. 2-16
Tripped sensor identification .............................. 2-17
Shock sensors (dealer option).. .......................... 2-18
Child safety locks .............................................. 2-18
Windows ............................................................. 2-19
Power windows ................................................. 2-19
Rear gate ............................................................ 2-21
Moonroof (if equipped) ...................................... 2-22
To open the moonroof ....................................... 2-23
To close the moonroof ....................................... 2-23
Anti-entrapment function .................................... 2-23
Sun shade ......................................................... 2-23 Keys and doors
2
Page 90 of 384
device may not cause harmful inter-
ference, and (2) this device must
accept any interference received, in-
cluding interference that may cause
undesired operation.
Changes or modifications not ex-
pressly approved by the party respon-
sible for compliance could void theuser’s authority to operate the equip-
ment. NOTE
To protect your vehicle from theft,
please pay close attention to the fol-
lowing security precautions: . Never leave your vehicle unattended
with its keys inside. . Before leaving your vehicle, close all
windows and lock the doors and reargate.. Do not leave spare keys or any
record of your key number in thevehicle.
CAUTION
. Do not place the key under direct
sunlight or anywhere it may
become hot. .
Do not get the key wet. If the key
gets wet, wipe it dry with a cloth
immediately.
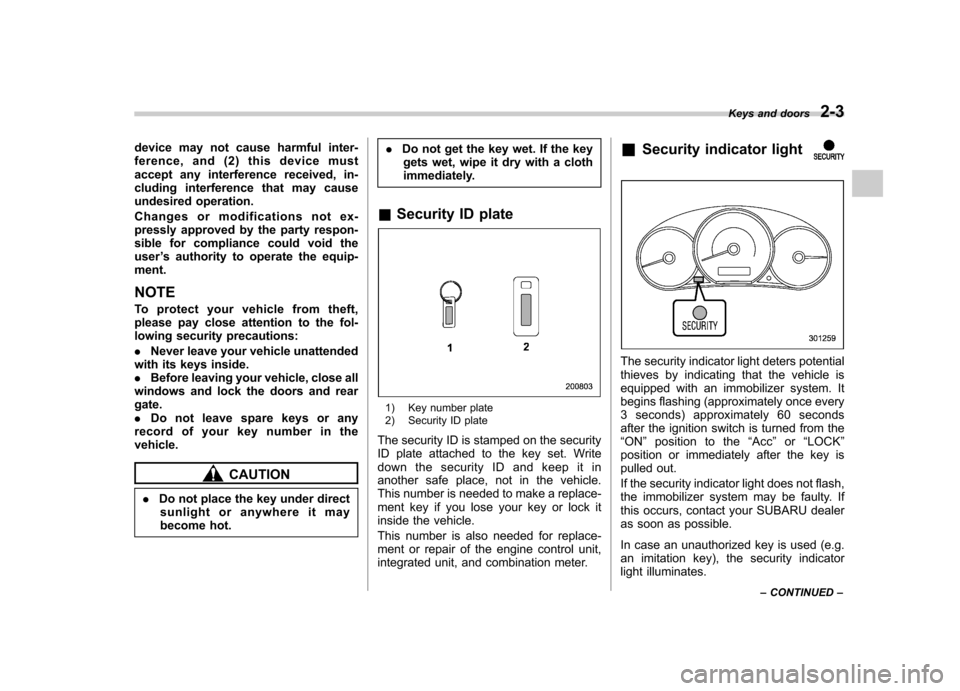
& Security ID plate
1) Key number plate
2) Security ID plate
The security ID is stamped on the security
ID plate attached to the key set. Write
down the security ID and keep it in
another safe place, not in the vehicle.
This number is needed to make a replace-
ment key if you lose your key or lock it
inside the vehicle.
This number is also needed for replace-
ment or repair of the engine control unit,
integrated unit, and combination meter. &
Security indicator light
The security indicator light deters potential
thieves by indicating that the vehicle is
equipped with an immobilizer system. It
begins flashing (approximately once every
3 seconds) approximately 60 seconds
after the ignition switch is turned from the“ON ”position to the “Acc ”or “LOCK ”
position or immediately after the key is
pulled out.
If the security indicator light does not flash,
the immobilizer system may be faulty. If
this occurs, contact your SUBARU dealer
as soon as possible.
In case an unauthorized key is used (e.g.
an imitation key), the security indicator
light illuminates. Keys and doors
2-3
– CONTINUED –
Page 102 of 384
position. &Arming the system
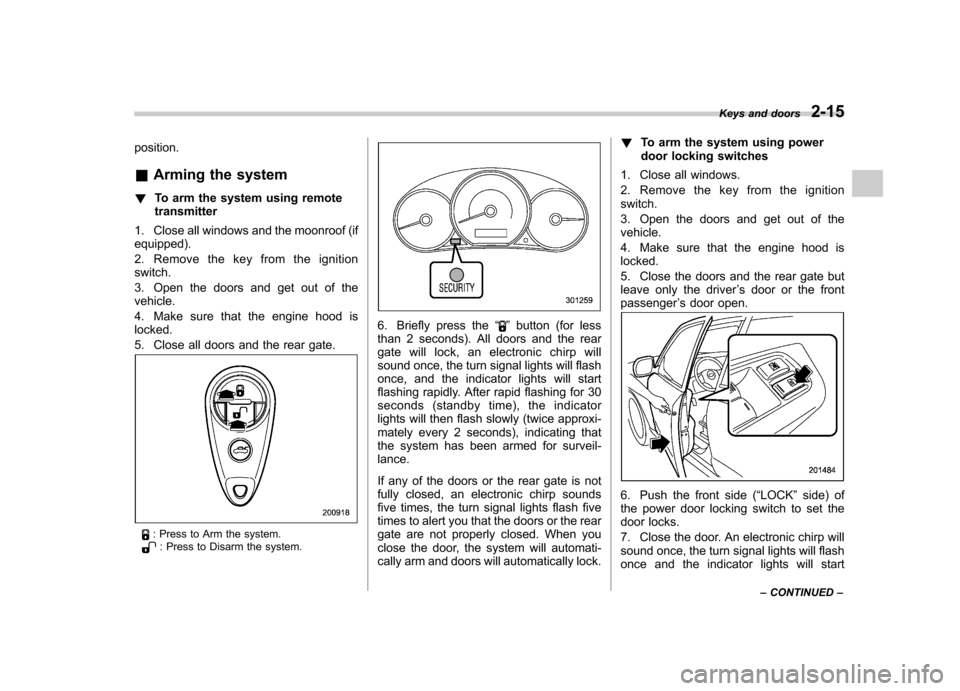
! To arm the system using remote transmitter
1. Close all windows and the moonroof (ifequipped).
2. Remove the key from the ignition switch.
3. Open the doors and get out of the vehicle.
4. Make sure that the engine hood is locked.
5. Close all doors and the rear gate.
: Press to Arm the system.: Press to Disarm the system.
6. Briefly press the “”button (for less
than 2 seconds). All doors and the rear
gate will lock, an electronic chirp will
sound once, the turn signal lights will flash
once, and the indicator lights will start
flashing rapidly. After rapid flashing for 30
seconds (standby time), the indicator
lights will then flash slowly (twice approxi-
mately every 2 seconds), indicating that
the system has been armed for surveil-lance.
If any of the doors or the rear gate is not
fully closed, an electronic chirp sounds
five times, the turn signal lights flash five
times to alert you that the doors or the rear
gate are not properly closed. When you
close the door, the system will automati-
cally arm and doors will automatically lock. !
To arm the system using power
door locking switches
1. Close all windows.
2. Remove the key from the ignition switch.
3. Open the doors and get out of the vehicle.
4. Make sure that the engine hood is locked.
5. Close the doors and the rear gate but
leave only the driver ’s door or the front
passenger ’s door open.
6. Push the front side ( “LOCK ”side) of
the power door locking switch to set the
door locks.
7. Close the door. An electronic chirp will
sound once, the turn signal lights will flash
once and the indicator lights will start Keys and doors
2-15
– CONTINUED –
Page 103 of 384

2-16Keys and doors
flashing rapidly. After rapid flashing for 30
seconds (standby time), the indicator
lights will then flash slowly (twice approxi-
mately every 2 seconds), indicating that
the system has been armed for surveil-lance. NOTE . The system can be armed even if the
engine hood, the windows and/or
moonroof (if equipped) are open. Al-
ways make sure that they are fully
closed before arming the system.. The 30-second standby time can be
eliminated if you prefer. Have it per-
formed by your SUBARU dealer.. The system is in the standby mode
for a 30-second period after locking the
doors with the remote transmitter. The
security indicator light will flash at
short intervals during this period.. If any of the following actions are
done during the standby period, the
system will not switch to the surveil-
lance state.
–Doors are unlocked using the
remote transmitter. – Any door (including the rear
gate) is opened.– Ignition switch is turned to the
“ ON ”position. &
Disarming the system
Briefly press the “
”button (for less than
2 seconds) on the remote transmitter. The driver ’s door will unlock, an electronic
chirp will sound twice, the turn signal
lights will flash twice. The flashing of the
security indicator light will then change
slowly (once approximately every 3 sec-
onds from twice approximately every 2
seconds), indicating that the alarm system
has been disarmed. NOTE
After disarming the alarm system,
briefly press the “
”button a second
time within 5 seconds to unlock all
other doors and the rear gate. ! Emergency disarming
If you cannot disarm the system using the
transmitter (i.e. the transmitter is lost,
broken or the transmitter battery is too
weak), you can disarm the system without
using the transmitter.
The system can be disarmed as follows. . Turn the ignition switch from the
“ LOCK ”to the “ON ”position with a
registered key.
& Valet mode
When you choose the valet mode, the
alarm system does not operate. In valet mode, the remote transmitter is used only
for locking and unlocking the doors and
rear gate and panic activation.
To enter the valet mode, change the
setting of your vehicle
’s alarm system for
deactivation mode. Refer to “Activating
and deactivating the alarm system ”in this
section. The security indicator light will
continue to flash once every 3 seconds
indicating that the system is in the valetmode.
To exit valet mode, change the setting of
your vehicle ’s alarm system for activation
mode. Refer to “Activating and deactivat-
ing the alarm system ”in this section.
& Passive arming
When passive arming mode has been
programmed by the dealer, arming of the
system is automatically accomplished
without using the remote transmitter. Note
that in this mode, DOORS MUST BE
MANUALLY LOCKED. ! To enter the passive mode
If you wish to program the passive arming
mode, have it done by your SUBARU
dealer.
Page 106 of 384
Windows &Power windows
WARNING
To avoid serious personal injury
caused by entrapment, you must
do the following. . When operating the power win-
dows, be extremely careful to
prevent anyone ’s fingers, arms,
neck or head from being caught
in the window.
. Always lock the passengers ’win-
dows using the lock switch when
children are riding in the vehicle.
. Before leaving the vehicle, al-
ways remove the key from the
ignition switch for safety and
never allow an unattended child
to remain in the vehicle. Failure
to follow this procedure could
result in injury to a child operat-
ing the power window.
The power windows operate only when
the ignition switch is in the “ON ”position. !
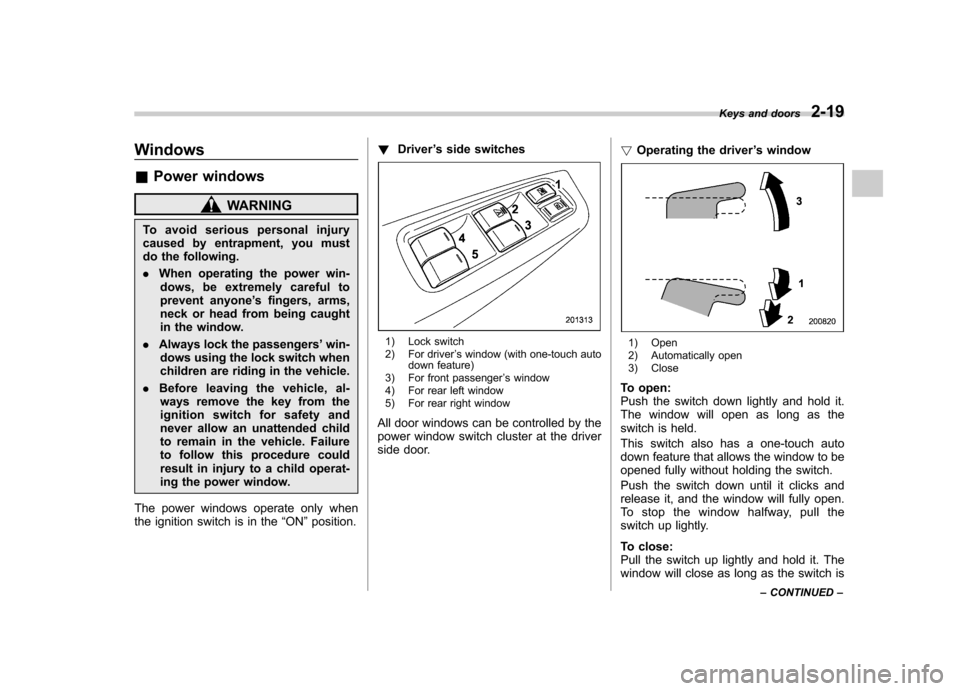
Driver ’s side switches
1) Lock switch
2) For driver ’s window (with one-touch auto
down feature)
3) For front passenger ’s window
4) For rear left window
5) For rear right window
All door windows can be controlled by the
power window switch cluster at the driver
side door. !
Operating the driver ’s window1) Open
2) Automatically open
3) Close
To open:
Push the switch down lightly and hold it.
The window will open as long as the
switch is held.
This switch also has a one-touch auto
down feature that allows the window to be
opened fully without holding the switch.
Push the switch down until it clicks and
release it, and the window will fully open.
To stop the window halfway, pull the
switch up lightly.
To close:
Pull the switch up lightly and hold it. The
window will close as long as the switch is Keys and doors
2-19
– CONTINUED –