Page 9 of 26
 Bolero Car Radio Manual Basic setting
7
– Briefly press the Set button to terminate the manual frequency selec-
tion and to display once again the lower function keys.
Storing a radio station on a displayed station key")
Basic setting
7
– Briefly press the Set button to terminate the manual frequency selec-
tion and to display once again the lower function keys.
Storing a radio station on a displayed station key – Continue to press one of the six station keys to displayed in
the main menu
RADIO
until a signal tone sounds. The currently heard
radio station is then stored on this station key.
Deleting a radio station from the memory list – Press the button in the main menu
RADIO
to open the
memory list.
– Press the function key behind the station you wish to delete. – Confirm the safety interrogation by pressing to remove the
station finally from the memory list.
If the currently heard radio station is already stored in the memory list, the memory space number is displayed behind the
description of the frequency range (
FM
or
AM
).
Use the main menu
Setup Radio
, to determine which of the six station keys are to
be displayed in the main menu
RADIO
.
Scan FunctionStations of a waveband can be played
briefly one after the other (for ten
seconds). – Press the set button , the radio se
arches automatically all available
stations of the current waveband.
– Alternatively, press the function key and press in the
opening pop-up window.
– During the current automatic play the function key will change from
to .
– Press the set button or function key again to end the auto-
matic play of the currently heard radio station.
RDS functionSwitching radio text on and off – Press the function key in the main menu
RADIO
and
in the opening pop-up window. Instead of the six station keys, the window for displaying the radio text
is now opened in the lower half
of the display.
– The window for displaying the radio text must fade out again to enable
the station keys to be displayed ag
ain. Briefly press on the display
window of the radio text.
– Alternatively, press the function key and the function key
shown as highlighted in the opening pop-up window.
RDS (“
Radio
Data
System”) serves to transmit program identification and additional
services therefore also enabling automatic tracking of stations. In the event of sufficiently satisfactory reception the suitable RDS radio stations will display the station name instead of the station frequency. If a radio station sends additional inform
ation via the RDS function while a station
is being stored, it can occur that the name of the radio station is later displayed incorrectly in the memory list.Traffic information function Switching traffic information TP (Traffic Program) on or off – Press on the button , in order to switch the traffic information func-
tion on or off.
The display “
TP” in combination with a station name (e. g. in the station or memory
list), indicates a traffic information station.
1 ...
6 ...
Memory
Delete
Delete
A8
Extras
Scan
Extras
Scan
A8
Scan
Extras
Radio text
Extras
Radio text
TP
s1ok.1a.book Page 7 Monday, March 30, 2009 3:29 PM
Page 10 of 26
 Bolero Car Radio Manual Basic setting
8Irrespective of which radio station is heard,
an additional receiver part in the unit
ensures that a traffic information station can
always be received as long as the traffic
inf")
Basic setting
8Irrespective of which radio station is heard,
an additional receiver part in the unit
ensures that a traffic information station can
always be received as long as the traffic
information function is switched on. The readiness of the traffic information function is displayed by “
TP” at the top right
in the display. If no traffic information st
ation can be received becaus
e, for example, radio recep-
tion is interrupted in general, “
No TP
” will be displayed instead of “
TP”. Remember
that car parks, tunnels, high
buildings or mountains can interrupt the radio signal
up to the total loss of reception. Incoming traffic announcement When a traffic announcemen
t is being received, a pop-up window will open.
If you wish to interrupt the transmission
of the traffic announcement, press on the
function key in the pop-up window
Traffic announcement
. The traffic infor-
mation function remains available and a
following traffic anno
uncement is made
again while the audio mode is in op
eration. Pressing the function key
will switch off the traffic information function permanently.
Traffic information memoryAutomatic recording of traffic reports If the traffic information function is switched on and a traffic information station is received, the incoming
traffic reports will be recorded
, as long as the ignition is
switched on. This way you are
informed at any time of the current traffic situation,
even if you have your radio switched
off for a lengthy period while driving.
If the vehicle is not in use (i
gnition off) while a traffic information station is received
and the traffic information function is sw
itched on, incoming
traffic reports from
this station are recorded for two hours. When switching the ignition off the current traffic information station is displayed for about five seconds, from which the next 65 minutes of traffic reports will be recorded. During this display of five seco
nds, you can select another traffic infor-
mation station using the arrow keys on the unit, which will be recorded.
If, when the vehicle is not in use, the rece
ption of the set traffic information station
is too poor because of external influences
, it will automatically search for another
traffic information station. A maximum of nine traffic a
nnouncements with a total length of up to four minutes
can be recorded. The oldest traffic report
will always be overwritten if the memory
is full. TIM recording times You also have the possibility to set two TIM recording times, to which the unit will also record traffic reports when the vehicl
e is not in use. Then the radio starts
according to the set TIM recording time with
the recording of all the incoming traffic
reports on the set traffic information station. For example, when you drive your vehicle to
work everyday at a certain time, only
enter the approximate start time. The radio starts with the recording at the set start time and ends the recording 65 minutes afterwards. In this way, before you begin your journey, you can retrieve the last traf
fic reports and tune into the current traffic
situation of the distance to be driven.
Note
•
In case of a message of over four minu
tes long, the beginni
ng is overwritten.
•
If the vehicle has not been used for mo
re than three days, no further traffic
reports are recorded, in order to stop
the vehicle battery from running down.
Playing traffic reports– Press on the button , in order to listen to the stored traffic
reports. The play function starts wi
th the last recorded traffic report
and runs through to the oldest recorded traffic report.
– Press on the button , in order to switch to the beginning of the
currently heard traffic report.
– In order to skip a traffic report, press on the button .
Cancel
TP deactivated
INFO
s1ok.1a.book Page 8 Monday, March 30, 2009 3:29 PM
Page 11 of 26
 Bolero Car Radio Manual Basic setting
9
– You can interrupt the play function by pressing the button . The
button changes to . Pressing the button will continue the play function from the last point.
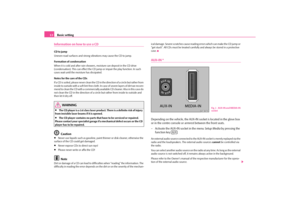
Selector key ME")
Basic setting
9
– You can interrupt the play function by pressing the button . The
button changes to . Pressing the button will continue the play function from the last point.
Selector key MEDIAThe main MEDIA menuCalling up the main MEDIA
menu and changing media source
– By pressing the button the play
function of the last played
media source will continue.
If audio sources are currently selectable
at the unit, use the range selector key
to change between the last audio sources.
If a previously played media source is se
lected again, play will continue from the
last played part. If an audio source cannot be selected at
the present time because, for example, no
data carrier has been inserted (e.g no
memory card), the function key will be
displayed with a grey background. Buttons on the unit for controlling the current audio sources – pressing this briefly changes over to
the beginning of the current title or
chapter, repeated pressing changes over to
the beginning of the previous title or
chapter. – briefly pressing this changes over to the next title or chapter.It is also possible to change tracks in the menu of the currently played audio source using the control button . Function keys for controlling the current audio sources
– pressing this briefly changes over to
the beginning of the current title or
chapter, repeated pressing changes over to
the beginning of the previous title or
chapter.
– briefly pressing this changes over to the next title or chapter.
– Pause: The play function is stoppe
d in the current position - the symbol
changes to , – pressing will continue
the play function in this position.
Selectable audio sources in the menu MEDIA
– changes over to the last played CD from the CD changer.
– changes over to an inserted memory card. – changes over to an additionally co
nnected external audio source *. Oper-
ating an externally connected audio source is possible with certain restrictions and depends largely on the type of the connection. Additional function keys in the main menu MEDIA
– starts the automatic play
Scan
. If is already displayed, the auto-
matic play has started - press
the function key to terminate.
– starts the random play function
Mix
. If is already displayed, the
random play function has started - press the function key to terminate.
– opens the pop-up window for switch
ing on the repeat function. In addi-
tion, it is determined if only the cu
rrent or the current or for the MP3
operation of the current the current is repeated.
– opens the title list of the current media source in order to choose
another title or another media source.Inserting or ejecting a CDInserting the CD –Press the button . – Choose the location .... for stor
ing the CD in the internal CD
changer. Wait until “
Please insert CD
” is displayed.
– Push a CD with the written side facing up as far as possible into the CD
case until it is automatically drawn in. The play function will start auto-matically.
MEDIA
MEDIA
A1
CDSD cardAUXScan
Scan
Mix
Mix
Repeat
Tra c k
CD
Folder
Playlist
Selection
/1
6
s1ok.1a.book Page 9 Monday, March 30, 2009 3:29 PM
Page 12 of 26
 Bolero Car Radio Manual Basic setting
10
Taking out the CD – Press on the button , the CD is driven to the initial position.If a CD is not taken out in the initial position, it will be reinserted after approximately 10")
Basic setting
10
Taking out the CD – Press on the button , the CD is driven to the initial position.If a CD is not taken out in the initial position, it will be reinserted after approximately 10 seconds for safety reasons. WMA Data (Windows Media Audio) The copyright of audio data compressed by
Windows
Media
Audio, can also be
protected by the DRM procedure (
Digital
Rights
Management). Such WMA data is
not supported by the unit.Inserting or removing a memory cardInserting a memory card – Push the memory card into the me
mory card case with the trimmed
edge to the front right (horizontal case) or to the front top (vertical case), until it is locked in position. The play function will start automat-ically.
Taking out a memory card – Press against the spring resistance
of the inserted memory card, the
memory card “skips” back into the Eject position.
Only MP3 data and unprotected WMA data ca
n be read from the SD card. All other
data is ignored. Memory card empty or data not readable If a memory card is inserted, on which no audio data has been stored, it will
not
be
switched over into the memory card mode after the loading procedure. In the menu MEDIA
the function key remains inactive in the top display line and
the function cannot be seleced. Requirements of the memory card Memory cards measuring 32 mm x 24 mm x 2.1 mm or 1.4 mm can be inserted into the memory card case.
Other physically suitable memory cards, su
ch as SDHC memory cards, are read by
the unit
not
.
Select CD from the CD changer– Press the button , in order to open the main menu
MEDIA
.
– If the unit is not already in the CD mode, press on the button in
the top display line.
– Press on the button , in order to display the title list of the
currently played CD.
– Press on the function key as often as necessary until the CD selec-
tion menu is displayed.
– Press on one of the buttons to , in order to start the
play function from the corresponding CD compartment.
If the
currently played
CD is selected in the CD selection menu, the title list is
opened. A CD compartment, in which no CD is inserted, is marked by “
Empty
” and the func-
tion key is shown as inactive. The CD which is currently playing, is indicated in the main menu
MEDIA
at the top
left of the display.
– Random play function; the tracks
will be played in a random order.
– Scroll through the CD. The first
10 seconds of each title are played.
Note
CDs, which cannot be read by the CD changer, are also not selectable in the CD selection menu of the radio (Display: “
Empty
”).
/SD card
MEDIA
CD
Selection
CD 1:
CD 6:
MixScan
s1ok.1a.book Page 10 Monday, March 30, 2009 3:29 PM
Page 13 of 26
 Bolero Car Radio Manual Basic setting
11
Select trackPress the selector key
to switch to the main
MEDIA
menu.
Audio CD: Select track – Press on the function key , in order to display the title list of
the currentl")
Basic setting
11
Select trackPress the selector key
to switch to the main
MEDIA
menu.
Audio CD: Select track – Press on the function key , in order to display the title list of
the currently played audio CD. The cu
rrently played track is shown as
highlighted.
– Select the title from the title list by pressing . MP3 Data: Select track – Press on the function key , in order to display the title list with
the currently played title and, if necessary, to display the sub-folder contained in this folder. The currently played track is shown as high-lighted.
– Press to choose another title. If th
e title you are searching for is in
another folder, you must first of
all search the folder structure.
– Press on the display of a data folder to open it (in picture: ). – Press the function key to open
the appropriate higher priority
folder.
Repeat title – Press the function key . – Press in the opening pop-up window to automatically repeat the
current title at the end.
– If you press (Audio CD operation) or (MP3 operation) in
the opening pop-up window the titles of the current CD or the current folder are repeated automatically.
Note
You can also change titels in the
menu MEDIA
by turning the set button .
•
If a data carrier in the internal
CD drive is ready to play, “
CD int.
” will be indi-
cated at the top left in the display.•
When playing MP3 data, the name of the artist, the album and the title of the
MP3 data will be displayed, if available, as
ID3 tag. The list an
d data name will be
displayed if there is no ID3 tag.•
Some audio CDs support “CD Text”. With these CDs the title name is displayed
instead of “
Tra c k
”.
General information for MP3 operationRequirements for the MP3 data and data carrier •
650 MB and 700 MB CD-ROM, CD-R, CD-RW.
•
The CDs must correspond to the ISO 9660 Level 2 standard as well as the Joliet
data system (single and multi-session).•
Data names must be no lo
nger than 64 characters.
•
The list structure is restricted
to a depth of 8 list levels.
•
The name of the artist, the album and the title of the reproduced MP3 data can
be shown as ID3 tag, providing this information is available. The list and data name will be displayed if there is no ID3 tag.•
Play lists are not supported.
•
WMA data (
Windows
Media
Audio) can also be played even if the copyright is
additionally protected by the DRM procedure (
Digital
Rights
Management). Such
WMA data is not su
pported by the unit.
Bit rate (data flow per time unit) •
The system supports MP3 data with bit rates of 32 to 320 KB/s as well as MP3
data with variable bit rates.•
The indicated playing time data with
variable bit rates is not reliable.
MEDIA
Selection
Track ...
Selection
F1.1.1
Repeat
Title
CD
folder
A8
s1ok.1a.book Page 11 Monday, March 30, 2009 3:29 PM
Page 14 of 26
 Bolero Car Radio Manual Basic setting
12
Information on how to use a CDCD to jump Uneven road surfaces and strong vibrations may cause the CD to jump. Formation of condensation When it is cold and after rain showers,
moist")
Basic setting
12
Information on how to use a CDCD to jump Uneven road surfaces and strong vibrations may cause the CD to jump. Formation of condensation When it is cold and after rain showers,
moisture can deposit in the CD drive
(condensation). This can effect the CD ju
mp or impair the play function. In such
cases wait until the moisture has dissipated. Notes for the care of the CDs If a CD is soiled, please never clean the CD in the direction of a circle but rather from inside to outside with a soft lint-free cloth. In case of severe layers of dir t we recom- m e n d t o c l e a n t h e C D w i th a c o m m e rc i a l l y a v a i l a b l e C D c l e a ne r. A l s o i n th i s c a s e d o not clean the CD in the direction of a circ
le but rather from inside to outside and
then let it dry off.
WARNING
•
The CD player is a 1st class laser produc
t. There is a definite risk of injury
from invisible laser beams if it is opened.•
The CD player contains no parts that have to be serviced or repaired.
Please contact your specialist garage if
a mechanical defect occurs or the CD
player has to be repaired.
Caution
•
Never use liquids such as gasoline, paint thinner or disk cleaner, otherwise the
surface of the CD could get damaged.•
Never expose CDs to direct sun rays!
•
Please never write or affix the CD!Note
Dirt or damage of a CD can lead to diffic
ulties when “reading” the information. The
difficulty in reading the error depends on the dirt or on the severity of the mechan-
ical damage. Severe scratches cause reading errors which can make the CD jump or “get stuck”. All CDs must be treated carefu
lly and always be stor
ed in a protective
case.AUX-IN *Depending on the vehicle, the AUX-IN
socket is located in the glove box
or in the centre console or armrest between the front seats. – Activate the AUX-IN socket in the menu
Setup Media
by pressing the
function key .
An external audio source connected to the AUX-IN socket is merely replayed via the radio and the loudspeakers. The external audio sources
cannot
be controlled via
the radio. You can select another audio source on the ra
dio at any time. As long as the external
audio source is not switched off, it re
mains always active in the background.
Please refer to the Owner's manual of the respective manufacturer for the opera- tion of the external audio source.
Fig. 1 AUX-IN and MEDIA-IN socket
AUX
s1ok.1a.book Page 12 Monday, March 30, 2009 3:29 PM
Page 15 of 26
 Bolero Car Radio Manual Basic setting
13
If a MEDIA-IN socket is additionally buil
t in, the button is displayed instead of
the function key in the
Audio menu
. Please note that an audio source
connected to the AUX")
Basic setting
13
If a MEDIA-IN socket is additionally buil
t in, the button is displayed instead of
the function key in the
Audio menu
. Please note that an audio source
connected to the AUX-IN socket can only be
replayed, if there is currently no data
carrier connected to the MEDIA-IN socket. Use the standard jack plug 3.5 mm for th
e AUX-IN socket. If the external audio
source does not have this jack
plug, you must use an adapter.
Adjust the play function volume of the external audio source The play function volume of the external audio source can be changed via the volume control on the radio. Depending on the connected audio source the output volume on the external audio source can be changed. You can also change the input sensitivity of the AUX-IN socket, so that the play func- tion volume of the external audio source
adapts to other audio sources or to avoid
contortions.
WARNING
•
On no account place an external audio source on the dash panel. You
could make sudden manoeuvres in th
e passenger compartment and injure
the occupants.•
On no account place an external audio source close to the airbags. You
could be thrown back in the passen
ger compartment by the airbags being
deployed and injure the occupants.•
You must not hold the external audio source in the hand or on the knees
while driving. You could make sudden manoeuvres in the passenger compartment and injure the occupants.•
Always guide the connection cable of th
e external audio source in such a
way that is does not restrict you when driving.
Caution
The AUX-IN socket must only be used for audio sources!
Multimedia socket MEDIA-IN *– Activate the AUX-IN socket in the menu
Setup Media
by pressing the
function key .
Depending on the vehicle, the multimedia socket MEDIA-IN is located in the glove box or in the center armrest between the front seats. Audio data in MP3, WMA, OGG Vorbis and AAC format from the external data sticker, connected to the multimedia
socket, can be played via the radio.
Adapter for connecting a data carrier For connecting an external data carrie
r, you will need an adapter which is
connected at the media socket MEDIA-IN
. Please contact yo
ur Škoda Service
Partner if necessary.Selector key SETUPMain menu set-ups (Setup)– Press the selector key to open the main menu
Setup
.
– Select the area for which you wish to change the set-ups or carry out
set-ups by pressing on your selection.
– Press on the function key , to switch back to the last selected menu.Overview of the set-up menus
– When in the radio mode, carry out set-ups for the function of the arrow
keys, for the displayed memory keys, the memory list and the traffic reports.
– select preferred TMC station and determine the area for TMC
announcements.
– Adjust the brightness of the display, day/night design of the map display
and select/deselect the confirmation tone for the keystroke.
PD
AUX
PD
SETUP
RadioTraffic programDisplay
s1ok.1a.book Page 13 Monday, March 30, 2009 3:29 PM
Page 16 of 26
 Bolero Car Radio Manual Basic setting
14
– Determine the set-ups for the play and display of MP3 data and activate
or deactivate the external connections.
– Change the system set-ups such as voice response and time")
Basic setting
14
– Determine the set-ups for the play and display of MP3 data and activate
or deactivate the external connections.
– Change the system set-ups such as voice response and time and cancel
or delete stored set-ups in individual areas. – Update the phone book in the unit,
delete all call lists and modify the
assignment of the shortcut keys.Radio set-upsCall up the menu
Setup Radio
by pressing the selector key and
the function key . Press on the or , to deter-m i n e f ro m w h i c h l i s t i n t h e ra d i o m o d e t h e s t a t i o n s a re t o b e s e l e c t e d w i t h the arrow keys. If the is selected, only stored stations from the memory list are called up. “
Memory
” is displayed at the top left in the
main menu
RADIO
.
Select station keys for display – Press on the function key behind in the menu
Setup
Radio
.
– In the pop-up window, press and select the station keys to be
displayed in the main menu
RADIO
.
Switching the RDS function on or off (RDS regional) – Press on the function key (r
egional station) and select a
set-up in the opening pop-up window.
– Press on the button , doing so always chooses the
frequency for the heard radio station,
which offers the best reception
at the present time.
– When pressing on the button , the unit attempts to hold a radio
station emitting regionally long enough until the reception quality is so bad, that there is a risk of a program loss.
Delete memory list – In the menu
Setup Radio
move the sliding regulator to the bottom to
display the function key .
– Press the function key and confirm the following
safety interrogation in order to erase all radio stations stored in the memory list.
Preferred TMC station If the “preferred” TMC station can no long
er be received, the system automatically
searches for the TMC station offering the best reception for the currently driven area. You can determine in the
Setup Radio
from which TMC station the reports are
to be announced.Traffic station set-upsCall up the menu
TIM Setup recording time
by pressing the selector key
and the function key .
– Press on the left of the display on TIM recording time, in order to open
the menu
Time setting
.
– In the menu
Time setting
, briefly press on the arrow keys or on
the display, below the display of
the hours or minutes, in order to
gradually change the respective time unit down or up.
– Keep pressing the corresponding arro
w key, in order to continuously
change the time unit. Release the button if the desired value has been reached.
– Press on the button , in order to take over the indicated TIM
recording time and to exit the menu
Time setting
.
– In this way you can set both desired TIM recording times.
MediaSystemTe l e p h o n e
SETUP
Radio
Station list
Memory list
Memory list
Station keys
RDS regional
Automatic
Fix
Delete memory listErase memory list
SETUP
Traffic information
s1ok.1a.book Page 14 Monday, March 30, 2009 3:29 PM