Page 201 of 310

Trailer towing199
Safety First
Controls and equipment
Practical tips
Technical Data
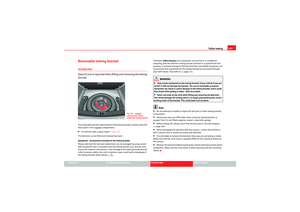
Make sure the ball joint is clean and undamaged
– Check the locking pin , release pin , shaft section and
knob ⇒page 198, fig. 155 on the ball joint to make sure they
are clean and undamaged.
The spring mechanism inside the ball joint must be in the ready
position
– Check that the red marking ⇒page 198, fig. 156 on the knob
is inside the black zone marked on the ball joint.
– Check that the locking pin is inside the holes in the shaft section of the ball joint.
– Check that the knob protrudes visibly from the ball joint, so that there is a clear gap between the knob and the ball joint.The ball joint can only be installed if the internal spring mechanism is in the
ready position.
Cont ⇒page 199, “Fitting the ball joint (step 3)”.
Fitting the ball joint (step 3)
AA
AB
AC
AD
AAAB
AC
Fig. 157 Removable
towing bracket: Setting
the spring mechanism to
the "ready" positionFig. 158 Removable
towing bracket: inserting
the ball joint
Exeo_EN.book Seite 199 Freitag, 28. August 2009 10:14 10
Page 202 of 310

Trailer towing
200
Setting the spring mechanism to the ready position (if required)
– Insert the key ⇒page 199, fig. 157 in the lock on the knob
and turn it towards the red marking.
– Pull out the knob in direction , hold and turn in direction
until the locking pin engages and the release pin moves
out visibly ⇒.
inserting the ball joint
– With the spring mechanism in the ready position, insert the ball joint into the mounting fixture and push it upwards ⇒page 199,
fig. 158 in the direction indicated (arrow) ⇒. It should lock
into position automatically. You should now clearly hear it click
into place.
– Lock the ball joint by turning the key to the green marking.
– Remove the key.Cont ⇒page 200, “Fitting the ball joint (step 4)”.
WARNING
•If it is not possible to set the spring mechanism to the ready position as
described above, do not use the ball joint. Please contact a specialist
garage.•To avoid injury, keep your hands away from the knob or cover piece
when inserting the ball joint in the mounting fixture. Otherwise, you could
be injured.
Fitting the ball joint (step 4)
A1
AA
AB
A2
A3
Fig. 159 Removable
towing bracket: Safety
checkFig. 160 Rear bumper:
Pulling down the
connecting socket
Exeo_EN.book Seite 200 Freitag, 28. August 2009 10:14 10
Page 203 of 310

Trailer towing201
Safety First
Controls and equipment
Practical tips
Technical Data
Safety check
– Check that the green marking ⇒page 200, fig. 159 on the
knob is inside the black zone marked on the ball joint.
– Check that the knob is directly against the ball joint, so that there is no gap between the knob and the ball joint -arrow-.
– Check that the ball joint is locked and the key is removed so that the knob cannot be pulled out ⇒.
– Check that the ball joint fits tightly in the mounting fixture (try moving it about to check).
To w i n g s o c k e t
– To plug in the electrical connection for the trailer, pull down the socket below the bumper ⇒page 200, fig. 160 .If the safety check is not satisfactory, the ball joint must be fitted again prop-
erly.
WARNING
To avoid accidents, the ball joint must meet all the safety requirements
listed in the safety check. The towing bracket must not be used if any one
of these requirements is not met. If this is the case, you should contact a
specialist garage.
Removing the ball joint– Insert the key in the lock ⇒fig. 161 on the knob.
– Unlock the ball joint by turning the key to the red marking.
AA
Fig. 161 Removable
towing bracket: Removing
the ball jointFig. 162 Rear bumper:
fitting the cover piece
A1
Exeo_EN.book Seite 201 Freitag, 28. August 2009 10:14 10
Page 204 of 310
Trailer towing
202
– Take hold of the ball joint and pull out the knob in direction .
– Keep hold of the knob and turn it as far as it will go in direction
.
– Release the knob. The spring mechanism will remain in the ready position ⇒.
– Pull the ball joint down out of the mounting fixture ⇒page 201, fig. 162. The cover piece will cover the mounting
fixture automatically .
– Put away the ball joint attachment under the floor panel in the luggage compartment.
– Move the socket back up to its original position.
WARNING
•To avoid injury, keep your hands away from the locking pin and the
release pin when releasing the locking mechanism.•Make sure that the cover piece is properly engaged on the mounting
fixture on the vehicle. Otherwise the ball joint may fail to engage securely
if dirt accumulates in the mounting fixture.
AA
AB
A1
A2
Exeo_EN.book Seite 202 Freitag, 28. August 2009 10:14 10
Page 205 of 310
Trailer towing203
Safety First
Controls and equipment
Practical tips
Technical Data
Fitting a towing bracket*
It is possible to fit a towing bracket to the rear of the vehicle.
Fig. 163 Attachment
points for towing bracket
Exeo_EN.book Seite 203 Freitag, 28. August 2009 10:14 10
Page 206 of 310

Trailer towing
204If a towing bracket is to be fitted after the vehicle is purchased, this must be
completed according to the instructions of the towing bracket manufacturer.
The attachment points for the towing bracket are on the lower part of the
vehicle.
The distance between the centre of the ball coupling and the ground should
never be lower than the indicated value, even with a fully loaded vehicle and
including the maximum resting weight.
Elevation values for securing the towing bracket:
65 mm (minimum)
403
629 mm
1112 mm (vehicle with max. load)
from 350 to 420 mm (fully loaded vehicle)
1,000 mm
Fitting a towing bracket•Driving with a trailer involves an extra effort for the vehicle. Therefore,
before fitting a towing bracket, please contact an Authorised Service Centre
to check whether your cooling system needs modification.•Submit to the legal requirements in your country (e.g. the fitting of a sepa-
rate warning lamp).•Certain vehicle components, e.g. the rear bumper, must be removed and
reinstalled. The towing bracket securing bolts must be tightened using a
torque wrench, and an electrical socket must be connected to the vehicle's
electrical system. The above-mentioned require specialized knowledge and
tools.•Figures in the illustration show the elevation value and the attachment
points which must be considered if you are retrofitting a towing bracket.WARNING
Towing brackets should be fitted by specialists.
•If the towing bracket is incorrectly installed, there is serious danger of
accident.•For your own safety, please observe the instructions provided by the
manufacturer of the towing bracket.Caution
•If the electrical socket is incorrectly installed, this could cause damage to
the vehicle's electrical system.Note
For the Sport finish, fitting a trailer bracket is not recommended due to the
design of the bumpers.
AA
ABACADAEAFAG
WARNING (continued)
Exeo_EN.book Seite 204 Freitag, 28. August 2009 10:14 10
Page 207 of 310

Your vehicle maintenance and cleaning205
Safety First
Controls and equipment
Practical tips
Technical Data
Your vehicle maintenance and cleaningGeneral notesRegular washing and care help maintain the value of your
vehicle.Yo u r v e h i c l e m a i n te n a n ce
Regular care and washing help to maintain the value of the vehicle. This may
also be one of the requirements for acknowledging warranty claims in the
event of bodywork corrosion or paint defects.
The best way to protect your car against the harmful effects of the environ-
ment is through correct maintenance and frequent washing. The longer
substances such as insects remains, bird droppings, resinous tree sap, road
dirt, industrial deposits, tar, soot or road salt and other aggressive materials
remain on the vehicle, the more damage they do to the paintwork. High
temperatures (for instance in strong sunlight) further intensify the corrosive
effect.
After winter, a period when salt is put on the roads, it is impor tant to have the
underside of the vehicle washed thoroughly.
Products for vehicle maintenance
Car care products are available in your Authorised Service Centre. Keep the
product instructions until you have used them up.
WARNING
•Car care products can be toxic. For this, they must always be kept
closed in their original container. Keep them out of the reach of children.
Failure to comply could result in poisoning.•Always read and observe the instructions and warnings on the package
before using car care products. Improper use could damage your health or your vehicle. The use of certain products may produce noxious vapours;
they should be used in well ventilated areas.
•Never use fuel, turpentine, engine oil, nail varnish remover or other
volatile fluids. These are toxic and highly flammable. Risk of fire and explo-
sion.•Before washing your vehicle, or carrying out any maintenance, switch
the engine off, apply your handbrake firmly and remove the key from the
ignition.Caution
Never attempt to remove dirt, mud or dust if the surface of the vehicle is dry.
Never use a dry cloth or sponge for cleaning purposes. This could damage the
paintwork or the windows of your vehicle. Soak dirt, mud or dust with plenty
of water.
For the sake of the environment
•When purchasing products for your vehicle maintenance, select the ones
which are not harmful to the environment.•The leftovers of the car care products should not be disposed of with ordi-
nary household waste. Observe the disposal information on the package.WARNING (continued)
Exeo_EN.book Seite 205 Freitag, 28. August 2009 10:14 10
Page 208 of 310

Your vehicle maintenance and cleaning
206Vehicle exterior maintenanceAutomatic car wash tunnel
The car can normally be washed without problem in an auto-
matic car wash.The vehicle paintwork is so durable that the car can normally be washed
without problems in an automatic car washing tunnel. However, the paint-
work wear depends to a large extent, on the kind of the car washing tunnel,
the brushes used, its water filtering and the type of cleaning and preservative
products.
Before going through a car wash, be sure to take the usual precautions such
as closing the windows and sunroof. There is nothing to note apart from that.
If the vehicle has special accessories such as spoilers or a roof carrier or two-
way radio aerial, etc., it is advisable to consult the car washing tunnel oper-
ator.
After washing, the brakes could hesitate to respond as the brake discs and
pads could be wet, or even frozen in winter. “Dry” the brakes by braking
several times.
WARNING
Water, ice and salt on the brakes can reduce braking efficiency. Risk of
accident.Washing by handVehicle washing
– First soften the dirt with plenty of water and rinse it off. – Clean your vehicle from top to bottom with a soft sponge, a glove
or a brush. Use very light pressure.
– Rinse the sponge or glove often with clean water.
– Special car shampoo should only be used for very stubborn dirt.
– Clean the wheels, sill panels etc. until last with a different sponge or glove.
– Rinse the vehicle thoroughly with water.
– Dry your vehicle surface gently with a chamois leather.
–When temperature is cold , dry the rubber seals and its surfaces
to prevent them from freezing. Apply silicone spray to the rubber
seals.
After washing
– Directly after washing, avoid sudden and sharp braking. “Dry” ⇒page 189, “Braking effect and braking distance”the brakes by
braking several times.
WARNING
•Wash your car with the ignition switched off.•Protect your hands and arms from cuts on sharp metal edges when
cleaning the underbody, the inside of the wheel housings etc. Risk of
injury.•Water, ice and salt on the brakes can reduce braking efficiency. Risk of
accident.
Exeo_EN.book Seite 206 Freitag, 28. August 2009 10:14 10