2009 PONTIAC TORRENT wheel
[x] Cancel search: wheelPage 177 of 436
REMOTE KEY LEARNING ACTIVE
This message displays while you are matching a
Remote Keyless Entry (RKE) transmitter to your vehicle.
See “LEARN REMOTE KEY” underDIC Operation
and Displays on page 3-42for more information.
SERVICE A/C (Air Conditioning)
SYSTEM
This message displays when there is a problem
detected in the air conditioning system. Have the
vehicle serviced by your dealer/retailer.
SERVICE AIR BAG
This message displays when there is a problem with
the airbag system. Have your vehicle serviced by your
dealer/retailer immediately. SeeAirbag Readiness
Light on page 3-28for more information.
SERVICE ALL WHEEL DRIVE
If your vehicle has the All-Wheel Drive (AWD)
system, this message displays along with the service
all-wheel drive light if a problem occurs with this system.
SeeService All-Wheel Drive Light on page 3-39. If this
message appears, stop as soon as possible and turn
off the vehicle. Restart the vehicle and check for themessage on the DIC display. If the message is still
displayed or appears again when you begin driving, the
AWD system needs service. See your dealer/retailer.
SERVICE BATTERY CHARGING
SYSTEM
This message displays when there is a problem with the
generator and battery charging systems. Driving with
this problem could drain the vehicle’s battery. Turn off all
unnecessary accessories. Stop and turn off the vehicle
as soon as it is safe to do so. Have the electrical
system checked by your dealer/retailer immediately.
Connecting a battery charger to your vehicle while the
ignition is in any position other than LOCK/OFF may
cause this message to appear. If you need to charge
your vehicle, make sure that the key is in LOCK/OFF
or out of the ignition during charging.
SERVICE BRAKE SYSTEM
This message displays and a chime sounds when the
brake �uid level is low. The brake system warning
light also appears on the instrument panel cluster when
this message appears on the DIC. SeeBrake System
Warning Light on page 3-30. Have the brake system
serviced by your dealer/retailer as soon as possible.
3-53
Page 194 of 436

Storing a Radio Station as a Favorite
Drivers are encouraged to set up their radio station
favorites while the vehicle is parked. Tune to favorite
stations using the presets, favorites button, and steering
wheel controls, if the vehicle has them. SeeDefensive
Driving on page 4-2.
If the radio has XM, a maximum of 36 stations can be
programmed as favorites using the six pushbuttons
positioned below the radio station frequency tabs and
by using the radio favorites page button (FAV button).
FAV (Favorites):Press the FAV button to go through
up to six pages of favorites, each having six favorite
stations available per page. Each page of favorites can
contain any combination of AM, FM, or XM (if equipped)
stations. To store a station as a favorite, perform the
following steps:
1. Tune to the desired radio station.
2. Press the FAV button to display the page where the
station is to be stored.
3. Press and hold one of the six pushbuttons until a
beep sounds. When that pushbutton is pressed
and released, the station that was set, returns.
4. Repeat the steps for each pushbutton radio station
to be stored as a favorite.The number of favorites pages can be setup using
the MENU button. To setup the number of favorites
pages, perform the following steps:
1. Press the MENU button to display the radio
setup menu.
2. Press the pushbutton located below the
FAV 1-6 tab.
3. Select the desired number of favorites pages
by pressing the pushbutton located below the
displayed page numbers.
4. Press the FAV button, or let the menu time out,
to return to the original main radio screen showing
the radio station frequency tabs and to begin
the process of programming favorites for the chosen
amount of numbered pages.
Setting the Tone (Bass/Treble)
(Base Radio with CD)
EQ (Equalization):To adjust the bass or treble,
press the
fknob or EQ button until the desired tone
control tab displays. Turn the
fknob clockwise or
counterclockwise to increase or decrease the setting.
The display shows the current bass or treble level.
If a station’s frequency is weak, or if there is static,
decrease the treble.
3-70
Page 223 of 436
Bluetooth Controls
Use the buttons located on the steering wheel to
operate the in-vehicle Bluetooth system. SeeAudio
Steering Wheel Controls on page 3-118for more
information.
bg(Push To Talk):Press to answer incoming calls,
to con�rm system information, and to start speech
recognition.
cx(Phone On Hook):Press to end a call, reject a
call, or to cancel an operation.
Pairing
A Bluetooth enabled cell phone must be paired to the
in-vehicle Bluetooth system �rst and then connected to
the vehicle before it can be used. See the cell phone
manufacturers user guide for Bluetooth functions before
pairing the cell phone. If a Bluetooth phone is not
connected, calls will be made using OnStar
®Hands-Free
Calling, if available. Refer to the OnStar owner’s guide for
more information.Pairing Information:
Up to �ve cell phones can be paired to the in-vehicle
Bluetooth system.
The pairing process is disabled when the vehicle is
moving.
The in-vehicle Bluetooth system automatically links
with the �rst available paired cell phone in the
order the phone was paired.
Only one paired cell phone can be connected to the
in-vehicle Bluetooth system at a time.
Pairing should only need to be completed once,
unless changes to the pairing information have
been made or the phone is deleted.
To link to a different paired phone, see Linking to a
Different Phone later in this section.
3-99
Page 242 of 436
Cleaning the RSE Overhead Console
When cleaning the RSE overhead console surface,
use only a clean cloth dampened with clean water.
Cleaning the Video Screen
When cleaning the video screen, use only a clean cloth
dampened with clean water. Use care when directly
touching or cleaning the screen, as damage can result.
Theft-Deterrent Feature
THEFTLOCK®is designed to discourage theft of
the vehicle’s radio by learning a portion of the Vehicle
Identi�cation Number (VIN). The radio does not operate
if it is stolen or moved to a different vehicle.
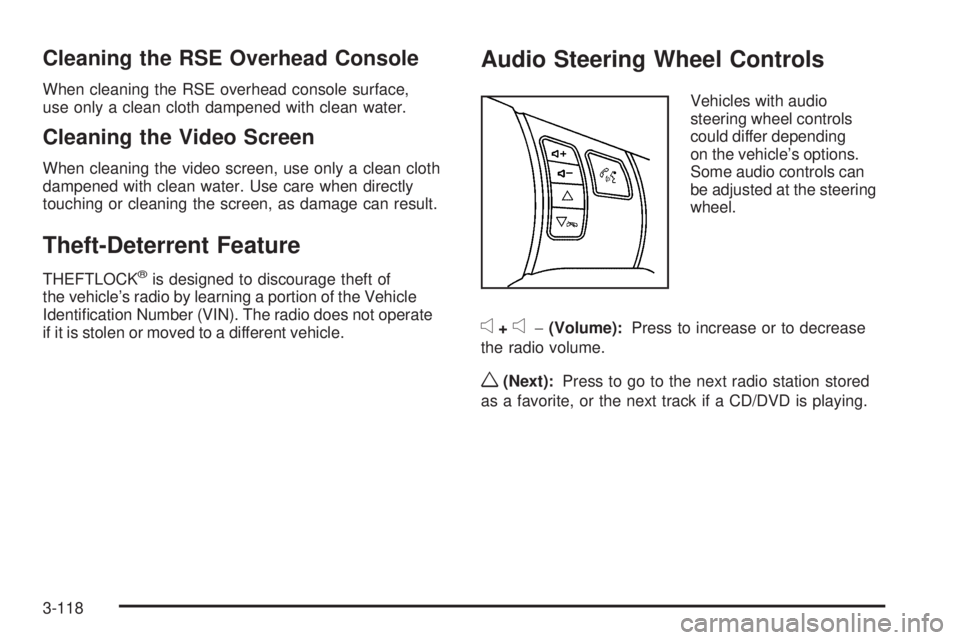
Audio Steering Wheel Controls
Vehicles with audio
steering wheel controls
could differ depending
on the vehicle’s options.
Some audio controls can
be adjusted at the steering
wheel.
e+e−(Volume):Press to increase or to decrease
the radio volume.
w(Next):Press to go to the next radio station stored
as a favorite, or the next track if a CD/DVD is playing.
3-118
Page 245 of 436
Your Driving, the Road, and the Vehicle............4-2
Driving for Better Fuel Economy.......................4-2
Defensive Driving...........................................4-2
Drunk Driving.................................................4-3
Control of a Vehicle........................................4-3
Braking.........................................................4-4
Antilock Brake System (ABS)...........................4-5
Braking in Emergencies...................................4-5
StabiliTrak
®System........................................4-6
Traction Control System (TCS).........................4-7
All-Wheel Drive (AWD) System.........................4-8
Steering........................................................4-9
Off-Road Recovery.......................................4-11
Passing.......................................................4-12
Loss of Control.............................................4-12Driving at Night............................................4-13
Driving in Rain and on Wet Roads..................4-14
Before Leaving on a Long Trip.......................4-15
Highway Hypnosis........................................4-15
Hill and Mountain Roads................................4-16
Winter Driving..............................................4-17
If Your Vehicle is Stuck in Sand, Mud,
Ice, or Snow.............................................4-19
Rocking Your Vehicle to Get It Out.................4-20
Loading the Vehicle......................................4-20
Towing..........................................................4-26
Towing Your Vehicle.....................................4-26
Recreational Vehicle Towing...........................4-26
Towing a Trailer...........................................4-33
Section 4 Driving Your Vehicle
4-1
Page 249 of 436
Antilock Brake System (ABS)
This vehicle has the Antilock Brake System (ABS), an
advanced electronic braking system that helps prevent a
braking skid.
When the engine is started and the vehicle begins to
drive away, ABS checks itself. A momentary motor
or clicking noise might be heard while this test is going
on, and it might even be noticed that the brake pedal
moves a little. This is normal.
If there is a problem with
ABS, this warning light
stays on. SeeAntilock
Brake System (ABS)
Warning Light on
page 3-31.
Let us say the road is wet and you are driving safely.
Suddenly, an animal jumps out in front of you. You slam
on the brakes and continue braking. Here is what
happens with ABS:
A computer senses that the wheels are slowing down.
If one of the wheels is about to stop rolling, the computer
will separately work the brakes at each wheel.ABS can change the brake pressure to each wheel, as
required, faster than any driver could. This can help
the driver steer around the obstacle while braking hard.
As the brakes are applied, the computer keeps
receiving updates on wheel speed and controls braking
pressure accordingly.
Remember: ABS does not change the time needed to get
a foot up to the brake pedal or always decrease stopping
distance. If you get too close to the vehicle in front of you,
there will not be enough time to apply the brakes if that
vehicle suddenly slows or stops. Always leave enough
room up ahead to stop, even with ABS.
Using ABS
Do not pump the brakes. Just hold the brake pedal
down �rmly and let antilock work. The antilock pump or
motor might be heard operating and the brake pedal
might be felt to pulsate, but this is normal.
Braking in Emergencies
ABS allows the driver to steer and brake at the same
time. In many emergencies, steering can help more than
even the very best braking.
4-5
Page 251 of 436
The system may be heard or felt while it is working.
This is normal. This light may also come on after
extended heavy braking, indicating the brakes have
become too hot to limit wheel spin.
StabiliTrak can be turned
off using the StabiliTrak/
TCS control button.
To disable StabiliTrak, press and hold the traction
control button until the StabiliTrak/TCS warning light
comes on the instrument panel. StabiliTrak can be
activated again by pressing the StabiliTrak/TCS button.
The SERVICE STABILITRAK message will be
displayed and the StabiliTrak/TCS warning light on
the instrument panel cluster will come on if there is
a problem with the system. When this light and
the SERVICE STABILITRAK message are on, the
system is not operational. Adjust your driving
accordingly.Traction Control System (TCS)
The vehicle has a Traction Control System (TCS) that
limits wheel spin. This is especially useful in slippery road
conditions. The system operates only if it senses that one
or more of the wheels are spinning or beginning to lose
traction. When this happens, the system works the
brakes and reduces engine power to limit wheel spin.
This light �ashes while the
traction control system is
limiting wheel spin.
The system may be heard or felt while it is working,
but this is normal. This light may also come on
after extended heavy braking indicating the brakes
have become too hot to limit wheel spin.
TCS automatically comes on whenever the vehicle is
started. To limit wheel spin, especially in slippery
road conditions, the system should always be left on.
But TCS can be turned off if needed. The system should
be turned off if the vehicle ever gets stuck in sand,
mud, ice, or snow and rocking the vehicle is required.
SeeRocking Your Vehicle to Get It Out on page 4-20.
4-7
Page 252 of 436
TCS can be turned off by
pressing the StabiliTrak/
TCS button, located next to
the gear shift lever.
When TCS is turned off, the StabiliTrak/TCS warning
light comes on the instrument panel cluster and
TRACTION CONTROL OFF brie�y displays.
The traction control system can be activated again by
pressing the traction control button. While the traction
control system is activated, the StabiliTrak/TCS warning
light comes on the instrument panel cluster and
TRACTION CONTROL ON brie�y displays.
If the system is limiting wheel spin when the button is
pressed, the StabiliTrak/TCS warning light comes on the
instrument panel cluster. The system will not turn off
until there is no longer a current need to limit wheel spin.
Turn the system back on by pressing the button
again. If the light does not come on, TCS might not be
working and the vehicle should be serviced by your
dealer/retailer.
Adding non-dealer/non-retailer accessories can affect
the vehicle’s performance. SeeAccessories and
Modifications on page 5-3for more information.All-Wheel Drive (AWD) System
If the vehicle has all-wheel drive (AWD), the AWD
system operates automatically without any action
required by the driver. If the front drive wheels begin to
slip, the rear wheels will automatically begin to drive
the vehicle as required. Torque is also applied to
the rear wheels during launches. There may be a slight
engagement noise during hard use but this is normal.
The Service All-Wheel
Drive Light is located on
the instrument panel
cluster.
This light and the SERVICE ALL WHEEL DRIVE
message in the DIC will come on and stay on to indicate
there may be a problem with the drive system and
service is required.
SeeService All-Wheel Drive Light on page 3-39and
DIC Warnings and Messages on page 3-49for
more information.
4-8