Page 104 of 228

104
Instruments and controls
Select the function. Press the OK
button or the left adjuster wheel on the
steering wheel to start or stop the stop
watch.
Restart trip computer
The measurement or calculation of
the following trip computer
information can be restarted:
■ Average consumption,
■ Absolute consumption,
■ Average speed,
■ Distance,
■ Stop watch.
Select the desired trip computer
information 3 93. To restart, press the
OK button or the left adjuster wheel
on the steering wheel for approx.
2 seconds. Trip computer in Graphic-
Info-Display or Colour-
Info-Display
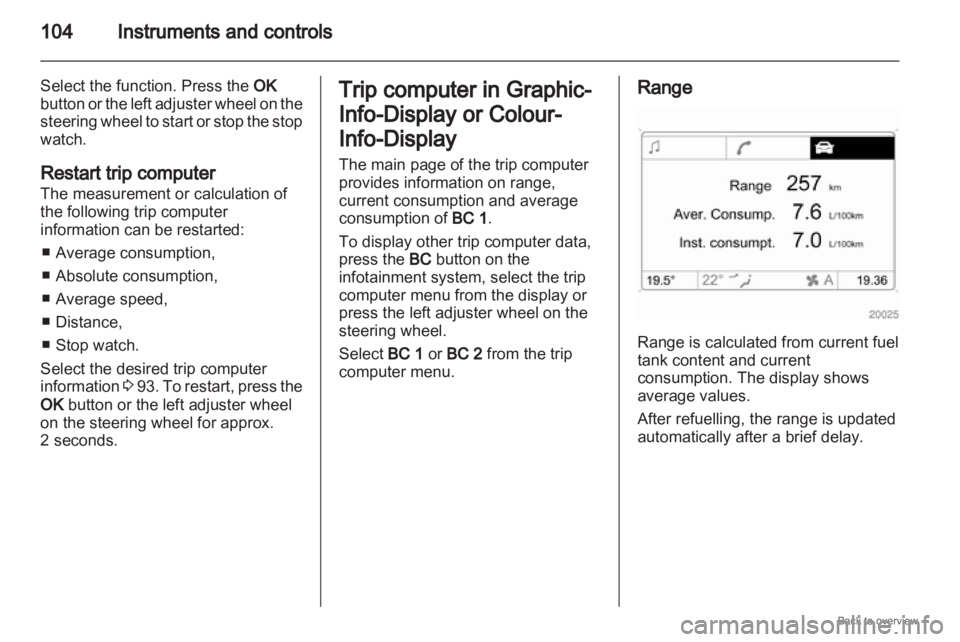
The main page of the trip computer
provides information on range,
current consumption and average
consumption of
BC 1.
To display other trip computer data,
press the BC button on the
infotainment system, select the trip
computer menu from the display or
press the left adjuster wheel on the
steering wheel.
Select BC 1 or BC 2 from the trip
computer menu. Range
Range is calculated from current fuel
tank content and current
consumption. The display shows
average values.
After refuelling, the range is updated
automatically after a brief delay.
Page 110 of 228

110
Lighting
Vehicles with halogen headlight
system
Have the headlights adjusted by
a workshop.
Vehicles with adaptive forward
lighting Adapting the aim of tne headlight
beam:
1.
Pull lever and hold.
2. Switch on ignition.
3. An acoustic signal sounds after approx. 3 seconds.
Control indicator B 3 92. Daytime running lights
With the ignition on and the light
switch set to 7 or AUTO, the parking
lights are switched on. When the
engine is running, headlights
illuminate.
On vehicle without automatic light
control, 9
must be switched on when
it gets dark for illumination of the
intrument panel.
The daytime running lights switch off
when the ignition is switched off.
Adaptive forward lighting
Adaptive forward lighting with Bi-
Xenon headlamps improves lighting
in curves and increases headlight
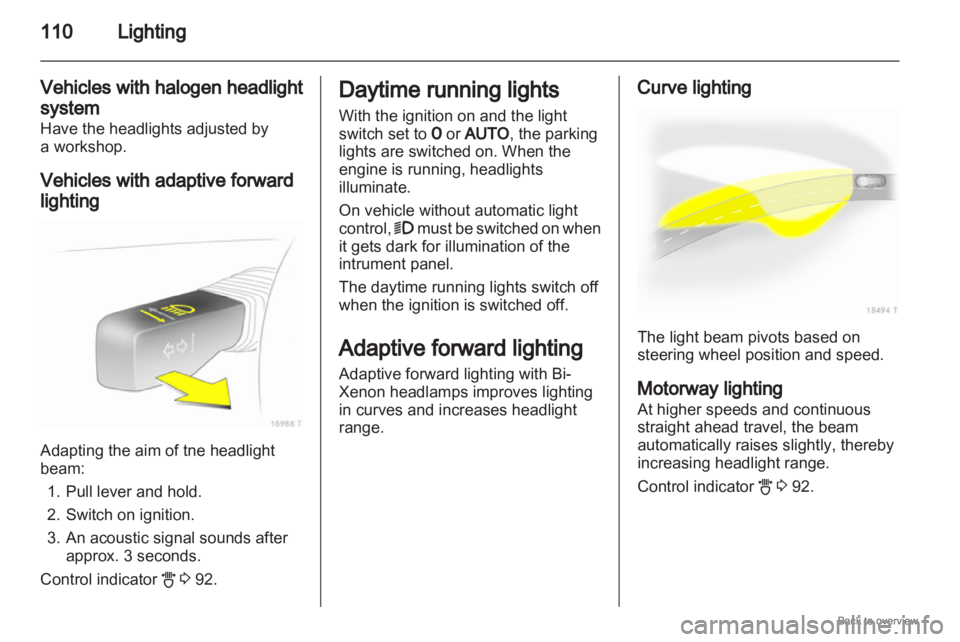
range. Curve lighting
The light beam pivots based on
steering wheel position and speed.
Motorway lighting
At higher speeds and continuous
straight ahead travel, the beam
automatically raises slightly, thereby
increasing headlight range.
Control indicator
B 3 92.
Page 111 of 228
Lighting
111
Hazard warning flashers Operated with the ¨ button.
The hazard warning flashers activate
automatically if the airbags deploy. Turn and lane-change
signals
Lever up = Right indicator
Lever down = Left indicator
The lever always springs back to its
original position.
If the lever is moved past the
resistance point, the indicator is
switched on constantly. When the
steering wheel moves back, the
indicator
is automatically deactivated.
For three flashes, e. g. when
changing lanes, press the lever until
resistance is felt and then release. Move the lever to the resistance point
and hold for longer indication.
Switch the indicator off manually by
moving the lever slightly.
Front fog lights
The front fog lights can only be
switched on when both the ignition
and headlights or parking lights are
on.
Operated with the > button.
Page 128 of 228

128
Driving and operating
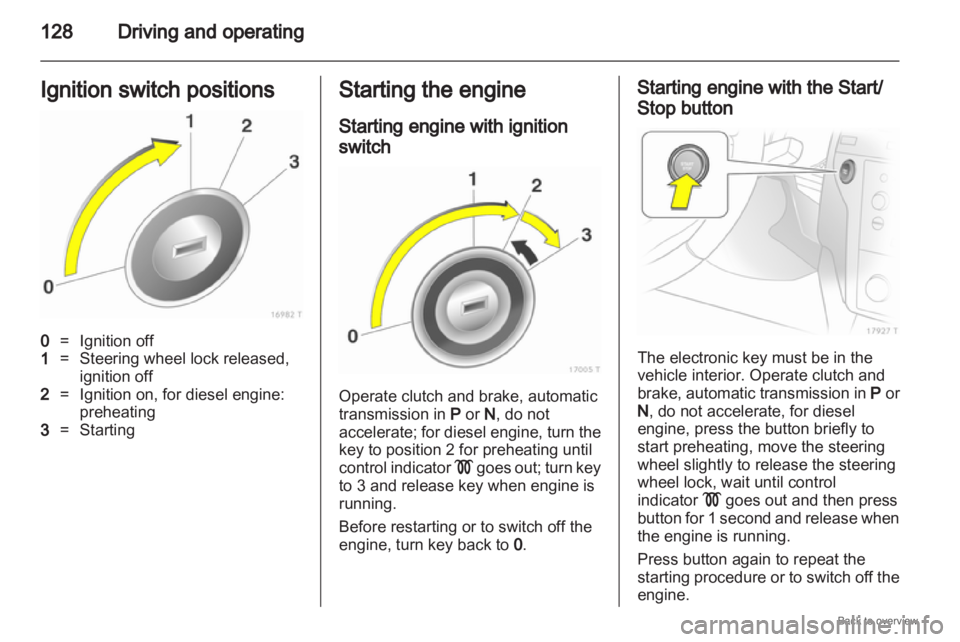
Ignition switch positions 0
= Ignition off
1 = Steering wheel lock released,
ignition off
2 = Ignition on, for diesel engine:
preheating
3 = Starting Starting the engine
Starting engine with ignition
switch
Operate clutch and brake, automatic
transmission in
P or N, do not
accelerate;
for diesel engine, turn the
key to position 2 for preheating until
control indicator ! goes out; turn key
to 3 and release key when engine is
running.
Before restarting or to switch off the
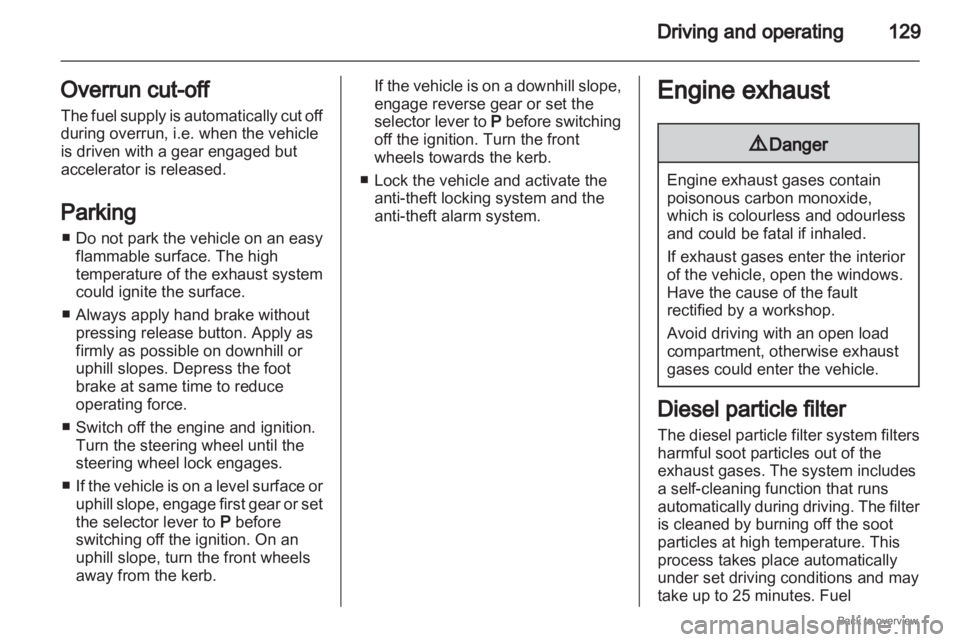
engine, turn key back to 0. Starting engine with the Start/
Stop button
The electronic key must be in the
vehicle interior. Operate clutch and
brake,
automatic transmission in P or
N , do not accelerate, for diesel
engine, press the button briefly to
start preheating, move the steering
wheel slightly to release the steering
wheel lock, wait until control
indicator ! goes out and then press
button for 1 second and release when
the engine is running.
Press button again to repeat the
starting procedure or to switch off the
engine.
Page 129 of 228

Driving and operating
129
Overrun cut-off
The fuel supply is automatically cut off
during overrun, i.e. when the vehicle
is driven with a gear engaged but
accelerator is released.
Parking
■ Do not park the vehicle on an easy flammable surface. The high
temperature of the exhaust system
could ignite the surface.
■ Always apply hand brake without pressing release button. Apply as
firmly as possible on downhill or
uphill slopes. Depress the foot
brake at same time to reduce
operating force.
■ Switch off the engine and ignition. Turn the steering wheel until the
steering wheel lock engages.
■ If the vehicle is on a level surface or uphill slope, engage first gear or set
the selector lever to P before
switching off the ignition. On an
uphill slope, turn the front wheels
away from the kerb. If the vehicle is on a downhill slope,
engage reverse gear or set the
selector
lever to P before switching
off the ignition. Turn the front
wheels towards the kerb.
■ Lock the vehicle and activate the anti-theft locking system and the
anti-theft alarm system. Engine exhaust
9
Danger Engine exhaust gases contain
poisonous carbon monoxide,
which is colourless and odourless
and could be fatal if inhaled.
If exhaust gases enter the interior
of the vehicle, open the windows.
Have the cause of the fault
rectified by a workshop.
Avoid driving with an open load
compartment, otherwise exhaust
gases could enter the vehicle.
Diesel particle filter
The
diesel particle filter system filters
harmful soot particles out of the
exhaust gases. The system includes
a self-cleaning function that runs
automatically during driving. The filter
is cleaned by burning off the soot
particles at high temperature. This
process takes place automatically
under set driving conditions and may
take up to 25 minutes. Fuel
Page 179 of 228
Vehicle care
179
The use of tyre chains is not permitted
on the temporary spare wheel.
Tyre repair kit
Minor damage to the tyre tread or
sidewall
can be repaired with the tyre
repair kit.
Do not remove foreign bodies from
the tyres.
Tyre damage exceeding 4 mm or that
is near the rim cannot be repaired with
the tyre repair kit. 9
Warning Do not drive faster than 80 km/h.
Do not use for a lengthy period.
Steering and handling may be
affected.
If you have a flat tyre:
Apply
the hand brake and engage first
gear, reverse gear or P. The tyre repair kit is in the stowage
compartment in the load
compartment.
Push the locking tabs forward and
remove the cover.
1.
Take the sealant bottle andbracket with air hose from the
insert. 2. Detach air hose from bracket and
screw onto sealant bottle
connection.
Page 197 of 228

Service and maintenance
197Service operations by year
1)
km ( x 1000) 1) 1
30 2
60 3
90 4
120 5
150
Replace and drain fuel filter, diesel (grade EN 590) X X
Replace fuel filter, external, CNG (grade EN 228), Z 16 YNG Every 4 years / 60.000 km
Check and adjust parking brake (no weight on wheels); visually inspect wheel mounting
and suspension springs front and rear, brake lines, brake pressure hoses, fuel lines,
gas lines of CNG vehicles, level control and exhaust system X X
Check exterior of body/underbody corrosion protection and note any damage in the
Service Booklet X X X X X
+o
Visually inspect front and rear wheel brakes
2)
, if a tyre pressure monitoring system is
fitted, do not swap wheels over X X
Annual service check if annual mileage exceeds 20 000 km
Engine, transmission (AT, MT), inspect air-conditioning compressor for leaks
2) X X X X X
Visually inspect folding covers on steering, tie rods and axle drive X X X X X
Tie rod and supporting joint checking X X X X X
+ Change brake and clutch fluid automated manual transmission (MTA) Every 2 years
2)
In case of too high consumption / leakage, perform additional work with customer's agreement.
Page 198 of 228

198
Service and maintenanceService operations by year
1)
km ( x 1000) 1) 1
30 2
60 3
90 4
120 5
150
Undo wheel fastening (take care if tyre pressure monitoring system is present) and
tighten to torque: 110 Nm.
The wheel bolt taper should be greased or oiled lightly during assembly.
Check tyre condition. Check/correct tyre pressure (including spare wheel)
With tyre repair system - check completeness and expiry date of kit. Replace sealant
bottle every 4 years. X X
+
Annual service check if annual mileage exceeds 20 000 km
Visually inspect first-aid kit, (presence in designated stowage compartment,
completeness and expiry date), lashing eyes and warning triangle Every 2 years
Check/correct headlamp adjustment (including auxiliary headlamps) X X
Grease door hinges, door stop, lock cylinder, striker plate, bonnet lock, tailgate hinges,
wipe door stop check strap clean before greasing X X
Test drive, final inspection (check steering and ignition locks, instruments and indicator
lamps,
entire brake system, steering, air conditioning, engine, body and running gear),
reset service interval display with TECH 2) X X X X X
+: Additional operations.
o: Under extreme operating conditions and if required by country-specific conditions, the intervals are reduced.