Page 113 of 336
CAUTION
cDo not use for anything other than
sunglasses.
cDo not leave sunglasses in the sun-
glasses holder while parking in direct
sunlight. The heat may damage the
sunglasses.
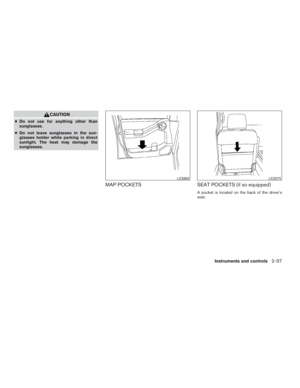
MAP POCKETS SEAT POCKETS (if so equipped)
A pocket is located on the back of the driver’s
seat.
LIC0863LIC0575
Instruments and controls2-37
ZREVIEW COPYÐ2009 Xterra(xtr)
Owners ManualÐUSA_English(nna)
05/21/08Ðdebbie
X
Page 114 of 336

CUP HOLDERS
The front cup holders have adapters that can be
removed to accommodate larger cups.
CAUTION
cAvoid abrupt starting and braking when
the cup holder is being used to prevent
spilling the drink. If the liquid is hot, it
can scald you or your passenger.
cUse only soft cups in the cup holder.
Hard objects can injure you in an
accident.To open the 2nd row cup holders (rear of the front
console) , lower the lid. To close, raise the lid. If
stepped on, the cup holder is designed to snap
loose from the console. To re-install, close the
cup holder assembly and push it back into the
console opening.
To fold the 2nd row bench seat back, first close
the cup holder.
CAUTION
cDo not use bottle holder for any other
objects that could be thrown about in
the vehicle and possibly injure people
during sudden braking or an accident.
cDo not use bottle holder for open liquid
containers.
Front
WIC0827
2nd row (rear of front console)
WIC0771
Bottle holder
LIC0864
2-38Instruments and controls
ZREVIEW COPYÐ2009 Xterra(xtr)
Owners ManualÐUSA_English(nna)
05/21/08Ðdebbie
X
Page 115 of 336

CARGO AREA STORAGE
To access the floor storage area, push downs1
to raise the handle, then pull up on the handles2
to lift the luggage board.
Attach the tether located on the inside of the
luggage board to a ceiling hook to hold the lug-
gage board up while accessing the storage area.
WARNING
Do not drive with the luggage board teth-
ered to a ceiling hook. In a sudden stop or
collision, the luggage board could come
loose and cause personal injury.
LUGGAGE HOOKS
The luggage hooks can be used to secure cargo
with ropes or other types of straps.
WARNING
cProperly secure all cargo with ropes or
straps to help prevent it from sliding or
shifting. Do not place cargo higher than
the seatbacks. In a sudden stop or col-
lision, unsecured cargo could cause
personal injury.
cUse suitable ropes and hooks to secure
cargo.cNever allow anyone to ride in the lug-
gage area. It is extremely dangerous to
ride in a cargo area inside of a vehicle.
In a collision, people riding in these
areas are more likely to be seriously
injured or killed.
cDo not allow people to ride in any area
of your vehicle that is not equipped with
seats and seat belts.
cThe child restraint top tether strap may
be damaged by contact with items in
the cargo area. Secure any items in the
cargo area. Your child could be seri-
ously injured or killed in a collision if
the top tether strap is damaged.
cBe sure everyone in your vehicle is in a
seat and using a seat belt properly.
LIC0865
Instruments and controls2-39
ZREVIEW COPYÐ2009 Xterra(xtr)
Owners ManualÐUSA_English(nna)
05/21/08Ðdebbie
X
Page 116 of 336
Side finisher
Do not apply a load of more than 110 lb (490 N)
to a single hook.
Floor hooks
Do not apply a load of more than 110 lb (490 N)
to a single hook.
LTI0140LTI0141
2-40Instruments and controls
ZREVIEW COPYÐ2009 Xterra(xtr)
Owners ManualÐUSA_English(nna)
05/21/08Ðdebbie
X
Page 117 of 336

CARGO NETS
WARNING
cProperly secure all cargo to help pre-
vent it from sliding or shifting. Do not
place cargo higher than the seatbacks.
In a sudden stop or collision, unsecured
cargo could cause personal injury.
cBe sure to secure all four hooks into the
retainers. The cargo restrained in the
net must not exceed 30 lbs. (13.6 kg) or
the net may not stay secured.The cargo nets help keep packages in the cargo
area from moving around while the vehicle is in
motion.
To install the large cargo net (if so equipped) ,
attach the hooks to the retainers.
To remove the large cargo net, detach the hooks
from the cargo net retainers.The right-hand luggage side net is not removable.
WARNING
cThe cargo restrained in the luggage
side nets must not exceed 8.5 lb (3.9 kg)
for each net or the net may not stay
secured.
cDo not place sharp objects in the lug-
gage side nets. Such objects may be-
come dangerous projectiles and cause
injury when the vehicle is moving or if
the vehicle is involved in a collision.
Cargo net (if so equipped)
LIC0876
Right-hand luggage side net
LIC0866
Instruments and controls2-41
ZREVIEW COPYÐ2009 Xterra(xtr)
Owners ManualÐUSA_English(nna)
05/21/08Ðdebbie
X
Page 118 of 336
To install the removable left-hand luggage side
net
sA, attach the net to the retainers. To remove,
detach the net from the retainers.
The smaller left-hand luggage side net is not
removable.
ROOF RACK
Left-hand luggage side nets
LIC0867
WIC0868
2-42Instruments and controls
ZREVIEW COPYÐ2009 Xterra(xtr)
Owners ManualÐUSA_English(nna)
05/21/08Ðdebbie
X
Page 119 of 336

WARNING
cDrive extra carefully when the vehicle is
loaded at or near the cargo carrying
capacity, especially if the significant
portion of that load is carried on the
roof rack.
cHeavy loading of the roof rack has the
potential to affect the vehicle stability
and handling during sudden or abnor-
mal handling maneuvers.
cRoof rack load should be evenly
distributed.
cDo not exceed maximum roof rack load
weight capacity.
cProperly secure all cargo with ropes or
straps to help prevent it from sliding or
shifting. In a sudden stop or collision,
unsecured cargo could cause personal
injury.
CAUTION
Use care when placing or removing items
from the roof rack. If you cannot comfort-
ably lift the items onto the roof rack from
the ground, use a ladder or stool.Always evenly distribute the cargo on the roof
rack.The maximum total load including the
gear basket is 150 lb (68 kg) evenly distrib-
uted. The maximum total load for the gear
basket is 30 lb (13 kg) evenly distributed.Be
careful that your vehicle does not exceed the
Gross Vehicle Weight Rating (GVWR) or the
Gross Axle Weight Ratings (GAWR front and
rear) . The GVWR and GAWR are located on the
F.M.V.S.S. label (located on the driver’s side door
jamb pillar) . For more information regarding
GVWR and GAWR, refer to “Vehicle loading
information” in the “Technical and consumer in-
formation” section later in this manual.
The crossbars can be adjusted or removed. Use
the Torxdriver provided in the tool kit (located
under the 2nd row seats) to loosen both crossbar
adjusting screws.
To adjust:
1. Loosen the adjusting screws with the
Torxdriver
s1by turning counterclockwise
sA.
2. When the clamp is loosened, move the
crossbar so the cargo can be positioned on
the crossbar
sB.
3. Tighten the crossbar adjusting screws with
the Torxdriver by turning clockwise.
4. Secure the cargo with rope.5. Always check the tightness of the crossbar
adjusting screws.
To remove:
1. Loosen the adjusting screws with the
Torxdriver
s1by turning counterclockwise
sA.
2. Rotate the clamps
sC.
3. Remove the crossbar.
4. Reverse to install.
5. Always check the tightness of the crossbar
adjusting screws.
Instruments and controls2-43
ZREVIEW COPYÐ2009 Xterra(xtr)
Owners ManualÐUSA_English(nna)
05/21/08Ðdebbie
X
Page 120 of 336
To open the gear basket lid:
s1Turn the handle counterclockwise.
s2Raise the lid.
NOTE:
Cargo in the gear basket must fit with the
lid closed. The maximum total load for the
gear basket is 30 lb (13 kg) evenly distrib-
uted. Do not force the lid closed.
WARNING
The lid should be closed and locked when
driving.To remove the gear basket assembly:
1. Open the lid.
2. Loosen the 4 TorxThead fasteners with a
Torxdriver by turning counterclockwise
sA.
3. Lift the gear basket to remove it
sB.
4. Reverse to reinstall.
5. Always check the tightness of the gear bas-
ket fasteners.
LIC0869LIC0870
2-44Instruments and controls
ZREVIEW COPYÐ2009 Xterra(xtr)
Owners ManualÐUSA_English(nna)
05/21/08Ðdebbie
X