2009 NISSAN QASHQAI run flat
[x] Cancel search: run flatPage 165 of 297
Downloaded from www.Manualslib.com manuals search engine During the first 1,600 km (1,000 miles), follow these
recommendations for the future reliability and
economy of your new vehicle. Failure to follow the
recommendations may result in shortened engine
life and reduced engine performance.
Avoid driving for long periods at a constant
speed, either fast or slow.
Do not accelerate at full throttle in any gear.
Avoid quick starts.
Avoid hard braking as much as possible.
Do not tow a trailer during the first 800 km (500
miles).
NOTE
Models with K9K diesel engine will achieve top
performance only after approximately 5,000 km
(3,000 miles).
WARNING
The driving characteristics of your vehicle can be
changed remarkably by any additional load and
its distribution as well as by adding optional
equipment (trailer couplings, roof racks, etc.).
Your driving style and speed have to be adjusted
accordingly. Especially when carrying heavy
loads, your speed must be reduced adequately.
Make sure the area around the vehicle is free of
obstacles.
Check fluid levels such as engine oil, coolant,
brake and clutch fluid, and window washer fluid
as frequently as possible, at least whenever you
refuel.
Visually inspect tyres for their appearance and
condition. Also check the tyre pressure for
proper inflation.
Maintenance items in the “8. Maintenance and
do-it-yourself” section should be checked peri-
odically.
Check that all windows and light lenses are
clean.
Check that all doors are closed.
Position the seat and adjust the head restraints.
Adjust the inside and outside mirrors.
Fasten your seat belt and ask all passengers to
do likewise.
Check the operation of the warning/indicator
lights when the ignition switch is turned to the
ON position.
Do not place hard or heavy objects on the dash-
board or rear parcel shelf in order to prevent
injury in the event of a sudden stop.
RUNNING-IN SCHEDULE BEFORE STARTING THE ENGINE
5-2Starting and driving
Page 170 of 297
Downloaded from www.Manualslib.com manuals search engine unlock the steering wheel, insert the ignition key and
turn it gently while rotating the steering wheel slightly
right and left.
The ignition key can only be removed when the
switch is in the LOCK position (Normal parking po-
sition) (0).
AUTOMATIC TRANSMISSION OR
CONTINUOUSLY VARIABLE
TRANSMISSION
On Automatic Transmission (AT) or Continuously
Variable Transmission (CVT) models, the ignition
lock is designed so that the key cannot be turned to
LOCK and removed until the selector lever is moved
to the P (Park) position.
When removing the key from the LOCK position of
the ignition switch, make sure that the selector lever
is in the P (Park) position.
The selector lever can only be moved from the P
(Park) position when the ignition switch is in the ON
position and the footbrake pedal is depressed.
To remove the key from the ignition switch:
1. Move the selector lever into the P (Park) posi-tion.
2. Turn the key to the LOCK position.
3. Remove the key from the ignition switch.
If the key is removed from the ignition switch, the
selector lever cannot be moved from the P (Park)
position. When the key cannot be turned toward the LOCK
position, proceed as follows to remove the key:
1. Move the selector lever into the P (Park) posi-
tion.
2. Turn the key slightly in the ON direction.
3. Turn the key towards the LOCK position.
4. Remove the key.
STEERING LOCK
To lock the steering wheel
1. Turn the key to the LOCK position.
2. Remove the key from the ignition switch.
3. Turn the steering wheel 1/6 of a turn clockwise from the straight up position.
To unlock the steering wheel
1. Insert the key into the ignition switch.
2. Gently turn the key while rotating the steeringwheel slightly right and left.
KEY POSITIONS
LOCK (Normal parking position) (0)
The ignition key can only be removed when in this
position.
The steering lock can only be locked in this position.
“OFF” (1)
The engine is turned off without locking the steering
wheel.
Acc (Accessories) (2)
This position activates electrical accessories, such
as the radio, when the engine is not running.
ON (Normal operating position) (3)
This position turns on the ignition system and elec-
trical accessories.
START (4)
The engine starter activates and the engine will start.
As soon as the engine has started, release the key
immediately. It will return to the ON position.
NOTE
For vehicles fitted with Stop/Start System:
When the engine is automatically stopped by the
Stop/Start System the ignition switch can still be
operated as usual.
At the end of a journey turn the ignition OFF to
avoid a flat battery. The Stop/Start System does
not automatically turn ignition off.
NISSAN ANTI-THEFT SYSTEM (NATS)
The NISSAN Anti Theft System (NATS)* will stop
the engine if someone tries to start the engine with-
out using the registered NATS key.
* Immobilizer
If you failed to start the engine using the NATS Key,
turn the ignition knob to the LOCK position, wait for
5 seconds and turn the key to the START position
again to start the engine.
Starting and driving5-7
Page 172 of 297
Downloaded from www.Manualslib.com manuals search engine AUTOMATIC TRANSMISSION OR
CONTINUOUSLY VARIABLE
TRANSMISSION
The ignition knob is designed so that it cannot be
turned to the LOCK position until the selector lever
is moved to the P (Park) position. The selector lever
can only be moved from the P (Park) position when
the ignition knob is in the ON position and the
footbrake pedal is depressed.
NOTE
The ignition knob warning appears and a buzzer
sounds twice when the ignition knob is turned to
the “OFF” position. Make sure that the selector
lever is in the P (Park) position, then turn the igni-
tion knob to the LOCK position. See “Warnings
and alerts” in the “2. Instruments and controls”
section for further details regarding the function-
ality of the ignition knob warning.
STEERING LOCK
To lock the steering wheel
In the LOCK position, turn the steering wheel 1/6 of
a turn from the straight up position.
To unlock the steering wheel
Depress the brake pedal, push the ignition knob and
turn it towards the Acc position while gently rotating
the steering wheel right or left.
IGNITION KNOB POSITION
LOCK (Normal parking position) (0)
The steering lock can only be locked in this position.
“OFF” (1)
The engine can be turned off without locking the
steering wheel.
Acc (Accessories) (2)
This position activates electrical accessories, such
as the radio, when the engine is not running.
ON (Normal operating position) (3)
This position turns on the ignition system and the
electrical accessories.
START (4)
The engine starter activates and the engine will start.
As soon as the engine has started, release the knob
immediately. It will return to the ON position.
NOTE
For vehicles fitted with Stop/Start System:
When the engine is automatically stopped by the
Stop/Start System the ignition knob can still be
operated as usual.
At the end of a journey turn the ignition OFF to
avoid a flat battery. The Stop/Start System does
not automatically turn ignition off.
Starting and driving5-9
Page 184 of 297
Downloaded from www.Manualslib.com manuals search engine NISSAN GREEN PROGRAM
The Stop/Start System is designed to prevent un-
necessary fuel consumption, exhaust emissions,
and noise during a journey:
When the vehicle comes to rest the engine is
automatically stopped*.
The engine is then automatically restarted before
you are ready to drive away**.
CAUTION
At the end of the journey the engine must be
stopped and ignition turned OFF. Lock the ve-
hicle as normal. Turning the ignition OFF will shut
down all electrical systems. Failure to do this may
result in a flat battery.
NORMAL OPERATION
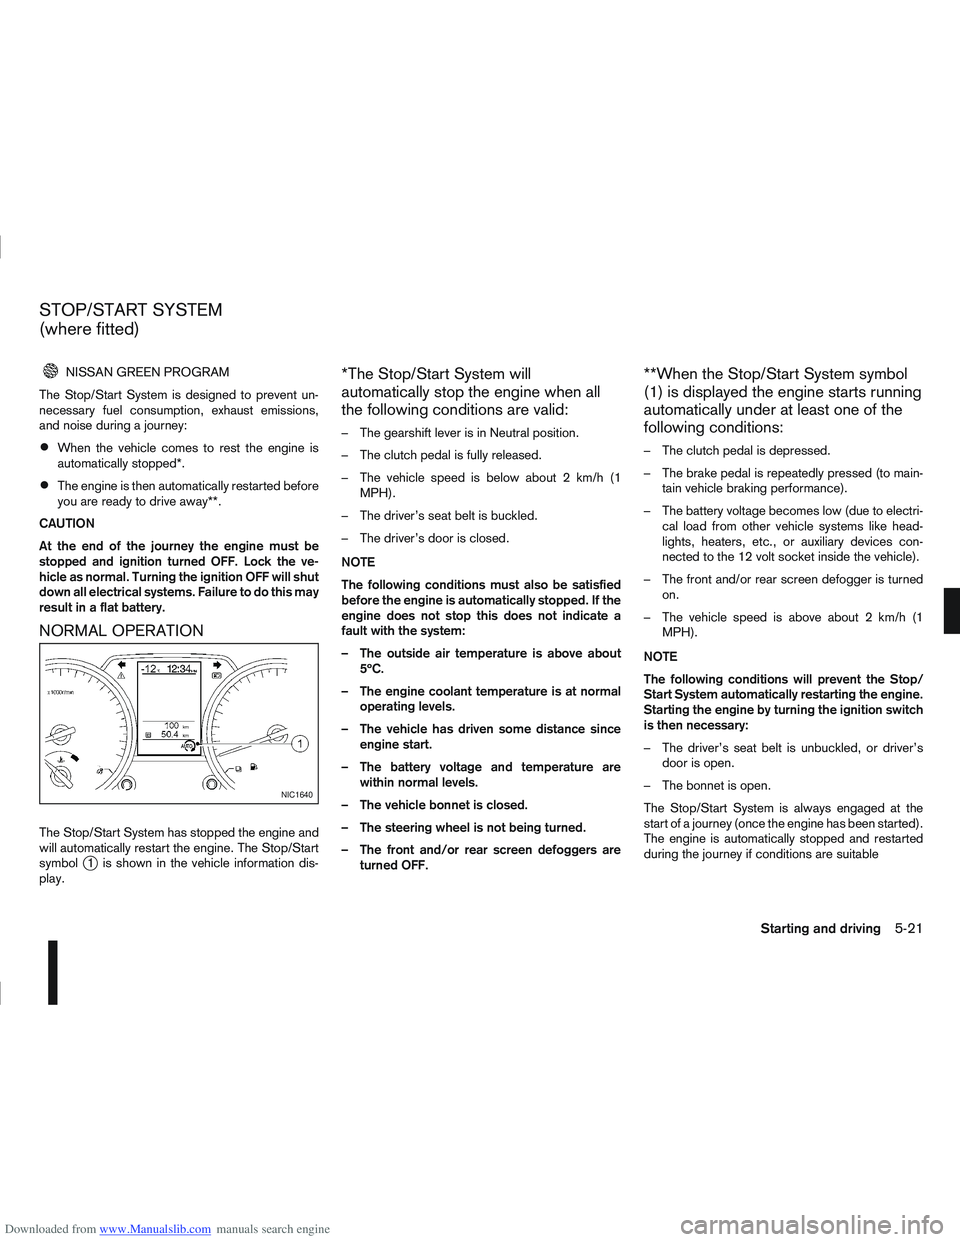
The Stop/Start System has stopped the engine and
will automatically restart the engine. The Stop/Start
symbol
j1 is shown in the vehicle information dis-
play.
*The Stop/Start System will
automatically stop the engine when all
the following conditions are valid:
– The gearshift lever is in Neutral position.
– The clutch pedal is fully released.
– The vehicle speed is below about 2 km/h (1 MPH).
– The driver’s seat belt is buckled.
– The driver’s door is closed.
NOTE
The following conditions must also be satisfied
before the engine is automatically stopped. If the
engine does not stop this does not indicate a
fault with the system:
– The outside air temperature is above about 5ºC.
– The engine coolant temperature is at normal operating levels.
– The vehicle has driven some distance since engine start.
– The battery voltage and temperature are within normal levels.
– The vehicle bonnet is closed.
– The steering wheel is not being turned.
– The front and/or rear screen defoggers are turned OFF.
**When the Stop/Start System symbol
(1) is displayed the engine starts running
automatically under at least one of the
following conditions:
– The clutch pedal is depressed.
– The brake pedal is repeatedly pressed (to main-tain vehicle braking performance).
– The battery voltage becomes low (due to electri- cal load from other vehicle systems like head-
lights, heaters, etc., or auxiliary devices con-
nected to the 12 volt socket inside the vehicle).
– The front and/or rear screen defogger is turned on.
– The vehicle speed is above about 2 km/h (1 MPH).
NOTE
The following conditions will prevent the Stop/
Start System automatically restarting the engine.
Starting the engine by turning the ignition switch
is then necessary:
– The driver’s seat belt is unbuckled, or driver’s door is open.
– The bonnet is open.
The Stop/Start System is always engaged at the
start of a journey (once the engine has been started).
The engine is automatically stopped and restarted
during the journey if conditions are suitable
NIC1640
STOP/START SYSTEM
(where fitted)
Starting and driving5-21
Page 198 of 297
Downloaded from www.Manualslib.com manuals search engine When parked on a sloping driveway, turn the
wheels so the vehicle will not roll into the street
in case it moves.
FACING DOWNHILL:j1
Turn the wheels into the kerb, allow the vehicle
to move forward until the kerb side wheel gently
touches the kerb. Then set the handbrake.
FACING UPHILL:j2
Turn the wheels away from the kerb and allow
the vehicle to move back until the kerb side wheel
gently touches the kerb. Then set the handbrake.
NO KERB — FACING DOWNHILL OR UPHILL:j3
Turn the wheels toward the side of the road so
the vehicle will move away from the centre of the
road if it moves. Then set the handbrake.
Turn the ignition switch to the LOCK position
and remove the key/Intelligent Key (where fit-
ted).
Always turn off ignition after parking a vehicle
with Stop/Start System fitted to avoid a possible
flat battery.
NOTE
The Stop/Start System is designed to prevent
unnecessary fuel consumption, exhaust emis-
sions and noise during a journey. The Stop/
Start System does not automatically turn off
ignition at the end of a journey. Your new vehicle was designed to be used primarily
to carry passengers and luggage.
Remember that towing a trailer will place additional
loads on your vehicle’s engine, drive-train, steering,
braking and other systems. Towing a trailer will also
exaggerate other conditions, such as sway caused
by crosswinds, rough road surfaces or passing
trucks. Driving style and speed must be adjusted
according to the circumstances. Before towing a
trailer, see a NISSAN dealer or qualified workshop
for an explanation of towing equipment and its
proper use.
OPERATING PRECAUTIONS
Avoid towing a trailer during the running-in
schedule.
Choose proper coupling devices (trailer hitch,
safety chain, roof carrier, etc.) for your vehicle
and trailer. These devices are available from a
NISSAN dealer or qualified workshop where you
can also obtain more detailed information about
trailer towing.
Heavy-duty kits are available at a NISSAN dealer
or qualified workshop.
It is advisable to contact a NISSAN dealer or
qualified workshop for towing details, before
towing a trailer up steep slopes for long dis-
tances.
Never allow the total trailer load (trailer weight
plus its cargo weight) to exceed the maximum
set for the coupling device. Contact a NISSAN dealer or qualified workshop
for more information on this matter.
The trailer must be loaded so that heavy goods
are distributed over the axle and as low in the
trailer as possible. Poor load distribution can se-
riously affect the stability of the trailer and tow
vehicle.
Do not exceed the maximum permitted vertical
load on the trailer hitch.
Before driving, make sure that the lighting sys-
tem of the trailer works properly.
When towing with 4WD models, the 4WD mode
switch should be in the AUTO position. Using
the vehicle in AUTO mode gives better traction,
particularly when moving off from stationary and/
or on an incline, as the vehicle is less likely to
wheel spin.
Avoid abrupt starts, accelerations and stops.
Avoid sharp turns and lane changes.
Always drive your vehicle at a moderate speed.
Always block the wheels on both vehicle and
trailer when parking. Apply the handbrake (where
fitted) on the trailer. Parking on a steep slope is
not recommended.
If parking on a steep slope is unavoidable it is
also advisable to put the vehicle into gear, or
select P (Park (AT or CVT models), and turn the
front wheels into the kerb (in addition to the other
precautions described). Before parking on a
TRAILER TOWING
Starting and driving5-35
Page 201 of 297
Downloaded from www.Manualslib.com manuals search engine When leaving your vehicle unoccupied:
Always remove the ignition key or Intelligent Key
(where fitted) and take it with you – even in your
own garage.
Close all windows completely and lock all doors.
Always park your vehicle where it can be seen.
At night, park in a well lit area.
If the vehicle is equipped with an alarm or immo-
bilization device, use it – even for short periods.
Do not leave children and pets in the vehicle
unattended.
Do not leave valuables on view to tempt a thief.
Always take your valuables with you. If you must
leave something in your vehicle, lock it in the lug-
gage compartment or hide it out of sight.
Do not leave the vehicle documents in your ve-
hicle. In the unfortunate event of your vehicle
being stolen, the documents will only help a thief
to sell the vehicle.
Do not leave articles on a roof rack as they are
particularly vulnerable. If possible, remove them
from the rack and lock them inside the vehicle.
Do not leave the spare key or Intelligent Key in
the vehicle – keep it in a safe place at home.
Do not leave a note of your vehicle’s key number
in the vehicle. A thief may break into the vehicle,
note the key number and return with a new key
and drive the vehicle.
WARNING
If the Electrically Power Assisted Steering
warning light (EPAS) illuminates while driv-
ing, the power assist for steering will be dis-
abled. Greater steering efforts are required to
operate the steering wheel, especially in
sharp turns and at low speed. Stop the ve-
hicle as soon as safely possible and contact a
NISSAN dealer or qualified workshop for fur-
ther assistance.
In certain circumstances, factors external to
the EPAS system may contribute to the illumi-
nation of the warning light. If the warning light
illuminates, stop the vehicle as soon as safely
possible if driving. Turn the ignition switch to
the “OFF” position and wait for approximately
20 seconds, then turn the ignition switch to
the ON position again. If the light remains illu-
minated, we recommend you to contact a
NISSAN dealer or qualified workshop. See
“Warning/indicator lights and audible
reminders” in the “2. Instruments and
controls” section for further details regarding
the EPAS warning light.
The EPAS (Electrically Power Assisted Steering)
system is designed to assist steering.
The steering may appear to feel slightly stiff follow-
ing parking manoeuvres including a great deal of
steering. This is not a malfunction; it is caused by a
control system designed to prevent the motor from overheating. No servicing is required. The EPAS
system will return to normal operation the next time
the vehicle is driven.
Similarly, the EPAS system may not provide full as-
sistance during periods of reduced battery voltage
but will recover once normal battery voltage is re-
stored.
If the EPAS warning light comes on while the engine
is running, it may indicate that the EPAS system is
not working properly. As result greater steering ef-
forts are required to steer the steering wheel, espe-
cially in sharp turns and at low speeds. Have the
system checked by a NISSAN dealer or qualified
workshop as soon as possible.
NOTE
Incorrectly inflated tyres can lead to poor steer-
ing ability and make the driver suspect a steering
problem: keep the vehicle’s tyres inflated to the
correct pressure at all times.
CAUTION
Any malfunction or accident that could have dam-
aged the steering components (including actual
or attempted theft damage) should be reported
to a NISSAN dealer or qualified workshop.
VEHICLE SECURITY
POWER STEERING SYSTEM
5-38Starting and driving
Page 288 of 297

Downloaded from www.Manualslib.com manuals search engine – When starting and driving ................................................ 5-3
Pregnant women ................................................................... 1-8
Protect
– Protect the environment ................................................. 8-13
– Protect your vehicle from corrosion .................................. 7-5
Push-starting ....................................................................... 6-12R
Radio
– FM AM radio with CD player ......................................... 4-30
– LW-MW-FM radio with 6 CD changer ........................... 4-23
– LW-MW-FM radio with CD player ................................. 4-23
– NATS immobilizer radio approval number ....................... 9-10
– NISSAN Connect .......................................................... 4-43
Rear parcel shelf ................................................................. 2-33
– Installation ..................................................................... 2-33
– Removal ........................................................................\
2-33
Rear seat ........................................................................\
...... 1-3
Rear window defogger ........................................................ 2-23
Rear-view monitor ................................................................. 4-2
– Operating tips ................................................................. 4-3
– Rear-view monitor setting ................................................ 4-3
Recommended SAE viscosity number ................................... 9-5
Remote control system (integrated keyfob) ............................ 3-3
Repairing flat tyre .................................................................. 6-7
Roof rail ........................................................................\
...... 2-32
Running-in schedule .............................................................. 5-2S
Safety
– Active head restraints ...................................................... 1-6
– Child safety ..................................................................... 1-8
– Child safety rear door locks ........................................... 3-11 – Head restraints adjustment .............................................. 1-5
– ISOFIX system .............................................................. 1-26
– Safety chains (Trailer) .................................................... 5-36
– Top tether strap for child restraint .................................. 1-27
Seat
– Active head restraints ...................................................... 1-6
– Armrest ........................................................................\
... 1-5
– Front seats – Adjustment ................................................. 1-2
– Head restraints adjustment .............................................. 1-5
– Rear seat ........................................................................\
. 1-3
– Seat heating .................................................................. 2-29
– Seats ........................................................................\
...... 1-2
Seat belt
– Child safety ..................................................................... 1-8
– Injured persons ............................................................... 1-9
– Pre-tensioner seat belt system ....................................... 1-12
– Precautions on seat belt usage ........................................ 1-7
– Pregnant women ............................................................. 1-8
– Rear centre seat .............................................................. 1-9
– Seat belt maintenance ................................................... 1-11
– Seat belt warning ............................................................ 1-6
– Seat belt warning (Rear seat or 2nd row) ....................... 2-12
– Seat belt warning light ..................................................... 2-3
– Seat belts ................................................................. 1-6, 7-4
– Three-point type seat belts ............................................... 1-9
Security system ................................................................... 3-13
– Alarm system ................................................................. 3-13
– NISSAN Anti-Theft System (NATS) ........................ 3-13, 3-2
Servicing air conditioner ............................................. 4-17, 4-21
Snow chains ....................................................................... 8-32
Spare tyre ........................................................................\
..... 6-2
Spark plugs (Petrol engine models) ..................................... 8-21
Speed limiter .............................................................. 2-21, 5-31
Speed limiter operations ...................................................... 5-32
Speedometer ........................................................................\
2-2
Starting
– Before starting the engine ................................................ 5-2
Index10-7
Page 294 of 297
Downloaded from www.Manualslib.com manuals search engine Use the roof rack only when necessary
Only install the roof luggage system when you really
need it, otherwise put it inside the vehicle or store it
in your garage. Do not drive around with an empty
roof rack, kayak holder, or ski rack, this will reduce
your aerodynamic drag significantly.
Optimise the use of air conditioning
The air conditioning system has a positive effect on
driving and vehicle safety through comfort cooling
and dehumidifying, drivers are more alert and have
better visibility when window demisting/defogging
becomes necessary. However, use of the air condi-
tioning system will increase fuel consumption sub-
stantially in an urban environment. Optimise the use
of air conditioning by using the vents as much as
possible.
Use the parking brake on slopes
Use the parking brake when holding your vehicle on
a slope. Avoid using the clutch (manual transmis-
sion) or the accelerator (automatic transmission or
continuously variable transmission) to hold your ve-
hicle as this leads to unnecessary fuel consumption
and wear.
Maintain a safe distance
Anticipate traffic conditions for a smoother drive and
to assure comfort and safety during your trip. Drive
and maintain a safe distance from other vehicles
while in traffic. This will help reduce fuel consump-
tion as you will not be constantly tapping your
brakes.
Check your tyre pressure
Low tyre pressure increases fuel consumption as
well as the use of non-recommended tyres. Correct
tyre pressure will maximise the grip of your vehicle
and optimise fuel consumption.
Have your car serviced regularly
Regular service allows you to run your vehicle in
optimal condition and with the best fuel efficiency.
Have your vehicle serviced by your NISSAN dealer
or a qualified workshop to ensure that it is main-
tained to its original standard.
In case of emergency ... 6-2
(Flat tyre, engine will not start, overheating,
towing)
How to start the engine ... 5-2
How to read the meters and gauges ... 2-2
Maintenance and do-it-yourself ... 8-2
Technical information ... 9-2
QUICK REFERENCE