2009 NISSAN QASHQAI lock
[x] Cancel search: lockPage 103 of 297

Downloaded from www.Manualslib.com manuals search engine the fuel system and emission control system.
An incorrect cap can result in a serious mal-
function and possible injury.
CAUTION
If fuel is spilled on the vehicle body, flush it away
with water to avoid paint damage.
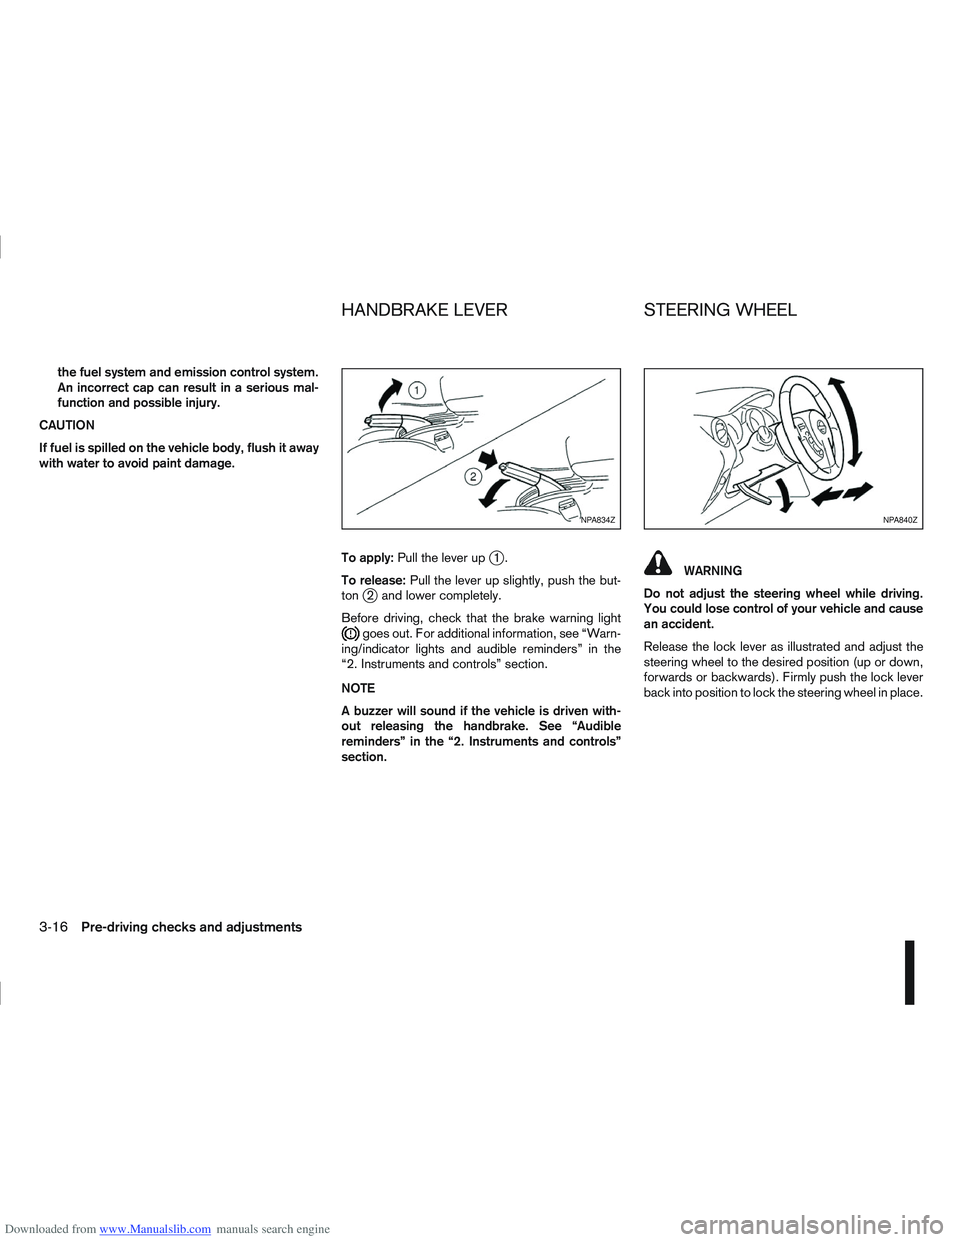
To apply:Pull the lever up
j1.
To release: Pull the lever up slightly, push the but-
ton
j2 and lower completely.
Before driving, check that the brake warning light
goes out. For additional information, see “Warn-
ing/indicator lights and audible reminders” in the
“2. Instruments and controls” section.
NOTE
A buzzer will sound if the vehicle is driven with-
out releasing the handbrake. See “Audible
reminders” in the “2. Instruments and controls”
section.
WARNING
Do not adjust the steering wheel while driving.
You could lose control of your vehicle and cause
an accident.
Release the lock lever as illustrated and adjust the
steering wheel to the desired position (up or down,
forwards or backwards). Firmly push the lock lever
back into position to lock the steering wheel in place.
NPA834ZNPA840Z
HANDBRAKE LEVER STEERING WHEEL
3-16Pre-driving checks and adjustments
Page 104 of 297

Downloaded from www.Manualslib.com manuals search engine CAUTION
Do not store the sun visor before returning it to
its original position.
1. To block out glare from the front, move the mainsun visor downwards.
2. To block glare from the side, remove the main sun visor from the centre mount and move it to
the side.
INSIDE REAR-VIEW MIRROR
j
1 Night position
j2Day position
jA Front of the vehicle
The night position
j1 will reduce glare from the
headlights of vehicles behind you at night.
WARNING
Only use the night position
j1 when necessary,
as it reduces rear-view clarity.
AUTOMATIC ANTI-DAZZLING INSIDE
MIRROR (where fitted)
The inside mirror is designed so that it automatically
adjusts the reflection according to the intensity of
the following vehicle’s headlights.
CAUTION
Do not hang any object on the mirror or spray
glass cleaner directly on the mirror. Doing so will
reduce the sensitivity of the sensor, resulting in
improper operation.
OUTSIDE REAR-VIEW MIRRORS
WARNING
Check the position of all mirrors before driv-
ing. Altering their position while driving could
distract your attention from the driving opera-
tion.
Objects viewed in the outside mirrors are
closer than they appear.
NPA839Z
NPA862Z
NPA829Z
SUN VISORS MIRRORS
Pre-driving checks and adjustments3-17
Page 120 of 297

Downloaded from www.Manualslib.com manuals search engine MANUAL AIR CONDITIONER
j
1Temperature control dial
j2Air recirculation button
j3Fan speed control dial
j4Rear window defogger button
(For details, see “Defogger switch” in the “2. Instruments and controls” section)
j5
Airflow control dial
j6Air conditioner ON/OFF button
Controls
Fan speed control dialm:
To switch the fan on or off and to control the fan
speed, turn the fan speed control dial clockwise to
increase the fan speed. To decrease the fan speed,
turn the fan speed control dial anticlockwise.
Temperature control dial:
Turn the temperature control dial to set the desired
air temperature from the vents and floor outlets.
NAA947
Manual air conditioner
Display screen, heater and air conditioner, and audio system4-13
Page 127 of 297

Downloaded from www.Manualslib.com manuals search engine 2. To switch off, press either thebutton to
return to the previous mode or the AUTO button
for the auto climate control mode.
To quickly defrost/defog the windscreen, set the
fan speed to the maximum position.
As soon as possible after the windscreen has
been cleared of ice or fog, press either the
windscreen defogger button or AUTO button.
When the windscreen defogging mode is acti-
vated, the air conditioner will automatically switch
on at outside temperatures [above -2°C (28°F)]
and the air recirculation mode will be switched
off.
Outside air is drawn into the passenger com-
partment to improve the defogging performance.
Heating and defogging (Manual mode):
This mode heats the interior and defogs the wind-
screen.
The outside air is drawn inside the passenger com-
partment when the
button is pressed. Switch
on the air-conditioning to improve the defogging and
adjust the preferred fan speed and temperature.
Fan speed control
m(Manual mode):
Turn the fan speed control dial anticlockwise or
clockwise to adjust the fan speed.
Press the AUTO button to change the fan speed to
automatic mode. Air recirculation:
Use this mode to recirculate interior air inside the
passenger compartment in situations such as driv-
ing on a dust raised road, avoiding traffic fumes or
having maximum cooling from the air conditioner.
Press the
<
>button to recirculate interior air.
The indicator light illuminates and the air conditioner
will automatically come on.
When the air recirculation mode is switched off, out-
side air is drawn into the passenger compartment.
Outside air circulation:
Use this mode to draw outside air into the passen-
ger compartment for normal heating, ventilation or
air conditioner operation.
Press the <
>button to change the air intake
from the air recirculation to the outside air mode.
The indicator light (
) turns off. To turn the system on/off:
Press the “ON/OFF” (
) button to turn the system
on or off.
The sensor
jA (next to the tweeter speaker) helps
the air conditioning system to maintain a constant
cabin temperature. Do not put anything on or around
this sensor and ensure that items nearby on the
windscreen do not shade it.
Operating tips
In order to improve the heater operation, clear
the snow and ice from the wiper blade and air
inlet in front of the windscreen.
When the engine coolant temperature and out-
side air temperature are low, the airflow from the
floor outlets may not operate for a maximum of
150 seconds. However, this is not a malfunction.
After the coolant temperature has warmed up,
the airflow from the floor outlets will operate nor-
mally.
NAA967Z
4-20Display screen, heater and air conditioner, and audio system
Page 129 of 297

Downloaded from www.Manualslib.com manuals search engine The player may skip while driving on rough
roads.
Occasionally, the CD player may not function
when the compartment temperature is ex-
tremely high. Decrease the temperature be-
fore use.
Do not expose the CD to direct sunlight.
CDs that are of poor quality, dirty, scratched,
covered with finger prints, or that have pin
holes may not work properly.
The following CDs may not work properly.
Copy control compact discs (CCCD)
Recordable compact discs (CD-R)
Rewritable compact discs (CD-RW)
Do not use the following CDs as they may
cause the CD player to malfunction.
8 cm (3.1 in) discs with an adaptor
CDs that are not round
CDs with a paper label
ANTENNA
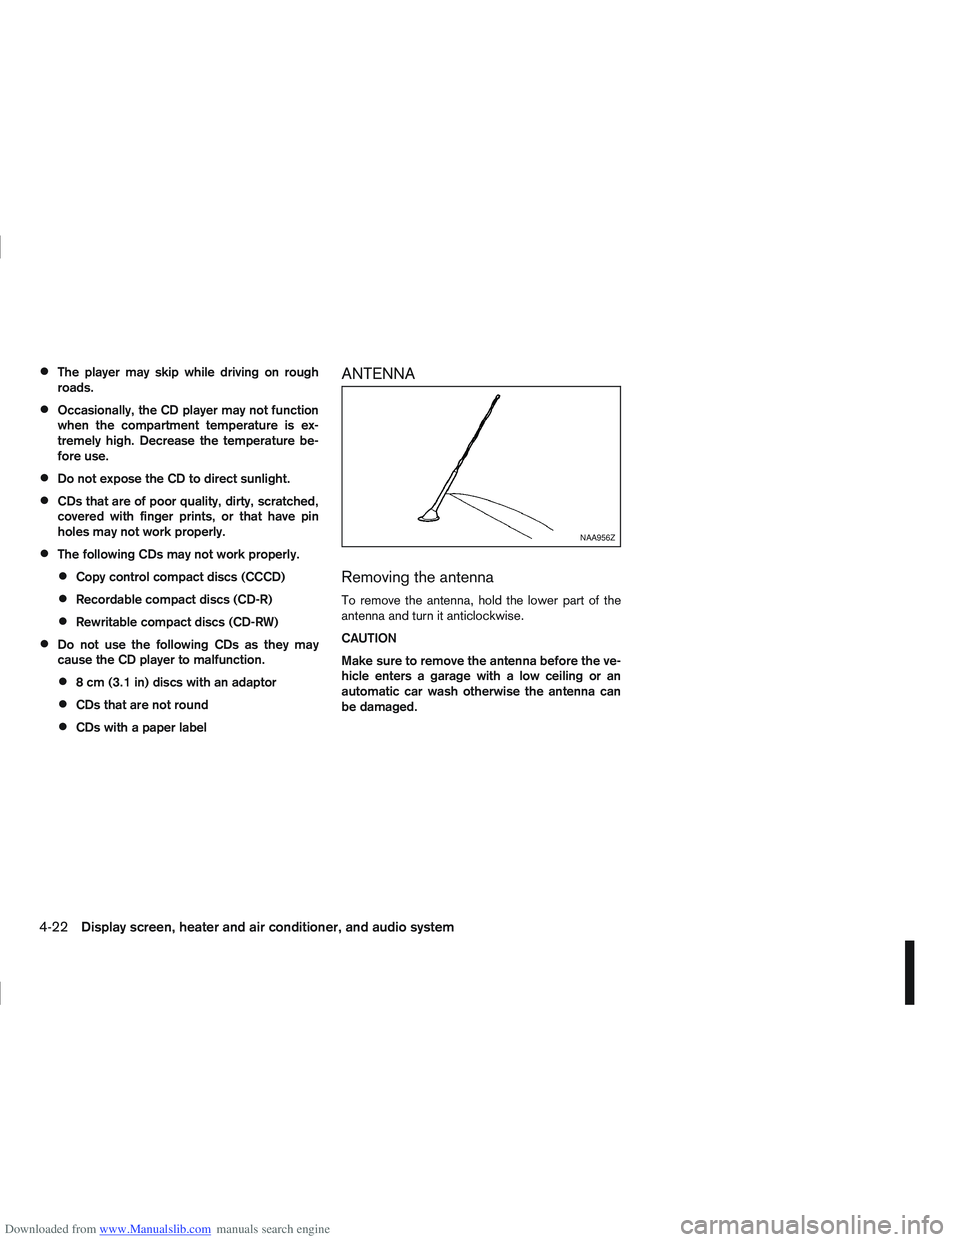
Removing the antenna
To remove the antenna, hold the lower part of the
antenna and turn it anticlockwise.
CAUTION
Make sure to remove the antenna before the ve-
hicle enters a garage with a low ceiling or an
automatic car wash otherwise the antenna can
be damaged.
NAA956Z
4-22Display screen, heater and air conditioner, and audio system
Page 131 of 297

Downloaded from www.Manualslib.com manuals search engine ANTI-THEFT SYSTEM
The audio unit is uniquely matched to the vehicle’s
NISSAN Anti Theft System (NATS) and therefore
cannot be transferred to any other vehicle. This unit
can only be activated when the ignition switch for
NATS is in the Acc or ON position.
AUDIO MAIN OPERATION
The audio unit operates when the ignition switch is
in Acc or ON position.
mPower ON/OFF button
Press thebutton to switch on the audio unit. If
the audio unit was switched off using the ignition
switch, it can also be switched on with the ignition
switch. The mode (radio or CD) that was playing
immediately before the unit was switched off will
resume playing and the volume will be set to the pre-
vious volume level.
The audio unit can be switched off either by press-
ing the
button or by turning the ignition switch to
the “OFF” or LOCK position.
mVolume level control
Turn the MENU/VOL dial in the clockwise or anti-
clockwise direction to adjust the volume level.
The audio unit is equipped with a speed control vol-
ume function, this means that the audio unit auto-
matically adjusts the volume level in relation to ve-
hicle speed. For details, see “MENU button” later in
this section.
Mute button (where fitted)
Press thebutton to mute the sound and
[MUTE] appears in the display. To cancel the mode,
use any one of the following options:
– Press the
button again.
– Turn the MENU/VOL dial.
– Press the
mSound button
Press thebutton to enter the sound menu. Each
time thebutton is pressed, the mode will change
as follows:
[BASS] →[TREBLE] →[BALANCE] →[FADE] →
[EQ] →[BASS]
When the desired mode appears in the display, turn
the MENU/VOL dial clockwise or anticlockwise to
adjust the settings. When the configuration is com-
plete, press the
is exited or wait at least 5 seconds without pressing
any buttons.
BASS control
Use this control to enhance or attenuate bass re-
sponse sound.
Turn the MENU/VOL dial clockwise or anticlockwise
to adjust the bass settings.
TREBLE control
Use this control to enhance or attenuate the treble.
Turn the MENU/VOL dial clockwise or anticlockwise
to adjust the treble settings.
BALANCE control
Use this control to adjust the balance of the volume
between the left and right speakers.
Turn the MENU/VOL dial anticlockwise or clock-
wise to adjust the left/right balance.
FADE (Fader) control
Use this control to adjust the balance of the volume
between the front and rear (where fitted) speakers.
Turn the MENU/VOL dial anticlockwise or clock-
wise to adjust the front/rear balance.
EQ (Equalizer)
Use this control to change the preset sound mode.
Turn the MENU/VOL dial in the clockwise or anti-
clockwise direction and the mode will change as fol-
lows:
[OFF] ⇔[ENHANCE] ⇔[ACOUSTIC] ⇔[LIVE]
⇔ [OFF]
RADIO OPERATION
When the(Power) button is pressed, the audio
unit will switch on with the last received radio sta-
tion, if the audio unit was previously switched off in
radio mode.
4-24Display screen, heater and air conditioner, and audio system
Page 134 of 297

Downloaded from www.Manualslib.com manuals search engine When the
during a NEWS interruption, the NEWS standby
mode remains active.
However, if the button is pressed and
the radio wave band changes to the MW or LW,
then the NEWS standby mode will be switched
off.
MENU BUTTON
To configure Alternative Frequency (AF), Regional
(REG) and Language settings, perform the follow-
ing procedure:
1) Press and hold the
Page 136 of 297

Downloaded from www.Manualslib.com manuals search engine CD eject button
CD player:
Press the eject (
) button and the CD will be
ejected.
6 CD changer:
1. A CD can be ejected by:
Pressing the eject () button (the currently
played CD will be ejected).
Pressing a CD select button followed by the
eject () button.
Pressing the eject () button followed by a
CD select button.
2. After pressing the eject (
) button, a notifica-
tion message appears in the display.
3. When the CD slot door opens, the CD is ejected and the CD can now be removed.
4. If necessary, insert another CD into the respec- tive CD slot or wait to let the system close the
CD slot door.
To eject all the discs sequentially, press and hold
the eject (
) button for longer than 1.5 seconds.
The CD changer will start to eject from the current
or last used CD. After removing an ejected CD, the
next CD will be ejected. Ejecting CD (with ignition switch in “OFF” or
LOCK):
When the ignition switch is in the “OFF” or LOCK
position it is possible to eject the currently played
CD. However the audio unit will not be activated.
CD player:
Press the eject (
) button and the CD will be
ejected.
6 CD changer:
Press the eject () button less than 1.5 sec-
onds and the CD will be ejected.
To eject all CD’s in sequential order, keep the
eject () button pressed for longer than 1.5
seconds. The CD changer starts to eject from
the current or last used CD onwards. After re-
moving an ejected CD, the next one comes out.
NOTE
When the CD is ejected and not removed
within 15 seconds, it will automatically retract
into the slot to protect it from damage.
If an error message appears in the display,
press the eject () button to eject the faulty
CD and insert another CD or check if the
ejected CD is inserted upside down.
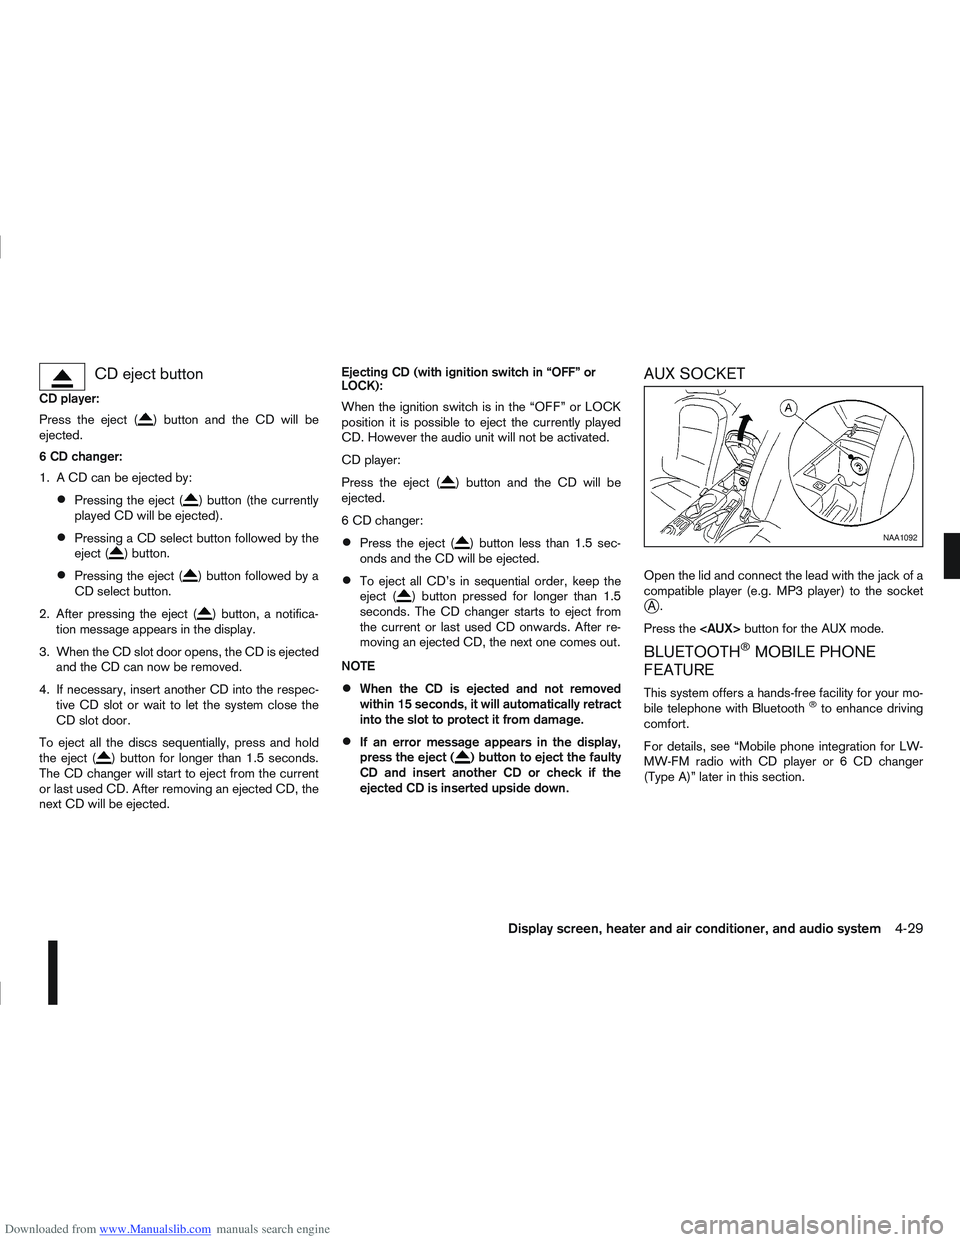
AUX SOCKET
Open the lid and connect the lead with the jack of a
compatible player (e.g. MP3 player) to the socket
jA.
Press the
BLUETOOTH®MOBILE PHONE
FEATURE
This system offers a hands-free facility for your mo-
bile telephone with Bluetooth®to enhance driving
comfort.
For details, see “Mobile phone integration for LW-
MW-FM radio with CD player or 6 CD changer
(Type A)” later in this section.
NAA1092
Display screen, heater and air conditioner, and audio system4-29