2009 NISSAN QASHQAI side lights
[x] Cancel search: side lightsPage 74 of 297
Downloaded from www.Manualslib.com manuals search engine Daytime light system (where fitted)
Even if the headlight switch is off, the headlight low
beam, front side, rear combination and number plate
lights will come on after starting the engine. How-
ever, you cannot change low beam to high beam
when the light switch is off.
When the light switch is turned to the
position,
the headlight low beam will turn off.
Autolight system (AUTO — where fitted)
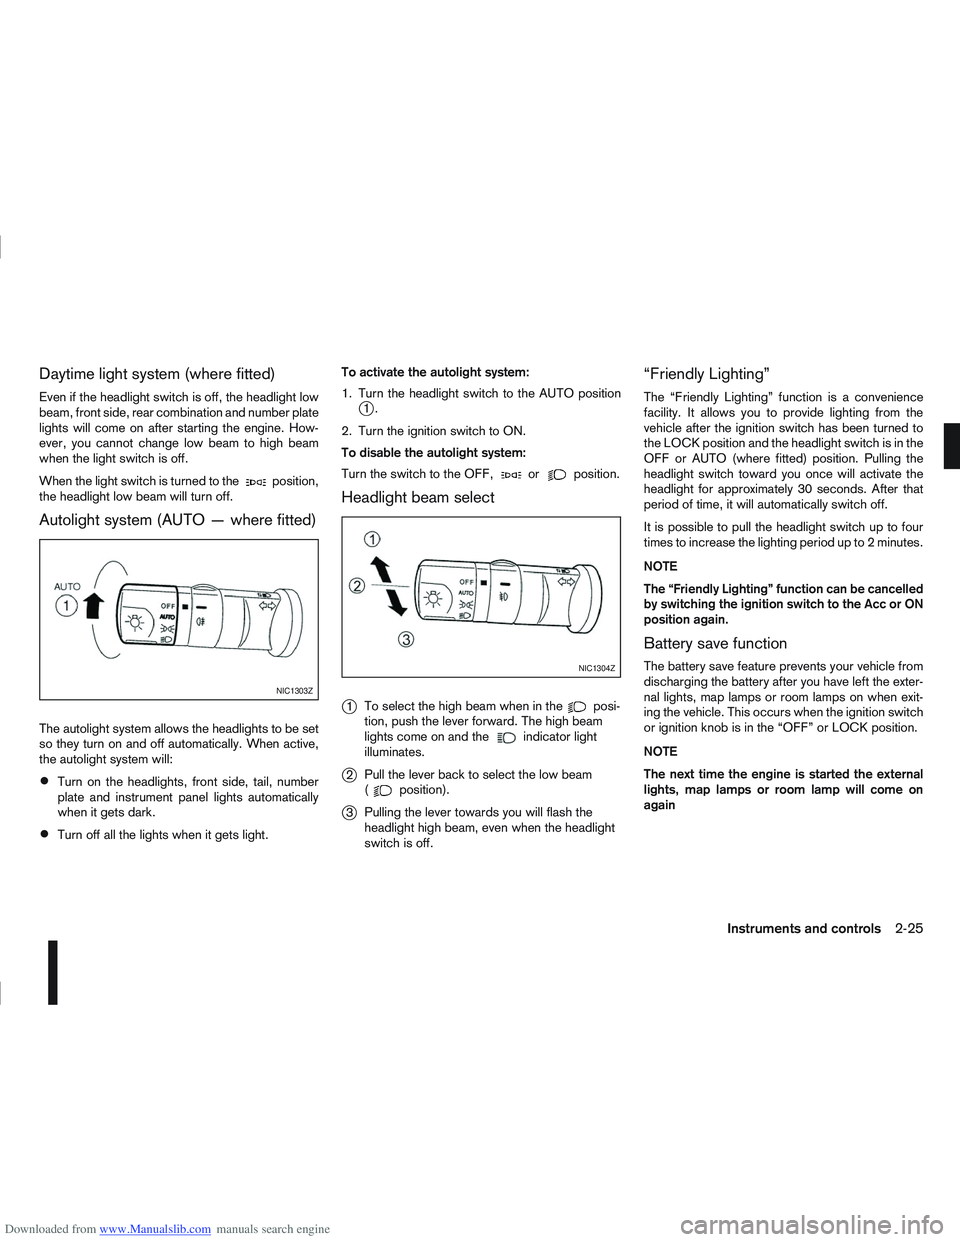
The autolight system allows the headlights to be set
so they turn on and off automatically. When active,
the autolight system will:
Turn on the headlights, front side, tail, number
plate and instrument panel lights automatically
when it gets dark.
Turn off all the lights when it gets light. To activate the autolight system:
1. Turn the headlight switch to the AUTO position
j1.
2. Turn the ignition switch to ON.
To disable the autolight system:
Turn the switch to the OFF,
orposition.
Headlight beam select
j
1 To select the high beam when in theposi-
tion, push the lever forward. The high beam
lights come on and the
indicator light
illuminates.
j2 Pull the lever back to select the low beam
(position).
j3Pulling the lever towards you will flash the
headlight high beam, even when the headlight
switch is off.
“Friendly Lighting”
The “Friendly Lighting” function is a convenience
facility. It allows you to provide lighting from the
vehicle after the ignition switch has been turned to
the LOCK position and the headlight switch is in the
OFF or AUTO (where fitted) position. Pulling the
headlight switch toward you once will activate the
headlight for approximately 30 seconds. After that
period of time, it will automatically switch off.
It is possible to pull the headlight switch up to four
times to increase the lighting period up to 2 minutes.
NOTE
The “Friendly Lighting” function can be cancelled
by switching the ignition switch to the Acc or ON
position again.
Battery save function
The battery save feature prevents your vehicle from
discharging the battery after you have left the exter-
nal lights, map lamps or room lamps on when exit-
ing the vehicle. This occurs when the ignition switch
or ignition knob is in the “OFF” or LOCK position.
NOTE
The next time the engine is started the external
lights, map lamps or room lamp will come on
again
NIC1303Z
NIC1304Z
Instruments and controls2-25
Page 76 of 297
Downloaded from www.Manualslib.com manuals search engine tion and turn the fog light switch to thepositionj1 . The front fog lights and indicator light will come
on. For additional information, see “Warning/indica-
tor lights and audible reminders” earlier in this sec-
tion.
To turn the front fog lights off, turn the fog light
switch to the OFF position.
REAR FOG LIGHT
The rear fog light should only be used when visibility
is seriously reduced – generally, to less than 100 m
(328 ft).
TypejA (without front fog lights)
To turn the rear fog light on:
1. Turn the headlight switch to the
position.
2. Turn the fog light switch to the
positionj1:
– The rear fog light and indicator light will come on
– The fog light switch will return to the “OFF” posi- tion ( —)
To turn the rear fog light off:
Turn the fog light switch to the
positionj1 again:
– The rear fog light and indicator light will switch off
– The fog light switch will return to the “OFF” posi- tion ( —) NOTE
If the headlight switch is turned from the
position, the rear fog light will switch off auto-
matically.
TypejB (with front fog lights)
To turn the rear fog light on:
1. Turn the headlight switch to the
orposition.
2. Turn the fog light switch to the
positionj2:
– The rear and front fog lights and both indicator lights will come on
– The fog light switch will return to the
positionj1
To turn the rear fog light off:
Turn the fog light switch to the
positionj2
again:
– The rear fog light and indicator light will switch off
– The fog light switch will return to the
position
NOTE
If the headlight switch is turned to the OFF posi-
tion, the rear fog light will switch off automati-
cally.
For additional information, see “Warning/indicator
lights and audible reminders” earlier in this section.
HEADLIGHT AIMING CONTROL
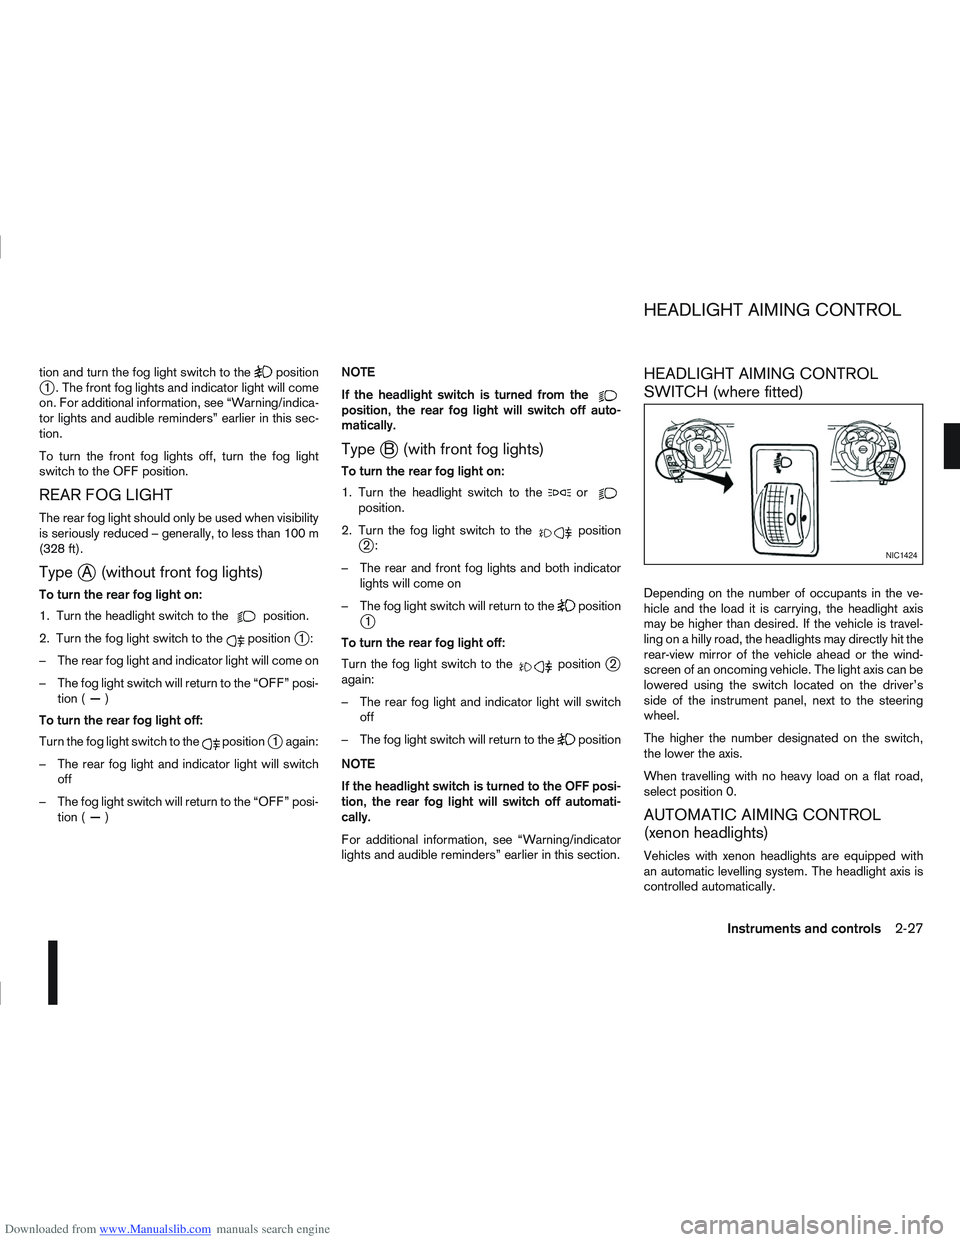
SWITCH (where fitted)
Depending on the number of occupants in the ve-
hicle and the load it is carrying, the headlight axis
may be higher than desired. If the vehicle is travel-
ling on a hilly road, the headlights may directly hit the
rear-view mirror of the vehicle ahead or the wind-
screen of an oncoming vehicle. The light axis can be
lowered using the switch located on the driver’s
side of the instrument panel, next to the steering
wheel.
The higher the number designated on the switch,
the lower the axis.
When travelling with no heavy load on a flat road,
select position 0.
AUTOMATIC AIMING CONTROL
(xenon headlights)
Vehicles with xenon headlights are equipped with
an automatic levelling system. The headlight axis is
controlled automatically.
NIC1424
HEADLIGHT AIMING CONTROL
Instruments and controls2-27
Page 86 of 297
Downloaded from www.Manualslib.com manuals search engine SYSTEM REINITIALISATION
The C-View® sunshade will require reinitialisation
whenever:
The sunshade system does not function prop-
erly.
The battery cable is reconnected.
The fuse is replaced.
Perform the following procedure to initialise the sun-
shade system.
1. Make sure the vehicle battery is connected.
2. Turn the ignition switch to the ON position.
3. Press and hold the “CLOSE” side of the switch. The system will now proceed as follows:
a. If open, the sunshade will start moving to the closed position.
b. After a few seconds, the system will fully open the sunshade.
c. From the fully open position, it returns to the closed position.
4. After reaching the closed position, release the sunshade switch.
5. The sunshade system is now reinitialised. NOTE
Do not disconnect the power for at least 2
seconds. If the reinitialisation procedure cannot be performed
successfully, take your vehicle to a NISSAN dealer
or qualified workshop.
CAUTION
Do not use for extended periods of time with the
engine stopped. This could discharge the bat-
tery.
NOTE
The interior lights will go off after approximately
15 minutes unless the ignition switch is in the
Acc or ON position.
FRONT ROOM LIGHT
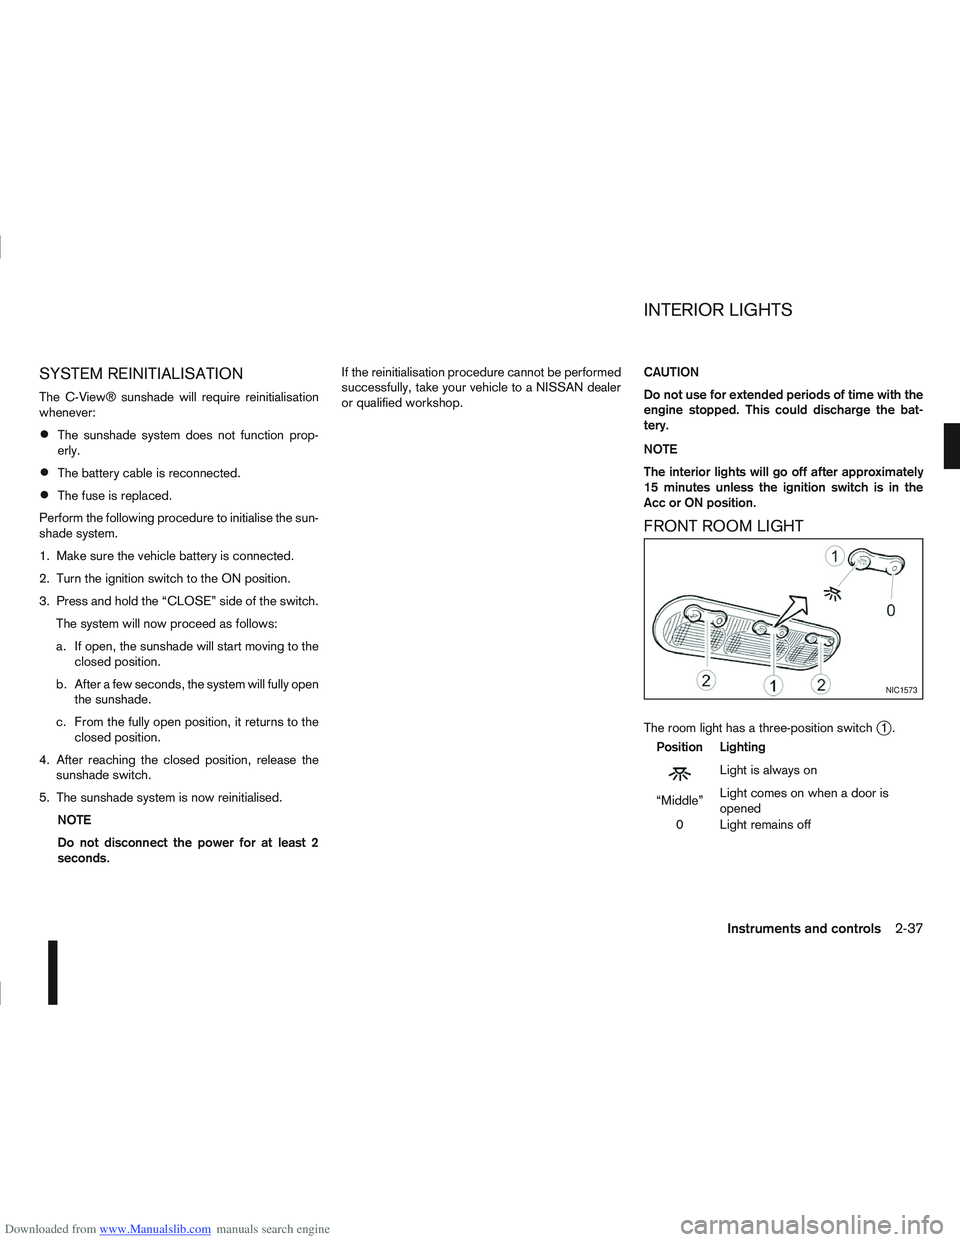
The room light has a three-position switchj1.
Position Lighting
mLightisalwayson
“Middle” Light comes on when a door is
opened
0 Light remains off
NIC1573
INTERIOR LIGHTS
Instruments and controls2-37
Page 92 of 297
Downloaded from www.Manualslib.com manuals search engine door outside lock switch until the direction indi-
cators flash to confirm the setting mode. Then
release the driver’s door outside lock switch.
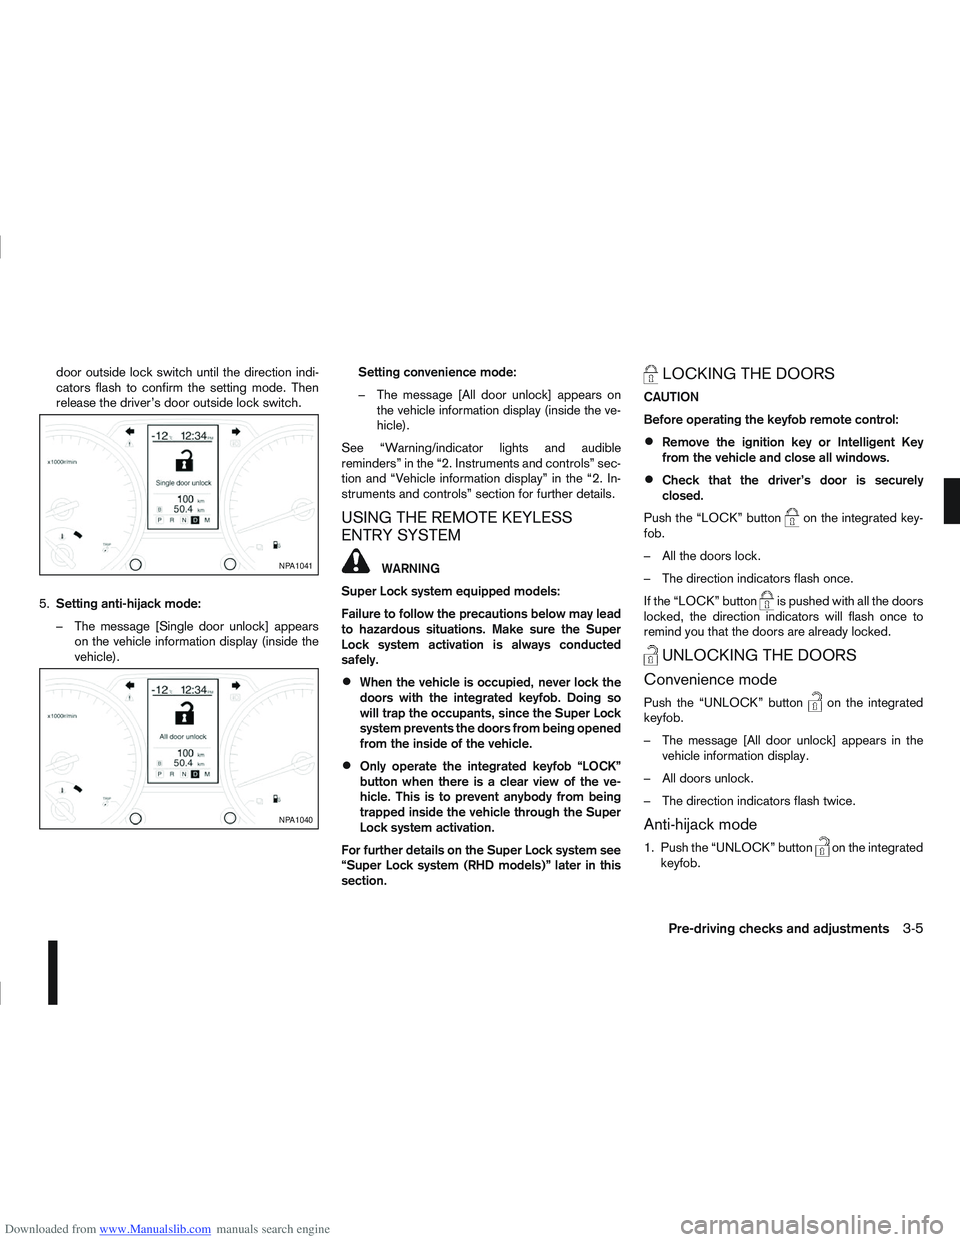
5. Setting anti-hijack mode:
– The message [Single door unlock] appears on the vehicle information display (inside the
vehicle). Setting convenience mode:
– The message [All door unlock] appears on
the vehicle information display (inside the ve-
hicle).
See “Warning/indicator lights and audible
reminders” in the “2. Instruments and controls” sec-
tion and “Vehicle information display” in the “2. In-
struments and controls” section for further details.
USING THE REMOTE KEYLESS
ENTRY SYSTEM
WARNING
Super Lock system equipped models:
Failure to follow the precautions below may lead
to hazardous situations. Make sure the Super
Lock system activation is always conducted
safely.
When the vehicle is occupied, never lock the
doors with the integrated keyfob. Doing so
will trap the occupants, since the Super Lock
system prevents the doors from being opened
from the inside of the vehicle.
Only operate the integrated keyfob “LOCK”
button when there is a clear view of the ve-
hicle. This is to prevent anybody from being
trapped inside the vehicle through the Super
Lock system activation.
For further details on the Super Lock system see
“Super Lock system (RHD models)” later in this
section.
LOCKING THE DOORS
CAUTION
Before operating the keyfob remote control:
Remove the ignition key or Intelligent Key
from the vehicle and close all windows.
Check that the driver’s door is securely
closed.
Push the “LOCK” button
on the integrated key-
fob.
– All the doors lock.
– The direction indicators flash once.
If the “LOCK” button
is pushed with all the doors
locked, the direction indicators will flash once to
remind you that the doors are already locked.
UNLOCKING THE DOORS
Convenience mode
Push the “UNLOCK” buttonon the integrated
keyfob.
– The message [All door unlock] appears in the vehicle information display.
– All doors unlock.
– The direction indicators flash twice.
Anti-hijack mode
1. Push the “UNLOCK” buttonon the integrated
keyfob.
NPA1041
NPA1040
Pre-driving checks and adjustments3-5
Page 104 of 297

Downloaded from www.Manualslib.com manuals search engine CAUTION
Do not store the sun visor before returning it to
its original position.
1. To block out glare from the front, move the mainsun visor downwards.
2. To block glare from the side, remove the main sun visor from the centre mount and move it to
the side.
INSIDE REAR-VIEW MIRROR
j
1 Night position
j2Day position
jA Front of the vehicle
The night position
j1 will reduce glare from the
headlights of vehicles behind you at night.
WARNING
Only use the night position
j1 when necessary,
as it reduces rear-view clarity.
AUTOMATIC ANTI-DAZZLING INSIDE
MIRROR (where fitted)
The inside mirror is designed so that it automatically
adjusts the reflection according to the intensity of
the following vehicle’s headlights.
CAUTION
Do not hang any object on the mirror or spray
glass cleaner directly on the mirror. Doing so will
reduce the sensitivity of the sensor, resulting in
improper operation.
OUTSIDE REAR-VIEW MIRRORS
WARNING
Check the position of all mirrors before driv-
ing. Altering their position while driving could
distract your attention from the driving opera-
tion.
Objects viewed in the outside mirrors are
closer than they appear.
NPA839Z
NPA862Z
NPA829Z
SUN VISORS MIRRORS
Pre-driving checks and adjustments3-17
Page 165 of 297
Downloaded from www.Manualslib.com manuals search engine During the first 1,600 km (1,000 miles), follow these
recommendations for the future reliability and
economy of your new vehicle. Failure to follow the
recommendations may result in shortened engine
life and reduced engine performance.
Avoid driving for long periods at a constant
speed, either fast or slow.
Do not accelerate at full throttle in any gear.
Avoid quick starts.
Avoid hard braking as much as possible.
Do not tow a trailer during the first 800 km (500
miles).
NOTE
Models with K9K diesel engine will achieve top
performance only after approximately 5,000 km
(3,000 miles).
WARNING
The driving characteristics of your vehicle can be
changed remarkably by any additional load and
its distribution as well as by adding optional
equipment (trailer couplings, roof racks, etc.).
Your driving style and speed have to be adjusted
accordingly. Especially when carrying heavy
loads, your speed must be reduced adequately.
Make sure the area around the vehicle is free of
obstacles.
Check fluid levels such as engine oil, coolant,
brake and clutch fluid, and window washer fluid
as frequently as possible, at least whenever you
refuel.
Visually inspect tyres for their appearance and
condition. Also check the tyre pressure for
proper inflation.
Maintenance items in the “8. Maintenance and
do-it-yourself” section should be checked peri-
odically.
Check that all windows and light lenses are
clean.
Check that all doors are closed.
Position the seat and adjust the head restraints.
Adjust the inside and outside mirrors.
Fasten your seat belt and ask all passengers to
do likewise.
Check the operation of the warning/indicator
lights when the ignition switch is turned to the
ON position.
Do not place hard or heavy objects on the dash-
board or rear parcel shelf in order to prevent
injury in the event of a sudden stop.
RUNNING-IN SCHEDULE BEFORE STARTING THE ENGINE
5-2Starting and driving
Page 183 of 297
Downloaded from www.Manualslib.com manuals search engine Shift lock release
j
1LHD models
j2RHD models
jA Shift lock release button
If the battery charge is low or discharged, the selec-
tor lever may not move from the P (Park) position
even with the brake pedal depressed and the selec-
tor lever button pushed.
To move the selector lever, perform the following
procedure:
1. Models with Intelligent Key system:
Place the ignition switch in the “OFF” or LOCK
position.
Models without Intelligent Key system:
Place the ignition switch in the LOCK position,
and remove the key if it is inserted.
2. Apply the handbrake.
3. Push down the shift lock release button
jA.Use
a suitable tool.
4. Push and hold the selector lever button and move the selector lever to the N (Neutral) position while
holding down the shift lock release button.
Place the ignition switch in the ON position to un-
lock the steering wheel. The vehicle may be moved
to the desired location. For models with Intelligent Key system: If the battery
is discharged completely, the steering wheel cannot
be unlocked. Do not move the vehicle with the steer-
ing wheel locked.
If the selector lever cannot be moved out of the P
(Park) position, have a NISSAN dealer or qualified
workshop check the CVT system as soon as pos-
sible.
WARNING
If the selector lever cannot be moved from the P
(Park) position while the engine is running and
the brake pedal is depressed, the stop lights may
not work. Malfunctioning stop lights could cause
an accident injuring yourself and others.
High fluid temperature protection mode
This transmission has a high fluid temperature pro-
tection mode. If the fluid temperature becomes too
high (for example, when climbing steep grades in
high temperature with heavy loads, such as when
towing a trailer), engine power and, under some
conditions, vehicle speed will be decreased auto-
matically to reduce the chance of transmission dam-
age. Vehicle speed can be controlled with the ac-
celerator pedal, but engine and vehicle speed may
be limited.
Fail-safe
When the fail-safe operation occurs, the CVT will
not be shifted to the selected driving position.
If the vehicle is driven under extreme conditions,
such as excessive wheel spinning and subse- quent hard braking, the fail-safe system may be
activated. This will occur even if all electrical cir-
cuits are functioning properly. In this case, place
the ignition switch in the “OFF” position and wait
for 10 seconds. Then turn the ignition switch back
to the ON position. The vehicle should return to
its normal operating condition. If it does not re-
turn to its normal operating condition, have a
NISSAN dealer or qualified workshop check the
transmission and repair it if necessary.
WARNING
When the fail-safe operation occurs, vehicle
speed may be gradually reduced. The reduced
speed may be lower than other traffic, which
could increase the chance of a collision. Be es-
pecially careful when driving. If necessary, pull to
the side of the road at a safe place and allow the
transmission to return to normal operation, or
have it repaired if necessary.
5-20Starting and driving
Page 184 of 297
Downloaded from www.Manualslib.com manuals search engine NISSAN GREEN PROGRAM
The Stop/Start System is designed to prevent un-
necessary fuel consumption, exhaust emissions,
and noise during a journey:
When the vehicle comes to rest the engine is
automatically stopped*.
The engine is then automatically restarted before
you are ready to drive away**.
CAUTION
At the end of the journey the engine must be
stopped and ignition turned OFF. Lock the ve-
hicle as normal. Turning the ignition OFF will shut
down all electrical systems. Failure to do this may
result in a flat battery.
NORMAL OPERATION
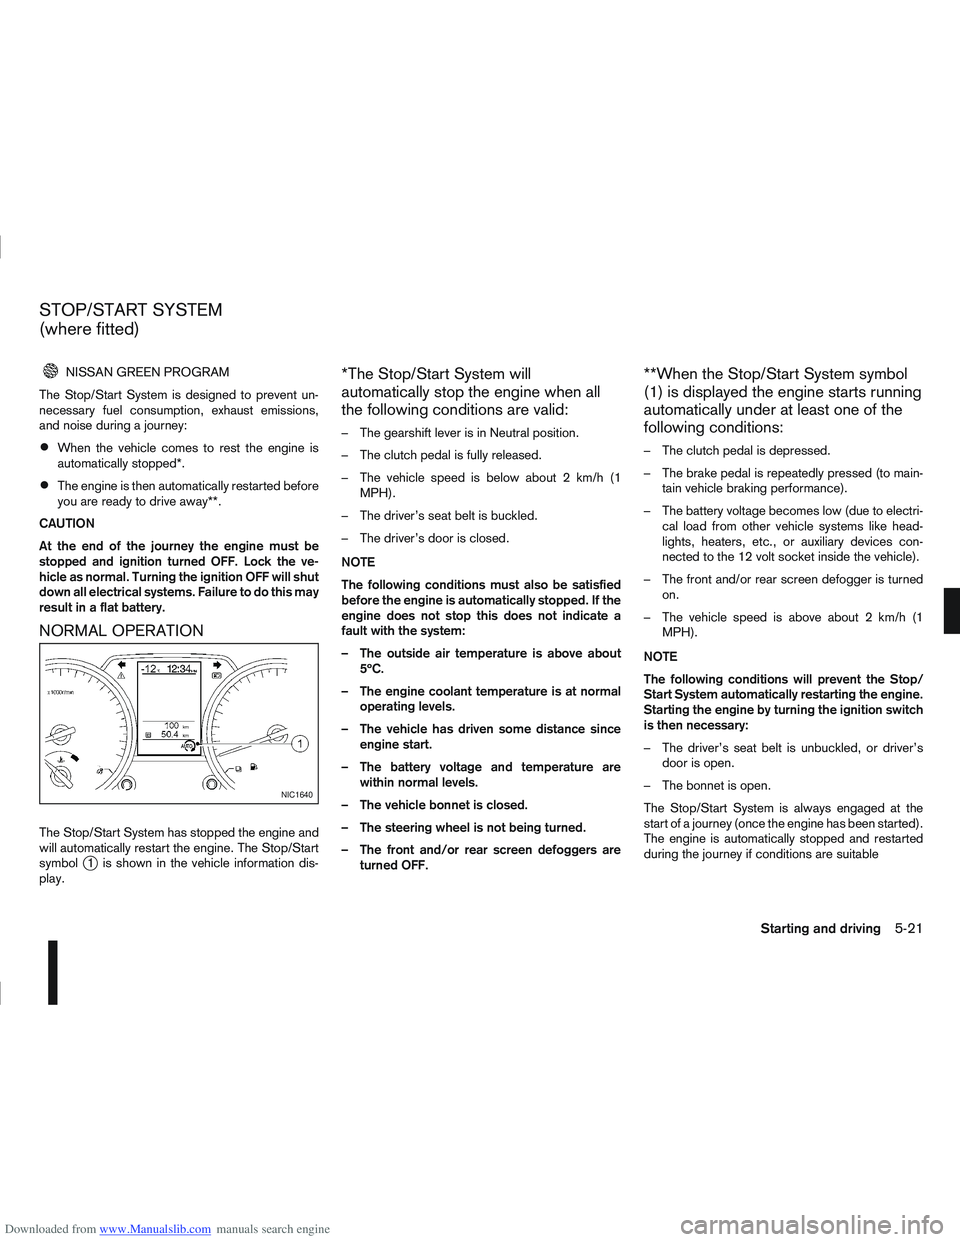
The Stop/Start System has stopped the engine and
will automatically restart the engine. The Stop/Start
symbol
j1 is shown in the vehicle information dis-
play.
*The Stop/Start System will
automatically stop the engine when all
the following conditions are valid:
– The gearshift lever is in Neutral position.
– The clutch pedal is fully released.
– The vehicle speed is below about 2 km/h (1 MPH).
– The driver’s seat belt is buckled.
– The driver’s door is closed.
NOTE
The following conditions must also be satisfied
before the engine is automatically stopped. If the
engine does not stop this does not indicate a
fault with the system:
– The outside air temperature is above about 5ºC.
– The engine coolant temperature is at normal operating levels.
– The vehicle has driven some distance since engine start.
– The battery voltage and temperature are within normal levels.
– The vehicle bonnet is closed.
– The steering wheel is not being turned.
– The front and/or rear screen defoggers are turned OFF.
**When the Stop/Start System symbol
(1) is displayed the engine starts running
automatically under at least one of the
following conditions:
– The clutch pedal is depressed.
– The brake pedal is repeatedly pressed (to main-tain vehicle braking performance).
– The battery voltage becomes low (due to electri- cal load from other vehicle systems like head-
lights, heaters, etc., or auxiliary devices con-
nected to the 12 volt socket inside the vehicle).
– The front and/or rear screen defogger is turned on.
– The vehicle speed is above about 2 km/h (1 MPH).
NOTE
The following conditions will prevent the Stop/
Start System automatically restarting the engine.
Starting the engine by turning the ignition switch
is then necessary:
– The driver’s seat belt is unbuckled, or driver’s door is open.
– The bonnet is open.
The Stop/Start System is always engaged at the
start of a journey (once the engine has been started).
The engine is automatically stopped and restarted
during the journey if conditions are suitable
NIC1640
STOP/START SYSTEM
(where fitted)
Starting and driving5-21