2009 NISSAN MURANO warning light
[x] Cancel search: warning lightPage 106 of 443

Black plate (104,1)
Model "Z51-D" EDITED: 2007/ 10/ 2
SIC3671
TURN SIGNAL SWITCH
*1Turn signal
Move the lever up or down to signal the turning
direction. When the turn is completed, the turn
signals cancel automatically.
*2Lane change signal
To indicate a lane change, move the lever up or
down to the point where lights begin flashing.
SIC3672
FOG LIGHT SWITCH (if so equipped)
To turn the fog lights on, turn the headlight
switch to theposition, then turn the switch
to theposition. To turn them off, turn the
switch to the OFF position.
The headlights must be on for the fog lights to
operate.
SIC2574
Push the switch on to warn other drivers when
you must stop or park under emergency condi-
tions. All turn signal lights will flash.
WARNING
.If stopping for an emergency, be
sure to move the vehicle well off the
road.
.Do not use the hazard warning
flashers while moving on the high-
way unless unusual circumstances
force you to drive so slowly that
your vehicle might become a hazard
to other traffic.
HAZARD WARNING FLASHER
SWITCH
2-36Instruments and controls
Page 107 of 443
Black plate (105,1)
Model "Z51-D" EDITED: 2007/ 10/ 2
.Turn signals do not work when the
hazard warning flasher lights are
on.
The flasher can be actuated with the ignition
switch in any position.
Some state laws may prohibit the use of
the hazard warning flasher switch while
driving.
SIC3586
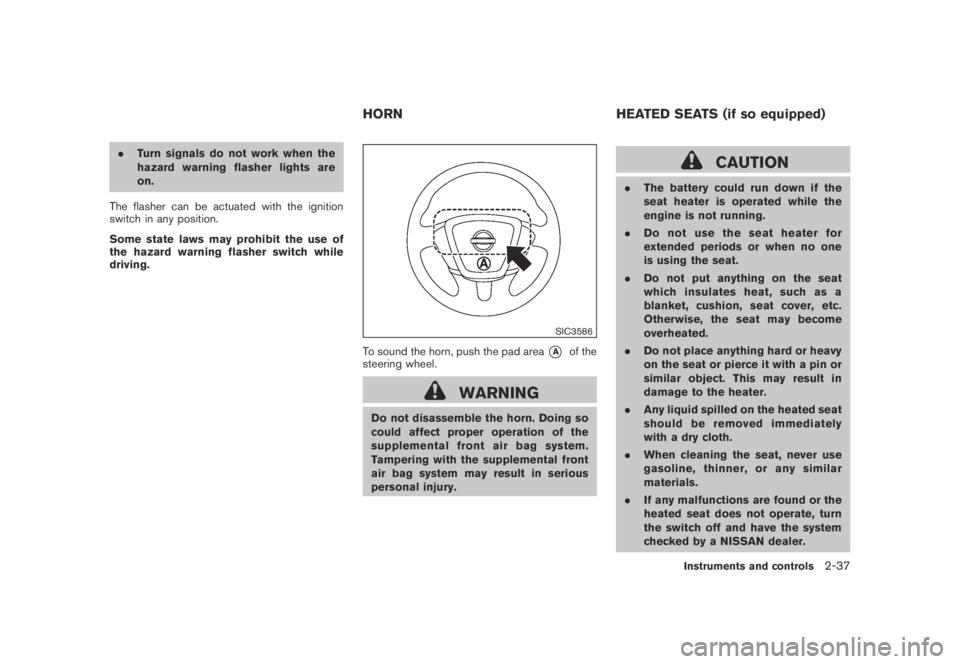
To sound the horn, push the pad area*Aof the
steering wheel.
WARNING
Do not disassemble the horn. Doing so
could affect proper operation of the
supplemental front air bag system.
Tampering with the supplemental front
air bag system may result in serious
personal injury.
CAUTION
.The battery could run down if the
seat heater is operated while the
engine is not running.
.Do not use the seat heater for
extended periods or when no one
is using the seat.
.Do not put anything on the seat
which insulates heat, such as a
blanket, cushion, seat cover, etc.
Otherwise, the seat may become
overheated.
.Do not place anything hard or heavy
on the seat or pierce it with a pin or
similar object. This may result in
damage to the heater.
.Any liquid spilled on the heated seat
should be removed immediately
with a dry cloth.
.When cleaning the seat, never use
gasoline, thinner, or any similar
materials.
.If any malfunctions are found or the
heated seat does not operate, turn
the switch off and have the system
checked by a NISSAN dealer.
HORN HEATED SEATS (if so equipped)
Instruments and controls2-37
Page 113 of 443
Black plate (111,1)
Model "Z51-D" EDITED: 2007/ 10/ 2
direct sunlight. The heat may da-
mage the glasses.
SIC3590
GLOVE BOX
WARNING
Keep glove box lid closed while driving
to help prevent injury in an accident or a
sudden stop.
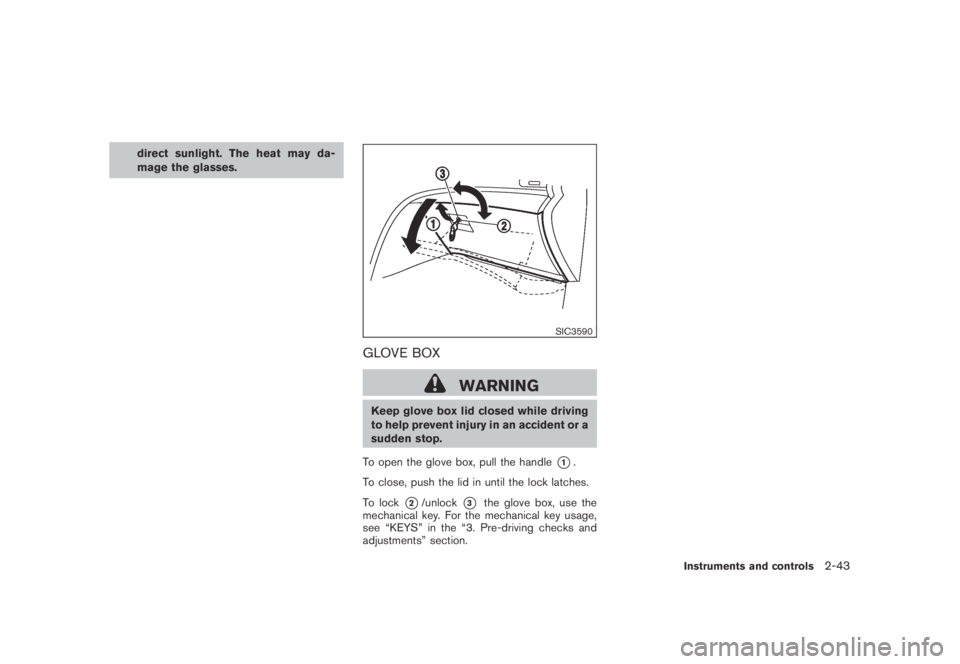
To open the glove box, pull the handle
*1.
To close, push the lid in until the lock latches.
To lock
*2/unlock*3the glove box, use the
mechanical key. For the mechanical key usage,
see “KEYS” in the “3. Pre-driving checks and
adjustments” section.
Instruments and controls2-43
Page 119 of 443
Black plate (117,1)
Model "Z51-D" EDITED: 2007/ 10/ 2
SIC3505
COAT HOOKS
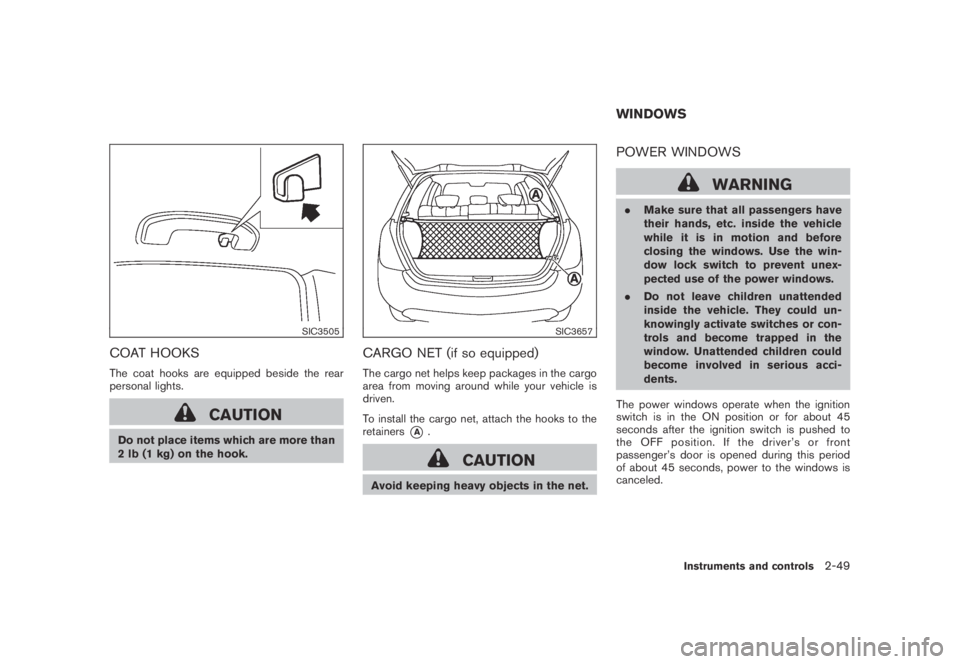
The coat hooks are equipped beside the rear
personal lights.
CAUTION
Do not place items which are more than
2 lb (1 kg) on the hook.
SIC3657
CARGO NET (if so equipped)
The cargo net helps keep packages in the cargo
area from moving around while your vehicle is
driven.
To install the cargo net, attach the hooks to the
retainers
*A.
CAUTION
Avoid keeping heavy objects in the net.
POWER WINDOWS
WARNING
.Make sure that all passengers have
their hands, etc. inside the vehicle
while it is in motion and before
closing the windows. Use the win-
dow lock switch to prevent unex-
pected use of the power windows.
.Do not leave children unattended
inside the vehicle. They could un-
knowingly activate switches or con-
trols and become trapped in the
window. Unattended children could
become involved in serious acci-
dents.
The power windows operate when the ignition
switch is in the ON position or for about 45
seconds after the ignition switch is pushed to
the OFF position. If the driver’s or front
passenger’s door is opened during this period
of about 45 seconds, power to the windows is
canceled.
WINDOWS
Instruments and controls2-49
Page 121 of 443
Black plate (119,1)
Model "Z51-D" EDITED: 2007/ 10/ 2
SIC3285
Automatic operation (for front door win-
dows)
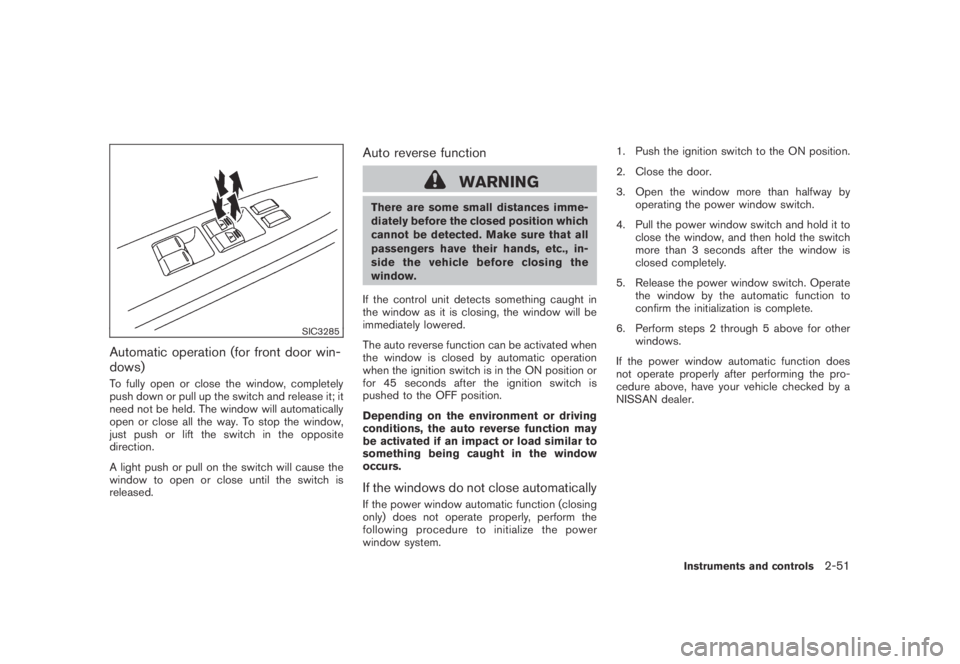
To fully open or close the window, completely
push down or pull up the switch and release it; it
need not be held. The window will automatically
open or close all the way. To stop the window,
just push or lift the switch in the opposite
direction.
A light push or pull on the switch will cause the
window to open or close until the switch is
released.
Auto reverse function
WARNING
There are some small distances imme-
diately before the closed position which
cannot be detected. Make sure that all
passengers have their hands, etc., in-
side the vehicle before closing the
window.
If the control unit detects something caught in
the window as it is closing, the window will be
immediately lowered.
The auto reverse function can be activated when
the window is closed by automatic operation
when the ignition switch is in the ON position or
for 45 seconds after the ignition switch is
pushed to the OFF position.
Depending on the environment or driving
conditions, the auto reverse function may
be activated if an impact or load similar to
something being caught in the window
occurs.
If the windows do not close automatically
If the power window automatic function (closing
only) does not operate properly, perform the
following procedure to initialize the power
window system.1. Push the ignition switch to the ON position.
2. Close the door.
3. Open the window more than halfway by
operating the power window switch.
4. Pull the power window switch and hold it to
close the window, and then hold the switch
more than 3 seconds after the window is
closed completely.
5. Release the power window switch. Operate
the window by the automatic function to
confirm the initialization is complete.
6. Perform steps 2 through 5 above for other
windows.
If the power window automatic function does
not operate properly after performing the pro-
cedure above, have your vehicle checked by a
NISSAN dealer.
Instruments and controls2-51
Page 123 of 443
Black plate (121,1)
Model "Z51-D" EDITED: 2007/ 10/ 2
operation, push either of the OPEN*1, CLOSE
*2or UP*5of the switch.
Tilting moonroof
To tilt up the moonroof, push the moonroof
switch to the up position
*5.
To tilt down the moonroof, push the switch to the
up position
*5or push the CLOSE side*2of
the switch.
When the moonroof is tilted up, push the
CLOSE side of the moonroof switch to the
second detent
*4. The moonroof will tilt down
and the sunshades will close.
Auto reverse function
WARNING
There are some small distances imme-
diately before the closed position which
cannot be detected. Make sure that all
passengers have their hands, etc., in-
side the vehicle before closing the
moonroof.
If the control unit detects something caught in
the moonroof and sunshades when they are
closing, the moonroof will be immediately
opened.
The auto reverse function can be activated whenthe moonroof and sunshades are closed by
automatic operation when the ignition switch is
in the ON position or for about 45 seconds after
the ignition switch is pushed to the OFF
position.
If the moonroof and sunshades cannot be
closed automatically when the auto reverse
function activates due to a malfunction, push
and hold the CLOSE side
*2of the moonroof
switch.
Depending on the environment or driving
conditions, the auto reverse function may
be activated if an impact or load similar to
something being caught in the moonroof
occurs.
If the moonroof does not operate
If the moonroof does not operate properly,
perform the following procedure to initialize the
moonroof operation system.
1. If the moonroof is open, close it fully by
pushing the CLOSE side
*2of the moon-
roof switch.
2. Push and hold the CLOSE side
*2of the
moonroof switch.
3. Release the moonroof switch after the
moonroof or sunshade moves slightly to
the closed position.
4. Push and hold the CLOSE side
*2of themoonroof switch for 10 seconds.
5. The moonroof and sunshades will fully open
and then close.
6. Check if the moonroof switch operates
normally.
If the moonroof does not operate properly after
performing the procedure above, have your
vehicle checked by a NISSAN dealer.
Instruments and controls2-53
Page 127 of 443
Black plate (125,1)
Model "Z51-D" EDITED: 2007/ 10/ 2
HomeLink®Universal Transceiver provides a
convenient way to consolidate the functions of
up to three individual hand-held transmitters into
one built-in device.
HomeLink
®Universal Transceiver:
.Will operate most Radio Frequency (RF)
devices such as garage doors, gates, home
and office lighting, entry door locks and
security systems.
.Is powered by your vehicle’s battery. No
separate batteries are required. If the
vehicle’s battery is discharged or is dis-
connected, HomeLink
®will retain all pro-
gramming.
Once HomeLink
®Universal Transceiver is
programmed, retain the original transmit-
ter for future programming procedures
(Example: new vehicle purchases) . Upon
sale of the vehicle, the programmed
HomeLink
®Universal Transceiver buttons
should be erased for security purposes.
For additional information, see “PRO-
GRAMMING HomeLink
®” later in this sec-
tion.
WARNING
.Do not use HomeLink®Universal
Transceiver with any garage door
opener that lacks safety stop andreverse features as required by
federal safety standards. (These
standards became effective for
opener models manufactured after
April 1, 1982.) A garage door opener
which cannot detect an object in the
path of a closing garage door and
then automatically stop and reverse,
does not meet current federal safety
standards. Using a garage door
opener without these features in-
creases the risk of serious injury or
death.
.During programming procedure,
your garage door or security gate
may open or close. Make sure that
people and objects are clear of the
garage door, gate, etc. that you are
programming.
.Your vehicle’s engine should be
turned off while programming
HomeLink
®Universal Transceiver.
PROGRAMMING HomeLink®
To program your HomeLink®Transceiver to
operate a garage door, gate, or entry door
opener, home or office lighting, you need to be
at the same location as the device. Note:
Garage door openers (manufactured after1996) have “rolling code protection”. To pro-
gram a garage door opener equipped with
“rolling code protection”; you will need to use
a ladder to get up to the garage door opener
motor to be able to access the “smart or learn”
program button.
HomeLink®UNIVERSAL
TRANSCEIVER (if so equipped)
Instruments and controls2-57
Page 146 of 443
Black plate (146,1)
Model "Z51-D" EDITED: 2007/ 10/ 2
Unlocking doors
1. Push the UNLOCKbutton*2once.
2. The hazard indicator flashes once. The
driver’s door will unlock.
3. Push the UNLOCK
button again within
1 minute.
4. The hazard indicator flashes once again. All
the doors and the lift gate will unlock.
All doors will be locked automatically unless one
of the following operations is performed within 1
minute after pushing the UNLOCK button while
the doors are locked. If during this 1-minute time
period, the UNLOCK button is pushed, all doors
will be locked automatically after another 1
minute.
.Opening any door
.Pushing the ignition switch
Opening windows
To open the windows, push the door UNLOCKbutton*2forabout 3 secondsafter the
door is unlocked.
To stop opening, release the UNLOCK
button.
Windows cannot be closed using the button on
the key.The door windows can be opened or closed by
turning the mechanical key in a door lock. (See
“DOORS” earlier in this section.)
Opening/closing lift gate (if so equipped)
1. Push the power lift gate button*3for more than 1 second.
2. The lift gate will automatically open.
The hazard indicator flashes 5 times and the
outside chime sounds for approximately 3
seconds.
To close the lift gate, push the power lift gate
button
*3.
The lift gate will automatically close.
If the button
*3is pushed while the lift
gate is being opened or closed, the lift gate will
reverse.
The power lift gate button
*3cannot be
operated when the ignition switch is in the ON
position.
Using panic alarm
If you are near your vehicle and feel threatened,
you can activate the alarm according to the
following procedure to call attention.
1. Push the PANIC
button*4formore
than 1 second.2. The theft warning alarm will sound and the
headlights will flash for 25 seconds.
3. The panic alarm stops under either of the
following conditions.
.It has run for 25 seconds, or
.Any of the buttons is pushed. (Note: the
panic button should be pushed for more
than 1 second.)
Setting hazard indicator and horn mode
This vehicle is set in hazard indicator and horn
mode when you first receive the vehicle.
In hazard indicator and horn mode, when the
LOCK
button*1is pushed, the hazard
indicator flashes twice and the horn chirps once.
When the UNLOCK
button*2is pushed,
the hazard indicator flashes once.
If horns are not necessary, the system can be
switched to the hazard indicator mode.
In hazard indicator mode, when the LOCK
button is pushed, the hazard indicator flashes
twice. When the UNLOCKbutton is
pushed, neither the hazard indicator nor the
horn operates.
3-16Pre-driving checks and adjustments