2009 NISSAN MURANO warning light
[x] Cancel search: warning lightPage 148 of 443
Black plate (148,1)
Model "Z51-D" EDITED: 2007/ 10/ 2
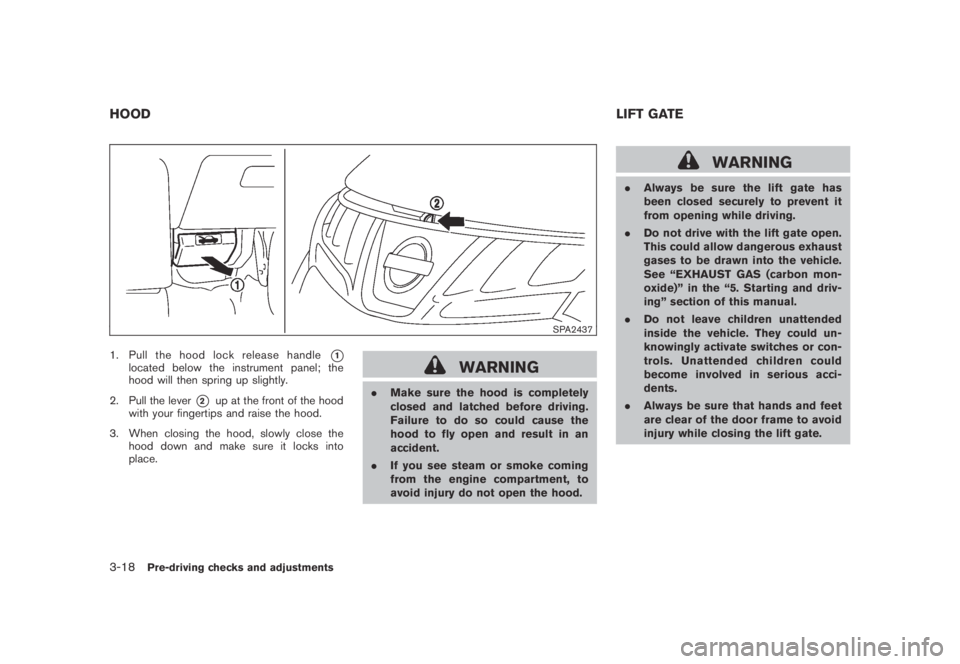
SPA2437
1. Pull the hood lock release handle*1located below the instrument panel; the
hood will then spring up slightly.
2. Pull the lever
*2up at the front of the hood
with your fingertips and raise the hood.
3. When closing the hood, slowly close the
hood down and make sure it locks into
place.
WARNING
.Make sure the hood is completely
closed and latched before driving.
Failure to do so could cause the
hood to fly open and result in an
accident.
.If you see steam or smoke coming
from the engine compartment, to
avoid injury do not open the hood.
WARNING
.Always be sure the lift gate has
been closed securely to prevent it
from opening while driving.
.Do not drive with the lift gate open.
This could allow dangerous exhaust
gases to be drawn into the vehicle.
See “EXHAUST GAS (carbon mon-
oxide)” in the “5. Starting and driv-
ing” section of this manual.
.Do not leave children unattended
inside the vehicle. They could un-
knowingly activate switches or con-
trols. Unattended children could
become involved in serious acci-
dents.
.Always be sure that hands and feet
are clear of the door frame to avoid
injury while closing the lift gate.
HOODLIFT GATE
3-18Pre-driving checks and adjustments
Page 153 of 443
Black plate (153,1)
Model "Z51-D" EDITED: 2007/ 10/ 2
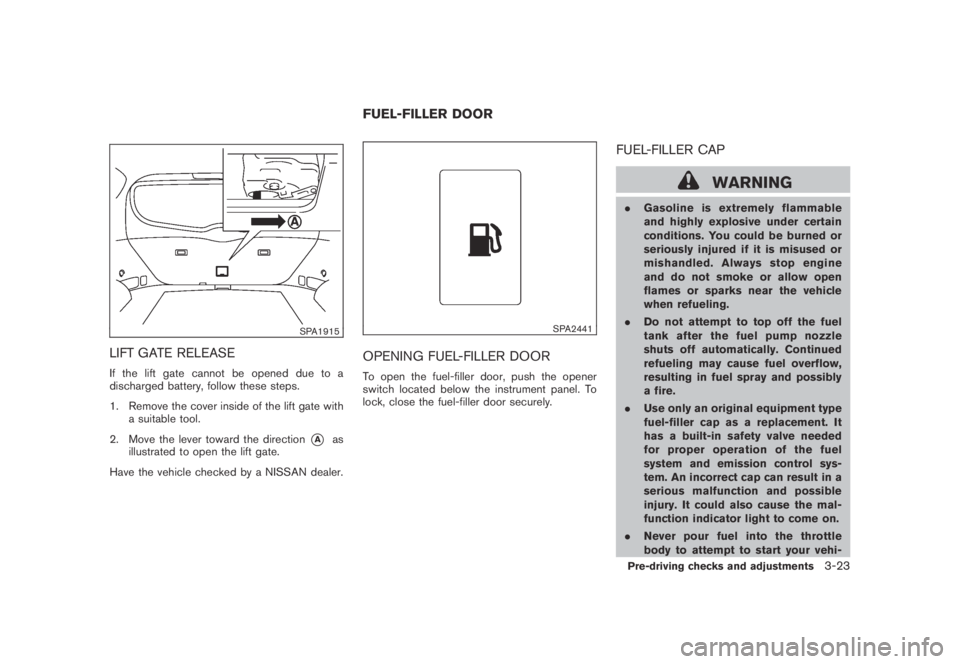
SPA1915
LIFT GATE RELEASE
If the lift gate cannot be opened due to a
discharged battery, follow these steps.
1. Remove the cover inside of the lift gate with
a suitable tool.
2. Move the lever toward the direction
*Aas
illustrated to open the lift gate.
Have the vehicle checked by a NISSAN dealer.
SPA2441
OPENING FUEL-FILLER DOOR
To open the fuel-filler door, push the opener
switch located below the instrument panel. To
lock, close the fuel-filler door securely.
FUEL-FILLER CAP
WARNING
.Gasoline is extremely flammable
and highly explosive under certain
conditions. You could be burned or
seriously injured if it is misused or
mishandled. Always stop engine
and do not smoke or allow open
flames or sparks near the vehicle
when refueling.
.Do not attempt to top off the fuel
tank after the fuel pump nozzle
shuts off automatically. Continued
refueling may cause fuel overflow,
resulting in fuel spray and possibly
a fire.
.Use only an original equipment type
fuel-filler cap as a replacement. It
has a built-in safety valve needed
for proper operation of the fuel
system and emission control sys-
tem. An incorrect cap can result in a
serious malfunction and possible
injury. It could also cause the mal-
function indicator light to come on.
.Never pour fuel into the throttle
body to attempt to start your vehi-
FUEL-FILLER DOOR
Pre-driving checks and adjustments3-23
Page 157 of 443

Black plate (157,1)
Model "Z51-D" EDITED: 2007/ 10/ 2
SPA2447
INSIDE MIRROR
Adjust the height and the angle of the inside
mirror to the desired position.
SPA2143
Manual anti-glare type
The night position*1will reduce glare from the
headlights of vehicles behind you at night.
Use the day position
*2when driving in daylight
hours.
WARNING
Use the night position only when ne-
cessary, because it reduces rear view
clarity.
SPA2422AType A
SPA2450Type B
MIRRORS
Pre-driving checks and adjustments3-27
Page 158 of 443

Black plate (158,1)
Model "Z51-D" EDITED: 2007/ 10/ 2
Automatic anti-glare type
The inside mirror is designed so that it
automatically changes reflection according to
the intensity of the headlights of the following
vehicle.
The anti-glare system will be automatically
turned on when the ignition switch is pushed
to the ON position.
When the anti-glare system is turned on, the
indicator light
*Awill illuminate and excessive
glare from the headlights of the vehicle behind
you will be reduced.
Type A: Push the
switch*Bto make the
inside rearview mirror operate normally and the
indicator light will turn off. Push the
switch
again to turn the system on.
Type B: Push the “*” switch
*Cto make the
inside rearview mirror operate normally. The
indicator light will turn off. Push the “I” switch
*Dto turn the system on.
Do not allow any object to cover the
sensors
*Eor apply glass cleaner on
them. Doing so will reduce the sensitivity
of the sensor, resulting in improper opera-
tion.
For the compass (if so equipped) operation, see
“COMPASS” in the “2. Instruments and con-
trols” section.For the HomeLink
®Universal Transceiver opera-
tion, see “HomeLink®UNIVERSAL TRANSCEI-
VER” in the “2. Instruments and controls”
section.
SPA2319
OUTSIDE MIRRORS
WARNING
Objects viewed in the outside mirror on
the passenger side are closer than they
appear. Be careful when moving to the
right. Using only this mirror could cause
an accident. Use the inside mirror or
glance over your shoulder to properly
judge distances to other objects.
Adjusting outside mirrors
The outside mirror control switch is located on
the armrest.
3-28Pre-driving checks and adjustments
Page 170 of 443
Black plate (168,1)
Model "Z51-D" EDITED: 2007/ 10/ 2
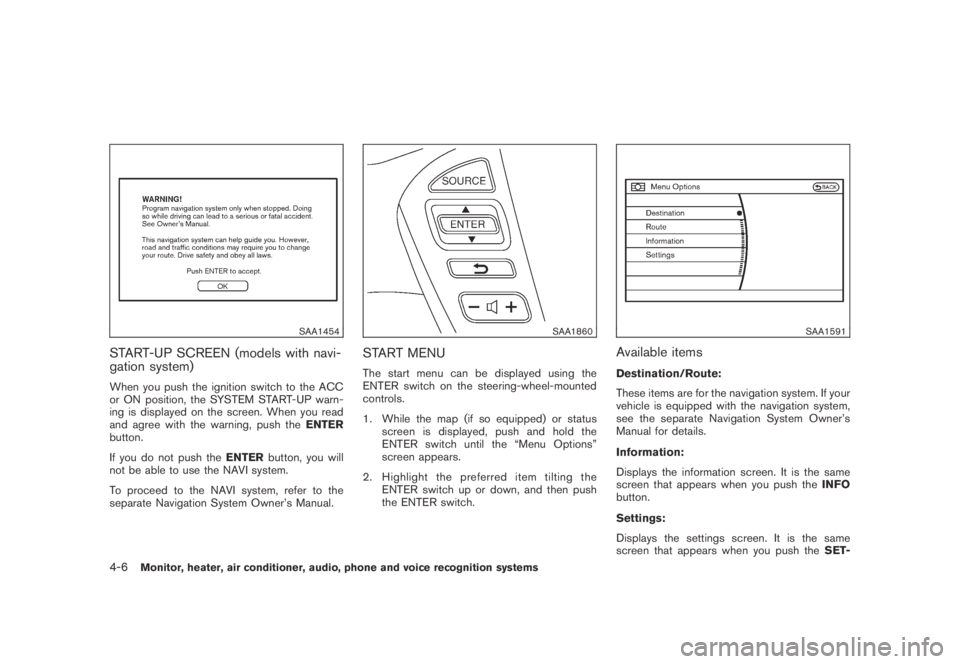
SAA1454
START-UP SCREEN (models with navi-
gation system)
When you push the ignition switch to the ACC
or ON position, the SYSTEM START-UP warn-
ing is displayed on the screen. When you read
and agree with the warning, push theENTER
button.
If you do not push theENTERbutton, you will
not be able to use the NAVI system.
To proceed to the NAVI system, refer to the
separate Navigation System Owner’s Manual.
SAA1860
START MENU
The start menu can be displayed using the
ENTER switch on the steering-wheel-mounted
controls.
1. While the map (if so equipped) or status
screen is displayed, push and hold the
ENTER switch until the “Menu Options”
screen appears.
2. Highlight the preferred item tilting the
ENTER switch up or down, and then push
the ENTER switch.
SAA1591
Available items
Destination/Route:
These items are for the navigation system. If your
vehicle is equipped with the navigation system,
see the separate Navigation System Owner’s
Manual for details.
Information:
Displays the information screen. It is the same
screen that appears when you push theINFO
button.
Settings:
Displays the settings screen. It is the same
screen that appears when you push theSET-
4-6Monitor, heater, air conditioner, audio, phone and voice recognition systems
Page 238 of 443
Black plate (236,1)
Model "Z51-D" EDITED: 2007/ 10/ 2
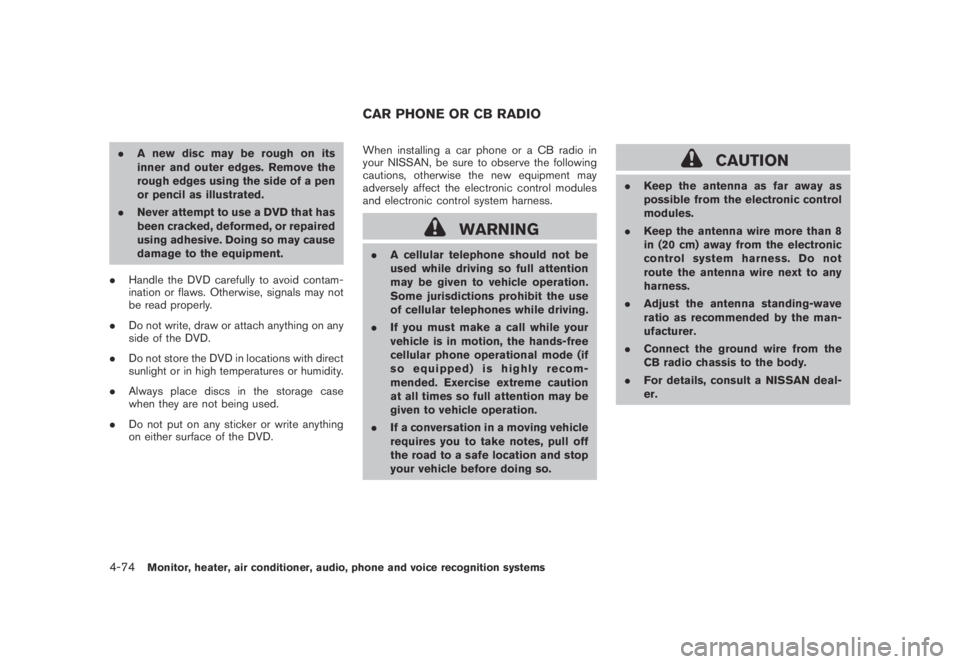
.A new disc may be rough on its
inner and outer edges. Remove the
rough edges using the side of a pen
or pencil as illustrated.
.Never attempt to use a DVD that has
been cracked, deformed, or repaired
using adhesive. Doing so may cause
damage to the equipment.
.Handle the DVD carefully to avoid contam-
ination or flaws. Otherwise, signals may not
be read properly.
.Do not write, draw or attach anything on any
side of the DVD.
.Do not store the DVD in locations with direct
sunlight or in high temperatures or humidity.
.Always place discs in the storage case
when they are not being used.
.Do not put on any sticker or write anything
on either surface of the DVD.When installing a car phone or a CB radio in
your NISSAN, be sure to observe the following
cautions, otherwise the new equipment may
adversely affect the electronic control modules
and electronic control system harness.
WARNING
.A cellular telephone should not be
used while driving so full attention
may be given to vehicle operation.
Some jurisdictions prohibit the use
of cellular telephones while driving.
.If you must make a call while your
vehicle is in motion, the hands-free
cellular phone operational mode (if
so equipped) is highly recom-
mended. Exercise extreme caution
at all times so full attention may be
given to vehicle operation.
.If a conversation in a moving vehicle
requires you to take notes, pull off
the road to a safe location and stop
your vehicle before doing so.
CAUTION
.Keep the antenna as far away as
possible from the electronic control
modules.
.Keep the antenna wire more than 8
in (20 cm) away from the electronic
control system harness. Do not
route the antenna wire next to any
harness.
.Adjust the antenna standing-wave
ratio as recommended by the man-
ufacturer.
.Connect the ground wire from the
CB radio chassis to the body.
.For details, consult a NISSAN deal-
er.
CAR PHONE OR CB RADIO
4-74Monitor, heater, air conditioner, audio, phone and voice recognition systems
Page 313 of 443

Black plate (16,1)
5 Starting and driving
Model "Z51-D" EDITED: 2007/ 10/ 2
Precautions when starting and driving..................... 5-2
Exhaust gas (carbon monoxide)......................... 5-2
Three-way catalyst.......................................... 5-2
Tire Pressure Monitoring System (TPMS)............. 5-3
Avoiding collision and rollover........................... 5-5
On-pavement and off-road driving precautions...... 5-5
Drinking alcohol/drugs and driving...................... 5-6
Driving safety precautions................................ 5-6
Push-button ignition switch.................................. 5-8
Intelligent Key system (if so equipped)................ 5-8
Push-button ignition switch operation................5-10
Push-button ignition switch positions................5-10
Key port.....................................................5-11
Before starting the engine..................................5-12
Starting the engine...........................................5-12
Driving the vehicle............................................5-13
Continuously Variable Transmission (CVT)..........5-13
Parking brake..................................................5-17
Cruise control.................................................5-18
Precautions on cruise control..........................5-18
Cruise control operations...............................5-18Break-in schedule............................................5-20
Increasing fuel economy....................................5-20
All-Wheel Drive (AWD) (if so equipped)................5-21
All-Wheel Drive (AWD) lock switch operations....5-21
AWD warning light.......................................5-22
Parking/parking on hills......................................5-24
Power steering................................................5-25
Brake system..................................................5-25
Braking precautions......................................5-25
Parking brake break-in...................................5-25
Anti-lock Braking System (ABS)......................5-26
Vehicle Dynamic Control (VDC) system.................5-27
Cold weather driving.........................................5-28
Freeing a frozen door lock..............................5-28
Anti-freeze..................................................5-28
Battery......................................................5-28
Draining of coolant water...............................5-28
Tire equipment............................................5-29
Special winter equipment...............................5-29
Driving on SNOW or ice................................5-29
Engine block heater (if so equipped).................5-29
Page 316 of 443
Black plate (316,1)
Model "Z51-D" EDITED: 2007/ 10/ 2
alternate tires and wheels allow the TPMS to
continue to function properly.
Additional information
.The TPMS does not monitor the tire
pressure of the spare tire.
.The TPMS will activate only when the
vehicle is driven at speeds above 16 MPH
(25 km/h) . Also, this system may not detect
a sudden drop in tire pressure (for example a
flat tire while driving) .
.The low tire pressure warning light does not
automatically turn off when the tire pressure
is adjusted. After the tire is inflated to the
recommended pressure, the vehicle must be
driven at speeds above 16 MPH (25 km/h)
to activate the TPMS and turn off the low tire
pressure warning light. Use a tire pressure
gauge to check the tire pressure.
.Tire pressure rises and falls depending on
the heat caused by the vehicle’s operation
and the outside temperature. Low outside
temperature can lower the temperature of
the air inside the tire which can cause a
lower tire inflation pressure. This may cause
the low tire pressure warning light to
illuminate. If the warning light illuminates in
low ambient temperature, check the tire
pressure for all four tires.
For additional information, see “Low tire pres-sure warning light” in the “2. Instruments and
controls” section and “TIRE PRESSURE MON-
ITORING SYSTEM (TPMS)” in the “6. In case of
emergency” section.
WARNING
.If the low tire pressure warning light
illuminates while driving, avoid sud-
den steering maneuvers or abrupt
braking, reduce vehicle speed, pull
off the road to a safe location and
stop the vehicle as soon as possi-
ble. Driving with under-inflated tires
may permanently damage the tires
and increase the likelihood of tire
failure. Serious vehicle damage
could occur and may lead to an
accident and could result in serious
personal injury. Check the tire pres-
sure for all four tires. Adjust the tire
pressure to the recommended COLD
tire pressure shown on the Tire and
Loading Information label to turn
the low tire pressure warning light
OFF. If you have a flat tire, replace it
with a spare tire as soon as possi-
ble. (See “FLAT TIRE” in the “6. In
case of emergency” section for
changing a flat tire.).When a spare tire is mounted or a
wheel is replaced, the TPMS will not
function and the low tire pressure
warning light will flash for approxi-
mately 1 minute. The light will
remain on after 1 minute. Contact
your NISSAN dealer as soon as
possible for tire replacement and/
or system resetting.
.Replacing tires with those not ori-
ginally specified by NISSAN could
affect the proper operation of the
TPMS.
.Do not inject any tire liquid or
aerosol tire sealant into the tires,
as this may cause a malfunction of
the tire pressure sensors.
CAUTION
.The TPMS may not function properly
when the wheels are equipped with
tire chains or the wheels are buried
in snow.
.Do not place metalized film or any
metal parts (antenna, etc.) on the
windows. This may cause poor re-
ception of the signals from the tire
5-4Starting and driving