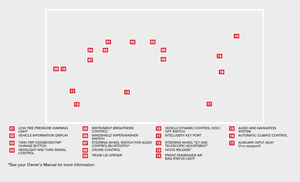
Page 9 of 36

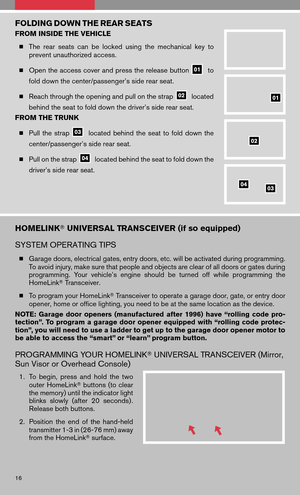
PASSENGER’S SIDE TEMPERATURE CONTROL DIAL
Turn the passenger’s temperature control dial left for cold air or right for hot air; doing so
will activate dual mode.
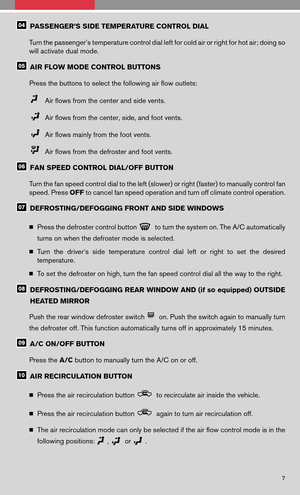
AIR FLOW MODE CONTROL BUTTONS
Press the buttons to select the following air flow outlets:
Air flows from the center and side vents.
Air flows from the center, side, and foot vents.
Air flows mainly from the foot vents.
Air flows from the defroster and foot vents.
FAN SPEED CONTROL DIAL/OFF BUTTON
Turn the fan speed control dial to the left (slower) or right (faster) to manually control fan
speed. Press OFFto cancel fan speed operation and turn off climate control operation.
DEFROSTING/DEFOGGING FRONT AND SIDE WINDOWS
� Press the defroster control button
to turn the system on. The A/C automatically
turns on when the defroster mode is selected.
� Turn thedriver’s sidetemperature controldialleftorright toset the desired
temperature.
� To set the defroster on high, turn the fan speed control dial all the way to the right.
DEFROSTING/DEFOGGING REAR WINDOW AND (if so equipped) OUTSIDE
HEATED MIRROR
Push the rear window defroster switch
on. Push the switch again to manually turn
the defroster off. This function automatically turns off in approximately 15 minutes.
A/C ON/OFF BUTTON
Press the A/Cbutton to manually turn the A/C on or off.
AIR RECIRCULATION BUTTON
� Press the air recirculation button
to recirculate air inside the vehicle.
� Press the air recirculation button
again to turn air recirculation off.
� The air recirculation mode can only be selected if the air flow control mode is in the
following positions:
,or.
7
Page 10 of 36

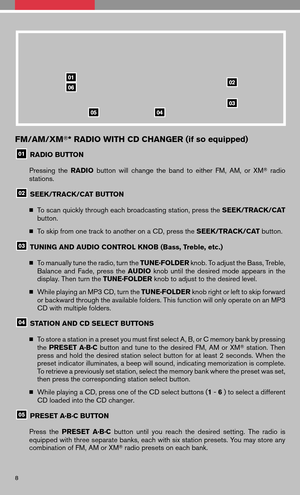
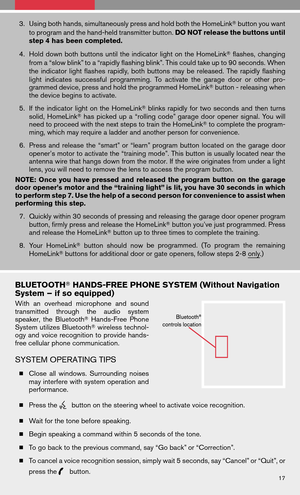
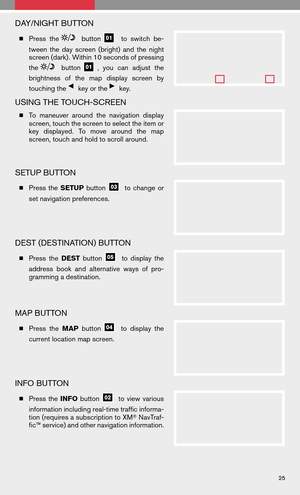
RADIO BUTTON
Pressing theRADIO buttonwillchange theband toeither FM,AM, orXM� radio
stations.
SEEK/TRACK/CAT BUTTON
� To scan quickly through each bro")
FM/AM/XM�* RADIO WITH CD CHANGER (if so equipped)
RADIO BUTTON
Pressing theRADIO buttonwillchange theband toeither FM,AM, orXM� radio
stations.
SEEK/TRACK/CAT BUTTON
� To scan quickly through each broadcasting station, press the SEEK/TRACK/CAT
button.
� To skip from one track to another on a CD, press the SEEK/TRACK/CATbutton.
TUNING AND AUDIO CONTROL KNOB (Bass, Treble, etc.)
� To manually tune the radio, turn the TUNE·FOLDERknob. To adjust the Bass, Treble,
Balance andFade, presstheAUDIO knobuntilthedesired modeappears inthe
display. Then turn the TUNE·FOLDERknob to adjust to the desired level.
� While playing an MP3 CD, turn the TUNE·FOLDERknob right or left to skip forward
or backward through the available folders. This function will only operate on an MP3
CD with multiple folders.
STATION AND CD SELECT BUTTONS
� To store a station in a preset you must first select A, B, or C memory bank by pressing
the PRESET A·B·Cbutton andtune tothe desired FM,AMorXM� station. Then
press andhold thedesired stationselectbutton foratleast 2seconds. Whenthe
preset indicator illuminates, a beep will sound, indicating memorization is complete.
To retrieve a previously set station, select the memory bank where the preset was set,
then press the corresponding station select button.
� While playing a CD, press one of the CD select buttons (1 -6 ) to select a different
CD loaded into the CD changer.
PRESET A·B·C BUTTON
Press thePRESET A·B·Cbutton untilyoureach thedesired setting.Theradio is
equipped with three separate banks, each with six station presets. You may store any
combination of FM, AM or XM� radio presets on each bank.
8
Page 11 of 36

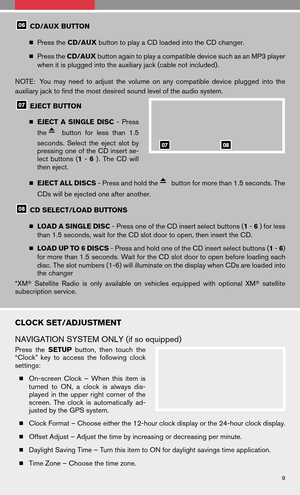
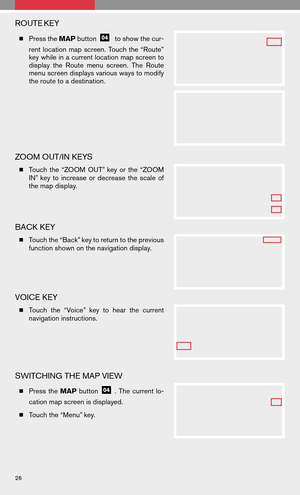
CD/AUX BUTTON
� Press the CD/AUX button to play a CD loaded into the CD changer.
� Press the CD/AUX button again to play a compatible device such as an MP3 player
when it is plugged into the auxiliary jack (cable not included) .
NOTE: Youmay need toadjust thevolume onany compatible deviceplugged intothe
auxiliary jack to find the most desired sound level of the audio system.
EJECT BUTTON
� EJECT ASINGLE DISC-Press
the
button forless than 1.5
seconds. Selecttheeject slotby
pressing one of the CD insert se-
lect buttons (1-6 ) . The CDwill
then eject.
� EJECT ALL DISCS - Press and hold the
button for more than 1.5 seconds. The
CDs will be ejected one after another.
CD SELECT/LOAD BUTTONS
� LOAD A SINGLE DISC - Press one of the CD insert select buttons (1 -6 ) for less
than 1.5 seconds, wait for the CD slot door to open, then insert the CD.
� LOAD UP TO 6 DISCS - Press and hold one of the CD insert select buttons ( 1-6)
for more than 1.5 seconds. Wait for the CD slot door to open before loading each
disc. The slot numbers (1-6) will illuminate on the display when CDs are loaded into
the changer
*XM� Satellite Radioisonly available onvehicles equipped withoptional XM�satellite
subscription service.
CLOCK SET/ADJUSTMENT
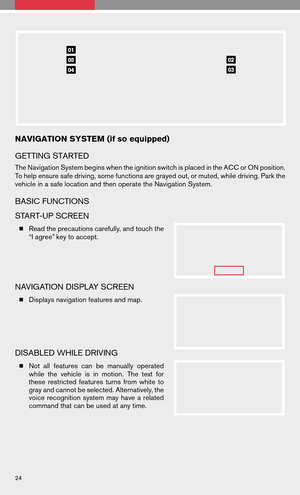
NAVIGATION SYSTEM ONLY (if so equipped)
Press theSETUP button,thentouch the
“Clock” keytoaccess thefollowing clock
settings:
� On-screen Clock–When thisitem is
turned toON, aclock isalways dis-
played inthe upper rightcorner ofthe
screen. Theclock isautomatically ad-
justed by the GPS system.
� Clock Format – Choose either the 12-hour clock display or the 24-hour clock display.
� Offset Adjust – Adjust the time by increasing or decreasing per minute.
� Daylight Saving Time – Turn this item to ON for daylight savings time application.
� Time Zone – Choose the time zone.
9
Page 12 of 36

� MPG (instant fuel economy)
� MPG/MPH (average")
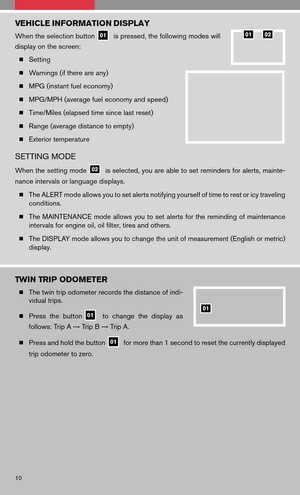
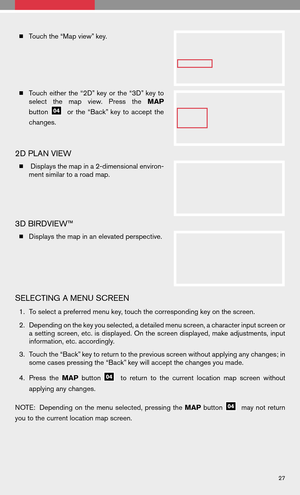
VEHICLE INFORMATION DISPLAY
When the selection buttonis pressed, the following modes will
display on the screen:
� Setting
� Warnings (if there are any)
� MPG (instant fuel economy)
� MPG/MPH (average fuel economy and speed)
� Time/Miles (elapsed time since last reset)
� Range (average distance to empty)
� Exterior temperature
SETTING MODE
When the setting modeis selected, you are able to set reminders for alerts, mainte-
nance intervals or language displays.
� The ALERT mode allows you to set alerts notifying yourself of time to rest or icy traveling
conditions.
� The MAINTENANCE modeallows youtoset alerts forthe reminding ofmaintenance
intervals for engine oil, oil filter, tires and others.
� The DISPLAY mode allows you to change the unit of measurement (English or metric)
display.
TWIN TRIP ODOMETER
� The twin trip odometer records the distance of indi-
vidual trips.
� Press thebutton
tochange thedisplay as
follows: Trip A →Trip B →Trip A.
� Press and hold the button
for more than 1 second to reset the currently displayed
trip odometer to zero.
10
Page 13 of 36
 (if so equipped)
�The CVT does not produce a gear change sen-
sation like traditional automatic transmissions.
� The transmission in your vehicle requires a sp")
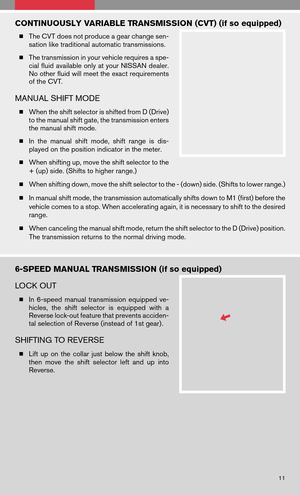
CONTINUOUSLY VARIABLE TRANSMISSION (CVT) (if so equipped)
�The CVT does not produce a gear change sen-
sation like traditional automatic transmissions.
� The transmission in your vehicle requires a spe-
cial fluid available only at your NISSAN dealer.
No other fluid will meet the exact requirements
of the CVT.
MANUAL SHIFT MODE
� When the shift selector is shifted from D (Drive)
to the manual shift gate, the transmission enters
the manual shift mode.
� Inthe manual shiftmode, shiftrange isdis-
played on the position indicator in the meter.
� When shifting up, move the shift selector to the
+ (up) side. (Shifts to higher range.)
� When shifting down, move the shift selector to the - (down) side. (Shifts to lower range.)
� In manual shift mode, the transmission automatically shifts down to M1 (first) before the
vehicle comes to a stop. When accelerating again, it is necessary to shift to the desired
range.
� When canceling the manual shift mode, return the shift selector to the D (Drive) position.
The transmission returns to the normal driving mode.
6-SPEED MANUAL TRANSMISSION (if so equipped)
LOCK OUT
� In6-speed manualtransmission equippedve-
hicles, theshift selector isequipped witha
Reverse lock-out feature that prevents acciden-
tal selection of Reverse (instead of 1st gear) .
SHIFTING TO REVERSE
� Lift uponthe collar justbelow theshift knob,
then move theshift selector leftand upinto
Reverse.
11
Page 14 of 36

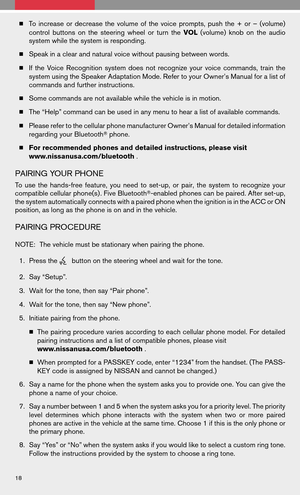
FRONT PASSENGER AIR BAG STATUS LIGHT
This vehicle is equipped with the Nissan Advanced Air Bag System.
Under some conditions, depending on the type of occupant or object
detected in the front passenger seat by the occupant classification
sensor, the front passenger air bag is designed to automatically turn
OFF.When the front passenger air bag is OFF,the front passenger
air bag status light will illuminate.* For example:
� When thesystem detects thatthefront passenger’s seatis
occupied by a small adult, child or child restraint as outlined in
the Owner’s Manual, the
will illuminate to indicate that the front passenger air
bag is OFF and will not inflate in a crash.
� When the front passenger’s seat is occupied and the passenger meets the conditions
outlined in the Owner’s Manual, the
will not illuminate to indicate that the front
passenger air bag is operational.
*When thesystem detects thatthefront passenger’s seatisunoccupied, the
passenger air bag status light will not illuminate, even though the front passenger
air bag is OFF.
TIRE PRESSURE MONITORING SYSTEM (TPMS)
This system monitors tire pressure. If the low tire pressure warning
light illuminates, check the tire pressure in all four tires.
Adjust thelow tirepressure tothe recommended COLDtirepres-
sure shown on the Tire and Loading Information label located in the
driver’s door opening. After tire pressures are adjusted, the vehicle
will need to be driven at speeds above 16 MPH (25 km/h) to activate
the TPMS and turn off the low tire pressure warning light.
SEAT BELT WARNING LIGHT AND CHIME
� The light and chime remind you to fasten your seat belts.
The light illuminates whenever the ignition switch is placed
in the ON or START position and remains illuminated until
the driver’s seatbeltisfastened. Atthe same time,the
chime sounds forapproximately 6seconds unlessthe
driver’s seat belt is securely fastened.
� With the ignition ON, the seat belt warning light may also
illuminate if the front passenger’s seat is occupied with the
front passenger’s seat belt not fastened.
12
Page 15 of 36
 OFF SWITCH (if so equipped)
The Vehicle Dynamic Control (VDC) system monitors driver inputs and
vehicle motion. Under certain conditions, it controls braking and engine
o")
VEHICLE DYNAMIC CONTROL (VDC) OFF SWITCH (if so equipped)
The Vehicle Dynamic Control (VDC) system monitors driver inputs and
vehicle motion. Under certain conditions, it controls braking and engine
outputtohelp improve tractionorhandling. VDCmayneed tobe
temporarily shut off if you are trying to free a vehicle stuck in snow or mud.
� Push the Vehicle Dynamic Control (VDC) OFF switch to deactivate
the VDC system. The
light will illuminate in the instrument panel
gauge area.
� Push the Vehicle Dynamic Control (VDC) OFF switch again to activate the VDC system.
The
light in the instrument panel gauge area will turn off.
� The VDC system is active while the vehicle is running until the switch is pushed to turn
it off.
REARVIEW MONITOR (if so equipped)
When the shift selector is moved to the R (Reverse) position,
the monitor display will automatically change to show the area
directly behind the vehicle.
The colored lines on the display screen indicate approximate
distances to objects.
� Red 1.5 ft (0.5 m); Yellow 3 ft (1 m); Green 7 ft (2 m) and
10 ft (3 m) .
CHILD SAFETY REAR DOOR LOCK (Sedan Only)
Child safety lockshelpprevent therear doors frombeing
opened accidentally, especiallywhensmallchildren arein
the vehicle. Thechild safety locklevers arelocated onthe
edge ofthe rear doors. Whenthelever isin the LOCK
position, the door can only be opened from the outside.
FUEL-FILLER DOOR RELEASE
The fuel-filler doorrelease islocated onthe floor tothe leftofthe
driver’s seat.
� To open the fuel-filler door, pull the release up.
� To lock, close the fuel-filler door securely.
13
Page 16 of 36

is OFF, the trunk lid cannot be opened with the trunk lid
opener (located onthe instrument panel) ,thetrunk
Request Switc")
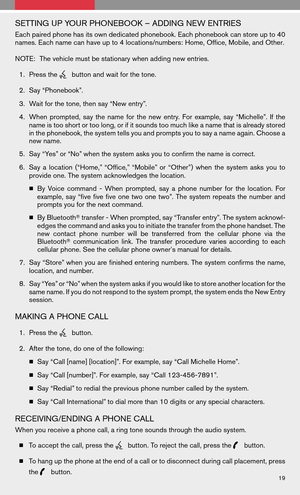
TRUNK LID CANCEL SWITCH
�When the cancel switch (located inside the glove box)
is OFF, the trunk lid cannot be opened with the trunk lid
opener (located onthe instrument panel) ,thetrunk
Request Switch button (if so equipped) or the Intelli-
gent Key button.
� It can be opened by using the Emergency Inside Trunk
Release.
MOONROOF CONTROLS (if so equipped)
The ignition switch must be in the ON position to operate
the moonroof controls.
TILTING THE MOONROOF
� To tiltthe moonroof up,push thetiltswitch toward
the
position.
� To tilt the moonroof down, push the tilt switch toward
the
position.
SLIDING THE MOONROOF
� To fully open the moonroof, push the switch toward theposition.
� To fully close the moonroof, push the switch toward the
position.
� To open orclose themoonroof partway, push theswitch ineither direction (
or) while the moonroof is sliding to stop it in the desired position.
FRONT SEAT ADJUSTMENTS
With manual seats (if so equipped):
FORWARD AND BACKWARD
� Pull the center of the bar up
under the front of the
seat andhold itwhile youslide theseat forward or
backward. Release the bar to lock the seat in position.
SEAT LIFTER (driver’s seat, if so equipped)
� Pull up or push down the adjusting lever
repeat-
edly to adjust the seat height.
RECLINING
� Lift the lever
on the side of the seat to adjust the seatback forward or backward.
Release thelever when youhave found acomfortable angleandtheseat beltfits
properly.
14