Page 74 of 313
 warning light
Low washer fluid warning light
High beam indicator light (Blue)
Automatic transmission check warning
light (A/T models)
Seat belt warning light
Malfunction")
Anti-lock Braking System
(ABS) warning light
Low washer fluid warning light
High beam indicator light (Blue)
Automatic transmission check warning
light (A/T models)
Seat belt warning light
Malfunction Indicator Light (MIL)
or
Brake warning light
Supplemental air bag warning light
Slip indicator light
Charge warning light
Automatic transmission position indicator
light (A/T models)
Traction Control System (TCS) off indica-
tor light (if so equipped)
Door open warning light
Cruise main switch indicator light
(if so equipped)
Vehicle Dynamic Control (VDC) off indi-
cator light (if so equipped)
Engine oil pressure warning light
Cruise set switch indicator light
(if so equipped)
Soft top indicator light (Roadster models)
Low tire pressure warning light
Front passenger air bag status light
Turn signal/hazard indicator lights
CHECKING BULBSApply the parking brake and turn the ignition key
to ON without starting the engine. The following
lights will come on:
,
or
,
,
The following lights come on briefly and then go
off:
,
or
,
,
,
,
,
If any light fails to come on, it may indicate a
burned-out bulb or an open circuit in the elec-trical system. Have the system repaired
promptly.
WARNING LIGHTS
or
Anti-lock Braking
System (ABS)
warning light
When the ignition switch is in the ON position,
the Anti-lock Braking System (ABS) warning
light illuminates and then turns off. This indicates
the ABS is operational.If the ABS warning light illuminates while the
engine is running, or while driving, it may indicate
the ABS is not functioning properly. Have the
system checked by a NISSAN dealer.
If an ABS malfunction occurs, the anti-lock
function is turned off. The brake system then
operates normally, but without anti-lock assis-
tance. See “Brake system” in the “5. Starting
and driving” section.
WARNING/INDICATOR LIGHTS
AND AUDIBLE REMINDERS
Instruments and controls
2-11
Page 80 of 313

This light illuminates when the soft top is being
operated or it is stopped before reaching a full
open/close state. When the top is fully opened,
the light")
Soft top indicator light
(Roadster models)
This light illuminates when the soft top is being
operated or it is stopped before reaching a full
open/close state. When the top is fully opened,
the light will turn off. When the top is fully closed,
the light will flash.
The soft top can be moved with the soft top
operating switch only under all of the following
conditions:
�When the vehicle is stopped.
�When the foot brake pedal is depressed.
�When the ignition switch is ON.
Turn signal/hazard indicator
lights
The light flashes when the turn signal switch
lever or hazard switch is turned on.AUDIBLE REMINDERS
Key reminder chimeThe chime will sound if the driver’s side door is
opened while the key is left in the ignition switch
(ignition switch is turned off). Remove the key
and take it with you when leaving the vehicle.Light reminder chimeThe chime will sound when the driver’s door is
opened with the headlight switch on unless the
key is in the ignition switch. Make sure to turn the
light switch off when you leave the vehicle.Seat belt warning chimeThe chime will sound for about 6 seconds unless
the driver’s seat belt is securely fastened.Brake pad wear warningThe disc brake pads have audible wear warn-
ings. When a brake pad requires replacement, it
will make a high pitched scraping sound when
the vehicle is in motion whether or not the brake
pedal is depressed. Have the brakes checked as
Instruments and controls
2-17
Page 87 of 313

HIGH VOLTAGE
�When xenon headlights are on, they
produce a high voltage. To prevent an
electric shock, never attempt to
modify or disassemble. Always have
your xenon headlights replaced at a
NISSAN dealer.
�Xenon headlights provide consider-
ably more light than conventional
headlights. If they are not correctly
aimed, they might temporarily blind
an oncoming driver or the driver
ahead of you and cause a serious
accident. If headlights are not aimed
correctly, immediately take your ve-
hicle to a NISSAN dealer and have
the headlights adjusted correctly.
When the xenon headlight is initially turned on,
its brightness or color varies slightly. However,
the color and brightness will soon stabilize.�The life of xenon headlights will be
shortened by frequent on-off operation.
It is generally desirable not to turn off
the headlights for short intervals (for
example, when the vehicle stops at a
traffic signal). Even when the daytime
running lights are active (Canada only),
the xenon headlights do not turn on.
This way the life of the xenon headlights
is not reduced.
�If the xenon headlight bulb is close to
burning out, the brightness will drasti-
cally decrease, the light will start blink-
ing, or the color of the light will become
reddish. If one or more of the above
signs appear, contact a NISSAN dealer.
HEADLIGHT SWITCH
Lighting
�1Turn the switch to the
position:
The front park, side marker, tail, license plate
and instrument lights will come on.
�2Turn the switch to the
position:
Headlights will come on and all the other
lights remain on.
SIC3291
HEADLIGHT AND TURN SIGNAL
SWITCH2-24
Instruments and controls
Page 90 of 313
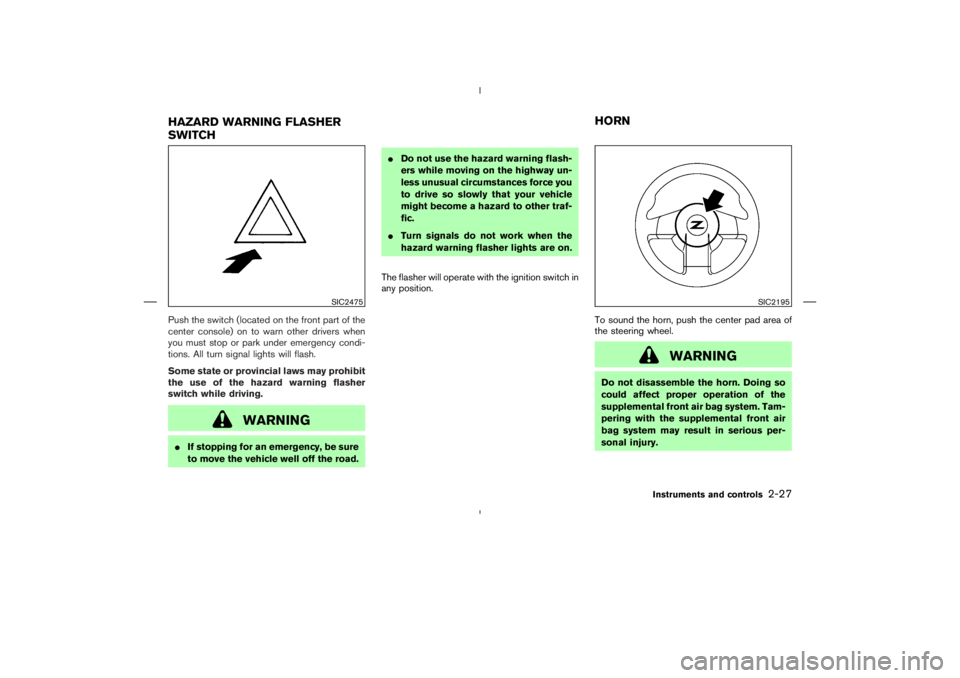
WARNING
�If stopping for an emergency, be sure
to move the vehicle well off the road.�Do not use the hazard warning flash-
ers while moving on the highway un-
less unusual circumstances force you
to drive so slowly that your vehicle
might become a hazard to other traf-
fic.
�Turn signals do not work when the
hazard warning flasher lights are on.
The flasher will operate with the ignition switch in
any position.
To sound the horn, push the center pad area of
the steering wheel.
SIC2195
HAZARD WARNING FLASHER
SWITCHHORN
Instruments and controls
2-27
Page 94 of 313
or
side will
advance the time and the
or
side
will turn back the time.
3. Push the DISP button
�A
(Type A), or RPT
�B
button (Type B) to finish the adjustment.
ResettingType A (audio with 1 CD player):
Push the DISP
�A
and TUNE
�D
buttons.
Type B (audio with 6 CD changer):
Push the RPT
�B
and TUNE
�D
buttons.
The time will be set to a time signal.
For example, if these buttons are pushed while
the time is between 8:00 and 8:29, the display
will be reset to 8:00. If pushed while it is
between 8:30 and 8:59, the display will be reset
to 9:00. At the same time the display will return
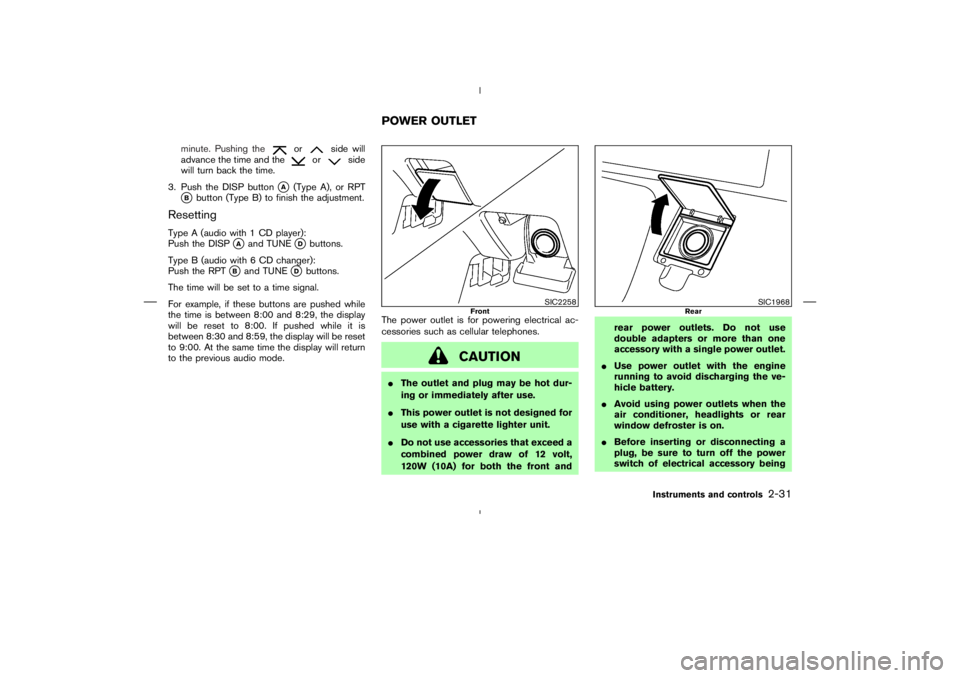
to the previous audio mode.The power outlet is for powering electrical ac-
cessories such as cellular telephones.
Page 107 of 313

until the indicator light
�A
blinks (after 20
seconds). Release both buttons.
2. Position the end of the hand-held transmitter
1-3in(26-76mm)away from the
HomeLink
surfac")
buttons (to clear the memory)
until the indicator light
�A
blinks (after 20
seconds). Release both buttons.
2. Position the end of the hand-held transmitter
1-3in(26-76mm)away from the
HomeLink
surface.3. Using both hands, simultaneously press and
hold both the HomeLink
button you want to
program and the hand-held transmitter but-
ton.
DO NOT release the buttons until step 4 has
been completed.
4. Hold down both buttons until the indicator
light on the HomeLinkflashes, changing
from a “slow blink” to a “rapid blink”. When
the indicator light flashes rapidly, both but-
tons may be released. The rapidly flashing
light indicates successful programming. To
activate the garage door or other pro-
grammed device, press and hold the pro-
grammed HomeLinkbutton - releasingwhen the device begins to activate.
5. If the indicator light on the HomeLink
blinks
rapidly for two seconds and then turns solid,
HomeLink
has picked up a “rolling code”
garage door opener signal. You will need to
proceed with the next steps to train the
HomeLinkto complete the programming
which may require a ladder and another
person for convenience.
6. Press and release the training button located
on the garage door opener’s motor to acti-
vate the “training mode”. This button is usu-
ally located near the antenna wire that hangs
down from the motor. If the wire originates
from under a light lens, you will need to
remove the lens to access the training button.
NOTE:
Once you have pressed and released the
training button on the garage door open-
er’s motor and the “training light” is lit, you
have 30 seconds in which to perform step
7. Use the help of a second person for
convenience to assist when performing
this step.
7. Quickly within 30 seconds of pressing and
releasing the garage door opener program
button, firmly press and release the
HomeLinkbutton you’ve just programmed.
SIC3012
SIC3011
2-44
Instruments and controls
Page 162 of 313
satellite
radio provider. After receiving the activation
signal, an available channel list will be auto-
matically updated in the radio. Turn the ignition
switch from the LOCK to ACC position to
update the channel list.
Satellite radio is not available in Alaska and
Hawaii.
Audio main operationFor all operation precautions, see “Audio opera-
tion precautions” earlier in this section.
Head unit:
The auto loudness circuit enhances the low
SAA1299
Display screen, heater, air conditioner and audio systems
4-23
Page 163 of 313
 or SEEK (
,
) button
to adjust Bass and Treble to the desired level.
Use the TUNE or SEEK button also to adjust
Fader or Balance modes. Fader adjusts the
sound level between the front and rear spe")
,
) or SEEK (
,
) button
to adjust Bass and Treble to the desired level.
Use the TUNE or SEEK button also to adjust
Fader or Balance modes. Fader adjusts the
sound level between the front and rear speakers
and Balance adjusts the sound between the
right and left speakers.
To change the AUDIOP (Audio Pilot) mode to
OFF or ON, push the TUNE or SEEK button.
Once you have adjusted the sound quality to the
desired level, push the AUDIO button repeatedly
until the radio or CD display reappears. Other-
wise, the radio or CD display will automatically
reappear after about 10 seconds.
satellite radio
service subscription is active.
When RADIO band select button is pushed
while the ignition switch is in the ACC or ON, the
radio will come on at the station last played.
The last station/channel played will also come on
when the ON⋅OFF/VOL control knob is pushed
to ON.
If a compact disc is playing when the RADIO
band select button is turned to ON, the compact
disc will automatically be turned off and the last
radio station/channel played will come on.
The FM stereo indicator ST will glow during FM
stereo reception. When the stereo broadcast
signal is weak, the radio will automatically
4-24
Display screen, heater, air conditioner and audio systems