2009 MITSUBISHI ASX door lock
[x] Cancel search: door lockPage 53 of 368
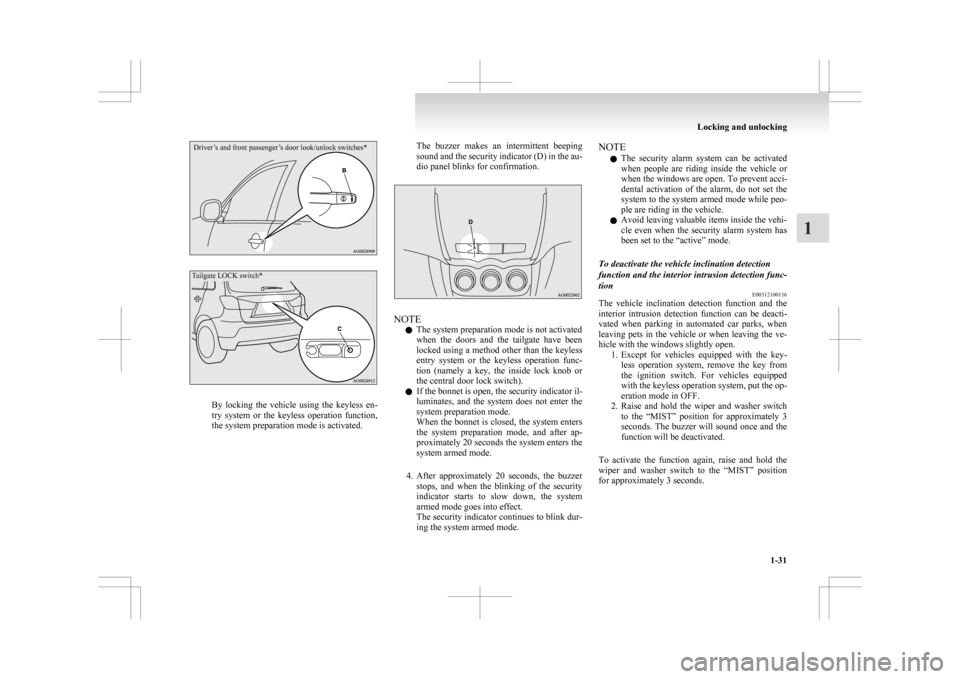
Driver’s and front passenger’s door look/unlock switches*
Tailgate LOCK switch*By locking the vehicle using the keyless en-
try
system or the keyless operation function,
the system preparation mode is activated. The buzzer makes an intermittent beeping
sound
and the security indicator (D) in the au-
dio panel blinks for confirmation. NOTE
l The system preparation mode is not activated
when
the doors and the tailgate have been
locked using a method other than the keyless
entry system or the keyless operation func-
tion (namely a key, the inside lock knob or
the central door lock switch).
l If the bonnet is open, the security indicator il-
luminates, and the system does not enter the
system preparation mode.
When the bonnet is closed, the system enters
the system preparation mode, and after ap-
proximately 20 seconds the system enters the
system armed mode.
4. After approximately 20 seconds, the buzzer stops, and when the blinking of the security
indicator starts to slow down, the system
armed mode goes into effect.
The security indicator continues to blink dur-
ing the system armed mode. NOTE
l The
security alarm system can be activated
when people are riding inside the vehicle or
when the windows are open. To prevent acci-
dental activation of the alarm, do not set the
system to the system armed mode while peo-
ple are riding in the vehicle.
l Avoid leaving valuable items inside the vehi-
cle even when the security alarm system has
been set to the “active” mode.
To deactivate the vehicle inclination detection
function and the interior intrusion detection func-
tion E00312100116
The vehicle inclination detection function and the
interior
intrusion detection function can be deacti-
vated when parking in automated car parks, when
leaving pets in the vehicle or when leaving the ve-
hicle with the windows slightly open. 1. Except for vehicles equipped with the key-less operation system, remove the key from
the ignition switch. For vehicles equipped
with the keyless operation system, put the op-
eration mode in OFF.
2. Raise and hold the wiper and washer switch to the “MIST” position for approximately 3
seconds. The buzzer will sound once and the
function will be deactivated.
To activate the function again, raise and hold the
wiper and washer switch to the “MIST” position
for approximately 3 seconds. Locking and unlocking
1-31 1
Page 54 of 368
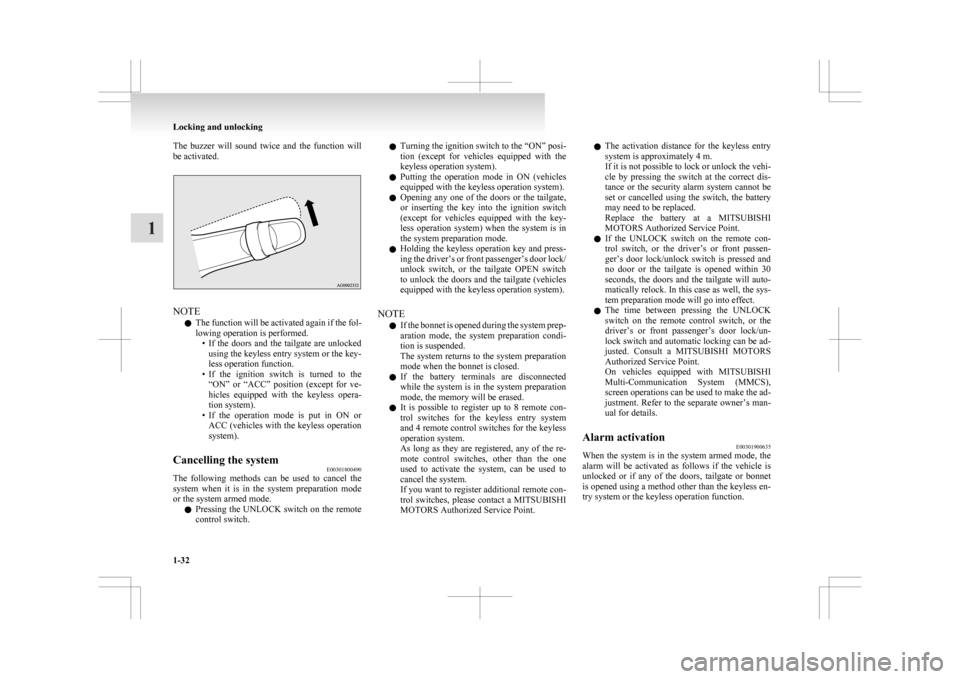
The buzzer will sound twice and the function will
be activated.
NOTE
l The
function will be activated again if the fol-
lowing operation is performed. • If the doors and the tailgate are unlockedusing the keyless entry system or the key-
less operation function.
• If the ignition switch is turned to the “ON” or “ACC” position (except for ve-
hicles equipped with the keyless opera-
tion system).
• If the operation mode is put in ON or ACC (vehicles with the keyless operation
system).
Cancelling the system E00301800490
The following methods can be used to cancel the
system
when it is in the system preparation mode
or the system armed mode.
l Pressing the UNLOCK switch on the remote
control switch. l
Turning
the ignition switch to the “ON” posi-
tion (except for vehicles equipped with the
keyless operation system).
l Putting the operation mode in ON (vehicles
equipped with the keyless operation system).
l Opening any one of the doors or the tailgate,
or inserting the key into the ignition switch
(except for vehicles equipped with the key-
less operation system) when the system is in
the system preparation mode.
l Holding the keyless operation key and press-
ing the driver’s or front passenger’s door lock/
unlock switch, or the tailgate OPEN switch
to unlock the doors and the tailgate (vehicles
equipped with the keyless operation system).
NOTE l If the bonnet is opened during the system prep-
aration mode, the system preparation condi-
tion is suspended.
The system returns to the system preparation
mode when the bonnet is closed.
l If the battery terminals are disconnected
while the system is in the system preparation
mode, the memory will be erased.
l It is possible to register up to 8 remote con-
trol switches for the keyless entry system
and 4 remote control switches for the keyless
operation system.
As long as they are registered, any of the re-
mote control switches, other than the one
used to activate the system, can be used to
cancel the system.
If you want to register additional remote con-
trol switches, please contact a MITSUBISHI
MOTORS Authorized Service Point. l
The activation distance for the keyless entry
system is approximately 4 m.
If it is not possible to lock or unlock the vehi-
cle by pressing the switch at the correct dis-
tance or the security alarm system cannot be
set or cancelled using the switch, the battery
may need to be replaced.
Replace the battery at a MITSUBISHI
MOTORS Authorized Service Point.
l If the UNLOCK switch on the remote con-
trol switch, or the driver’s or front passen-
ger’s door lock/unlock switch is pressed and
no door or the tailgate is opened within 30
seconds, the doors and the tailgate will auto-
matically relock. In this case as well, the sys-
tem preparation mode will go into effect.
l The time between pressing the UNLOCK
switch on the remote control switch, or the
driver’s or front passenger’s door lock/un-
lock switch and automatic locking can be ad-
justed. Consult a MITSUBISHI MOTORS
Authorized Service Point.
On vehicles equipped with MITSUBISHI
Multi-Communication System (MMCS),
screen operations can be used to make the ad-
justment. Refer to the separate owner’s man-
ual for details.
Alarm activation E00301900635
When the system is in the system armed mode, the
alarm
will be activated as follows if the vehicle is
unlocked or if any of the doors, tailgate or bonnet
is opened using a method other than the keyless en-
try system or the keyless operation function. Locking and unlocking
1-32
1
Page 55 of 368
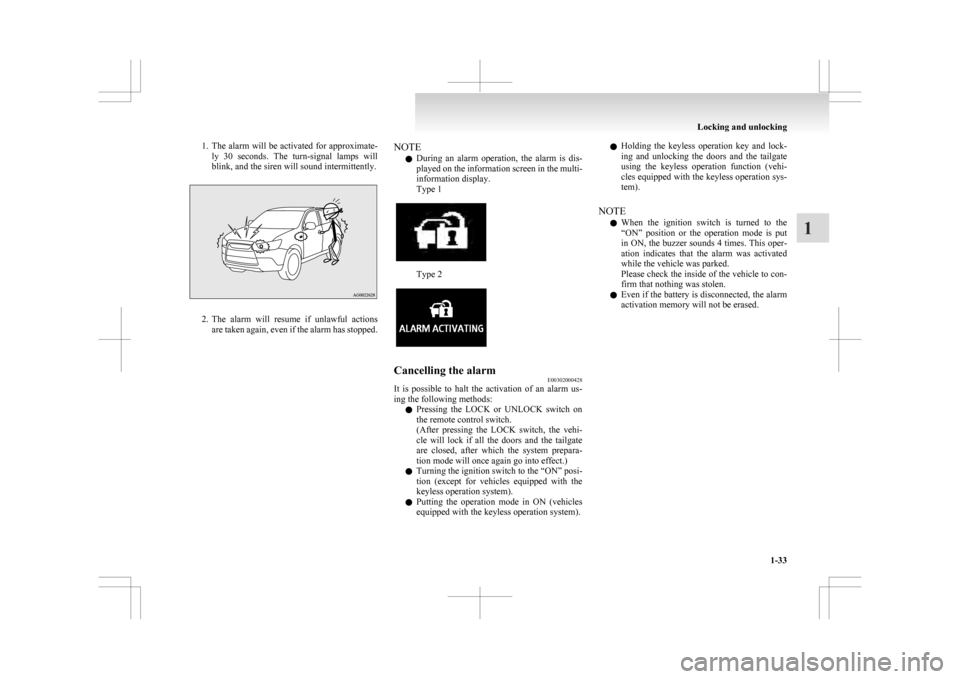
1. The alarm will be activated for approximate-
ly 30 seconds. The turn-signal lamps will
blink, and the siren will sound intermittently. 2. The
alarm will resume if unlawful actions
are taken again, even if the alarm has stopped. NOTE
l During
an alarm operation, the alarm is dis-
played on the information screen in the multi-
information display.
Type 1 Type 2
Cancelling the alarm
E00302000428
It is possible to halt the activation of an alarm us-
ing the following methods:
l Pressing
the LOCK or UNLOCK switch on
the remote control switch.
(After pressing the LOCK switch, the vehi-
cle will lock if all the doors and the tailgate
are closed, after which the system prepara-
tion mode will once again go into effect.)
l Turning the ignition switch to the “ON” posi-
tion (except for vehicles equipped with the
keyless operation system).
l Putting the operation mode in ON (vehicles
equipped with the keyless operation system). l
Holding
the keyless operation key and lock-
ing and unlocking the doors and the tailgate
using the keyless operation function (vehi-
cles equipped with the keyless operation sys-
tem).
NOTE l When the ignition switch is turned to the
“ON” position or the operation mode is put
in ON, the buzzer sounds 4 times. This oper-
ation indicates that the alarm was activated
while the vehicle was parked.
Please check the inside of the vehicle to con-
firm that nothing was stolen.
l Even if the battery is disconnected, the alarm
activation memory will not be erased. Locking and unlocking
1-33 1
Page 56 of 368
Electric window control
E00302200521
The electric windows can only be operated with the
ignition
switch in the “ON” position or the opera-
tion mode in ON. WARNING
l Before
operating the electric window con-
trol, make sure that nothing can get trap-
ped (head, hand, finger, etc.).
l Never leave the vehicle without removing
the key.
l Never leave a child (or other person who
might not be capable of safe operation of
the electric window control) in the vehicle
alone.
l The child may tamper with the switch at
the risk of its hands or head being trap-
ped in the window.
Electric window control switch E00302301558
Each door window opens or closes while the corre-
sponding switch is operated.
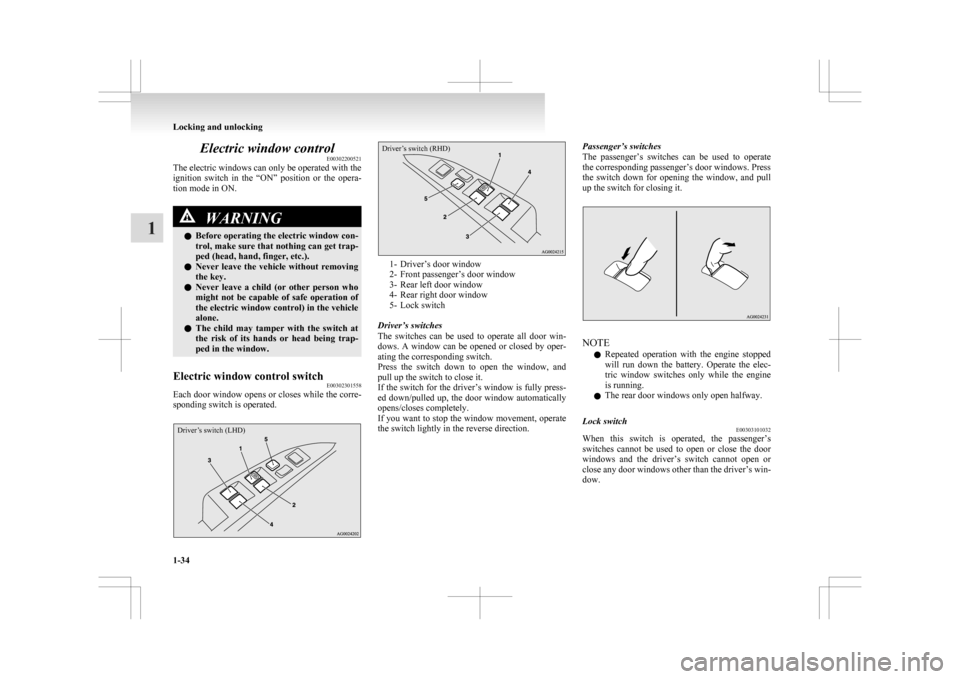
Driver’s switch (LHD)
Driver’s switch (RHD) 1- Driver’s door window
2-
Front passenger’s door window
3- Rear left door window
4- Rear right door window
5- Lock switch
Driver’s switches
The switches can be used to operate all door win-
dows. A window can be opened or closed by oper-
ating the corresponding switch.
Press the switch down to open the window, and
pull up the switch to close it.
If the switch for the driver’s window is fully press-
ed down/pulled up, the door window automatically
opens/closes completely.
If you want to stop the window movement, operate
the switch lightly in the reverse direction. Passenger’s switches
The
passenger’s switches can be used to operate
the corresponding passenger’s door windows. Press
the switch down for opening the window, and pull
up the switch for closing it. NOTE
l Repeated
operation with the engine stopped
will run down the battery. Operate the elec-
tric window switches only while the engine
is running.
l The rear door windows only open halfway.
Lock switch E00303101032
When this switch is operated, the passenger’s
switches
cannot be used to open or close the door
windows and the driver’s switch cannot open or
close any door windows other than the driver’s win-
dow. Locking and unlocking
1-34
1
Page 57 of 368
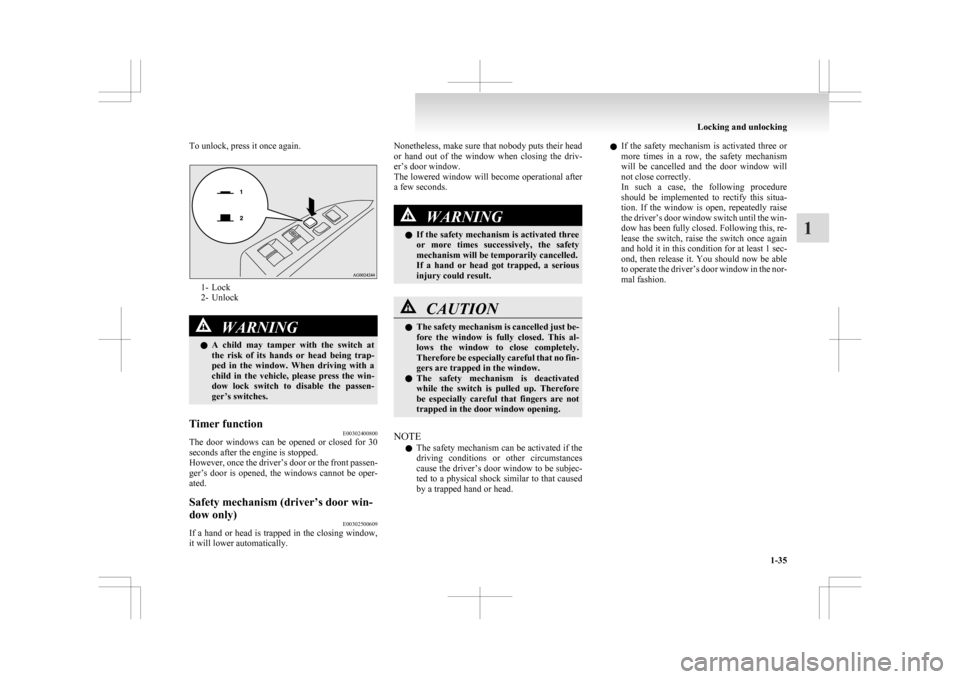
To unlock, press it once again.
1- Lock
2-
Unlock WARNING
l A
child may tamper with the switch at
the risk of its hands or head being trap-
ped in the window. When driving with a
child in the vehicle, please press the win-
dow lock switch to disable the passen-
ger’s switches.
Timer function E00302400800
The door windows can be opened or closed for 30
seconds after the engine is stopped.
However,
once the driver’s door or the front passen-
ger’s door is opened, the windows cannot be oper-
ated.
Safety mechanism (driver’s door win-
dow only) E00302500609
If a hand or head is trapped in the closing window,
it will lower automatically. Nonetheless, make sure that nobody puts their head
or
hand out of the window when closing the driv-
er’s door window.
The lowered window will become operational after
a few seconds. WARNING
l If
the safety mechanism is activated three
or more times successively, the safety
mechanism will be temporarily cancelled.
If a hand or head got trapped, a serious
injury could result. CAUTION
l
The
safety mechanism is cancelled just be-
fore the window is fully closed. This al-
lows the window to close completely.
Therefore be especially careful that no fin-
gers are trapped in the window.
l The safety mechanism is deactivated
while the switch is pulled up. Therefore
be especially careful that fingers are not
trapped in the door window opening.
NOTE l The
safety mechanism can be activated if the
driving conditions or other circumstances
cause the driver’s door window to be subjec-
ted to a physical shock similar to that caused
by a trapped hand or head. l
If
the safety mechanism is activated three or
more times in a row, the safety mechanism
will be cancelled and the door window will
not close correctly.
In such a case, the following procedure
should be implemented to rectify this situa-
tion. If the window is open, repeatedly raise
the driver’s door window switch until the win-
dow has been fully closed. Following this, re-
lease the switch, raise the switch once again
and hold it in this condition for at least 1 sec-
ond, then release it. You should now be able
to operate the driver’s door window in the nor-
mal fashion. Locking and unlocking
1-35 1
Page 123 of 368
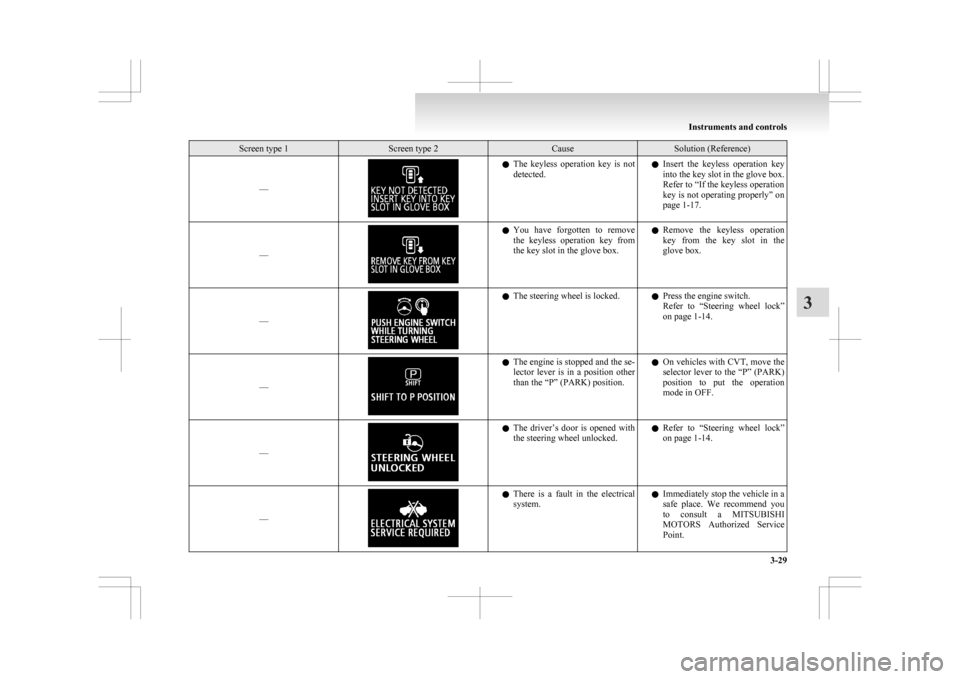
Screen type 1 Screen type 2 Cause Solution (Reference)
–– l
The keyless operation key is not
detected. l
Insert the keyless operation key
into the key slot in the glove box.
Refer to “If the keyless operation
key is not operating properly” on
page 1-17.
–– l
You
have forgotten to remove
the keyless operation key from
the key slot in the glove box. l
Remove the keyless operation
key from the key slot in the
glove box.
–– l
The steering wheel is locked.
lPress the engine switch.
Refer
to “Steering wheel lock”
on page 1-14.
–– l
The engine is stopped and the se-
lector
lever is in a position other
than the “P” (PARK) position. l
On vehicles with CVT, move the
selector lever to the “P” (PARK)
position to put the operation
mode in OFF.
–– l
The
driver’s door is opened with
the steering wheel unlocked. l
Refer to “Steering wheel lock”
on page 1-14.
–– l
There
is a fault in the electrical
system. l
Immediately stop the vehicle in a
safe place. We recommend you
to consult a MITSUBISHI
MOTORS Authorized Service
Point. Instruments and controls
3-29 3
Page 140 of 368
![MITSUBISHI ASX 2009 1.G Owners Manual [Except for vehicles equipped with keyless
operation system]
The ignition switch is turned to the “LOCK”
or “ACC” position, or the key is removed
from the ignition switch.
[For veh MITSUBISHI ASX 2009 1.G Owners Manual [Except for vehicles equipped with keyless
operation system]
The ignition switch is turned to the “LOCK”
or “ACC” position, or the key is removed
from the ignition switch.
[For veh](/manual-img/19/7566/w960_7566-139.png)
[Except for vehicles equipped with keyless
operation system]
The ignition switch is turned to the “LOCK”
or “ACC” position, or the key is removed
from the ignition switch.
[For vehicles equipped with keyless opera-
tion system]
The operation mode is in OFF or ACC.
[When the engine was started using the key]
• If the key is removed and the driver’sdoor is opened, a buzzer sounds at a high
pitch intermittently to remind the driver
to turn off the lamps.
[When the engine was started using the key-
less operation function] • If the operation mode is put in OFF andthe driver’s door is opened, a buzzer
sounds at a high pitch intermittently to re-
mind the driver to turn off the lamps.
l If the following operation is performed while
the lamp switch is in the “ ”
position, the
lamps will remain on for about 3 minutes
while the driver’s door is shut and will then
automatically go out.
[Except for vehicles equipped with keyless
operation system]
The ignition switch is turned to the “LOCK”
or “ACC” position, or the key is removed
from the ignition switch.
[For vehicles equipped with keyless opera-
tion system]
The operation mode is in OFF or ACC.
NOTE l The lamp auto-cutout will not function when
the lamp switch is in the “ ” position.l
The
lamp auto-cutout function can also be dis-
abled.
For further information, we recommend you
to consult a MITSUBISHI MOTORS Author-
ized Service Point.
On vehicles equipped with MITSUBISHI
Multi-Communication System (MMCS),
screen operations can be used to make the ad-
justment. Refer to the separate owner’s man-
ual for details.
When you want to keep the lamps on: 1. In the following cases, turn the lamp switchto the “OFF” position.
[Except for vehicles equipped with keyless
operation system]
The ignition switch is in the “LOCK” or
“ACC” position.
[For vehicles equipped with keyless opera-
tion system]
The operation mode is in OFF or ACC.
2. Turn on the lamps with the switch in the
“ ”
or “ ” position again, then the
lamps will remain on.
NOTE l When the engine was started using the key, if
the driver’s door is opened and the key is re-
moved, the lamp monitor buzzer sounds at a
high pitch intermittently.
The buzzer stops when the driver’s door is
closed. (The warning is also displayed on the
multi-information display.)
The buzzer stops in the following manner.
• Turn the lamp switch to the “OFF” posi-tion.
• Close the driver’s door. l
When
the engine was started using the key-
less operation function, if the driver’s door is
opened and the operation mode is put in
OFF, the lamp monitor buzzer sounds at a
high pitch intermittently.
The buzzer stops when the driver’s door is
closed. (The warning is also displayed on the
multi-information display.)
The buzzer stops in the following manner. • Turn the lamp switch to the “OFF” posi-tion.
• Close the driver’s door.
Lamp monitor buzzer E00506100559
[When the engine was started using the key]
If
the driver’s door is opened when the key is in the
“LOCK” or “ACC” position or removed from the
ignition switch while the lamps are on, a buzzer
will sound to remind the driver to turn off the lamps.
[When the engine was started using the keyless op-
eration function]
If the driver’s door is opened when the operation
mode is in ACC or OFF with the lamps illumina-
ted, a buzzer will sound to remind the driver to turn
off the lamps.
In both cases, the buzzer will automatically stop if
the auto-cutoff function is activated, the lamp
switch is turned off, or the door is closed. Instruments and controls
3-46
3
Page 159 of 368
Parking
E00600601505
To
park the vehicle, fully engage the parking
brake, and then move the gearshift lever to 1 st
or
“R” (Reverse) position for vehicles equipped with
M/T, or set the selector lever to “P” (PARK) posi-
tion for vehicles equipped with CVT.
Parking on a hill
To prevent the vehicle from rolling, follow these
procedures:
Parking on a downhill slope
Turn the front wheels towards the kerb and move
the vehicle forward until the kerb side wheel gently
touches the kerb.
On vehicles equipped with M/T, apply the parking
brake and place the gearshift lever into the “R” (Re-
verse) position.
On vehicles equipped with CVT, apply the parking
brake and place the selector lever into the “P”
(PARK) position.
If necessary, apply chocks to wheels.
Parking on an uphill slope
Turn the front wheels away from the kerb and
move the vehicle back until the kerb side wheel gen-
tly touches the kerb.
On vehicles equipped with M/T, apply the parking
brake and place the gearshift lever into the 1 st
posi-
tion.
On vehicles equipped with CVT, apply the parking
brake and place the selector lever into the “P”
(PARK) position.
If necessary, apply chocks to wheels. NOTE
l If
your vehicle is equipped with CVT, be
sure to apply the parking brake before mov-
ing selector lever to the “P” (PARK) posi-
tion. If you move the selector lever to the
“P” (PARK) position before applying the
parking brake, it may be difficult to disen-
gage the selector lever from the “P” (PARK)
position when next you drive the vehicle, re-
quiring application of a strong force to the se-
lector lever to move from the “P” (PARK) po-
sition.
Parking with the engine running
Never leave the engine running while you take a
short sleep/rest. Also, never leave the engine run-
ning in a closed or poorly ventilated place. WARNING
l Leaving
the engine running risks injury
or death from accidentally moving the
gearshift lever (M/T) or the selector lever
(CVT) or the accumulation of toxic ex-
haust fumes on the passenger compart-
ment.
Where you park WARNING
l Do
not park your vehicle in areas where
combustible materials such as dry grass
or leaves can come in contact with a hot
exhaust, since a fire could occur. Do not keep the steering wheel fully
turned for a long time
More
effort could be required to turn the steering
wheel.
Refer to “Electric power steering system (EPS)” on
page 4-40.
When leaving the vehicle
Always carry the key and lock all doors and the tail-
gate when leaving the vehicle unattended.
Always try to park your vehicle in a well lit area. Starting and driving
4-07 4