Page 57 of 317

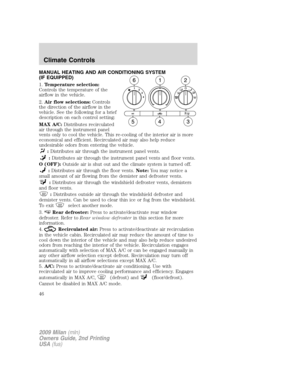
Note:If the battery is disconnected, discharged, or a new battery is
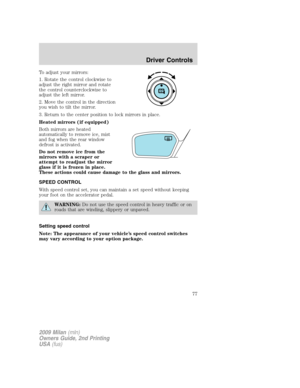
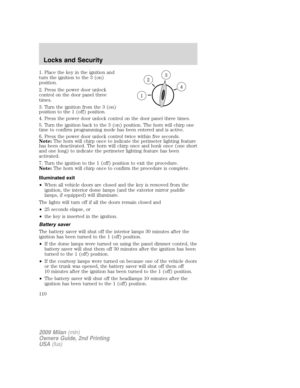
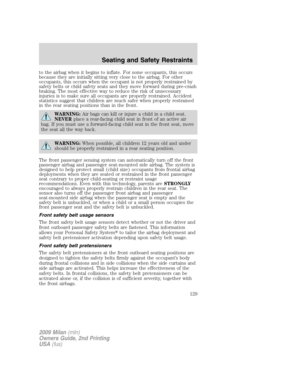
installed, the dimmer switch requires re-calibration. Rotate the dimmer
switch from the full dim position to the full dome/on position to reset.
This will ensure that your displays are visible under all lighting
conditions.
AIMING THE HEADLAMPS
The headlamps on your vehicle are properly aimed at the assembly plant.
If your vehicle has been in an accident, the alignment of your headlamps
should be checked by your authorized dealer.
Vertical aim adjustment
1. Park the vehicle directly in front of a wall or screen on a level surface,
approximately 25 feet (7.6 meters) away.
•(1) 8 feet (2.4 meters)
•(2) Center height of lamp to
ground
•(3) 25 feet (7.6 meters)
•(4) Horizontal reference line
2. Measure the height of the
headlamp bulb center from the
ground and mark an 8 foot
(2.4 meter) horizontal reference line
on the vertical wall or screen at this
height (a piece of masking tape works well).
3. Turn on the low beam headlamps to illuminate the wall or screen and
open the hood.
To see a clearer light pattern for adjusting, you may want to block the
light from one headlamp while adjusting the other.
4. On the wall or screen you will
observe an area of high intensity
light. The top of the high intensity
area should touch the horizontal
reference line, if not, the beam will
need to be adjusted using the next
step.
2009 Milan(mln)
Owners Guide, 2nd Printing
USA(fus)
Lights
57
Page 58 of 317
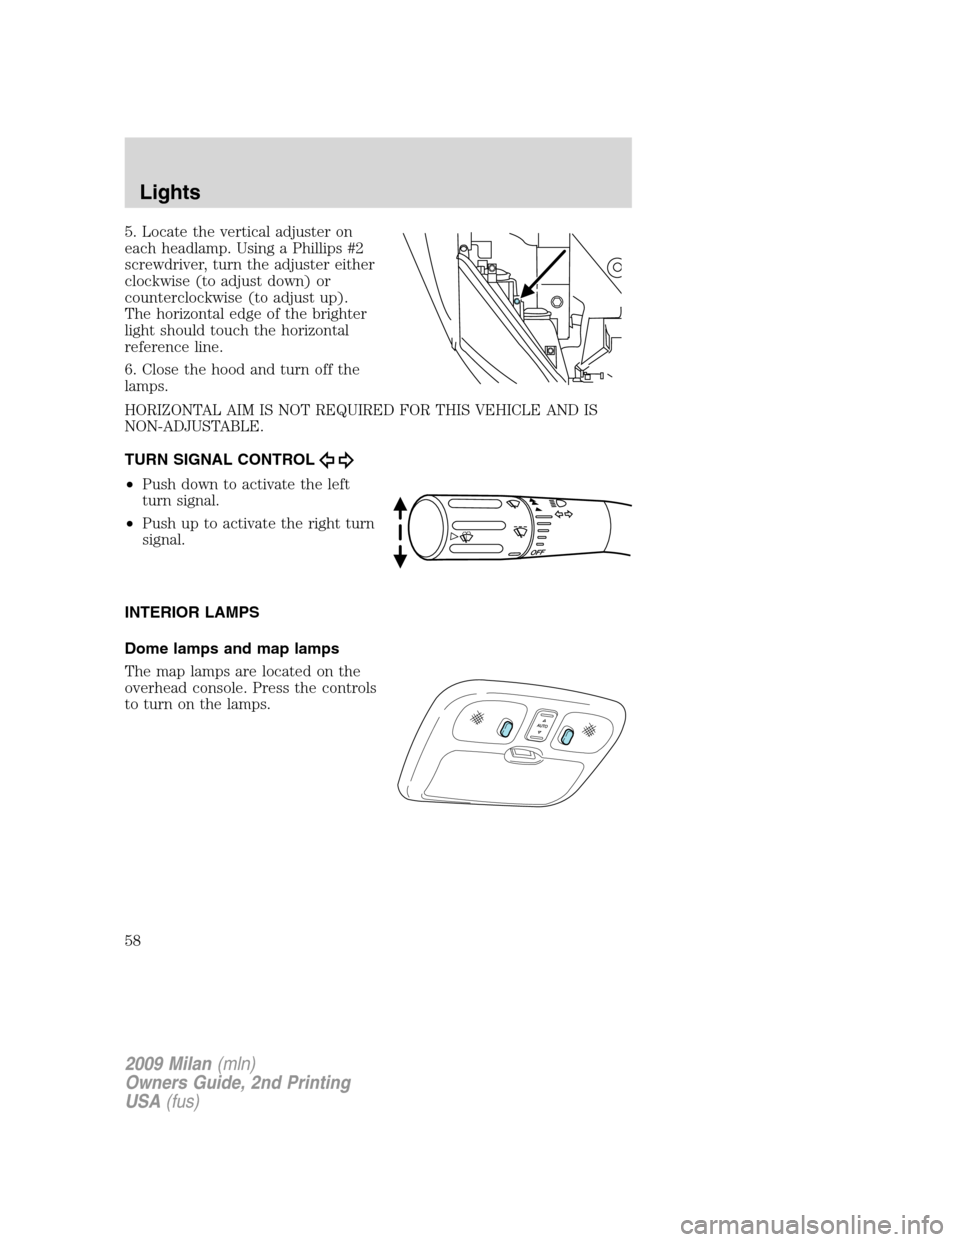
5. Locate the vertical adjuster on
each headlamp. Using a Phillips #2
screwdriver, turn the adjuster either
clockwise (to adjust down) or
counterclockwise (to adjust up).
The horizontal edge of the brighter
light should touch the horizontal
reference line.
6. Close the hood and turn off the
lamps.
HORIZONTAL AIM IS NOT REQUIRED FOR THIS VEHICLE AND IS
NON-ADJUSTABLE.
TURN SIGNAL CONTROL
•Push down to activate the left
turn signal.
•Push up to activate the right turn
signal.
INTERIOR LAMPS
Dome lamps and map lamps
The map lamps are located on the
overhead console. Press the controls
to turn on the lamps.
2009 Milan(mln)
Owners Guide, 2nd Printing
USA(fus)
Lights
58
Page 59 of 317

Your vehicle may also have reading
lamps within the rear dome lamp(s).
Press the switches on either side of
the dome lamp to turn on the
lamps.
Ambient/Mood lighting (if equipped)
Illuminates four footwells, two
console cupholders and the console
bin with a choice of seven colors.
The ambient lighting control switch
is located on the center console
near the gearshift lever. To activate,
press and release the control switch
to cycle through the seven color
choices plus the off state.
The lights come on whenever the ignition is in either the on or accessory
position.Note:The ambient lights will stay on until after the ignition is
placed in the off position and either of the front doors are opened or the
accessory delay timer expires.
BULB REPLACEMENT
Headlamp condensation
Exterior lamps are vented to accommodate normal changes in pressure.
Condensation can be a natural by-product of this design. When moist air
enters the lamp assembly through the vents, condensation can occur
when the temperature is cold. When normal condensation occurs, a thin
film of mist can form on the interior of the lens. The thin mist eventually
clears and exits through the vents during normal operation. Clearing
time may take as long as 48 hours under dry weather conditions.
Examples of acceptable condensation are:
•Presence of thin mist (no streaks, drip marks or droplets)
•Fine mist covers less than 50% of the lens
Examples of unacceptable moisture (usually caused by a lamp water
leak) are:
•Water puddle inside the lamp
•Large water droplets, drip marks or streaks present on the interior of
the lens
2009 Milan(mln)
Owners Guide, 2nd Printing
USA(fus)
Lights
59
Page 60 of 317

Take your vehicle to dealer for service if any of the above conditions of
unacceptable moisture are present.
Using the right bulbs
Replacement bulbs are specified in the chart below. Headlamp bulbs must
be marked with an authorized “D.O.T.” for North America and an “E” for
Europe to ensure lamp performance, light brightness and pattern and safe
visibility. The correct bulbs will not damage the lamp assembly or void the
lamp assembly warranty and will provide quality bulb burn time.
FunctionNumber of
bulbsTrade
number
Headlamp high beam 2 H7
Headlamp low beam 2 H11LL
Front park/turn signal lamp 23457NAK
(amber)
Front sidemarker lamp 2 168
*Rear sidemarker lamp N/ASNAP LED
70
*Stop/tail lamp N/A LED
Rear turn signal lamp 23157 A
(amber)
Backup lamp 2 921
License plate lamp 2 C5W
High-mount brake lamp 1 921
Fog lamp (if equipped) 2 H11
Map lamp 2 12V6W
Dome/reading lamp 6 578
Visor vanity lamp - Slide on Rail system
(SOR)2 37 or 14V1CP
Puddle lamp (if equipped) 2 W5W
Glove box lamp 1 194
Luggage compartment lamp 1 578
All replacement bulbs are clear in color except where noted.
To replace all instrument panel lights - see your authorized dealer.
*To replace these lamps - see your authorized dealer.
2009 Milan(mln)
Owners Guide, 2nd Printing
USA(fus)
Lights
60
Page 61 of 317
Replacing exterior bulbs
Check the operation of all the bulbs frequently.
Replacing headlamp bulbs
Highbeam bulb replacement
1. Make sure the headlamp switch is in the off position, then open the
hood.
2. Reach over the front bolster.
3. Disengage top of flexible washer
bottle filler neck from snap strap
attachment and position it to gain
access path to the high beam bulb
(Passenger side only).
4. Remove the protective cap/grill
from the headlamp housing by
grabbing it and pulling rearward.
5. Remove the bulb socket by
rotating it counterclockwise, then
pulling it straight out of the lamp
assembly.
6. Carefully pull bulb straight out of
socket and push in the new one.
WARNING:Handle a
halogen headlamp bulb
carefully and keep out of
children’s reach. Grasp the bulb
only by its plastic base and do not
touch the glass. The oil from your
hand could cause the bulb to
break the next time the
headlamps are operated.
2009 Milan(mln)
Owners Guide, 2nd Printing
USA(fus)
Lights
61
Page 62 of 317

7. For ease of bulb socket installation into the lamp assembly, hold the
bulb socket at 15 degrees clockwise from a vertical position. Use the two
lead wires oriented up to represent the vertical reference position.
8. From the 15 degree position, rotate the bulb socket clockwise to a
locked position.
9. Tuck the two lead wires into the lamp housing to assure that they are
not pinched when installing the protective rubber cap.
10. Install the protective cap/grill to the housing circular ring by pushing
and pressing it forward.
11. Re-apply pressure around the complete circular ring on the housing
to make sure the protective cap is completely seated.
12. Reconnect washer bottle filler neck snap strap by reversing step 3
(Passenger side only).
13. Turn the headlamps on and make sure they work properly. If the
headlamp was correctly aligned before you changed the bulb, you should
not need to align it again.
Lowbeam bulb replacement
1. Make sure the headlamp switch is in the off position, then open the
hood.
2. Remove the vertical shield from
the bolster by disengaging the
S-shaped clip and rotating it up in a
clockwise direction (Driver side
only).
3. Remove the air tube from the air
filter assembly (Driver side only).
2009 Milan(mln)
Owners Guide, 2nd Printing
USA(fus)
Lights
62
Page 63 of 317

4. Remove screw from oval splash
shield access panel from the
exterior wheel well area. Lift up and
rearward to release a hidden finger
attachment at the lower portion of
the panel (Passenger side only).
5. From the exterior wheel well
area, reach arm through splash
shield opening to access bulb socket
(Passenger side only).
6. Remove the protective cap/grill
from the headlamp housing by
grabbing it and pulling rearward.
7. Remove the bulb socket by
rotating it counterclockwise, then
pulling it straight out of the lamp
assembly.
8. Let go of the bulb socket and
leave it dangling near the lamp
housing (Passenger side only).
9. Reach over the front bolster in the engine area and, with a tool if
necessary, bring the bulb socket upwards into an unobstructed area to
replace the bulb (Passenger side only).
10. Disconnect the electrical
connector from the bulb socket and
discard the old bulb socket.
11. Connect the new bulb socket to
the electrical connector.
2009 Milan(mln)
Owners Guide, 2nd Printing
USA(fus)
Lights
63
Page 64 of 317

WARNING:Handle a halogen headlamp bulb carefully and keep
out of children’s reach. Grasp the bulb only by its plastic base
and do not touch the glass. The oil from your hand could cause the
bulb to break the next time the headlamps are operated.
12. After the new bulb is installed, carefully let the bulb socket dangle
downward near the lamp housing (Passenger side only).
13. From the exterior wheel well area, reach arm through splash shield
opening to install bulb socket with new bulb (Passenger side only).
14. Install the new bulb socket into the lamp assembly by aligning the
indexing fingers, then rotate clockwise to locked position.
15. Install the protective cap/grill to the housing circular ring by pushing
and pressing it forward.
16. Re-apply pressure around the complete circular ring on the housing
to make sure the protective cap is completely seated.
17. Reinstall splash shield access panel with screw (Passenger side only).
18. Reinstall air tube to the air filter assembly (Driver side only).
19. Reinstall the vertical shield to the bolster (Driver side only).
20. Turn the headlamps on and make sure they work properly. If the
headlamp was correctly aligned before you changed the bulb, you should
not need to align it again.
Replacing front parking lamp/turn signal bulbs
1. Make sure headlamp switch is in the off position, then open the hood.
2. Reach over the front bolster.
3. Remove the vertical shield from
the bolster by disengaging the
S-shaped clip and rotating it up in a
clockwise direction (Driver side
only).
2009 Milan(mln)
Owners Guide, 2nd Printing
USA(fus)
Lights
64