Page 65 of 333

The sliding tray and inside bin can
be hooked on the side or rear of the
console for extra storage.
AUXILIARY POWER POINT (12V)
Power outlets are designed for accessory plugs only. Do not insert
any other object in the power outlet as this will damage the
outlet and blow the fuse. Do not hang any type of accessory or
accessory bracket from the plug. Improper use of the power
outlet can cause damage not covered by your warranty.
The auxiliary power point is located
in the instrument panel.
A second auxiliary power point is
located on the rear side of the
center console.
Do not use the power point for
operating the cigarette lighter
element (if equipped).
To prevent the fuse from being
blown, do not use the power
point(s) over the vehicle capacity of 12 VDC/180W. If the power point or
cigar lighter socket is not working, a fuse may have blown. Refer to
Fuses and relaysin theRoadside Emergencieschapter for information
on checking and replacing fuses.
To have full capacity usage of your power point, the engine is required to
be running to avoid unintentional discharge of the battery. To prevent
the battery from being discharged:
•do not use the power point longer than necessary when the engine is
not running,
•do not leave battery chargers, video game adapters, computers and
other devices plugged in overnight or when the vehicle is parked for
extended periods.
Always keep the power point caps closed when not being used.
2009 Mariner Hybrid(mhv)
Owners Guide, 1st Printing
USA(fus)
Driver Controls
65
Page 66 of 333

Cigar/Cigarette lighter (if equipped)
Do not plug optional electrical accessories into the cigarette lighter
socket.
Do not hold the lighter in with your hand while it is heating, this will
damage the lighter element and socket. The lighter will be released from
its heating position when it is ready to be used.
Note:Improper use of the lighter can cause damage not covered by your
warranty, and can result in fire or serious injury.
Power point (110 VAC)
The 110 VAC power point outlet is used for powering electrical devices
that require up to 150W. Exceeding the 150W limit will cause the power
point to cut off the power temporarily to provide overload protection.
Note:The 110 VAC power point is
equipped with a safety cap and a
safety twist tab. They both provide
protection from inserting any object
into the power point other than the
110 VAC electrical device plug. The
safety cap should always be in a
closed position whenever the power
point outlet is not in use.
The 110 VAC power point is located
in the floor console in front of the
gearshift.
The power outlet is not designed for the following electric appliances;
they may not work properly:
•Cathode ray tube type televisions.
•Motor loads, such as vacuum cleaners, electric saws and other electric
power tools, compressor-driven refrigerators, etc.
•Measuring devices, which process precise data, such as medical
equipment, measuring equipment, etc.
•Other appliances requiring an extremely stable power supply:
microcomputer-controlled electric blankets, touch sensor lamps, etc.
Do not keep electrical devices plugged in the power point
whenever the device is not in use. It is not recommended to use
any extension cord with the 110 VAC power point, since it will
defeat the safety protection design provided by the cap and twist
2009 Mariner Hybrid(mhv)
Owners Guide, 1st Printing
USA(fus)
Driver Controls
66
Page 67 of 333

tab. It will also cause the power point to overload due to
powering multiple devices that can reach beyond the 150W load
limit.
The power point can switch to a fault mode when it is overloaded,
overheated, or shorted. For overloading and shorting conditions, unplug
your device and turn the ignition key off then on. For an overheating
condition, let the system cool off, then turn the ignition key off then on.
The 110 VAC power point can provide power whenever the vehicle
ignition is in the run position and the power point green indicator light
located in the top left corner is turned on. Refer to the indicator light
code below for the power point status.
Indicator light Code
Green light is On — Power point is ready to supply power
Green light is Off — Power point power supply is off. Ignition is not in
RUN position
Green light is blinking — Power point is in fault mode
POWER WINDOWS (IF EQUIPPED)
WARNING:Do not leave children unattended in the vehicle and
do not let children play with the power windows. They may
seriously injure themselves.
WARNING:When closing the power windows, you should verify
they are free of obstructions and ensure that children and/or
pets are not in the proximity of the window openings.
Press and pull the window switches
to open and close windows.
•Push down (to the first detent)
and hold the switch to open.
•Pull up and hold the switch to
close.
Rear Window Buffeting:When one or both of the rear windows are
open, the vehicle may demonstrate a wind throb or buffeting noise; this
noise can be alleviated by lowering a front window approximately two to
three inches.
2009 Mariner Hybrid(mhv)
Owners Guide, 1st Printing
USA(fus)
Driver Controls
67
Page 68 of 333

One touch down (AUTO)
Allows the driver’s window to open
fully without holding the control
down. Push the switch completely
down to the second detent and
release quickly. The window will
open fully. Momentarily press the
switch to any position to stop the
window operation.
Window lock
The window lock feature allows only
the driver to operate the power
windows.
To lock out all the window controls
(except for the driver’s) press the
right side of the control. Press the
left side to restore the window
controls.
Accessory delay
With accessory delay, the window switches, moon roof (if equipped) and
audio system may be used for up to 10 minutes after the ignition switch
is turned to the off position or until either front door is opened.
INTERIOR MIRROR
The interior rear view mirror has two pivot points on the support arm
which lets you adjust the mirror UP or DOWN and from SIDE to SIDE.
WARNING:Do not adjust the mirror while the vehicle is in
motion.
Automatic dimming interior rear view mirror
Your vehicle may be equipped with an interior rear view mirror which
has an auto-dimming function. The electronic day/night mirror will
change from the normal (high reflective) state to the non-glare
(darkened) state when bright lights (glare) reach the mirror. When the
mirror detects bright light from behind the vehicle, it will automatically
adjust (darken) to minimize glare.
2009 Mariner Hybrid(mhv)
Owners Guide, 1st Printing
USA(fus)
Driver Controls
68
Page 69 of 333
Without microphone
With microphone
The mirror will automatically return to the normal state whenever the
vehicle is placed in R (Reverse) to ensure a bright clear view when
backing up.
Do not block the sensors on the front and back of the interior
rear view mirror since this may impair proper mirror
performance.
Do not clean the housing or glass of any mirror with harsh
abrasives, fuel or other petroleum-based cleaning products.
EXTERIOR MIRRORS
Power side view mirrors
WARNING:Do not adjust the mirror while the vehicle is in
motion.
To adjust your mirrors:
1. Rotate the control clockwise to
adjust the right mirror and rotate
the control counterclockwise to
adjust the left mirror.
2. Move the control in the direction
you wish to tilt the mirror.
3. Return to the center position to lock mirrors in place.
2009 Mariner Hybrid(mhv)
Owners Guide, 1st Printing
USA(fus)
Driver Controls
69
Page 70 of 333
Fold-away mirrors
Fold the side mirrors in carefully
when driving through a narrow
space, like an automatic car wash.
Heated outside mirrors
(if equipped)
Both mirrors are heated
automatically to remove ice, mist
and fog when the rear window
defrost is activated.
Do not remove ice from the
mirrors with a scraper or
attempt to readjust the mirror
glass if it is frozen in place.
These actions could cause damage to the glass and mirrors.
Do not clean the housing or glass of any mirror with harsh
abrasives, fuel or other petroleum-based cleaning products.
SPEED CONTROL
With speed control set, you can maintain a set speed without keeping
your foot on the accelerator pedal.
WARNING:Do not use the speed control in heavy traffic or on
roads that are winding, slippery or unpaved.
2009 Mariner Hybrid(mhv)
Owners Guide, 1st Printing
USA(fus)
Driver Controls
70
Page 71 of 333
Setting speed control
The controls for using your speed
control are located on the steering
wheel for your convenience.
1. Press the ON control and release
it.
2. Accelerate to the desired speed.
3. Press the SET + control and
release it.
4. Take your foot off the accelerator
pedal.
5. The indicator light
on the
instrument cluster will turn on.
Note:
•Vehicle speed may vary momentarily when driving up and down a
steep hill.
•If the vehicle speed increases above the set speed on a downhill, you
may want to apply the brakes to reduce the speed.
•If the vehicle speed decreases more than 10 mph (16 km/h) below
your set speed on an uphill, your speed control will disengage.
Disengaging speed control
To disengage the speed control:
•Depress the brake pedal
Disengaging the speed control will not erase previous set speed.
2009 Mariner Hybrid(mhv)
Owners Guide, 1st Printing
USA(fus)
Driver Controls
71
Page 72 of 333
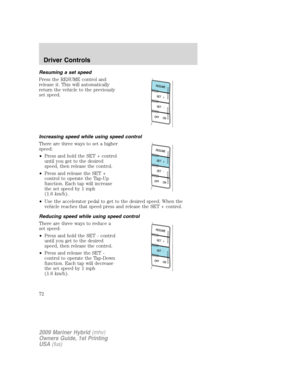
Resuming a set speed
Press the RESUME control and
release it. This will automatically
return the vehicle to the previously
set speed.
Increasing speed while using speed control
There are three ways to set a higher
speed:
•Press and hold the SET + control
until you get to the desired
speed, then release the control.
•Press and release the SET +
control to operate the Tap-Up
function. Each tap will increase
the set speed by 1 mph
(1.6 km/h).
•Use the accelerator pedal to get to the desired speed. When the
vehicle reaches that speed press and release the SET + control.
Reducing speed while using speed control
There are three ways to reduce a
set speed:
•Press and hold the SET - control
until you get to the desired
speed, then release the control.
•Press and release the SET -
control to operate the Tap-Down
function. Each tap will decrease
the set speed by 1 mph
(1.6 km/h).
2009 Mariner Hybrid(mhv)
Owners Guide, 1st Printing
USA(fus)
Driver Controls
72