Page 111 of 426
111 Controls in detail
Lighting
Hazard warning flasher
The hazard warning flasher can be
switched on at all times, even with the
SmartKey removed from the starter
switch.
The hazard warning flasher switches on
automatically when an air bag deploys.
The hazard warning flasher switch is
located on the upper part of the center
console.
1Hazard warning flasher switchSwitching on hazard warning flasher
�
Press hazard warning flasher
switch1.
All turn signals are flashing.Switching off hazard warning flasher
�
Press hazard warning flasher switch1
again.
i
With the hazard warning flasher activated
and the combination switch set for either left or
right turn, only the respective turn signals will
operate when the ignition is switched on.
i
If the hazard warning flasher has been
activated automatically, press hazard warning
flasher switch1 once to switch it off.
Page 112 of 426

112 Controls in detailLightingInterior lighting
The controls are located in the overhead
control panel.
1Left-hand reading lamp on/off
2Right-hand reading lamp on/off
3Interior lighting on/off
4Automatic control on/offAutomatic control
Deactivating
�
Slide switch4 to the right.
The interior lighting and the entry/exit
lamps remain switched off in darkness,
even when you�
unlock the vehicle
�
open a door
�
remove the SmartKey from the
starter switchActivating
�
Slide switch 4 to the left.
Interior lamps switches on in darkness
when you �
unlock the vehicle
�
open a door
�
remove the SmartKey from the
starter switch
In addition, the entry/exit lamps in the
door come on when you open a door.
The interior lighting switches off auto-
matically following a preset time delay.
For more information, see “Setting in-
terior lighting delayed switch-off”
(
�page 137).
!
An interior lamp switched on manually does
not go out automatically.
Leaving an interior lamp switch in the ON posi-
tion for extended periods of time with the engine
turned off could result in a discharged battery.
i
The interior lighting is factory-set to
automatic mode.
i
If a door remains open, the interior lamps
switch off automatically after approximately
5minutes.
Page 113 of 426

113 Controls in detail
Lighting
Manual control
Switching interior lighting on�
Press switch3.
The interior lighting switches on.
Switching interior lighting off
�
Press switch3 again.
The interior lighting switches off.
Reading lamps
The reading lamps are integrated into the
interior rear view mirror.
�
Press reading lamp switch1or2 to
switch on the desired reading lamp.
�
Press reading lamp switch1or2
again to switch off the respective
reading lamp.
Courtesy lighting
For better orientation in the dark, courtesy
lamps will illuminate the interior of your
vehicle in the following ways:�
When you open a door, the driver’s and
passenger’s footwell are illuminated.
�
If the SmartKey is in starter switch
position1, the center console will be il-
luminated.
Trunk lamp
The trunk lamp switches on if the trunk is
opened.
If you leave the trunk open for an extended
period of time, the trunk lamp will switch
off automatically after approximately
10 minutes.
i
The center console is illuminated from the
interior rear view mirror.
i
The setting selected for the interior lighting
is used for the trunk lighting as well.
Page 117 of 426

117 Controls in detail
Control system
�Control system
The control system is activated as soon as
the SmartKey in the starter switch is
turned to position1. The control system
enables you to call up information about
your vehicle and to change vehicle
settings.
For example, you can use the control sys-
tem to find out when your vehicle is next
due for service, to set the language for
messages in the instrument cluster
display, and much more.
The control system relays information to
the multifunction display.
Multifunction display
The multifunction display consists of the
display fields in the speedometer and the
tachometer. In its default state, the left
display field shows the outside tempera-
ture and main odometer, while the trip
odometer and the clock appears in the
right display field. This default setting is
referred to as the standard display.Standard display1Main odometer
2Outside temperature or speed
3Current gear selector lever
position/gear range
4Trip odometer
5Automatic transmission shift program
mode
6Clock
Warning!
G
A driver’s attention to the road and traffic
conditions must always be his/her primary
focus when driving.
For your safety and the safety of others, se-
lecting features through the multifunction
steering wheel should only be done by the
driver when traffic and road conditions
permit it to be done safely.
Bear in mind that at a speed of just 30 mph
(approximately 50 km/h), your vehicle is
covering a distance of 44 feet (approximate-
ly 14 m) every second.
Page 124 of 426

124 Controls in detailControl systemRACETIMER
The RACETIMER allows you to time and
save driving stretches in hours, minutes
and seconds.�
Press button è or ÿ repeatedly
until you see the 722S menu.
�
Press button j repeatedly until you
see the RACETIMER.1Lap
2RACETIMER
3Gear indicatorStarting the RACETIMER
�
Press button æ.
The timer starts.
Displaying intermediate time
�
Press button ç while the timer is
running.
The intermediate time is shown for
5 seconds.
Stopping the RACETIMER
�
Press button æ.
The timer stops.
Warning!
G
The RACETIMER feature is only for use on
roads and in conditions where high speed
driving is permitted. Racing on public roads
is prohibited under all circumstances and
the driver is and must always remain
responsible for following posted speed
limits.
i
You can start the RACETIMER when the
engine is running or the starter switch is in
position2 (
�page 40).
i
While the RACETIMER is being displayed,
you cannot adjust the volume using
buttonsæ or ç.
i
When you stop the vehicle and turn the
SmartKey to position 1 (
�page 40), the RACE-
TIMER stops timing. Timing is resumed when you
switch the ignition back on (�page 40) or
restart the engine (
�page 47) and then press
the æbutton.
Page 128 of 426

128 Controls in detailControl systemVehicle status message memory menu
Use the vehicle status message memory
menu to scan malfunction and warning
messages that may be stored in the
system. Such messages appear in the
multifunction display and are based on
conditions or system status the vehicle’s
system has recorded.
The vehicle status message memory menu
only appears, if messages have been
stored.
�
Press buttonè orÿ repeatedly
until you see the vehicle status mes-
sage memory in the right multifunction
display.
If the vehicle status message memory
menu does not appear, no messages
have been stored.
If conditions have occurred causing status
messages to be recorded, the number of
messages appears in the right multi-
function display:
1Number of recorded status messages
�
Press button k or j.
The stored messages will now be
displayed in the order in which they
have occurred. For malfunction and
warning messages, see “Vehicle status
messages in the multifunction display”
(�page 319).
Should the vehicle’s system record any
conditions while driving, the number of
messages will reappear in the multifunc-
tion display when the SmartKey in the
starter switch is turned to position0 or
removed from the starter switch.
If you switch off the ignition you will delete
the vehicle status message memory ex-
cept for a few high-priority messages. The
control system only deletes these messag-
es when the cause for the messages has
been rectified.
Warning!
G
Malfunction and warning messages are only
indicated for certain systems and are inten-
tionally not very detailed. The malfunction
and warning messages are simply a remind-
er with respect to the operation of certain
systems and do not replace the owner’s
and/or driver’s responsibility to maintain
the vehicle’s operating safety by having all
required maintenance and safety checks
performed on the vehicle and by bringing
the vehicle to an authorized Mercedes-Benz
Center to address the malfunction and
warning messages (
�page 319).
Page 135 of 426
�
Move the selection marker with button
æ or ç to the
Lighting
sub-
menu.
�
Press button j or k repeatedly
unti")
135 Controls in detail
Control system
Setting daytime running lamp mode
(USA only)�
Move the selection marker with button
æ or ç to the
Lighting
sub-
menu.
�
Press button j or k repeatedly
until you see this message in the left
multifunction display:
Light Circuit
Headlamp Mode
.
The selection marker is on the current
setting.
�
Press buttonæ orç to select
manual operation (
Manual
) or daytime
running lamp mode (
Constant
)
activated.With daytime running lamp mode activated
and the exterior lamp switch in
positionM orU, the low-beam
headlamps are switched on when the
engine is running.
In low ambient light conditions the
following lamps will switch on additionally:
�
Parking lamps
�
Tail lamps
�
License plate lamps
�
Side marker lamps
For more information on the daytime
running lamp mode, see “Daytime running
lamp mode” (
�page 108).Setting locator lighting
With the locator lighting feature activated
and the exterior lamp switch in
positionU, the following lamps will
switch on during darkness when the
vehicle is unlocked with the SmartKey:
�
Parking lamps
�
Tail lamps
�
License plate lamps
�
Side marker lamps
�
Front fog lamps
The locator lighting switches off when the
driver’s door is opened.
If you do not open a door after unlocking
the vehicle with the SmartKey the lamps
will switch off automatically after approxi-
mately 40 seconds.
i
This function is not available in countries
where the daytime running lamp mode is manda-
tory and therefore in a constant mode.
i
For safety reasons, resetting the
Lighting
submenu to factory settings while driving
(
�page 129) will not deactivate the daytime
running lamp mode.
You see the following message in the right multi-
function display:
Cannot be fully reset to
factory settings while driving
.
Page 137 of 426
137 Controls in detail
Control system
You can temporarily deactivate the
headlamps delayed switch-off feature:�
Before leaving the vehicle turn the
SmartKey in the starter switch to
position0.
�
Then turn it to position2 and back
to0.
The delayed switch-off feature is deac-
tivated. It will reactivate as soon as you
reinsert the SmartKey in the starter
switch.Setting interior lighting delayed
switch-off
Use this function to set whether you would
like the interior lighting to remain on for
10 seconds during darkness after you have
removed the SmartKey from the starter
switch.
�
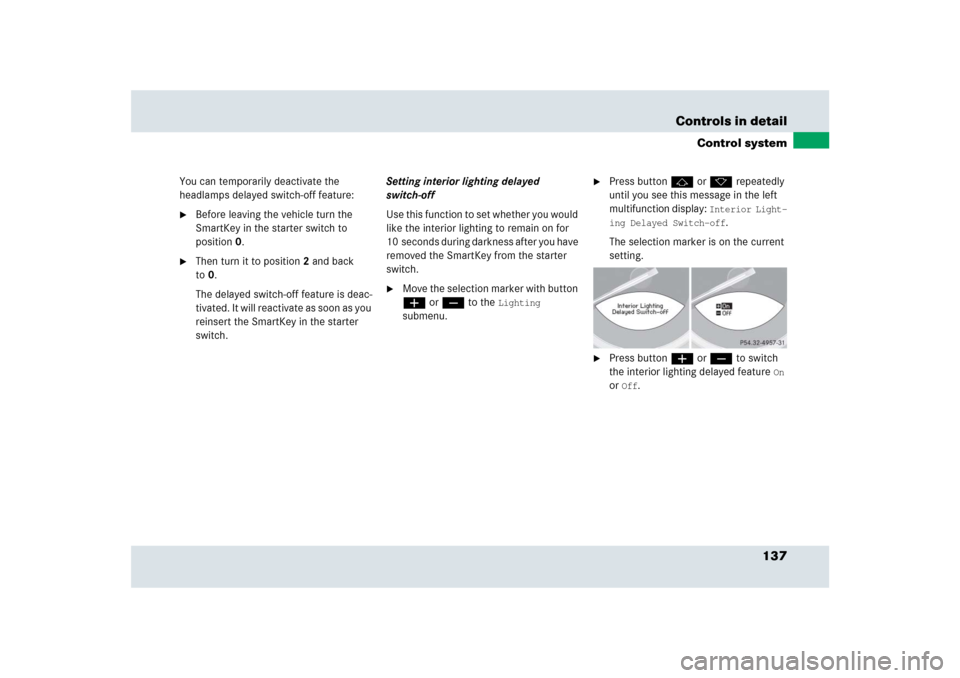
Move the selection marker with button
æ or ç to the
Lighting
submenu.
�
Press button j or k repeatedly
until you see this message in the left
multifunction display:
Interior Light-
ing Delayed Switch-off
.
The selection marker is on the current
setting.
�
Press button æ or ç to switch
the interior lighting delayed feature
On
or
Off
.