Page 128 of 426

128 Controls in detailControl systemVehicle status message memory menu
Use the vehicle status message memory
menu to scan malfunction and warning
messages that may be stored in the
system. Such messages appear in the
multifunction display and are based on
conditions or system status the vehicle’s
system has recorded.
The vehicle status message memory menu
only appears, if messages have been
stored.
�
Press buttonè orÿ repeatedly
until you see the vehicle status mes-
sage memory in the right multifunction
display.
If the vehicle status message memory
menu does not appear, no messages
have been stored.
If conditions have occurred causing status
messages to be recorded, the number of
messages appears in the right multi-
function display:
1Number of recorded status messages
�
Press button k or j.
The stored messages will now be
displayed in the order in which they
have occurred. For malfunction and
warning messages, see “Vehicle status
messages in the multifunction display”
(�page 319).
Should the vehicle’s system record any
conditions while driving, the number of
messages will reappear in the multifunc-
tion display when the SmartKey in the
starter switch is turned to position0 or
removed from the starter switch.
If you switch off the ignition you will delete
the vehicle status message memory ex-
cept for a few high-priority messages. The
control system only deletes these messag-
es when the cause for the messages has
been rectified.
Warning!
G
Malfunction and warning messages are only
indicated for certain systems and are inten-
tionally not very detailed. The malfunction
and warning messages are simply a remind-
er with respect to the operation of certain
systems and do not replace the owner’s
and/or driver’s responsibility to maintain
the vehicle’s operating safety by having all
required maintenance and safety checks
performed on the vehicle and by bringing
the vehicle to an authorized Mercedes-Benz
Center to address the malfunction and
warning messages (
�page 319).
Page 130 of 426
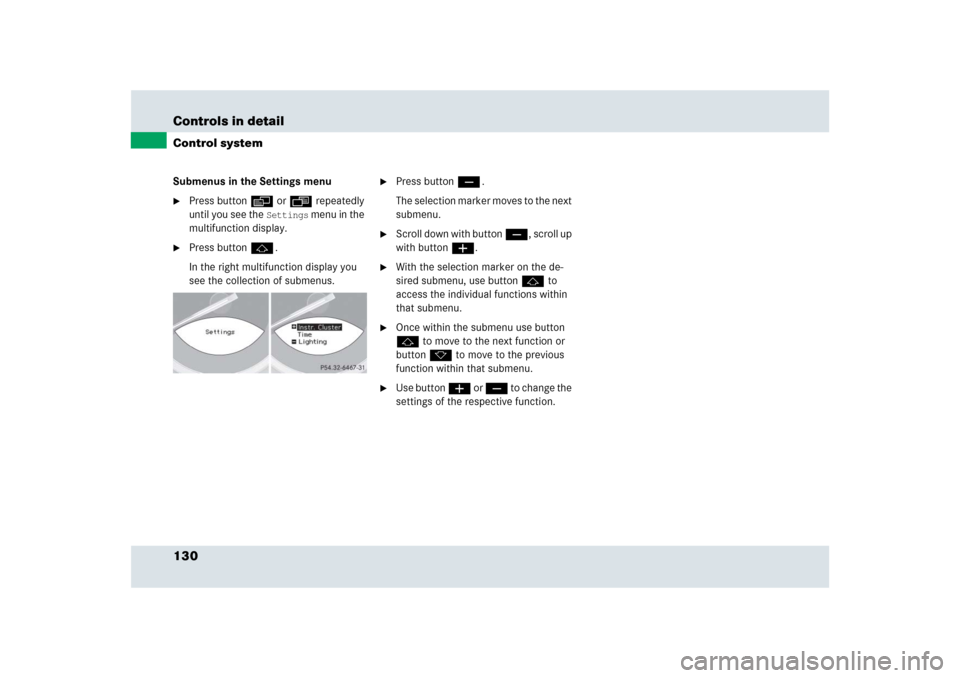
130 Controls in detailControl systemSubmenus in the Settings menu�
Press button è or ÿ repeatedly
until you see the
Settings
menu in the
multifunction display.
�
Press button j.
In the right multifunction display you
see the collection of submenus.
�
Press button ç.
The selection marker moves to the next
submenu.
�
Scroll down with button ç, scroll up
with button æ.
�
With the selection marker on the de-
sired submenu, use button j to
access the individual functions within
that submenu.
�
Once within the submenu use button
j to move to the next function or
button k to move to the previous
function within that submenu.
�
Use button æ or ç to change the
settings of the respective function.
Page 152 of 426
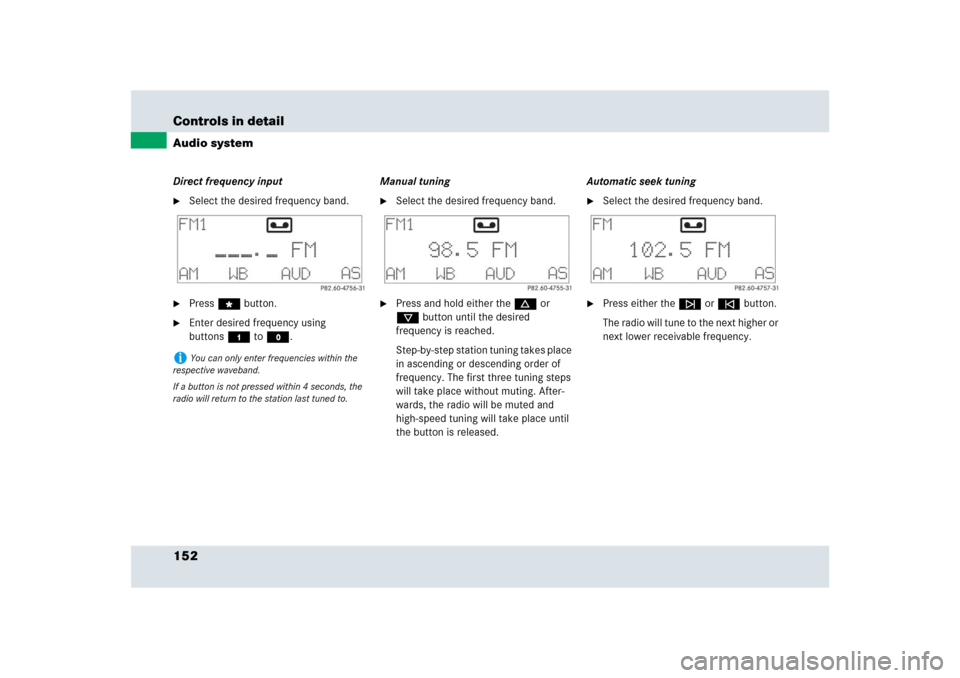
152 Controls in detailAudio systemDirect frequency input�
Select the desired frequency band.
�
Press“ button.
�
Enter desired frequency using
buttons4 toM.Manual tuning
�
Select the desired frequency band.
�
Press and hold either thed or
cbutton until the desired
frequency is reached.
Step-by-step station tuning takes place
in ascending or descending order of
frequency. The first three tuning steps
will take place without muting. After-
wards, the radio will be muted and
high-speed tuning will take place until
the button is released.Automatic seek tuning
�
Select the desired frequency band.
�
Press either thef or ebutton.
The radio will tune to the next higher or
next lower receivable frequency.
i
You can only enter frequencies within the
respective waveband.
If a button is not pressed within 4 seconds, the
radio will return to the station last tuned to.
Page 158 of 426

158 Controls in detailAudio systemCD changer operation
General notes
Should excessively high temperatures oc-
cur while in CD mode,
CD TEMP HIGH
will
appear in the display and the CD will be
muted. The unit will then switch back to
the last operating mode used until the tem-
perature has decreased to a safe operating
level.
Should excessively low temperatures
occur while in CD mode,
CD TEMP LOW
will
appear in the display, but the CD will
continue to play.
Handle CDs carefully to prevent interfer-
ence during playback. Avoid fingerprints
and dust on CDs. Do not write on CDs or
apply any labels or other material to them.Only use original CDs. Using copied CDs
may create problems during playback.
Clean CDs from time to time with a com-
mercially available cleaning cloth. Do not
use solvents, anti-static sprays, etc. for
cleaning. Replace the CD in its case after
use. Protect CDs from heat and direct
sunlight.
Only use CDs, which bear the label shown
and that conform to the compact disc
digital audio standard (IEC 60908). You
can therefore only use CDs with a
maximum thickness of 1.3 mm.
i
Use of CDs which do not meet this standard
may cause damage to the CD changer. Do not
play single-CDs (80 mm) with an adapter.
Your CD drive has been designed to play CDs
which correspond to the IEC 60908 standard.
If you insert thicker data carriers, e.g. ones that
have data on both sides (one side with DVD data,
the other side with audio data), they cannot be
ejected and will damage the drive.Warning!
G
The CD changer is a Class 1 laser product.
There is a danger of invisible laser radiation
if the cover is opened or damaged.
Do not remove the cover. The CD changer
does not contain any parts which can be ser-
viced by the user. For safety reasons, have
any service work which may be necessary
performed only by qualified personnel.
Page 160 of 426

160 Controls in detailAudio systemSelecting CDs�
You can select from among the CDs in
the CD magazine using buttons4
to6.CD and the magazine slot number of the
selected CD appear in the display. The
number of the current track is
displayed after
TRACK
.
If there is no CD in the selected maga-
zine slot, you see
NO CD
appears on the
display with the corresponding slot
number.Skipping tracks forward/backward
�
Skipping tracks forward�
Pressf button.
The next track will be played.
�
Skipping tracks backward�
Presse button.
If the track has been playing for
more than 10 seconds, it will revert
to the start of that track. If it has
been playing for less than
10 seconds, it will revert to the
preceding track.
Pressing thef or ebutton repeat-
edly will result in multiple tracks being
skipped.
Fast forward/reverse
�
Fast forward�
Press and holdd button until
desired point has been reached.
�
Fast reverse�
Press and holdc button until
desired point has been reached.
Scanning
�
Starting scan�
Press2 button.SC appears in the display.
Each track on the current CD will be
played for approximately 8 seconds
in ascending order.
�
Ending scan�
Press2, d, c, f or
ebutton.
i
The relative time of the track is shown on the
display during the search.
Page 166 of 426

166 Controls in detailAudio systemEmergency calls “911”
The following describes how to dial a “911”
emergency call using the audio system
head unit when a Mercedes-Benz specified
mobile phone is connected with the Blue-
tooth
® interface. Unless otherwise speci-
fied, the descriptions refer to the audio
system head unit.
Consult the separate telephone operating
instructions that came with your mobile
phone for information on how to place a
“911” emergency call on the mobile
phone. The following conditions must be met for a
“911” emergency call:
�
Telephone must be switched on.
�
The corresponding mobile communica-
tions network must be available.
If you cannot make an emergency call, you
will have to initiate rescue measures
yourself. Placing a “911” emergency call using
audio head unit with the phone locked
�
Press hbutton to switch to
telephone operation.
You see
CODE?
in the audio display.
�
Press button4 on the audio head
unit until you see
911
in the audio
display.
You see
911
in the audio display while
the telephone establishes the connec-
tion.
�
Wait until the emergency call center
answers, then describe the emergency.
Warning!
G
The “911” emergency call system is a public
service. Using it without due cause is a
criminal offense.
i
Emergency calls may not be possible with all
telephone networks or if certain network servic-
es and/or telephone functions are active. Check
with your local service providers.
Page 171 of 426

171 Controls in detail
Automatic transmission
Gear selector lever positions
Effect
ì
Park position
Gear selector lever position
when the vehicle is parked. Place
gear selector lever in park
positionP only when vehicle is
stopped. The park position is not
intended to serve as a brake
when the vehicle is parked.
Rather, the driver should always
set the parking brake in addition
to placing the gear selector lever
in park positionP to secure the
vehicle.
The SmartKey can only be
removed from the starter switch
with the gear selector lever in
park positionP. With the
SmartKey removed, the gear
selector lever is locked in park
positionP.
Effect
í
Reverse gear
Place gear selector lever in re-
verse gearR only when vehicle is
stopped.
Effect
ë
Neutral
No power is transmitted from the
engine to the drive axle. When
the brakes are released, the
vehicle can be moved freely
(pushed or towed).
To avoid damage to the trans-
mission, never engage neutral
positionN while driving.
If the ESP
® is deactivated or
malfunctioning:
Move gear selector lever to neu-
tral positionN only if the vehicle
is in danger of skidding, e.g. on
icy roads.
ê
Drive position
The transmission shifts
automatically. All five forward
gears are available.
Page 179 of 426
 to the MAN setting.
The transmission switches to the
manual program mode")
179 Controls in detail
Automatic transmission
Activating manual shift program�
Turn program mode selector switch1
(�page 175) to the MAN setting.
The transmission switches to the
manual program modeM. The letter
M
appears in the right multifunction dis-
play and the lamp in program mode se-
lector switch3 (
�page 179) comes
on. Automatic shifting is switched off.
The gear range is not limited.
You can change the gears manually when
the gear selector lever is in drive
positionD. You can upshift or downshift
through the gears in succession.Selecting manual shift program mode
3Program mode selector switch for the
manual shift program
I Sport For sporty driving
II Super Sport For very sporty driving
III Race For racing-like driving
1
The individual shifting programs differ with
regard to spontaneity, response time, and
shifting smoothness.
�
Turn program selector switch3 to the
desired setting (I, II or III).
Downshifting
�
Pull the left shift paddle1
(�page 177).
or
�
Briefly press the gear selector lever to
the left in theD-direction.
The transmission shifts to the next
lower gear.
1Please always drive carefully and obey applicable
speed limits.
i
The currently selected manual shift program
(I, II or III) does not appear in the right multifunc-
tion display. The current setting is indicated only
on the program mode selector switch 3.Warning!
G
On slippery road surfaces, never downshift
in order to obtain braking action. This could
result in drive wheel slip and reduced
vehicle control. Your vehicle’s ABS will not
prevent this type of loss of control.
��