Page 49 of 426

49 Getting started
Driving
Starting difficulties
If the engine does not start as described,
carry out the following steps:�
Turn the SmartKey in the starter switch
to position0 and repeat starting
procedure (
�page 48).
�
Remember that extended starting
attempts can drain the battery.
If the engine does not start after several
starting attempts, there could be a
malfunction in the engine electronics or in
the fuel supply system.
�
Notify an authorized Mercedes-Benz
Center or call Roadside Assistance.
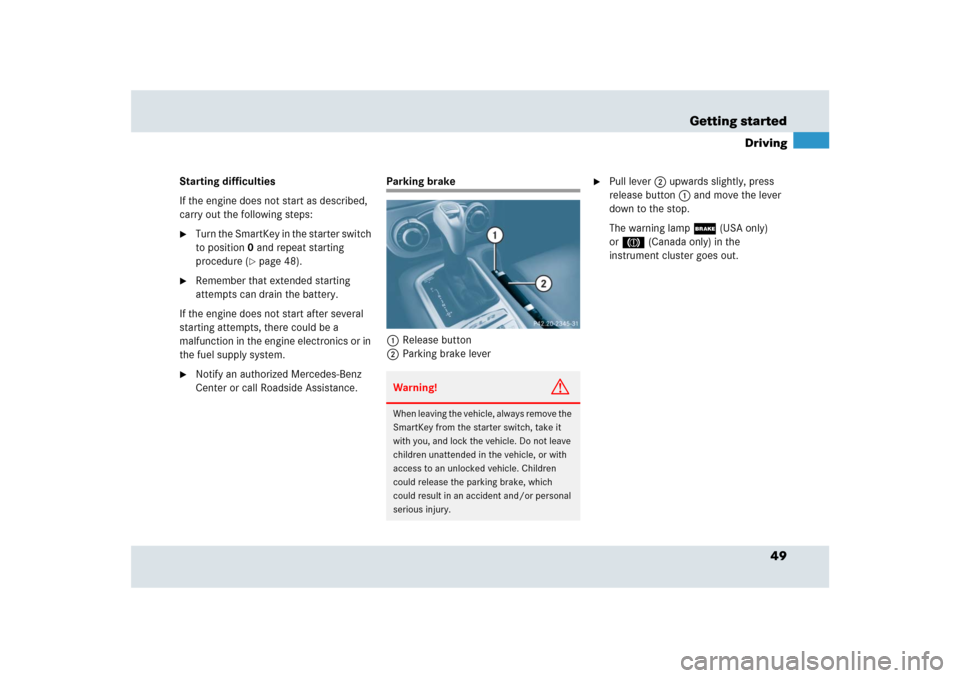
Parking brake
1Release button
2Parking brake lever
�
Pull lever2 upwards slightly, press
release button1 and move the lever
down to the stop.
The warning lamp; (USA only)
or3 (Canada only) in the
instrument cluster goes out.
Warning!
G
When leaving the vehicle, always remove the
SmartKey from the starter switch, take it
with you, and lock the vehicle. Do not leave
children unattended in the vehicle, or with
access to an unlocked vehicle. Children
could release the parking brake, which
could result in an accident and/or personal
serious injury.
Page 51 of 426

51 Getting started
Driving
Switching on headlamps
Low-beam headlamps
The exterior lamp switch is located on the
dashboard to the left of the steering wheel.Exterior lamp switch1Off
2Low-beam headlamps on�
Turn the exterior lamp switch to
positionB.
The low-beam headlamps come on.High beam
The combination switch is located on the
left of the steering column.
Combination switch1High beam
2High-beam flasher�
Push combination switch in direction of
arrow1.
The high-beam headlamps and
high-beam headlamp indicator
lampA in the instrument cluster
come on (
�page 29).
For more information on headlamps, see
“Lighting” (
�page 106).
Turn signals
The combination switch is located on the
left of the steering column.Combination switch1Turn signals, right
2Turn signals, left�
Press the combination switch up 1 or
down 2.
The corresponding turn signal indicator
lampL orK in the instrument
cluster flashes (
�page 29).
The combination switch resets automati-
cally after major directional changes.
Page 55 of 426

55 Getting started
Parking and locking
�Parking and locking
You have now completed your first drive.
You have properly stopped and parked
your vehicle. End your drive as follows.
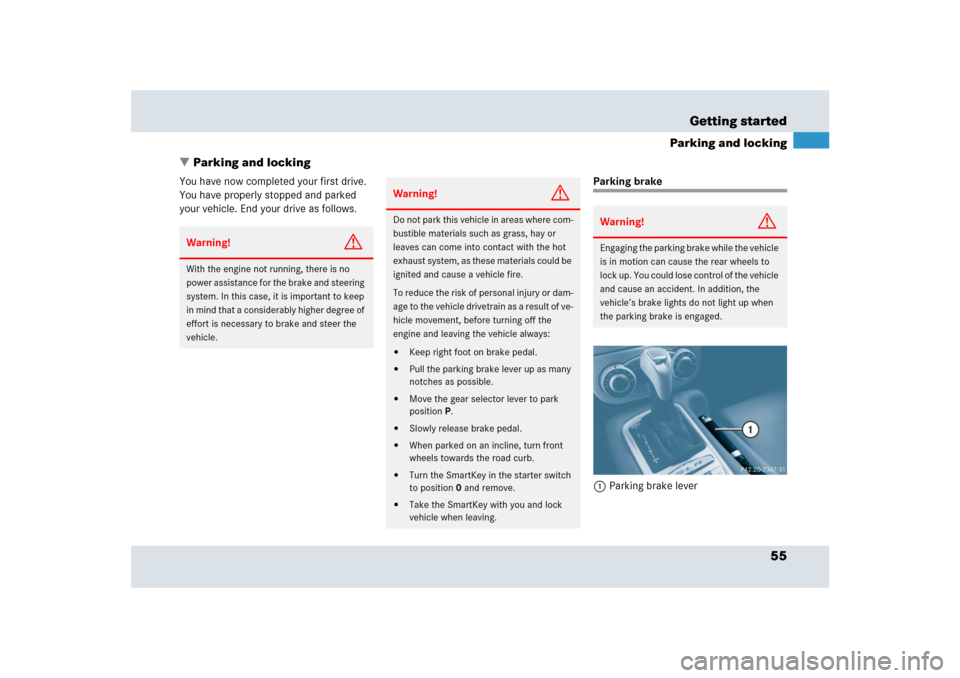
Parking brake
1Parking brake lever
Warning!
G
With the engine not running, there is no
power assistance for the brake and steering
system. In this case, it is important to keep
in mind that a considerably higher degree of
effort is necessary to brake and steer the
vehicle.
Warning!
G
Do not park this vehicle in areas where com-
bustible materials such as grass, hay or
leaves can come into contact with the hot
exhaust system, as these materials could be
ignited and cause a vehicle fire.
To reduce the risk of personal injury or dam-
age to the vehicle drivetrain as a result of ve-
hicle movement, before turning off the
engine and leaving the vehicle always:�
Keep right foot on brake pedal.
�
Pull the parking brake lever up as many
notches as possible.
�
Move the gear selector lever to park
positionP.
�
Slowly release brake pedal.
�
When parked on an incline, turn front
wheels towards the road curb.
�
Turn the SmartKey in the starter switch
to position0 and remove.
�
Take the SmartKey with you and lock
vehicle when leaving.
Warning!
G
Engaging the parking brake while the vehicle
is in motion can cause the rear wheels to
lock up. You could lose control of the vehicle
and cause an accident. In addition, the
vehicle’s brake lights do not light up when
the parking brake is engaged.
Page 57 of 426

57 Getting started
Parking and locking
Locking
�
Exit the vehicle and close all doors.
Opening a door causes the door win-
dows on that side of the vehicle to
open slightly. They will return to the up
position when the door is closed.
�
Press the lock button‹ on the
SmartKey (
�page 38).
With the hood, trunk and all doors
closed, all turn signal lamps flash three
times. The anti-theft alarm system is
armed.
For more information, see “Locking and
unlocking” (
�page 98).
Warning!
G
To prevent possible personal injury, always
keep hands and fingers away from the door
openings when closing the doors. Be espe-
cially careful when small children are
around.
Before closing doors, make sure there is no
possibility of someone getting caught in a
door during closing.Warning!
G
When leaving the vehicle, always remove the
SmartKey from the starter switch, take it
with you, and lock the vehicle. Do not leave
children unattended in the vehicle, or with
access to an unlocked vehicle. A child’s
unsupervised access to a vehicle could
result in an accident and/or serious
personal injury.
Warning!
G
Only Mercedes-Benz SLR McLaren Roadster
722 S:
Because of the carbon fiber the footwell
could be slippery when wet. Be careful when
exiting the vehicle with wet shoe soles, you
could slip on it.!
The door windows will not open or close if
the battery is discharged or the door windows
are impeded by ice. In this case open or close
the door with increased caution. Do not attempt
to force the door opened or closed. Doing so
may damage the door seals or the side window.
i
If you hear a warning signal you have forgot-
ten to switch off the headlamps before opening
the driver’s door.
In addition the message$
Lights Are
Still On
appears in the multifunction display.
Switch off the headlamps.
Page 66 of 426

66 Safety and SecurityOccupant safetyThe air bags will not deploy in impacts
which do not exceed the system’s
deployment thresholds. You will then be
protected by the fastened seat belts.The passenger air bag will only be de-
ployed if:
�
the system, based on the OCS weight
sensor readings, senses that the pas-
senger seat is occupied
�
the PASSENGER AIR BAG OFF indicator
lamp in the lower part of the center
console is not lit (
�page 70)
�
the impact exceeds a preset
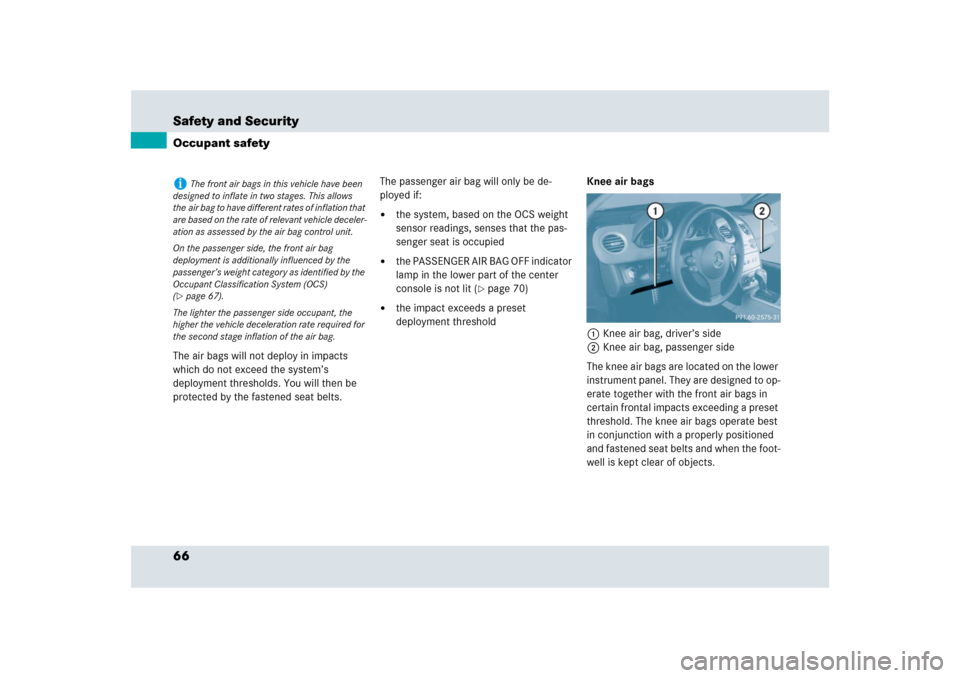
deployment thresholdKnee air bags
1Knee air bag, driver’s side
2Knee air bag, passenger side
The knee air bags are located on the lower
instrument panel. They are designed to op-
erate together with the front air bags in
certain frontal impacts exceeding a preset
threshold. The knee air bags operate best
in conjunction with a properly positioned
and fastened seat belts and when the foot-
well is kept clear of objects.
i
The front air bags in this vehicle have been
designed to inflate in two stages. This allows
the air bag to have different rates of inflation that
are based on the rate of relevant vehicle deceler-
ation as assessed by the air bag control unit.
On the passenger side, the front air bag
deployment is additionally influenced by the
passenger’s weight category as identified by the
Occupant Classification System (OCS)
(
�page 67).
The lighter the passenger side occupant, the
higher the vehicle deceleration rate required for
the second stage inflation of the air bag.
Page 76 of 426

76 Safety and SecurityOccupant safetyChildren in the vehicle
If an infant or child is traveling with you in
the vehicle:�
Secure the child using an infant or child
restraint appropriate to the age and
size of the child.
�
Make sure the infant or child is proper-
ly secured at all times while the vehicle
is in motion.
Infant and child restraint seats and
information on choosing an appropriate
restraint system can be obtained from any
Mercedes-Benz Center.Infant and child restraint systems
We recommend all infants and children be
properly restrained at all times while the
vehicle is in motion.
The passenger lap-shoulder belt has a
special seat belt retractor for secure
fastening of child restraints.
To fasten a child restraint follow child
restraint instructions for mounting. Then
pull the shoulder belt out completely and
let it retract. During seat belt retraction, a
ratcheting sound can be heard to indicate
that the special seat belt retractor is acti-
vated. The seat belt is now locked. Push
down on child restraint to take up any
slack.
To deactivate, release seat belt buckle and
let seat belt retract completely.
The seat belt can again be used in the
usual manner.Warning!
G
Do not leave children unattended in the
vehicle, even if they are secured in a child
restraint system. The children could�
injure themselves on parts of the vehicle
�
be seriously or fatally injured through
excessive exposure to extreme heat or
cold
Do not expose the child restraint system to
direct sunlight. The child restraint system’s
metal parts, for example, could become very
hot, and the child could be burned on these
parts.
If children open a door, they could�
injure other persons
�
get out of the car and injure themselves
or be injured by following traffic
Do not carry heavy or hard objects in the
passenger compartment unless they are
firmly secured in place.
For more information, please refer to the
“Useful features” section (
�page 209)
through (
�page 210).
Unsecured or improperly positioned cargo
increases a child’s risk of injury in the event
of
�
strong braking maneuvers
�
sudden changes of direction
�
an accident
Page 82 of 426

82 Safety and SecurityDriving safety systemsIn this section you will find information on
the following driving safety systems:�
ABS (A
ntilock B
rake S
ystem)
�
BAS (B
rake A
ssist S
ystem)
�
ESP
® (E
lectronic S
tability P
rogram)
�
Electro-hydraulic brake system
ABS
The Antilock Brake System (ABS) regulates
the brake pressure so that the wheels do
not lock during braking. This allows you to
maintain the ability to steer your vehicle.
The ABS is functional above a speed of ap-
proximately 5 mph (8 km/h) independent
of road surface conditions.
On slippery road surfaces, the ABS will
respond even to light brake pressure.
The -indicator lamp in the instrument
cluster comes on when you switch on the
ignition. It goes out when the engine is run-
ning.
Warning!
G
The following factors increase the risk of
accidents:�
Excessive speed, especially in turns
�
Wet and slippery road surfaces
�
Following another vehicle too closely
The driving safety systems described in this
section cannot reduce these risks or pre-
vent the natural laws of physics from acting
on the vehicle.
Always adapt your driving style to the pre-
vailing road an weather conditions and keep
a safe distance to other road users and ob-
jects on the street.
i
In winter operation, the maximum effective-
ness of the ABS, the BAS, the ESP
®, and the
electro-hydraulic brake system is only achieved
with winter tires (
�page 292) or snow chains as
required.
Warning!
G
Do not pump the brake pedal. Use firm,
steady brake pedal pressure instead. Pump-
ing the brake pedal defeats the purpose of
the ABS and significantly reduces braking
effectiveness.
Page 96 of 426
Controls in detailLocking and unlocking
Lighting
Instrument cluster
Control system
Audio system
Automatic transmission
Good visibility
Automatic climate control
Open air
Driving systems
Useful features