2009 MERCEDES-BENZ GL SUV start stop button
[x] Cancel search: start stop buttonPage 96 of 309

Changing gears
The automatic transmission shifts into indi-
vidual gears automatically. This automatic
gearshifting behaviour is determined by:
R
drive position D(Y page 93) with shift
ranges 6,5,4,3,2and 1(Y page 94)
R the selected drive program
(S/M) (Ypage 95)
R the position of the accelerator pedal
(Y page 94)
R the road speed
R select a possible shift range restriction
In drive position D, you can use the DIRECT
SELECT steering wheel gearshift paddle
(Y page 94) to influence the gearshifts
made by the automatic transmission and shift
gear yourself.
Gear indicator The current gear is shown in the multi-func-
tion display.
:
Gear indicator
! If the gear indicator in the multi-function
display is not working, you should pull away
carefully to check whether the desired gear
is engaged. Ideally, you should select posi-
tion Dand drive program S*. Do not restrict
the shift range. Transmission positions B
Park position
Prevents the vehicle from rolling
away when stopped. Only select
P
when your vehicle is stationary.
If you switch off the engine using
the key and then remove the key or
open one of the front doors, the
automatic transmission will auto-
matically shift to park position P.
If you switch off the engine using
the Start/Stop button and open
the driver's door, the automatic
transmission automatically shifts
to park position P. C
Reverse gear
Only shift the automatic transmis-
sion to
Rwhen the vehicle is sta-
tionary. A
Neutral
Do not shift the automatic trans-
mission to
Nwhile you are driving.
Otherwise, the automatic trans-
mission could be damaged.
If you switch off the engine using
the key or the Start/Stop button,
the automatic transmission auto-
matically shifts to neutral N.
If ESP ®
is deactivated or faulty,
only shift the automatic transmis-
sion to Nif the vehicle is in danger
of skidding, e.g. on icy roads. 7
Drive
The automatic transmission
changes gear automatically. All
forward gears are available. Transmission
93Controls
* optional
X164_AKB; 2; 3, en-GB
wobuchh,
Version: 2.11.8.1 2009-03-31T14:14:58+02:00 - Seite 93 Z
Dateiname: 6515431202_buchblock.pdf; erzeugt am 01. Apr 2009 00:17:12; WK
Page 99 of 309
Drive program
Sis characterised by the fol-
lowing:
R sporty engine and suspension configura-
tion
R the vehicle pulling away in first gear
R the automatic transmission shifting up
later
R the late shift point of the automatic trans-
mission can lead to higher fuel consump-
tion
If you have selected transmission position D,
you can activate the manual drive program
and shift up or down through the individual
gears. The gear currently selected and
engaged is shown in the multi-function dis-
play.
X To deactivate: press program selector
button :repeatedly until Sor Mappears
in the multi-function display.
or
X Restart the engine.
The automatic transmission then switches
to the automatic drive program.
Upshifting
X Pull right-hand steering wheel gearshift
paddle (Y page 94).
The automatic transmission shifts up to the
next gear.
Downshifting G
Risk of accident
Do not change down for additional engine
braking on a slippery road surface. This could
cause the drive wheels to lose their grip and
the vehicle could skid.
X Pull left-hand steering wheel gearshift pad-
dle (Y page 95).
The automatic transmission shifts down to
the next gear.
i If you brake the vehicle or stop without
shifting down, the automatic transmission will shift down to a gear that will allow the
vehicle to accelerate or pull away again.
Kickdown
You can also use kickdown for maximum
acceleration in manual drive program M.
X Depress the accelerator pedal beyond the
pressure point.
The transmission shifts to a lower gear
depending on the engine speed.
X Shift back up once the desired speed is
reached.
i If you apply full throttle, the automatic
transmission shifts up to the next gear
when the maximum engine speed is
reached. This prevents the engine from
overrevving. Instrument cluster
Points to remember
You will find an illustration of the instrument
cluster in the "At a glance" section
(Y page 25). G
Risk of accident
No further messages can be displayed if the
instrument cluster and/or the multi-function
display fails.
This means that you will not see information
about the driving situation, such as the speed,
outside temperature, warning/indicator
lamps, display messages or system failures.
The vehicle's handling characteristics may be
affected. Adjust your driving style and speed
accordingly.
Immediately consult a qualified specialist
workshop which has the necessary specialist
knowledge and tools to carry out the work
required. Mercedes-Benz recommends that
you use a Mercedes-Benz Service Centre for
this purpose. In particular, work relevant to
safety or on safety-related systems must be
carried out at a qualified specialist workshop. 96
Instrument clusterControls
X164_AKB; 2; 3, en-GB
wobuchh
,V ersion: 2.11.8.1
2009-03-31T14:14:58+02:00 - Seite 96
Dateiname: 6515431202_buchblock.pdf; erzeugt am 01. Apr 2009 00:17:13; WK
Page 118 of 309
do not switch the automatic transmission to
another gear.
If you do not wait for the gear change process
to complete, it may not be correctly imple-
mented. The transfer case may then be in
neutral and the connection between the
engine and the drive axles may be disen-
gaged. The vehicle could then move freely,
even if a gear is engaged, and could inadver-
tently start moving, particularly if it is on a
slope.
Observe the messages in the multi-function
display.
From HIGH RANGE to LOW RANGE
! Only carry out the gear change process if:
R the engine is running
R the automatic transmission is in N
R you are not driving above 40 km/h
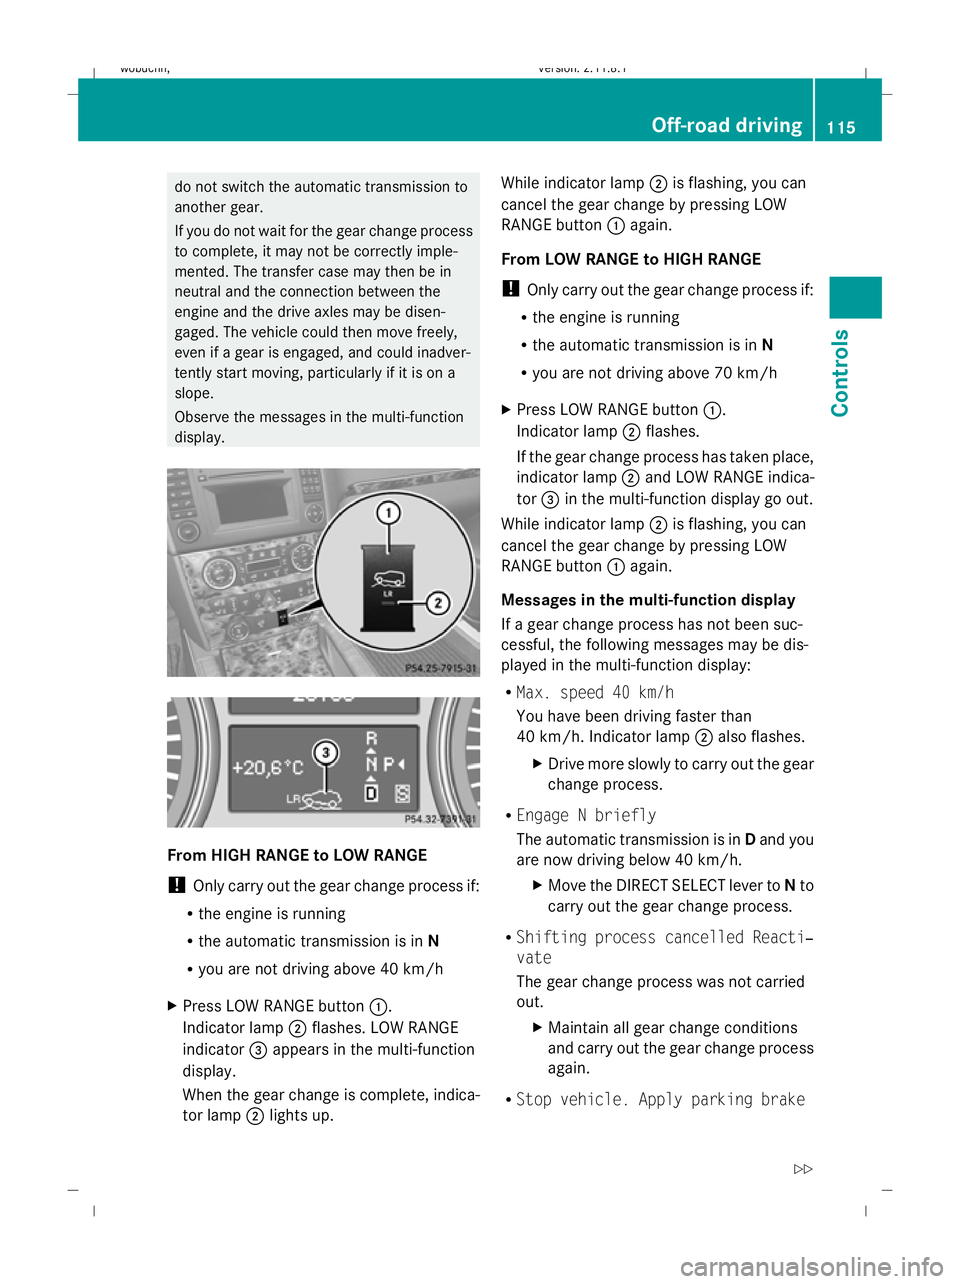
X Press LOW RANGE button :.
Indicator lamp ;flashes. LOW RANGE
indicator =appears in the multi-function
display.
When the gear change is complete, indica-
tor lamp ;lights up. While indicator lamp
;is flashing, you can
cancel the gear change by pressing LOW
RANGE button :again.
From LOW RANGE to HIGH RANGE
! Only carry out the gear change process if:
R the engine is running
R the automatic transmission is in N
R you are not driving above 70 km/h
X Press LOW RANGE button :.
Indicator lamp ;flashes.
If the gear change process has taken place,
indicator lamp ;and LOW RANGE indica-
tor =in the multi-function display go out.
While indicator lamp ;is flashing, you can
cancel the gear change by pressing LOW
RANGE button :again.
Messages in the multi-function display
If a gear change process has not been suc-
cessful, the following messages may be dis-
played in the multi-function display:
R Max. speed 40 km/h
You have been driving faster than
40 km/h. Indicator lamp ;also flashes.
X Drive more slowly to carry out the gear
change process.
R Engage N briefly
The automatic transmission is in Dand you
are now driving below 40 km/h.
XMove the DIRECT SELECT lever to Nto
carry out the gear change process.
R Shifting process cancelled Reacti‐
vate
The gear change process was not carried
out.
XMaintain all gear change conditions
and carry out the gear change process
again.
R Stop vehicle. Apply parking brake Off-road driving
115Controls
X164_AKB; 2; 3, en-GB
wobuchh, Version: 2.11.8.1 2009-03-31T14:14:58+02:00 - Seite 115 Z
Dateiname: 6515431202_buchblock.pdf; erzeugt am 01. Apr 2009 00:17:19; WK
Page 134 of 309
X
Start the engine.
X Turn selector wheel :clockwise.
The vehicle is raised.
or
X Turn selector wheel ;anti-clockwise.
The vehicle is lowered.
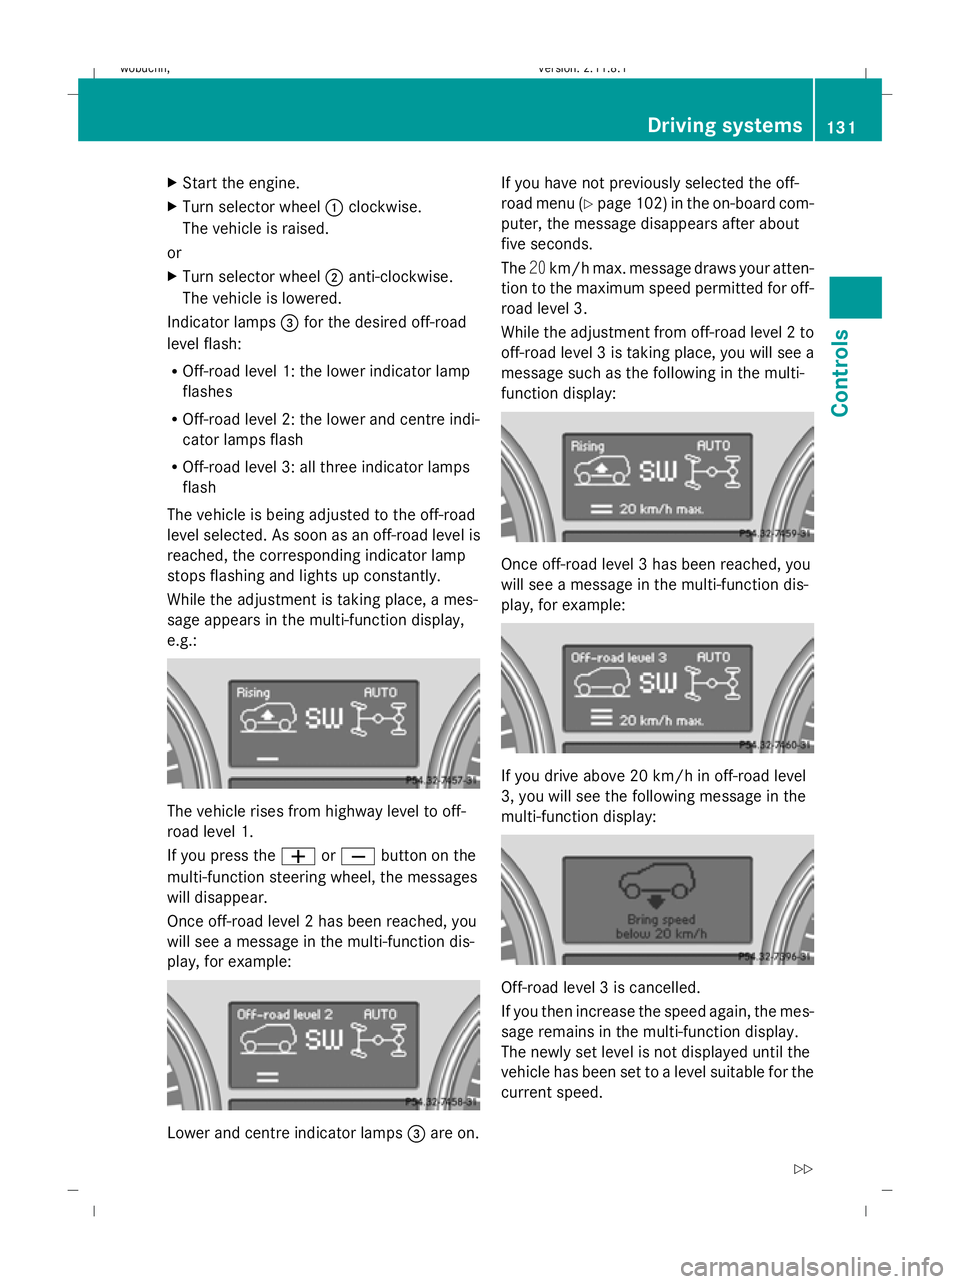
Indicator lamps =for the desired off-road
level flash:
R Off-road level 1: the lower indicator lamp
flashes
R Off-road level 2: the lower and centre indi-
cator lamps flash
R Off-road level 3: all three indicator lamps
flash
The vehicle is being adjusted to the off-road
level selected. As soon as an off-road level is
reached, the corresponding indicator lamp
stops flashing and lights up constantly.
While the adjustment is taking place, a mes-
sage appears in the multi-function display,
e.g.: The vehicle rises from highway level to off-
road level 1.
If you press the
WorX button on the
multi-function steering wheel, the messages
will disappear.
Once off-road level 2 has been reached, you
will see a message in the multi-function dis-
play, for example: Lower and centre indicator lamps
=are on. If you have not previously selected the off-
road menu (Y
page 102) in the on-board com-
puter, the message disappears after about
five seconds.
The 20km/h max. message draws your atten-
tion to the maximum speed permitted for off-
road level 3.
While the adjustment from off-road level 2 to
off-road level 3 is taking place, you will see a
message such as the following in the multi-
function display: Once off-road level 3 has been reached, you
will see a message in the multi-function dis-
play, for example:
If you drive above 20 km/h in off-road level
3, you will see the following message in the
multi-function display:
Off-road level 3 is cancelled.
If you then increase the speed again, the mes-
sage remains in the multi-function display.
The newly set level is not displayed until the
vehicle has been set to a level suitable for the
current speed. Driving systems
131Controls
X164_AKB; 2; 3, en-GB
wobuchh, Version: 2.11.8.1 2009-03-31T14:14:58+02:00 - Seite 131 Z
Dateiname: 6515431202_buchblock.pdf; erzeugt am 01. Apr 2009 00:17:25; WK
Page 136 of 309

If one or more indicator lamps
=are on:
X Turn the selector wheel anti-clockwise ;
until all indicator lamps =that are lit start
to flash.
The vehicle is lowered to highway level. As
soon as the next lowest level is reached,
the indicator lamp stops flashing and goes
out.
While the adjustment is taking place, a mes-
sage appears in the multi-function display,
e.g.: If you press the
WorX button on the
multi-function steering wheel, the messages
will disappear.
Once highway level has been reached, all indi-
cator lamps =go out. You will see a message
in the multi-function display, for example: If you have not previously selected the off-
road menu (Y
page 102) in the on-board com-
puter, the message disappears after about
five seconds.
The vehicle automatically selects highway
level if you are driving at a speed above
115 km/h or if you drive at between
100 km/h and 115 km/h for around 20 sec-
onds. Depending on the ADS basic setting
(Y page 129), the vehicle is lowered to high-
speed level at high speeds. PARKTRONIC*
G
Risk of accident
PARKTRONIC is only an aid and may not
detect all obstacles. It is not a substitute for
attentive driving.
You are always responsible for safety and
must continue to pay attention to your imme-
diate surroundings when parking and
manoeuvring. You could otherwise endanger
yourself and others. G
Risk of injury
Make sure that no persons or animals are in
the manoeuvring range. Otherwise, they
could be injured.
PARKTRONIC is an electronic parking aid
using ultrasound. It indicates visually and
audibly the distance between your vehicle
and an object.
PARKTRONIC is activated automatically when
you:
R switch on the ignition
R release the parking brake
R shift the automatic transmission to D,Ror
N
PARKTRONIC is deactivated at speeds above
18 km/h. It is reactivated at lower speeds.
PARKTRONIC monitors the area around your
vehicle using six sensors in the front bumper
and four sensors in the rear bumper. :
Example: sensors in the front bumper,
left-hand side Driving systems
133Controls
* optional
X164_AKB; 2; 3, en-GB
wobuchh,
Version: 2.11.8.1 2009-03-31T14:14:58+02:00 - Seite 133 Z
Dateiname: 6515431202_buchblock.pdf; erzeugt am 01. Apr 2009 00:17:26; WK
Page 180 of 309
temperature, or for about 30 minutes if the
engine is not at normal operating temper-
ature (if you had started the engine only
briefly), before measuring.
i If you wish to cancel the measurement,
press the *or& button on the multi-
function steering wheel.
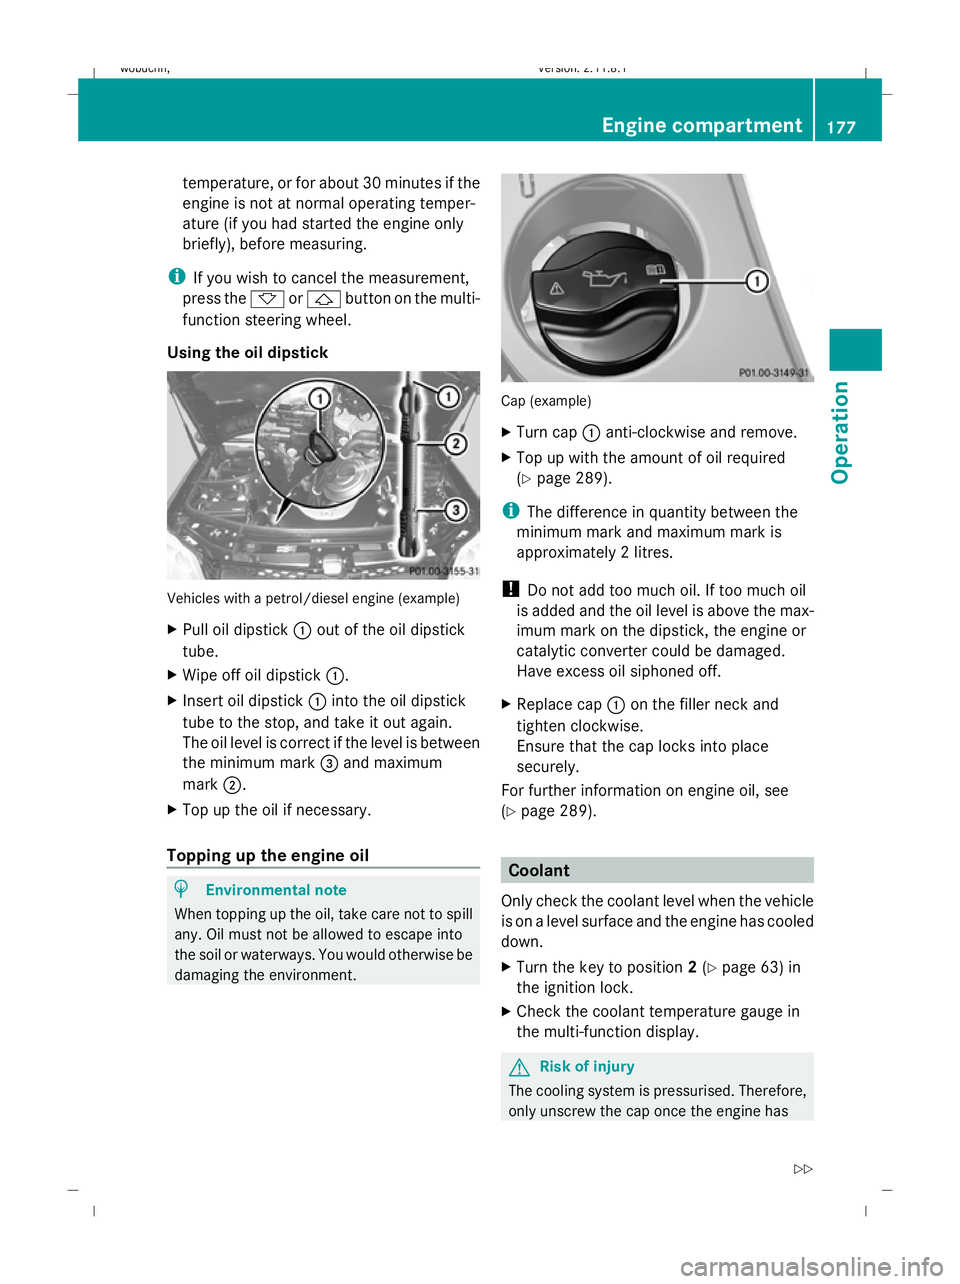
Using the oil dipstick Vehicles with a petrol/diesel engine (example)
X Pull oil dipstick :out of the oil dipstick
tube.
X Wipe off oil dipstick :.
X Insert oil dipstick :into the oil dipstick
tube to the stop, and take it out again.
The oil level is correct if the level is between
the minimum mark =and maximum
mark ;.
X Top up the oil if necessary.
Topping up the engine oil H
Environmental note
When topping up the oil, take care not to spill
any. Oil must not be allowed to escape into
the soil or waterways. You would otherwise be
damaging the environment. Cap (example)
X
Turn cap :anti-clockwise and remove.
X Top up with the amount of oil required
(Y page 289).
i The difference in quantity between the
minimum mark and maximum mark is
approximately 2 litres.
! Do not add too much oil. If too much oil
is added and the oil level is above the max-
imum mark on the dipstick, the engine or
catalytic converter could be damaged.
Have excess oil siphoned off.
X Replace cap :on the filler neck and
tighten clockwise.
Ensure that the cap locks into place
securely.
For further information on engine oil, see
(Y page 289). Coolant
Only check the coolant level when the vehicle
is on a level surface and the engine has cooled
down.
X Turn the key to position 2(Y page 63) in
the ignition lock.
X Check the coolant temperature gauge in
the multi-function display. G
Risk of injury
The cooling system is pressurised. Therefore,
only unscrew the cap once the engine has Engine compartment
177Operation
X164_AKB; 2; 3, en-GB
wobuchh,V ersion: 2.11.8.1
2009-03-31T14:14:58+02:00 - Seite 177 Z
Dateiname: 6515431202_buchblock.pdf; erzeugt am 01. Apr 2009 00:17:46; WK
Page 205 of 309
High-pressure cleaners
G
Risk of accident
Do not use high-pressure cleaners with circu-
lar-jet nozzles (dirt grinders) to clean your
vehicle, in particular the tyres. You could oth-
erwise damage the tyres and cause an acci-
dent.
! Observe the instructions issued by the
equipment manufacturer concerning the
distance to be maintained between the
nozzle of the high-pressure cleaner and the
vehicle (at least 30 cm).
Move the high-pressure cleaner nozzle
around when cleaning your vehicle.
Do not aim directly at any of the following:
R tyres
R door joint
R electrical components
R battery
R connectors
R lights
R seals
R trim elements
R ventilation slots
Damaged seals or electrical components
can lead to failures or leaks.
Cleaning the paintwork Scratches, corrosive deposits, areas affected
by corrosion and damage caused by inade-
quate care cannot always be completely
repaired. In such cases, visit a qualified spe-
cialist workshop immediately, e.g. a
Mercedes-Benz Service Centre.
X Remove the following types of dirt immedi-
ately, whilst avoiding rubbing too hard.
Soak:
R insect remains with insect remover
R bird droppings with water and rinse off the treated surface after-
wards.
Remove:
R
tree resin, oils, fuels and greases by rub-
bing gently with a cloth soaked in petro-
leum ether or lighter fluid.
R tar stain with tar remover
R wax with silicone remover
! Do not affix:
R stickers
R films
R magnetic plates or similar items
to painted surfaces. Otherwise, you could
damage the paintwork.
Cleaning the wheels !
Do not use acidic wheel cleaners to
remove brake dust. This could damage
wheel bolts and brake components.
Cleaning the windows X
Clean the inside and outside of the win-
dows with a damp cloth and a cleaning
product approved and recommended by
Mercedes-Benz.
! Clean the water drainage channels of the
windscreen and the rear window at regular
intervals. Under certain circumstances,
deposits such as leaves, petals and pollen
may prevent water from draining away
leading to corrosion damage.
Cleaning the wiper blades G
Risk of injury
Before cleaning the windscreen or wiper
blades, turn the key to position 0in the igni-
tion lock or press the Start/Stop button* until
all indicator lamps have gone out in the instru-
ment cluster. The windscreen wipers could
otherwise move and cause injury. 202
CareOperation
* optional
X164_AKB; 2; 3, en-GB
wobuchh,
Version: 2.11.8.1 2009-03-31T14:14:58+02:00 - Seite 202
Dateiname: 6515431202_buchblock.pdf; erzeugt am 01. Apr 2009 00:17:53; WK
Page 234 of 309
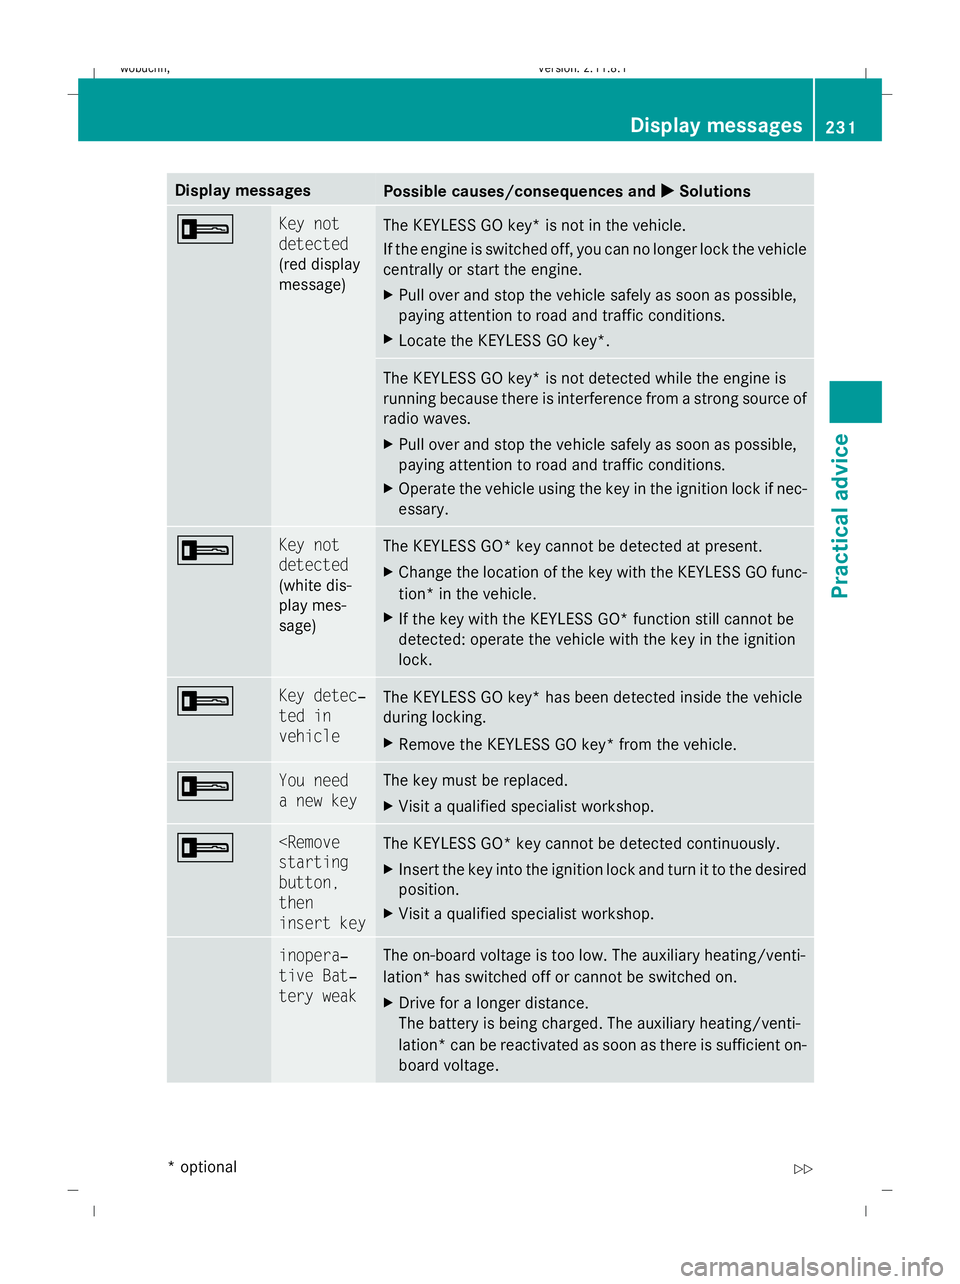
Display messages
Possible causes/consequences and
X
X Solutions + Key not
detected
(red display
message)
The KEYLESS GO key* is not in the vehicle.
If the engine is switched off, you can no longer lock the vehicle
centrally or start the engine.
X
Pull over and stop the vehicle safely as soon as possible,
paying attention to road and traffic conditions.
X Locate the KEYLESS GO key*. The KEYLESS GO key* is not detected while the engine is
running because there is interference from a strong source of
radio waves.
X Pull over and stop the vehicle safely as soon as possible,
paying attention to road and traffic conditions.
X Operate the vehicle using the key in the ignition lock if nec-
essary. + Key not
detected
(white dis-
play mes-
sage)
The KEYLESS GO* key cannot be detected at present.
X
Change the location of the key with the KEYLESS GO func-
tion* in the vehicle.
X If the key with the KEYLESS GO* function still cannot be
detected: operate the vehicle with the key in the ignition
lock. + Key detec‐
ted in
vehicle
The KEYLESS GO key* has been detected inside the vehicle
during locking.
X
Remove the KEYLESS GO key* from the vehicle. + You need
a new key The key must be replaced.
X
Visit a qualified specialist workshop. +
button,
then
insert key
The KEYLESS GO* key cannot be detected continuously.
X
Insert the key into the ignition lock and turn it to the desired
position.
X Visit a qualified specialist workshop. & inopera‐
tive Bat‐
tery weak The on-board voltage is too low. The auxiliary heating/venti-
lation* has switched off or cannot be switched on.
X
Drive for a longer distance.
The battery is being charged. The auxiliary heating/venti-
lation *can be reactivated as soon as there is sufficient on-
board voltage. Display messages
231Practical advice
* optional
X164_AKB; 2; 3, en-GB
wobuchh,
Version: 2.11.8.1 2009-03-31T14:14:58+02:00 - Seite 231 Z
Dateiname: 6515431202_buchblock.pdf; erzeugt am 01. Apr 2009 00:18:01; WK