2009 MERCEDES-BENZ GL SUV sensor
[x] Cancel search: sensorPage 59 of 309
R
the sliding/tilting sunroof* is closed.
R there are no objects, e.g. mascots, hang-
ing on the rear-view mirror or on the grab
handles on the roof trim.
This will prevent false alarms.
X Make sure that all the doors and the tail-
gate are closed.
X Lock the vehicle with the key or, on vehicles
with KEYLESS GO*, also using the locking
button on the door handle.
The interior motion sensor is primed after
approximately 40 seconds.
Deactivating the interior motion sensor When you unlock your vehicle using the key
or KEYLESS GO *,the interior motion sensor
is automatically deactivated.
To prevent a false alarm, deactivate the inte-
rior motion sensor if you lock your vehicle
and:
R people or animals remain in the vehicle.
R a side window remains open.
R a hinged side window* remains open.
R the sliding/tilting sunroof* remains open.
It is possible to deactivate the interior motion
sensor using the on-board computer for the
next time the vehicle is locked
(Y page 109). The interior motion sensor
remains deactivated until you unlock and lock
the vehicle again.
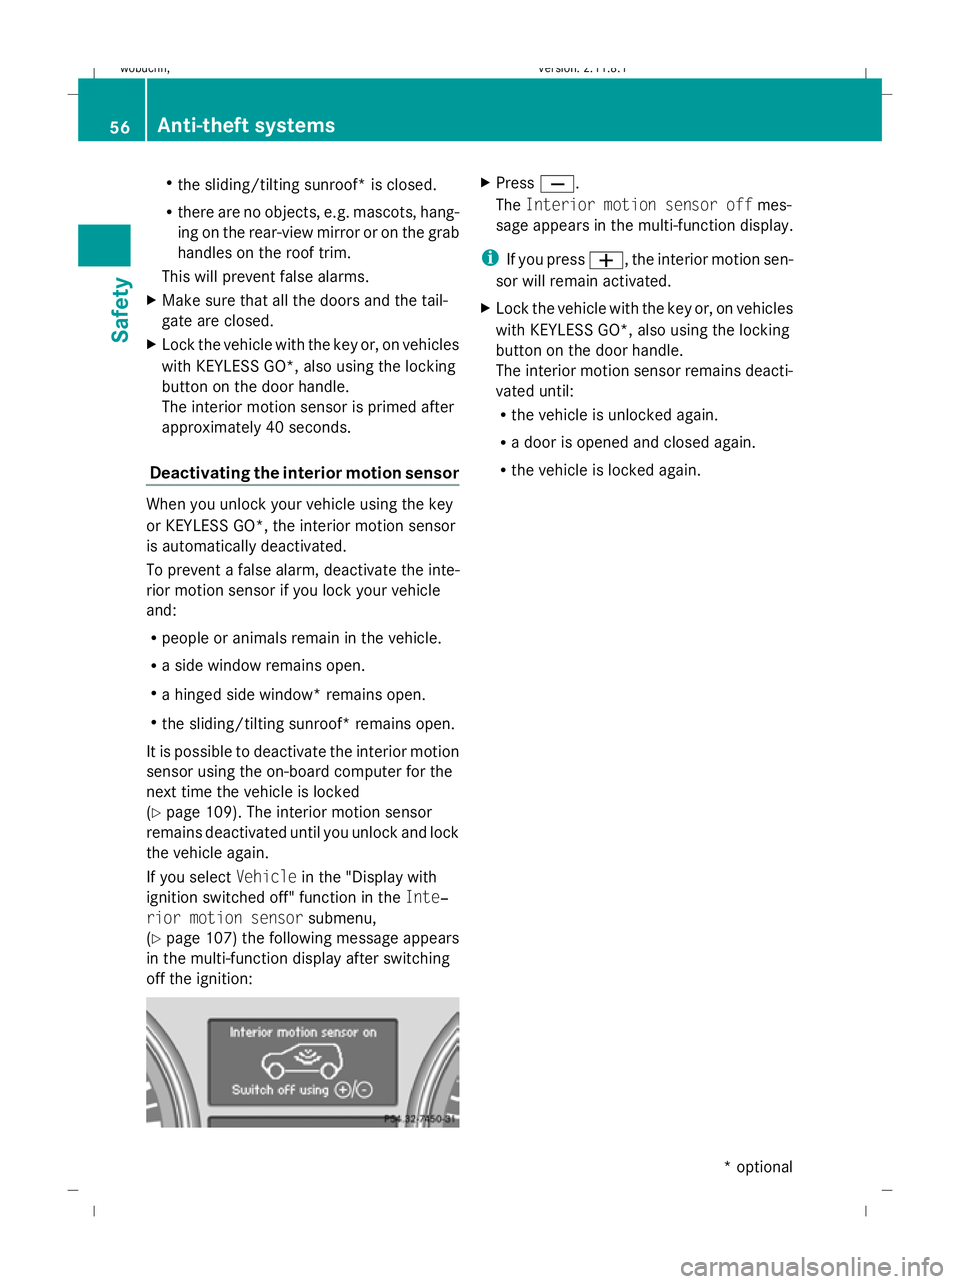
If you select Vehiclein the "Display with
ignition switched off" function in the Inte‐
rior motion sensor submenu,
(Y page 107) the following message appears
in the multi-function display after switching
off the ignition: X
Press X.
The Interior motion sensor off mes-
sage appears in the multi-function display.
i If you press W, the interior motion sen-
sor will remain activated.
X Lock the vehicle with the key or, on vehicles
with KEYLESS GO*, also using the locking
button on the door handle.
The interior motion sensor remains deacti-
vated until:
R
the vehicle is unlocked again.
R a door is opened and closed again.
R the vehicle is locked again. 56
Anti-theft systemsSafety
* optional
X164_AKB; 2; 3, en-GB
wobuchh
,V ersion: 2.11.8.1
2009-03-31T14:14:58+02:00 - Seite 56
Dateiname: 6515431202_buchblock.pdf; erzeugt am 01. Apr 2009 00:16:50; WK
Page 61 of 309

Opening and closing
Key
The key centrally locks/unlocks:
R the doors
R the tailgate
R the fuel filler flap G
Risk of accident
If children are left unsupervised in the vehicle,
they could:
R open a door from the inside at any time,
even if it has been locked
R start the vehicle using a key which has been
left in the vehicle
R release the parking brake
They could thereby endanger themselves and
others. Never leave children unsupervised in
the vehicle. Always take the key with you
when leaving the vehicle, even if you are only
leaving it for a short time. :
& To lock the vehicle
; F To open/close the tailgate*
= Emergency key element
? % To unlock the vehicle
A Battery check lamp
When unlocking, the turn signals flash once.
When locking, they flash three times.
When it is dark, the surround lighting also
comes on if it is activated in the on-board
computer. The vehicle relocks automatically if you do not
open a door or the tailgate within 40 seconds
of unlocking the vehicle.
KEYLESS GO* You can start, lock or unlock the vehicle using
the KEYLESS GO key. To do this, you only
need carry the key with you. When you touch
the surface of the sensors on the vehicle's
door handles, KEYLESS GO establishes a
radio connection between the vehicle and the
key.
The distance to the door handle from which
you wish to lock or unlock the vehicle must
not be greater than 1 m.
When starting the engine and whilst driving,
KEYLESS GO also checks whether a valid key
is in the vehicle by periodically establishing
radio contact. X
To unlock the vehicle: touch the inner
surface of the door handle.
X To lock the vehicle: press locking but-
ton :.
If you pull on the handle of the tailgate, only
the luggage compartment of the vehicle is
unlocked.
i If the vehicle has been parked for a long
time, you must pull the door handle to acti-
vate KEYLESS GO. 58
Opening and closingControls
* optional
X164_AKB; 2; 3, en-GB
wobuchh,
Version: 2.11.8.1 2009-03-31T14:14:58+02:00 - Seite 58
Dateiname: 6515431202_buchblock.pdf; erzeugt am 01. Apr 2009 00:16:51; WK
Page 77 of 309
G
Risk of accident
If incident light from headlamps is prevented
from striking the sensor in the rear-view mir-
ror, for instance, if the safety net is fitted, the
mirror’s automatic anti-dazzle function will
not work.
Incident light could then dazzle you. This may
prevent you from observing the traffic condi-
tions, thereby causing an accident. In this
case, adjust the rear-view mirror manually. Memory functions*
Storing settings
Using the memory button you can store up to
three different settings, e. g. for three differ-
ent people.
The following settings are stored as a single
memory preset:
R position of the seat, backrest and head
restraint
R driver's side: steering wheel position
R driver's side: position of the exterior mir-
rors on the driver's and front-passenger
sides G
Risk of injury
The memory function can still be used when
the key has been removed. For this reason,
children should never be left unsupervised in
the vehicle. Otherwise, they could become
trapped when moving the seat or the steering
wheel. G
Risk of accident
Only use the memory function on the driver’s
side when the vehicle is stationary. Other-
wise, you could be distracted from the traffic
conditions by the steering wheel and seat
moving of their own accord, and as a result
cause an accident. X
Adjust the seat ( Ypage 64).
X On the driver's side, also adjust the steer-
ing wheel (Y page 70) and the mirrors
(Y page 72).
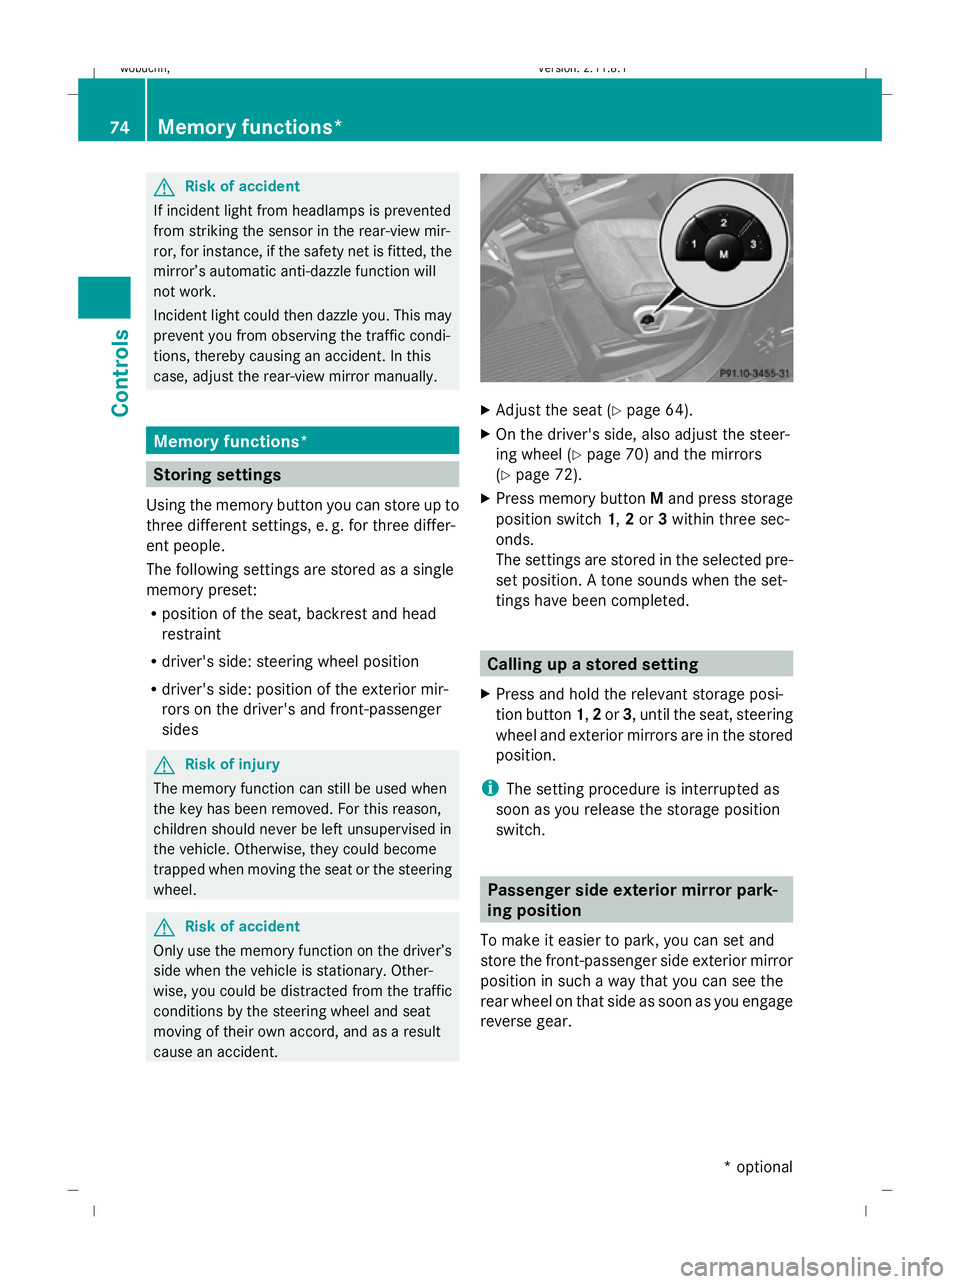
X Press memory button Mand press storage
position switch 1,2or 3within three sec-
onds.
The settings are stored in the selected pre-
set position. A tone sounds when the set-
tings have been completed. Calling up a stored setting
X Press and hold the relevant storage posi-
tion button 1,2or 3, until the seat, steering
wheel and exterior mirrors are in the stored
position.
i The setting procedure is interrupted as
soon as you release the storage position
switch. Passenger side exterior mirror park-
ing position
To make it easier to park, you can set and
store the front-passenger side exterior mirror
position in such a way that you can see the
rear wheel on that side as soon as you engage
reverse gear. 74
Memory functions*Controls
* optional
X164_AKB; 2; 3, en-GB
wobuchh,
Version: 2.11.8.1 2009-03-31T14:14:58+02:00 - Seite 74
Dateiname: 6515431202_buchblock.pdf; erzeugt am 01. Apr 2009 00:17:04; WK
Page 87 of 309
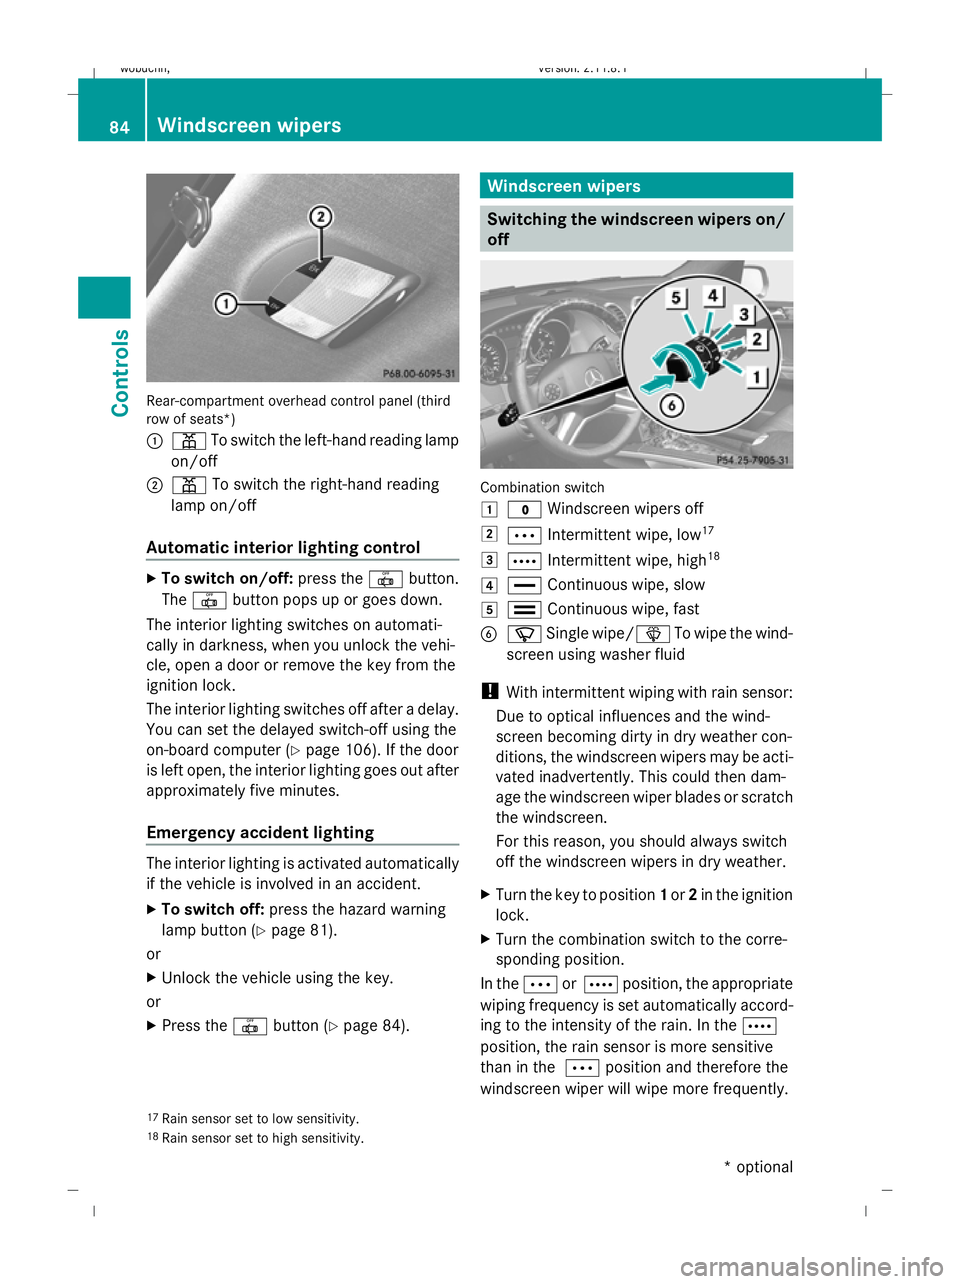
Rear-compartment overhead control panel (third
row of seats*)
:
p To switch the left-hand reading lamp
on/off
; p To switch the right-hand reading
lamp on/off
Automatic interior lighting control X
To switch on/off: press the|button.
The | button pops up or goes down.
The interior lighting switches on automati-
cally in darkness, when you unlock the vehi-
cle, open a door or remove the key from the
ignition lock.
The interior lighting switches off after a delay.
You can set the delayed switch-off using the
on-board computer (Y page 106). If the door
is left open, the interior lighting goes out after
approximately five minutes.
Emergency accident lighting The interior lighting is activated automatically
if the vehicle is involved in an accident.
X To switch off: press the hazard warning
lamp button (Y page 81).
or
X Unlock the vehicle using the key.
or
X Press the |button (Y page 84). Windscreen wipers
Switching the windscreen wipers on/
off Combination switch
1
$ Windscreen wipers off
2 Ä Intermittent wipe, low 17
3 Å Intermittent wipe, high 18
4 ° Continuous wipe, slow
5 ¯ Continuous wipe, fast
B í Single wipe/ îTo wipe the wind-
screen using washer fluid
! With intermittent wiping with rain sensor:
Due to optical influences and the wind-
screen becoming dirty in dry weather con-
ditions, the windscreen wipers may be acti-
vated inadvertently. This could then dam-
age the windscreen wiper blades or scratch
the windscreen.
For this reason, you should always switch
off the windscreen wipers in dry weather.
X Turn the key to position 1or 2in the ignition
lock.
X Turn the combination switch to the corre-
sponding position.
In the ÄorÅ position, the appropriate
wiping frequency is set automatically accord-
ing to the intensity of the rain. In the Å
position, the rain sensor is more sensitive
than in the Äposition and therefore the
windscreen wiper will wipe more frequently.
17 Rain sensor set to low sensitivity.
18 Rain sensor set to high sensitivity. 84
Windscreen wipersCont
rols
* optional
X164_AKB; 2; 3, en-GB
wobuchh,
Version: 2.11.8.1 2009-03-31T14:14:58+02:00 - Seite 84
Dateiname: 6515431202_buchblock.pdf; erzeugt am 01. Apr 2009 00:17:08; WK
Page 110 of 309
Setting the display when the ignition is
switched off
The
Display when ignition off function
allows you to set which display you see in the
multi-function display after removing the key
from the ignition lock.
X Press VorU on the steering wheel
to select the Settings... menu.
X Press the &button to select submenus.
X Press the WorX button to select the
Vehicle submenu.
X Press the &button to select Display
when ignition off.
X Press the WorX button to select
Interior motion sensor, Tow-away
protection orMiles/km.
X Press the &,VorU button to
select a different display.
Activating/deactivating the automatic
door locking feature
When you activate the Automatic door
locking function, your vehicle will be cen-
trally locked above a speed of approximately
15 km/h.
i For more information on the automatic
door locking feature, see (Y page 60).
X Press VorU on the steering wheel
to select the Settings... menu.
X Press the &button to select submenus.
X Press the WorX button to select the
Vehicle submenu.
X Press the &button to select Auto‐
matic door locking.
X Press the WorX button to activate
or deactivate the Automatic door lock‐
ing feature.
X Press the &,VorU button to
select a different display. Heating submenu Auxiliary heating* departure time
Only vehicles with auxiliary heating have this
function.
The
Aux.heating departure time function
allows you to select a stored departure time
or change the departure time for which the
vehicle with auxiliary heating is preheated.
The auxiliary heating timer function calcu-
lates the switch-on time according to the out-
side temperature so that the vehicle is pre-
heated by the departure time. When the
departure time is reached, the auxiliary heat-
ing continues to heat for a further five
minutes and then switches off. The auxiliary
heating adopts the temperature settings
selected for Thermatic 2-zone automatic cli-
mate control or Thermotronic luxury multi-
zone automatic climate control*.
You can switch off the auxiliary heating by
using the remote control or the auxiliary heat-
ing button on the centre console. G
Risk of poisoning
Exhaust fumes are produced when the auxili-
ary heating is in operation. Inhaling these
exhaust fumes can be poisonous. You should
therefore switch off the auxiliary heating in
confined spaces without an extraction sys-
tem, e.g. a garage. G
Risk of fire
When the auxiliary heating is in operation,
parts of the vehicle can become very hot.
Make sure that the exhaust system does
not under any circumstances come into con-
tact with highly flammable materials such as
dry grass or fuels. The highly flammable mate-
rial could otherwise ignite and set the vehicle
alight. Select your parking space accordingly.
Operating the auxiliary heating is therefore
prohibited at filling stations or when your vehi-
cle is being refuelled. Always switch off the
auxiliary heating at filling stations. On-board computer
107Controls
* optional
X164_AKB; 2; 3, en-GB
wobuchh,
Version: 2.11.8.1 2009-03-31T14:14:58+02:00 - Seite 107 Z
Dateiname: 6515431202_buchblock.pdf; erzeugt am 01. Apr 2009 00:17:17; WK
Page 113 of 309
X
Press VorU on the steering wheel
to select the Additional functions menu.
X IfTow-away protection is not displayed,
press the &or* button to select
Tow-away protection.
X Press the WorX button to prime or
deactivate Tow-away protection.
X Press &, VorU to select a dif-
ferent display.
Priming/deactivating the interior
motion sensor* If you deactivate the
Interior motion sen‐
sor, it will not be primed when you next lock
the vehicle.
X Press VorU on the steering wheel
to select the Additional functions menu.
X If the Interior motion sensor function
is not displayed, press the &or*
button to select the Interior motion
sensor.
X Press the WorX button to prime or
deactivate the Interior motion sensor .
X Press &, VorU to select a dif-
ferent display. Trip computer menu
You can use the Trip computermenu to call
up or reset statistical data for your vehicle.
You can select kmormiles as the unit of
measurement for distance (Y page 103).
Trip computer "From start" or "From
reset" The values in the
From startsubmenu are
calculated from the start of a journey whilst
the values in the From resetsubmenu are
calculated from the last time the submenu
was reset. X
Press VorU on the steering wheel
to select the trip computer menu.
X Press &or* to select From start
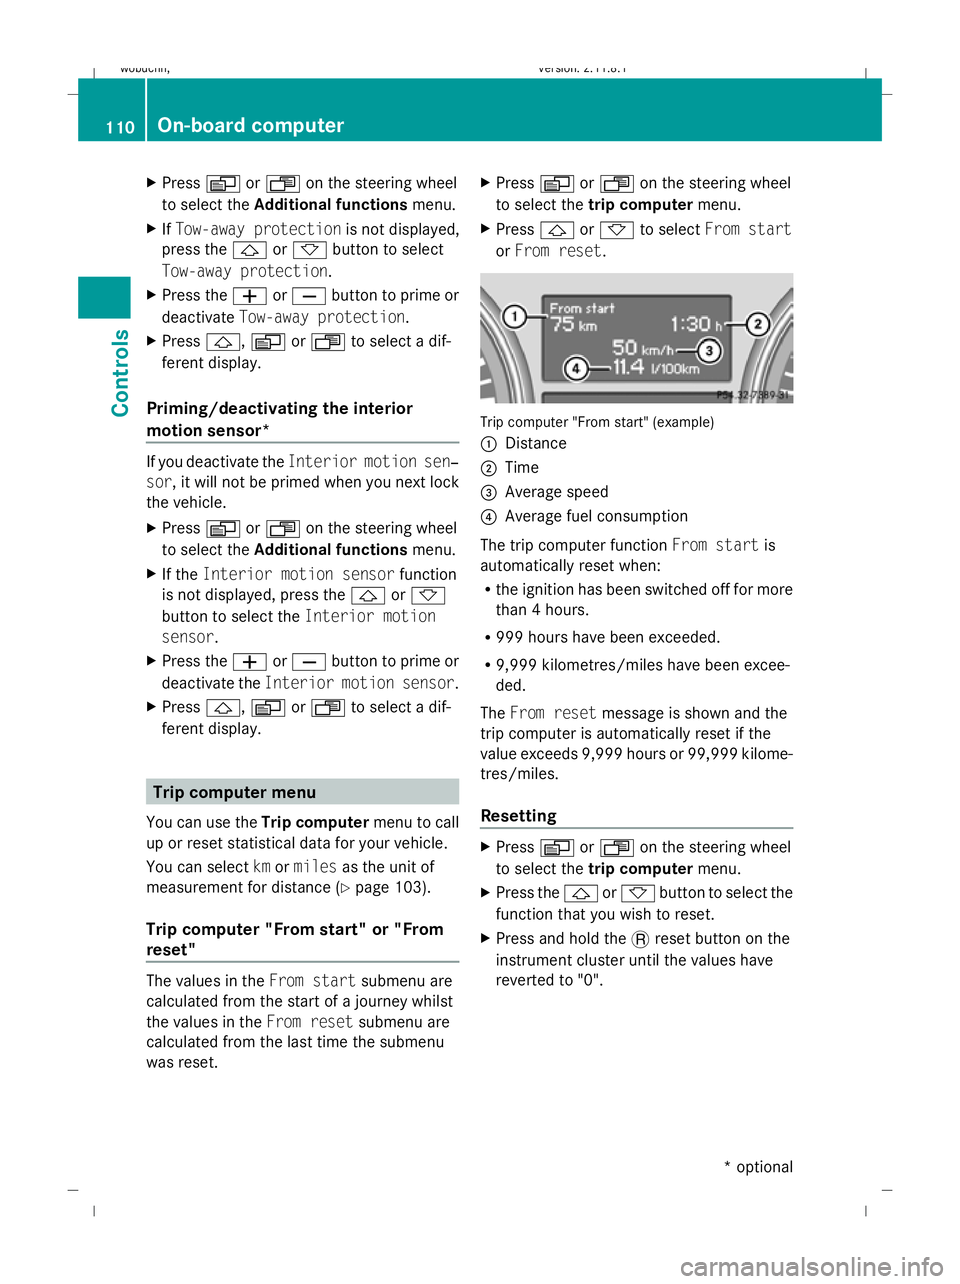
or From reset. Trip computer "From start" (example)
:
Distance
; Time
= Average speed
? Average fuel consumption
The trip computer function From startis
automatically reset when:
R the ignition has been switched off for more
than 4 hours.
R 999 hours have been exceeded.
R 9,999 kilometres/miles have been excee-
ded.
The From reset message is shown and the
trip computer is automatically reset if the
value exceeds 9,999 hours or 99,999 kilome-
tres/miles.
Resetting X
Press VorU on the steering wheel
to select the trip computer menu.
X Press the &or* button to select the
function that you wish to reset.
X Press and hold the .reset button on the
instrument cluster until the values have
reverted to "0". 110
On-board computerControls
* optional
X164_AKB; 2; 3, en-GB
wobuchh,
Version: 2.11.8.1 2009-03-31T14:14:58+02:00 - Seite 110
Dateiname: 6515431202_buchblock.pdf; erzeugt am 01. Apr 2009 00:17:17; WK
Page 123 of 309
laden or towing a trailer, you must select shift
range 1,2or 3in good time. By doing so, you
will make use of the braking effect of the
engine, which relieves the load on the brake
system and prevents the brakes from over-
heating and wearing too quickly. G
Risk of accident
The brake pedal is retracted when Distronic
brakes. Do not restrict the movement of the
pedal in any way.
R Do not put any objects in the footwell.
R Ensure that floor mats and carpets are fixed
securely.
R Do not place your foot under the brake
pedal as it could become trapped.
You could otherwise cause an accident and
injure yourself and others. G
Risk of accident
Do not change down for additional engine
braking on a slippery road surface. This could
cause the drive wheels to lose their grip and
the vehicle could skid. G
Risk of accident
Distronic is only an aid designed to assist
driving. The driver is fully responsible for the
vehicle's distance from other vehicles, the
vehicle's speed and for braking in good time.
Distronic does not react to:
R pedestrians
R stationary obstacles on the road, e.g. sta-
tionary or parked vehicles
R oncoming and crossing traffic
Distronic may not detect narrow vehicles driv-
ing in front, e.g. motorcycles, or vehicles driv-
ing on a different line. Therefore, always pay
attention to traffic conditions even when Dis-
tronic is activated. Otherwise, you may fail to
recognise dangers in time, cause an accident
and injure yourself and others.
If a slower-moving vehicle is detected in front,
Distronic causes your vehicle to brake and maintain the preset distance to the vehicle in
front that you have set. G
Risk of accident
Distronic cannot take account of road and
traffic conditions. Deactivate, or do not acti-
vate, Distronic if it does not detect the vehicle
in front, or if it no longer detects it. This is
especially the case:
R before corners
R in filter lanes
R when changing to a lane with faster moving
traffic
R in complex driving situations or where the
lanes are diverted, e.g. at motorway/road-
way construction sites
Otherwise, Distronic maintains the current
speed or accelerates to the set speed.
Distronic cannot take account of weather
conditions. Deactivate, or do not activate,
Distronic:
R if the roads are slippery, snow-covered or
icy. The wheels could lose their grip when
braking or accelerating. The vehicle could
start to skid.
R if the sensors are dirty or there is poor vis-
ibility, e.g. due to snow, rain or fog. Dis-
tance control may be impaired.
Always pay attention to traffic conditions
even when Distronic is activated. Otherwise,
you may fail to recognise dangers in time,
cause an accident and injure yourself and oth-
ers.
If no car is driving in front of you, Distronic
works like cruise control in the speed range
between 30 km/h and 200 km/h. If a vehicle
is driving in front of you, Distronic Plus works
in the speed range between 0 km/h and
200 km/h.
Do not use Distronic while driving on roads
with steep gradients. 120
Driving systemsControls
X164_AKB; 2; 3, en-GB
wobuchh,
Version: 2.11.8.1 2009-03-31T14:14:58+02:00 - Seite 120
Dateiname: 6515431202_buchblock.pdf; erzeugt am 01. Apr 2009 00:17:21; WK
Page 136 of 309

If one or more indicator lamps
=are on:
X Turn the selector wheel anti-clockwise ;
until all indicator lamps =that are lit start
to flash.
The vehicle is lowered to highway level. As
soon as the next lowest level is reached,
the indicator lamp stops flashing and goes
out.
While the adjustment is taking place, a mes-
sage appears in the multi-function display,
e.g.: If you press the
WorX button on the
multi-function steering wheel, the messages
will disappear.
Once highway level has been reached, all indi-
cator lamps =go out. You will see a message
in the multi-function display, for example: If you have not previously selected the off-
road menu (Y
page 102) in the on-board com-
puter, the message disappears after about
five seconds.
The vehicle automatically selects highway
level if you are driving at a speed above
115 km/h or if you drive at between
100 km/h and 115 km/h for around 20 sec-
onds. Depending on the ADS basic setting
(Y page 129), the vehicle is lowered to high-
speed level at high speeds. PARKTRONIC*
G
Risk of accident
PARKTRONIC is only an aid and may not
detect all obstacles. It is not a substitute for
attentive driving.
You are always responsible for safety and
must continue to pay attention to your imme-
diate surroundings when parking and
manoeuvring. You could otherwise endanger
yourself and others. G
Risk of injury
Make sure that no persons or animals are in
the manoeuvring range. Otherwise, they
could be injured.
PARKTRONIC is an electronic parking aid
using ultrasound. It indicates visually and
audibly the distance between your vehicle
and an object.
PARKTRONIC is activated automatically when
you:
R switch on the ignition
R release the parking brake
R shift the automatic transmission to D,Ror
N
PARKTRONIC is deactivated at speeds above
18 km/h. It is reactivated at lower speeds.
PARKTRONIC monitors the area around your
vehicle using six sensors in the front bumper
and four sensors in the rear bumper. :
Example: sensors in the front bumper,
left-hand side Driving systems
133Controls
* optional
X164_AKB; 2; 3, en-GB
wobuchh,
Version: 2.11.8.1 2009-03-31T14:14:58+02:00 - Seite 133 Z
Dateiname: 6515431202_buchblock.pdf; erzeugt am 01. Apr 2009 00:17:26; WK