2009 MERCEDES-BENZ E-CLASS SALOON ESP
[x] Cancel search: ESPPage 171 of 373

For Blind Spot Assist to help you when driving,
the radar sensor system must be switched on
and operational. G
Risk of accident
Blind Spot Assist cannot detect road and traf-
fic conditions.
Blind Spot Assist may not detect narrow vehi-
cles, such as motorcycles or bicycles, or only
detect them too late.
Monitoring may be affected by dirty sensors,
strong spray or poor visibility caused by snow,
rain or mist, for example. In this case, vehicles
are detected late or not at all.
Always pay attention to traffic conditions and
your surroundings. Otherwise, you may fail to
recognise dangers in time, cause an accident
and injure yourself and others.
Monitoring range of the sensors
Blind Spot Assist monitors the area up to
three metres behind your vehicle and directly
next to your vehicle as shown in the diagram. Example: Saloon
G
Risk of accident
Blind Spot Assist monitors certain areas in the
immediate vicinity of your vehicle. Vehicles
that approach and drive past at high speeds
are not detected. There is no display and no
warning. If the lanes are very wide, it may not be pos-
sible to monitor the complete width of the
neighbouring lane. For this reason, vehicles in
the next lane may not be detected, especially
if they are driving in a staggered formation in
different lanes. This may be the case if vehi-
cles are driving at the edge of their lane that
is furthest away from your vehicle.
Always pay attention to traffic conditions and
your surroundings. Otherwise, you may fail to
recognise dangers in time, cause an accident
and injure yourself and others.
If the lanes are narrow, the system may be
unable to distinguish the neighbouring lane
from the one beyond it. For this reason, vehi-
cles in the farther lane may be indicated,
especially if the vehicles are driving in a stag-
gered formation in different lanes. This may
be the case if vehicles are driving at the edge
of the lane that is nearest your vehicle. Due
to the nature of the system, warnings may be
issued in error when driving close to crash
barriers or similar solid lane borders.
The two sensors for Blind Spot Assist are
integrated into the sides of the rear bumper.
Make sure that the bumper is free from dirt,
ice or slush around the sensors. For example,
the radar sensors must not be covered by
cycle racks or overhanging loads. Following a
severe impact or in the event of damage to
the bumpers, have the function of the radar
sensors checked at a qualified specialist
workshop, e.g. a Mercedes-Benz Service
Centre. Otherwise, Blind Spot Assist may not
work properly. 168
Driving systemsControls
212_AKB; 2; 4, en-GB
mkalafa
,V ersion: 2.11.8.1
2009-05-05T14:17:16+02:00 - Seite 168
Dateiname: 6515346702_buchblock.pdf; erzeugt am 07. May 2009 14:16:26; WK
Page 173 of 373
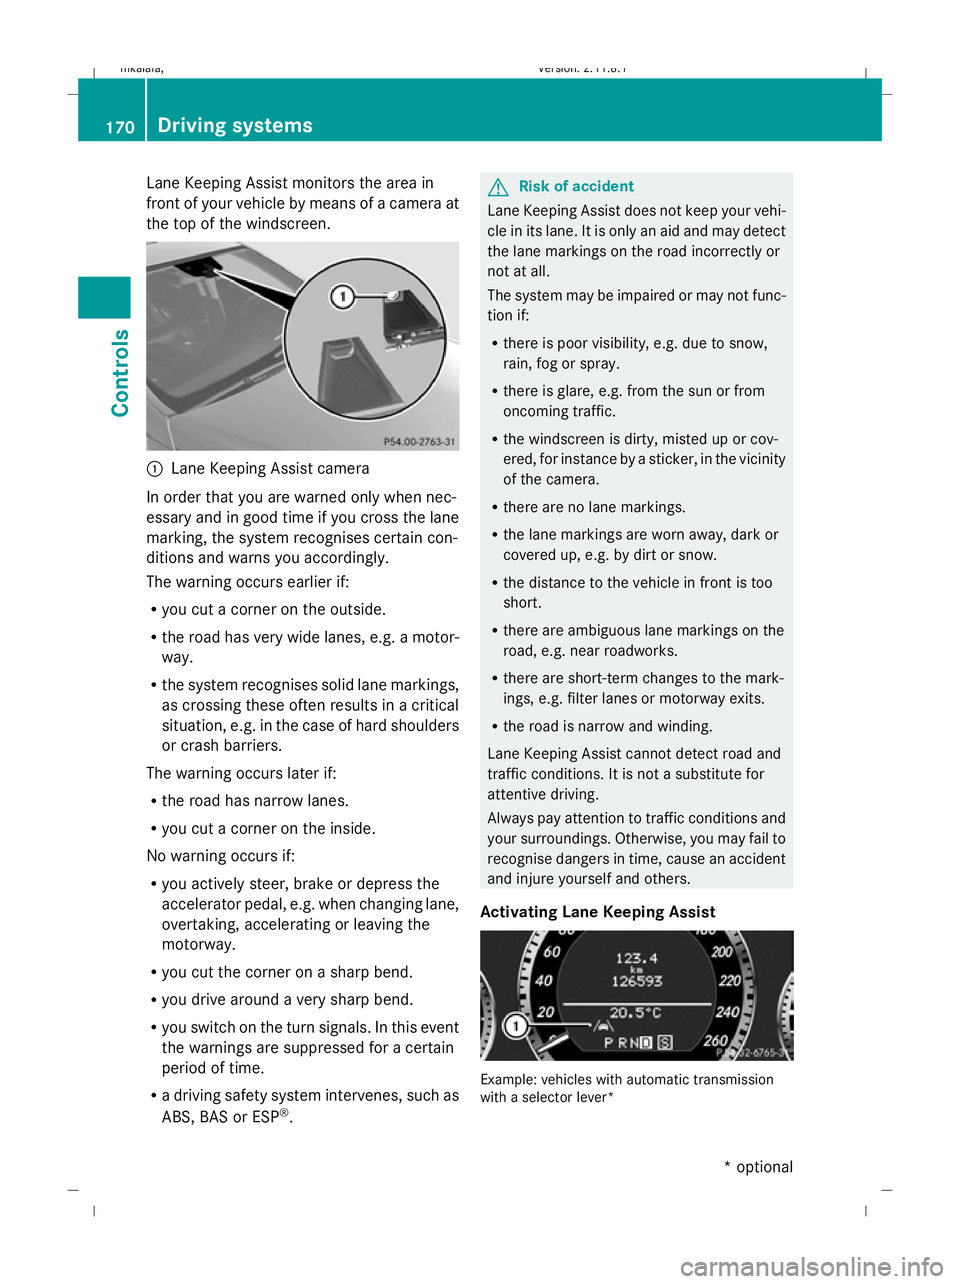
Lane Keeping Assist monitors the area in
front of your vehicle by means of a camera at
the top of the windscreen. :
Lane Keeping Assist camera
In order that you are warned only when nec-
essary and in good time if you cross the lane
marking, the system recognises certain con-
ditions and warns you accordingly.
The warning occurs earlier if:
R you cut a corner on the outside.
R the road has very wide lanes, e.g. a motor-
way.
R the system recognises solid lane markings,
as crossing these often results in a critical
situation, e.g. in the case of hard shoulders
or crash barriers.
The warning occurs later if:
R the road has narrow lanes.
R you cut a corner on the inside.
No warning occurs if:
R you actively steer, brake or depress the
accelerator pedal, e.g. when changing lane,
overtaking, accelerating or leaving the
motorway.
R you cut the corner on a sharp bend.
R you drive around a very sharp bend.
R you switch on the turn signals. In this event
the warnings are suppressed for a certain
period of time.
R a driving safety system intervenes, such as
ABS, BAS or ESP ®
. G
Risk of accident
Lane Keeping Assist does not keep your vehi-
cle in its lane. It is only an aid and may detect
the lane markings on the road incorrectly or
not at all.
The system may be impaired or may not func-
tion if:
R there is poor visibility, e.g. due to snow,
rain, fog or spray.
R there is glare, e.g. from the sun or from
oncoming traffic.
R the windscreen is dirty, misted up or cov-
ered, for instance by a sticker, in the vicinity
of the camera.
R there are no lane markings.
R the lane markings are worn away, dark or
covered up, e.g. by dirt or snow.
R the distance to the vehicle in front is too
short.
R there are ambiguous lane markings on the
road, e.g. near roadworks.
R there are short-term changes to the mark-
ings, e.g. filter lanes or motorway exits.
R the road is narrow and winding.
Lane Keeping Assist cannot detect road and
traffic conditions. It is not a substitute for
attentive driving.
Always pay attention to traffic conditions and
your surroundings. Otherwise, you may fail to
recognise dangers in time, cause an accident
and injure yourself and others.
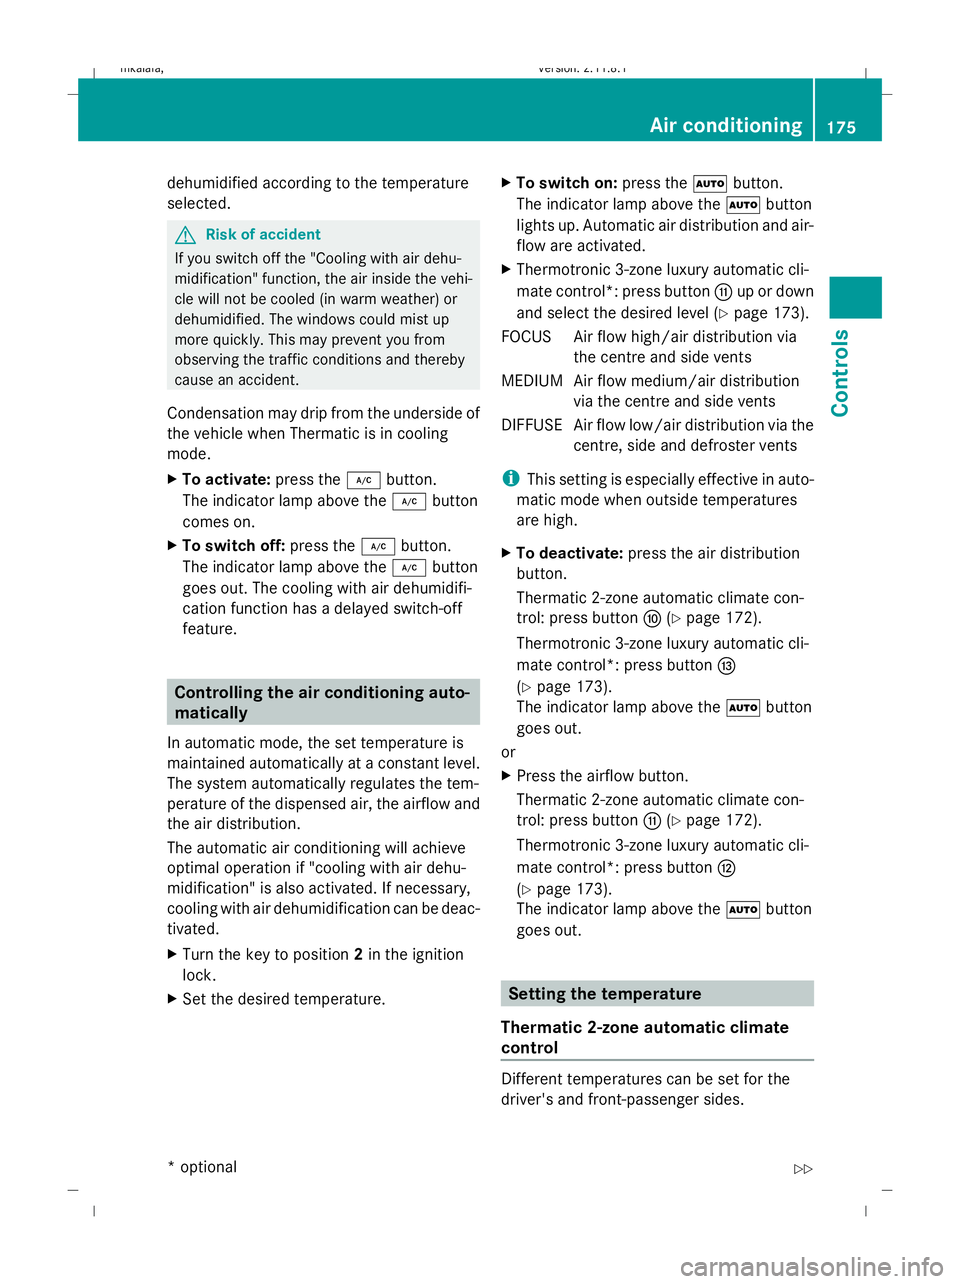
Activating Lane Keeping Assist Example: vehicles with automatic transmission
with a selector lever* 170
Driving systemsControls
* optional
212_AKB; 2; 4, en-GB
mkalafa
,V ersion: 2.11.8.1
2009-05-05T14:17:16+02:00 - Seite 170
Dateiname: 6515346702_buchblock.pdf; erzeugt am 07. May 2009 14:16:27; WK
Page 178 of 373
dehumidified according to the temperature
selected.
G
Risk of accident
If you switch off the "Cooling with air dehu-
midification" function, the air inside the vehi-
cle will not be cooled (in warm weather) or
dehumidified. The windows could mist up
more quickly. This may prevent you from
observing the traffic conditions and thereby
cause an accident.
Condensation may drip from the underside of
the vehicle when Thermatic is in cooling
mode.
X To activate: press the¿button.
The indicator lamp above the ¿button
comes on.
X To switch off: press the¿button.
The indicator lamp above the ¿button
goes out. The cooling with air dehumidifi-
cation function has a delayed switch-off
feature. Controlling the air conditioning auto-
matically
In automatic mode, the set temperature is
maintained automatically at a constant level.
The system automatically regulates the tem-
perature of the dispensed air, the airflow and
the air distribution.
The automatic air conditioning will achieve
optimal operation if "cooling with air dehu-
midification" is also activated. If necessary,
cooling with air dehumidification can be deac-
tivated.
X Turn the key to position 2in the ignition
lock.
X Set the desired temperature. X
To switch on: press theÃbutton.
The indicator lamp above the Ãbutton
lights up. Automatic air distribution and air-
flow are activated.
X Thermotronic 3-zone luxury automatic cli-
mate control*: press button Gup or down
and select the desired level (Y page 173).
FOCUS Air flow high/air distribution via the centre and side vents
MEDIUM Air flow medium/air distribution via the centre and side vents
DIFFUS EAir flow low/air distribution via the
centre, side and defroster vents
i This setting is especially effective in auto-
matic mode when outside temperatures
are high.
X To deactivate: press the air distribution
button.
Thermatic 2-zone automatic climate con-
trol: press button F(Ypage 172).
Thermotronic 3-zone luxury automatic cli-
mate control*: press button I
(Y page 173).
The indicator lamp above the Ãbutton
goes out.
or
X Press the airflow button.
Thermatic 2-zone automatic climate con-
trol: press button G(Ypage 172).
Thermotronic 3-zone luxury automatic cli-
mate control*: press button H
(Y page 173).
The indicator lamp above the Ãbutton
goes out. Setting the temperature
Thermatic 2-zone automatic climate
control Different temperatures can be set for the
driver's and front-passenger sides. Air conditioning
175Controls
* optional
212_AKB; 2; 4, en-GB
mkalafa,
Version: 2.11.8.1 2009-05-05T14:17:16+02:00 - Seite 175 Z
Dateiname: 6515346702_buchblock.pdf; erzeugt am 07. May 2009 14:16:29; WK
Page 188 of 373

Sliding/tilting sunroof*
Overhead control panel
:
To open
; To close/lower
= To raise
X Turn the key to position 1or 2in the ignition
lock.
X Pull or push the switch in the corresponding
direction.
i If you press the switch beyond the point
of resistance, an automatic opening/clos-
ing process is started in the corresponding
direction. You can stop automatic opera-
tion by pressing again.
The sun protection cover automatically opens
along with the sliding/tilting sunroof. Once
you have closed the sliding/tilting sunroof,
you can close the cover by hand.
Closing with increased force and with-
out the anti-entrapment feature G
Risk of injury
You could be severely or even fatally injured
when closing the sliding/tilting sunroof with
increased force or without the anti-entrap-
ment feature. Make sure that nobody can
become trapped when closing the sliding/tilt-
ing sunroof.
If the sliding/tilting sunroof locks up during
closing:
X Immediately after it locks up, pull the
switch again to the pressure point in the direction of arrow
;until the sliding/tilt-
ing sunroof is closed.
The sliding/tilting sunroof is closed with
more force.
If the sliding/tilting sunroof locks up during
closing again:
X Immediately after it locks up, pull the
switch again to the pressure point in the
direction of arrow ;until the sliding/tilt-
ing sunroof is closed.
The sliding/tilting sunroof is closed without
the anti-entrapment feature.
Rain closing feature* If the key is in position
0in the ignition lock,
or if it is removed, the sliding/tilting sunroof
closes automatically:
R if it starts to rain
R at extreme outside temperatures
R after six hours
R if there is a malfunction in the power supply
The rear of the sliding/tilting sunroof is then
raised in order to ventilate the interior of the
vehicle.
i The sliding/tilting sunroof is opened
slightly again if it is obstructed while being
closed by the rain closing feature. The rain
closing feature is then deactivated.
The sliding/tilting sunroof does not close if:
R it is raised at the rear
R it is blocked
R no rain is falling on the area of the wind-
screen being monitored by the rain sensor
(e.g. because the vehicle is under a bridge
or in a carport)
Resetting Reset the sliding/tilting sunroof if it does not
open smoothly. Sliding sunroof
185Controls
* optional
212_AKB; 2; 4, en-GB
mkalafa,
Version: 2.11.8.1 2009-05-05T14:17:16+02:00 - Seite 185 Z
Dateiname: 6515346702_buchblock.pdf; erzeugt am 07. May 2009 14:16:33; WK
Page 189 of 373
X
Turn the key to position 1or 2in the ignition
lock.
X The sliding/tilting sunroof is raised fully at
the rear.
X Keep the switch pressed for an additional
second.
X Make sure that the sliding/tilting sunroof
can be opened or closed fully again
(Y page 185).
X If this is not the case, consult a qualified
specialist workshop. Panorama sliding sunroof*
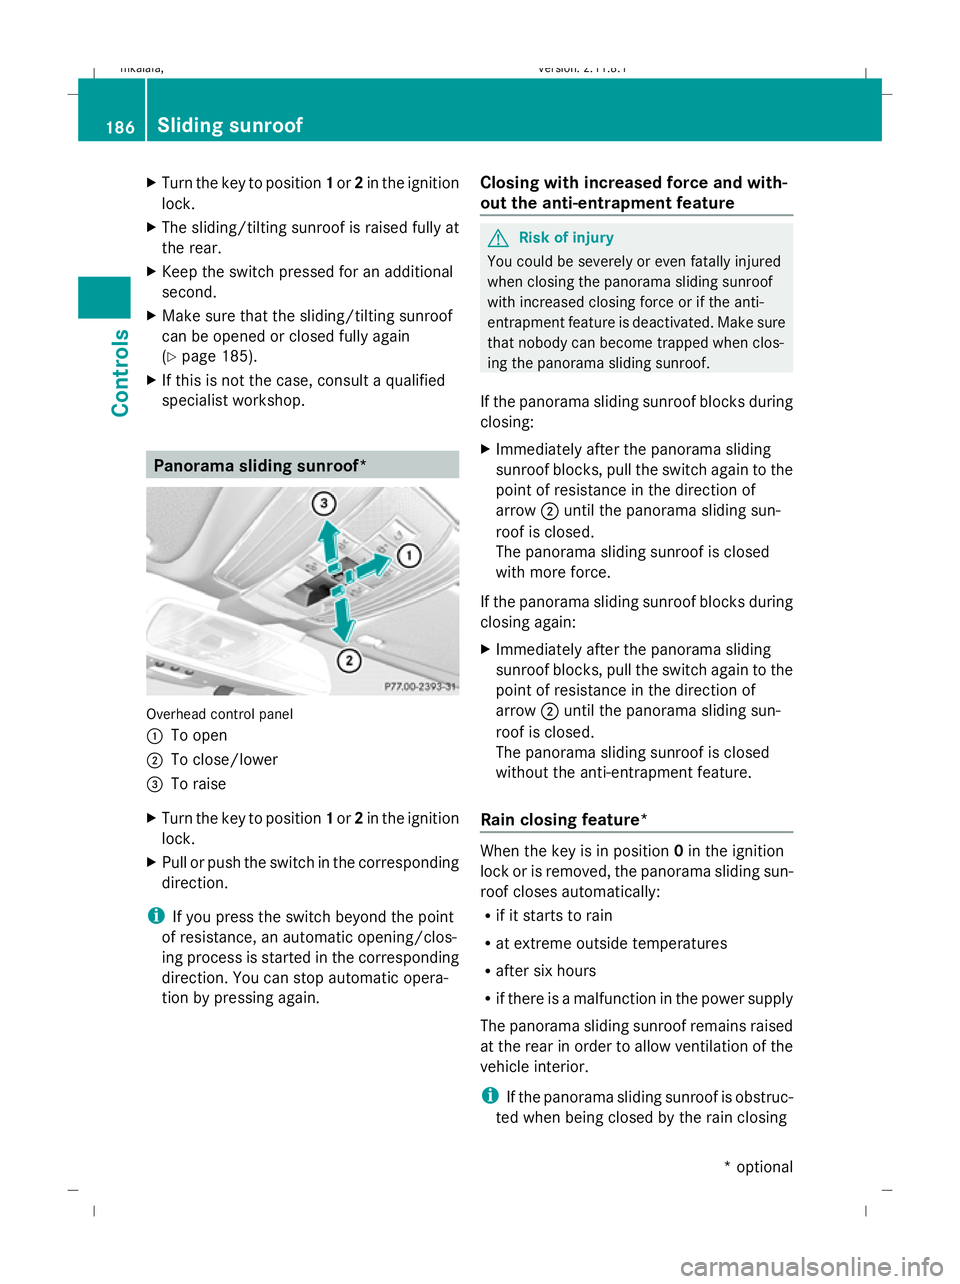
Overhead control panel
:
To open
; To close/lower
= To raise
X Turn the key to position 1or 2in the ignition
lock.
X Pull or push the switch in the corresponding
direction.
i If you press the switch beyond the point
of resistance, an automatic opening/clos-
ing process is started in the corresponding
direction. You can stop automatic opera-
tion by pressing again. Closing with increased force and with-
out the anti-entrapment feature G
Risk of injury
You could be severely or even fatally injured
when closing the panorama sliding sunroof
with increased closing force or if the anti-
entrapment feature is deactivated. Make sure
that nobody can become trapped when clos-
ing the panorama sliding sunroof.
If the panorama sliding sunroof blocks during
closing:
X Immediately after the panorama sliding
sunroof blocks, pull the switch again to the
point of resistance in the direction of
arrow ;until the panorama sliding sun-
roof is closed.
The panorama sliding sunroof is closed
with more force.
If the panorama sliding sunroof blocks during
closing again:
X Immediately after the panorama sliding
sunroof blocks, pull the switch again to the
point of resistance in the direction of
arrow ;until the panorama sliding sun-
roof is closed.
The panorama sliding sunroof is closed
without the anti-entrapment feature.
Rain closing feature* When the key is in position
0in the ignition
lock or is removed, the panorama sliding sun-
roof closes automatically:
R if it starts to rain
R at extreme outside temperatures
R after six hours
R if there is a malfunction in the power supply
The panorama sliding sunroof remains raised
at the rear in order to allow ventilation of the
vehicle interior.
i If the panorama sliding sunroof is obstruc-
ted when being closed by the rain closing 186
Sliding sunroofControls
* optional
212_AKB; 2; 4, en-GB
mkalafa,
Version: 2.11.8.1 2009-05-05T14:17:16+02:00 - Seite 186
Dateiname: 6515346702_buchblock.pdf; erzeugt am 07. May 2009 14:16:33; WK
Page 190 of 373

feature, it opens again slightly. The rain
closing feature is then deactivated.
The panorama sliding sunroof does not close
if:
R it is raised at the rear.
R it is blocked.
R no rain is falling on the area of the wind-
screen being monitored by the rain sensor
(e.g. because the vehicle is under a bridge
or in a carport). Roller sunblinds for the panorama
sliding sunroof*
The roller sunblinds provide protection from
the sun. The two roller sunblinds can only be
opened and closed together when the pano-
rama sliding sunroof is closed. G
Risk of injury
Make sure that nobody can become trapped
as you open or close the roller sunblinds. Overhead control panel
: To open
; To close
= To open
X Turn the key to position 1or 2in the ignition
lock.
X Pull or push the switch in the corresponding
direction. i
If you press the switch beyond the point
of resistance, an automatic opening/clos-
ing process is started in the corresponding
direction. You can stop automatic opera-
tion by pressing again.
Resetting the panorama sliding sunroof
and the roller sunblinds Reset the panorama sliding sunroof and the
roller sunblinds if the panorama sliding sun-
roof or the roller sunblinds do not close
smoothly.
X Turn the key to position 1or 2in the ignition
lock.
X Pull the switch repeatedly to the point of
resistance in the direction of arrow ;until
the panorama sliding sunroof is fully
closed.
X Keep the switch pulled for an additional
second.
X Pull the switch repeatedly to the point of
resistance in the direction of arrow ;until
the roller sunblinds are fully closed.
X Keep the switch pulled for an additional
second.
X Check that the panorama sliding sunroof
and the roller sunblinds can be fully opened
again.
X If this is not the case, consult a qualified
specialist workshop. Loading and stowing
Loading guidelines
G
Risk of injury
Secure and position the load as described in
the loading guidelines.
Otherwise, vehicle occupants could
be injured by the load being thrown around in
the event of sharp braking, a sudden change
in direction or an accident.
You will find further information in the "Secur-
ing a load" section. Loading and stowing
187Controls
* optional
212_AKB; 2; 4, en-GB
mkalafa,
Version: 2.11.8.1 2009-05-05T14:17:16+02:00 - Seite 187 Z
Dateiname: 6515346702_buchblock.pdf; erzeugt am 07. May 2009 14:16:33; WK
Page 198 of 373
X
Press button :.
Flap ;folds down.
X Press catch =in and pull out frame ?
containing the skibag. G
Risk of poisoning
When the skibag has been removed, always
drive with the boot lid closed. Otherwise,
exhaust fumes could enter the vehicle inte-
rior. Through-loading feature in the rear
bench seat* (Saloon)
The left-hand and right-hand rear seat backr-
ests can be folded down to increase the boot
capacity. G
Risk of injury
Do not carry heavy or hard objects inside the
vehicle or in the boot unless they are secured.
Otherwise, you and other vehicle occupants
could be injured by objects being thrown
around the vehicle in the event of sharp brak-
ing, a sudden change in direction or an acci-
dent. G
Risk of poisoning
Always drive with the boot lid closed. Exhaust
fumes could otherwise enter the vehicle inte-
rior.
Folding the rear seat backrest forwards !
Before you fold down the rear seat back-
rest, remove the side head restraints for
the integrated child seat*, see the "Side
head restraints for integrated child seat*"
section. Otherwise, the side head
restraints could be damaged.
i Vehicles with a Memory function*: when
you fold one or both parts of the rear seat
backrest forwards, the respective front
seat moves forward slightly, when neces-
sary, in order to avoid contact.
X Vehicles without Memory function*: if nec-
essary, move the driver's or front-
passenger seat forwards.
X Open the boot/luggage compartment.
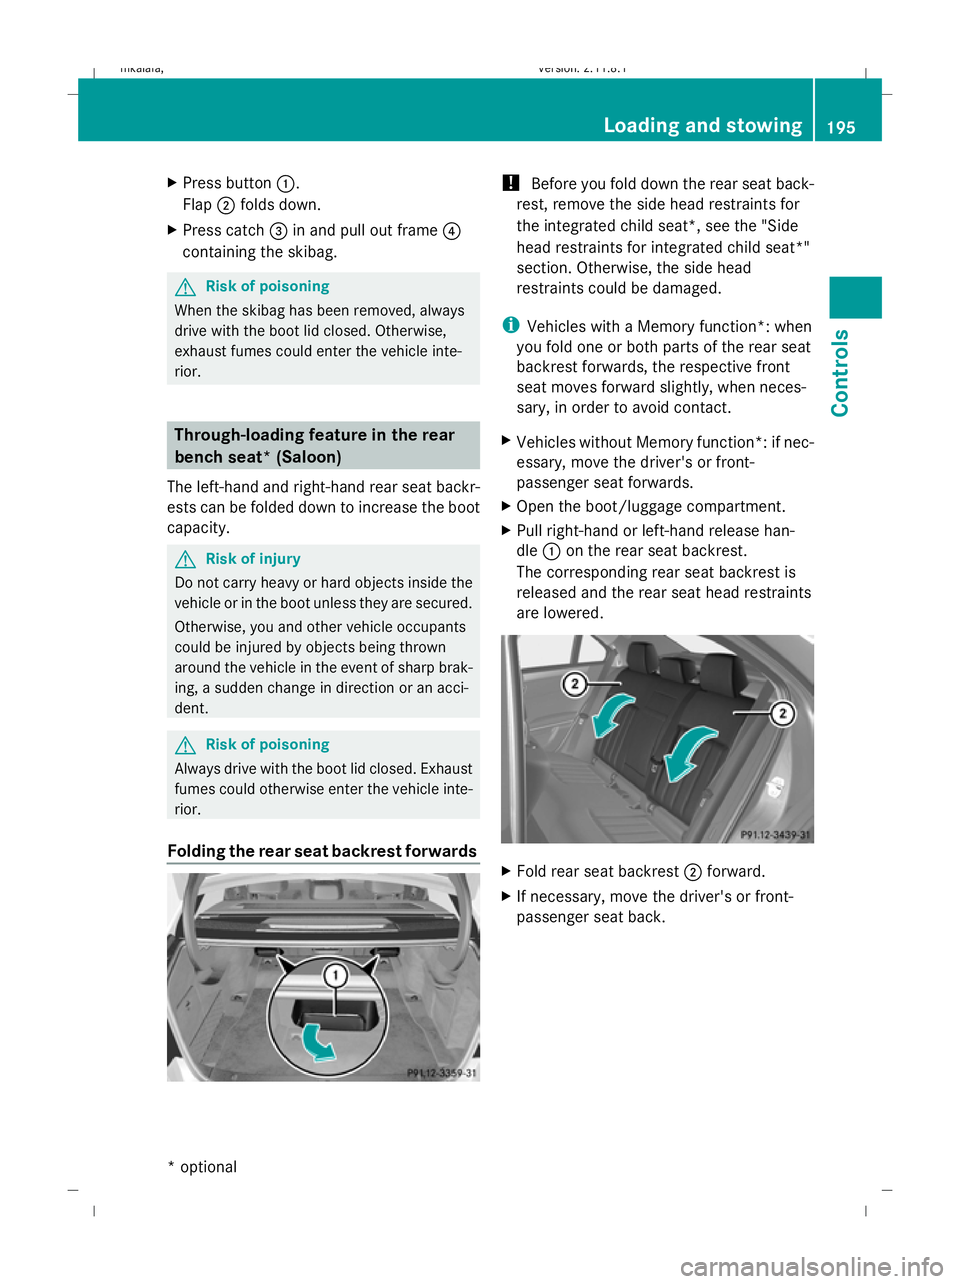
X Pull right-hand or left-hand release han-
dle :on the rear seat backrest.
The corresponding rear seat backrest is
released and the rear seat head restraints
are lowered. X
Fold rear seat backrest ;forward.
X If necessary, move the driver's or front-
passenger seat back. Loading and stowing
195Controls
* optional
212_AKB; 2; 4, en-GB
mkalafa,
Version: 2.11.8.1 2009-05-05T14:17:16+02:00 - Seite 195 Z
Dateiname: 6515346702_buchblock.pdf; erzeugt am 07. May 2009 14:16:40; WK
Page 199 of 373
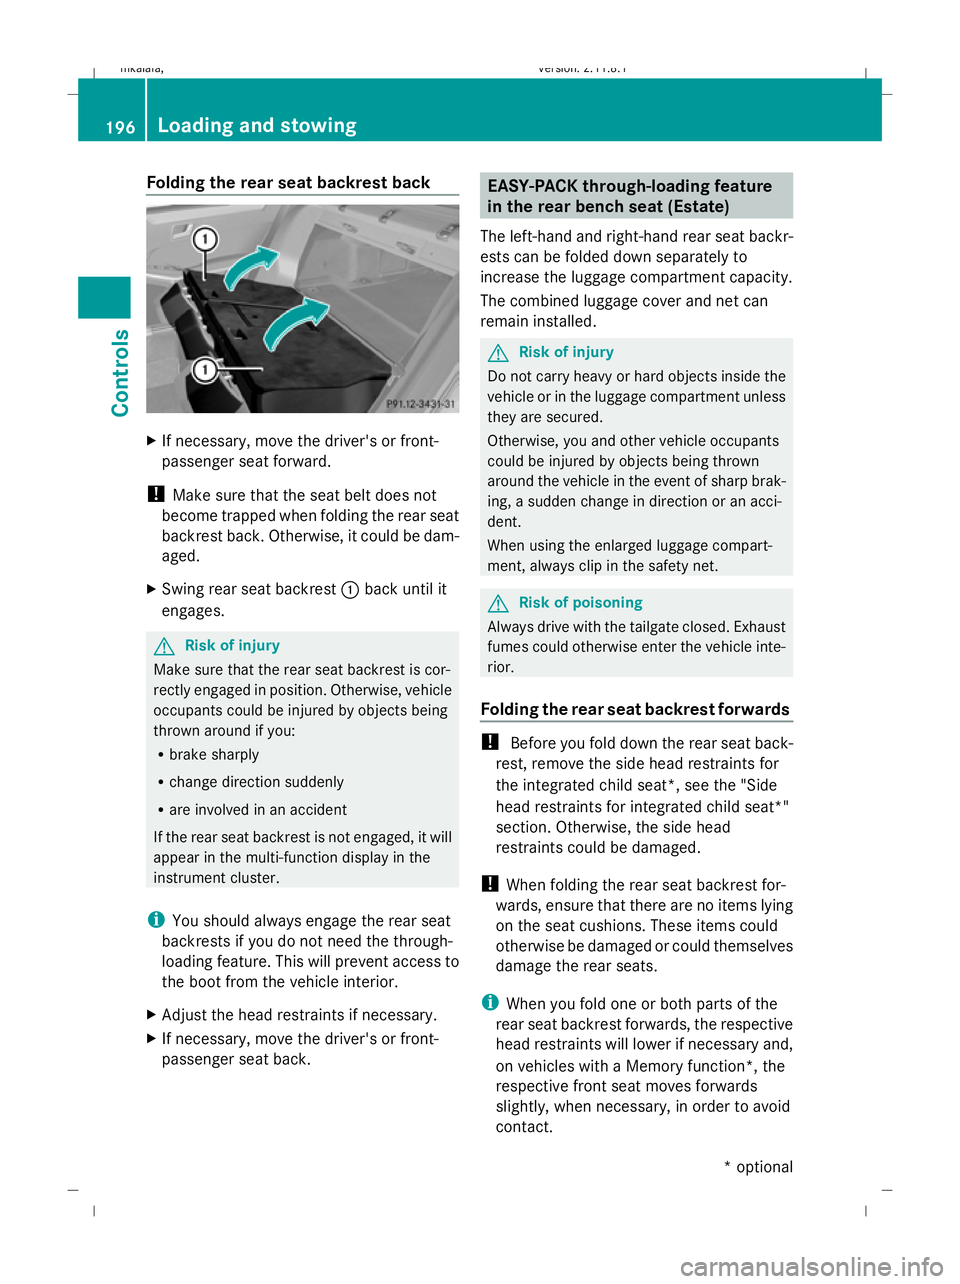
Folding the rear seat backrest back
X
If necessary, move the driver's or front-
passenger seat forward.
! Make sure that the seat belt does not
become trapped when folding the rear seat
backrest back. Otherwise, it could be dam-
aged.
X Swing rear seat backrest :back until it
engages. G
Risk of injury
Make sure that the rear seat backrest is cor-
rectly engaged in position. Otherwise, vehicle
occupants could be injured by objects being
thrown around if you:
R brake sharply
R change direction suddenly
R are involved in an accident
If the rear seat backrest is not engaged, it will
appear in the multi-function display in the
instrument cluster.
i You should always engage the rear seat
backrests if you do not need the through-
loading feature. This will prevent access to
the boot from the vehicle interior.
X Adjust the head restraints if necessary.
X If necessary, move the driver's or front-
passenger seat back. EASY-PACK through-loading feature
in the rear bench seat (Estate)
The left-hand and right-hand rear seat backr-
ests can be folded down separately to
increase the luggage compartment capacity.
The combined luggage cover and net can
remain installed. G
Risk of injury
Do not carry heavy or hard objects inside the
vehicle or in the luggage compartment unless
they are secured.
Otherwise, you and other vehicle occupants
could be injured by objects being thrown
around the vehicle in the event of sharp brak-
ing, a sudden change in direction or an acci-
dent.
When using the enlarged luggage compart-
ment, always clip in the safety net. G
Risk of poisoning
Always drive with the tailgate closed. Exhaust
fumes could otherwise enter the vehicle inte-
rior.
Folding the rear seat backrest forwards !
Before you fold down the rear seat back-
rest, remove the side head restraints for
the integrated child seat*, see the "Side
head restraints for integrated child seat*"
section. Otherwise, the side head
restraints could be damaged.
! When folding the rear seat backrest for-
wards, ensure that there are no items lying
on the seat cushions. These items could
otherwise be damaged or could themselves
damage the rear seats.
i When you fold one or both parts of the
rear seat backrest forwards, the respective
head restraints will lower if necessary and,
on vehicles with a Memory function*, the
respective front seat moves forwards
slightly, when necessary, in order to avoid
contact. 196
Loading and stowingCont
rols
* optional
212_AKB; 2; 4, en-GB
mkalafa
,V ersion: 2.11.8.1
2009-05-05T14:17:16+02:00 - Seite 196
Dateiname: 6515346702_buchblock.pdf; erzeugt am 07. May 2009 14:16:40; WK