2009 MERCEDES-BENZ E-CLASS ESTATE axle
[x] Cancel search: axlePage 63 of 373
R
interference by other radar sources
R strong radar reflections, for example in
multi-storey garages
BAS PLUS does not react to people or ani-
mals, oncoming vehicles and crossing traffic.
BAS PLUS may not detect narrow vehicles
such as motorcycles and vehicles driving on
a different line.
Following a collision or crash-related damage
to the front end of the vehicle, have the con-
figuration and operation of the radar sensors
checked at a Mercedes-Benz Service Centre.
If BAS PLUS is not available due to a malfunc-
tion in the radar sensor system, the braking
system remains available with full brake
boosting effect and BAS. Adaptive brake lamps
i Adaptive brake lamps are only available in
certain countries.
If you brake sharply from a speed of more
than 50 km/h or if braking is assisted by BAS
or BAS PLUS *,the brake lamps flash rapidly.
In this way, traffic travelling behind you is
warned in an even more noticeable manner.
If you brake sharply from a speed of more
than 70 km/h to a standstill, the hazard warn-
ing lamps are activated automatically. If the
brakes are applied again, the brake lamps
light up continuously. The hazard warning
lamps switch off automatically if you travel
faster than 10 km/h. You can also switch off
the hazard warning lamps using the hazard
warning switch button (Y page 96).ESP
®
(Electronic Stability Program)
ESP ®
monitors driving stability and traction,
i.e. power transmission between tyres and
the road surface.
If ESP ®
detects that the vehicle is deviating
from the direction desired by the driver, one
or more wheels are braked to stabilise the vehicle. If necessary, the engine output is also
modified to keep the vehicle on the desired
course within physical limits. ESP ®
assists
the driver when pulling away on wet or slip-
pery roads. ESP ®
can also stabilise the vehi-
cle during braking.
When ESP ®
intervenes, the äwarning
lamp flashes in the instrument cluster. G
Risk of accident
If the ä warning lamp in the instrument
cluster flashes, proceed as follows:
R do not deactivate ESP ®
under any circum-
stances.
R only depress the accelerator pedal as far as
necessary when pulling away.
R adapt your driving style to suit the prevail-
ing road and weather conditions.
Otherwise, the vehicle could skid.
ESP ®
cannot reduce the risk of an accident if
you drive too fast. ESP ®
cannot override the
laws of physics.
! If the vehicle is to be towed with the front
or rear axle raised, the ignition must be
switched off (key in position 0or 1in the
ignition lock). Application of the brakes by
ESP ®
could otherwise destroy the brake
system on the front or rear axle.
! Vehicles with 4MATIC* may not be towed
with the front or rear axle raised.
i Only use wheels with the recommended
tyre sizes. Only then will ESP ®
function
properly.
ESP ®
trailer stabilisation If your trailer begins to lurch, you can only
stabilise the vehicle/trailer combination by
depressing the brake firmly.
In this situation, ESP ®
assists you and can
detect when the trailer begins to lurch.
ESP ®
slows the vehicle down by braking and 60
Driving safety systemsSafety
* optional
212_AKB; 2; 4, en-GB
mkalafa,
Version: 2.11.8.1 2009-05-05T14:17:16+02:00 - Seite 60
Dateiname: 6515346702_buchblock.pdf; erzeugt am 07. May 2009 14:15:43; WK
Page 85 of 373
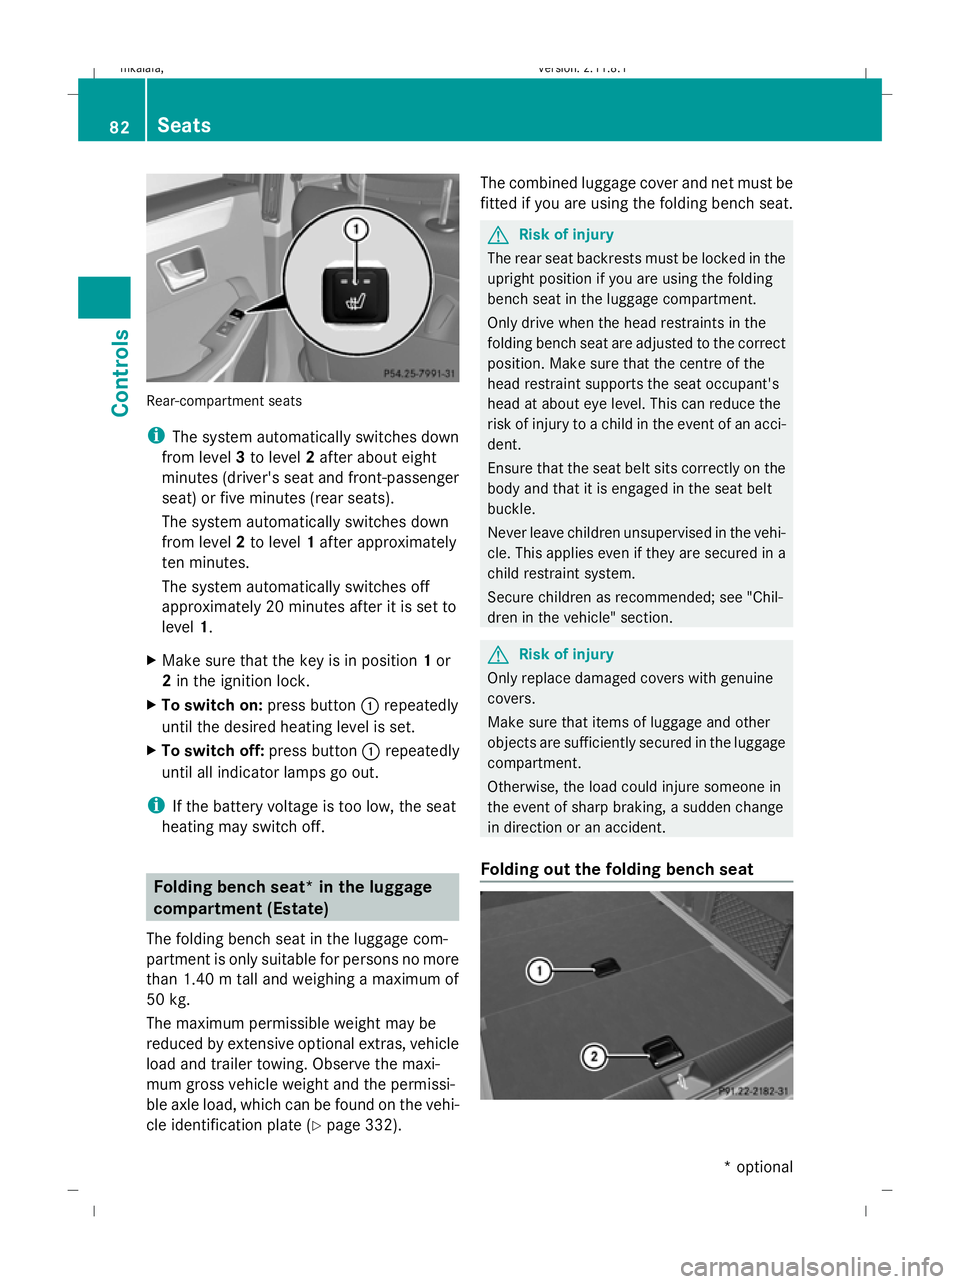
Rear-compartment seats
i
The system automatically switches down
from level 3to level 2after about eight
minutes (driver's seat and front-passenger
seat) or five minutes (rear seats).
The system automatically switches down
from level 2to level 1after approximately
ten minutes.
The system automatically switches off
approximately 20 minutes after it is set to
level 1.
X Make sure that the key is in position 1or
2 in the ignition lock.
X To switch on: press button:repeatedly
until the desired heating level is set.
X To switch off: press button:repeatedly
until all indicator lamps go out.
i If the battery voltage is too low, the seat
heating may switch off. Folding bench seat* in the luggage
compartment (Estate)
The folding bench seat in the luggage com-
partment is only suitable for persons no more
than 1.40 m tall and weighing a maximum of
50 kg.
The maximum permissible weight may be
reduced by extensive optional extras, vehicle
load and trailer towing. Observe the maxi-
mum gross vehicle weight and the permissi-
ble axle load, which can be found on the vehi-
cle identification plate (Y page 332).The combined luggage cover and net must be
fitted if you are using the folding bench seat. G
Risk of injury
The rear seat backrests must be locked in the
upright position if you are using the folding
bench seat in the luggage compartment.
Only drive when the head restraints in the
folding bench seat are adjusted to the correct
position. Make sure that the centre of the
head restraint supports the seat occupant's
head at about eye level. This can reduce the
risk of injury to a child in the event of an acci-
dent.
Ensure that the seat belt sits correctly on the
body and that it is engaged in the seat belt
buckle.
Never leave children unsupervised in the vehi-
cle. This applies even if they are secured in a
child restraint system.
Secure children as recommended; see "Chil-
dren in the vehicle" section. G
Risk of injury
Only replace damaged covers with genuine
covers.
Make sure that items of luggage and other
objects are sufficiently secured in the luggage
compartment.
Otherwise, the load could injure someone in
the event of sharp braking, a sudden change
in direction or an accident.
Folding out the folding bench seat 82
SeatsCont
rols
* optional
212_AKB; 2; 4, en-GB
mkalafa
,V ersion: 2.11.8.1
2009-05-05T14:17:16+02:00 - Seite 82
Dateiname: 6515346702_buchblock.pdf; erzeugt am 07. May 2009 14:15:53; WK
Page 101 of 373
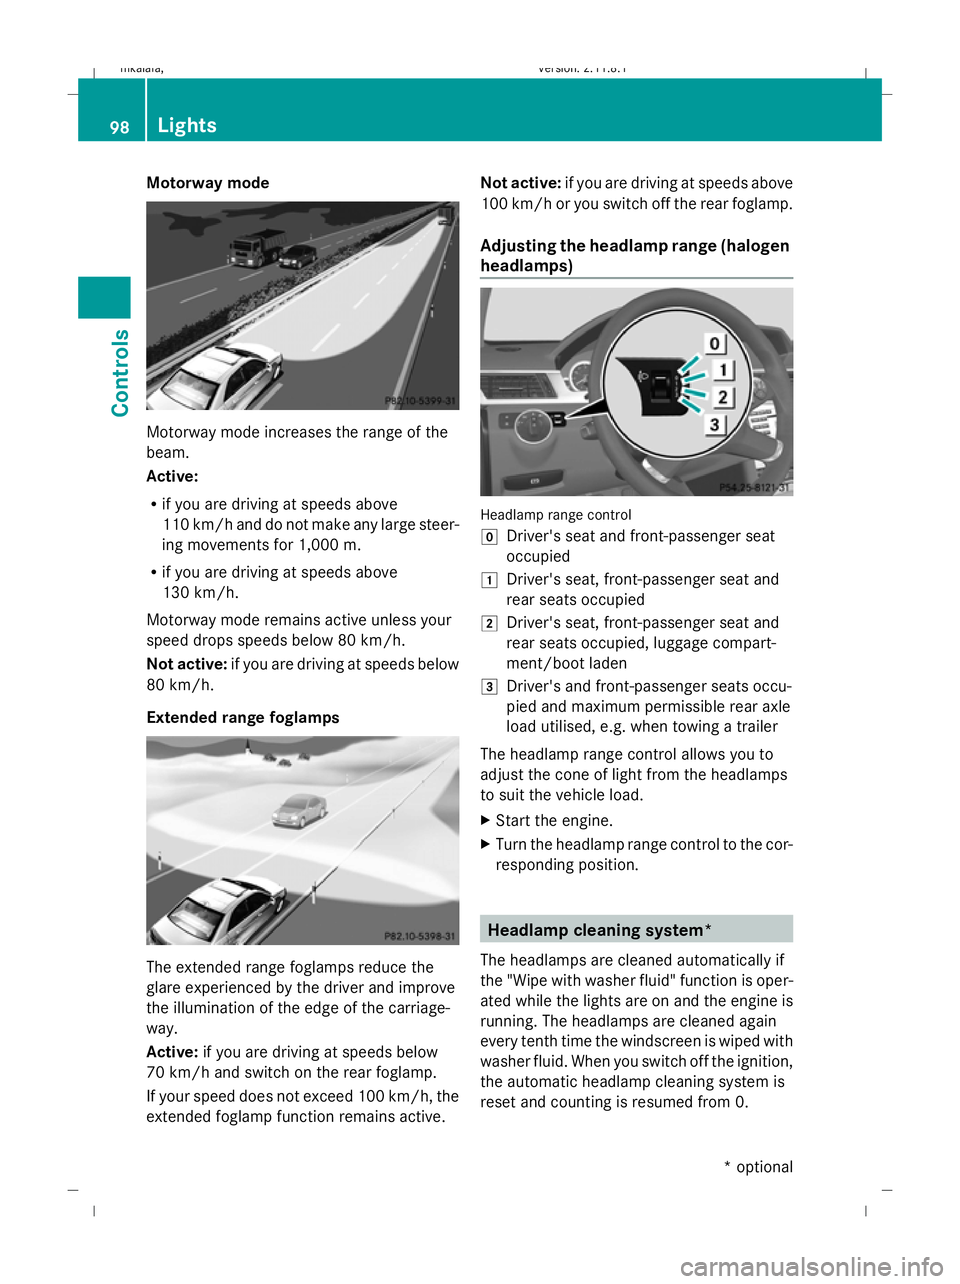
Motorway mode
Motorway mode increases the range of the
beam.
Active:
R if you are driving at speeds above
110 km/h and do not make any large steer-
ing movements for 1,000 m.
R if you are driving at speeds above
130 km/h.
Motorway mode remains active unless your
speed drops speeds below 80 km/h.
Not active: if you are driving at speeds below
80 km/h.
Extended range foglamps The extended range foglamps reduce the
glare experienced by the driver and improve
the illumination of the edge of the carriage-
way.
Active: if you are driving at speeds below
70 km/h and switch on the rear foglamp.
If your speed does not exceed 100 km/h, the
extended foglamp function remains active. Not active:
if you are driving at speeds above
100 km/h or you switch off the rear foglamp.
Adjusting the headlamp range (halogen
headlamps) Headlamp range control
g
Driver's seat and front-passenger seat
occupied
1 Driver's seat, front-passenger seat and
rear seats occupied
2 Driver's seat, front-passenger seat and
rear seats occupied, luggage compart-
ment/boot laden
3 Driver's and front-passenger seats occu-
pied and maximum permissible rear axle
load utilised, e.g. when towing a trailer
The headlamp range control allows you to
adjust the cone of light from the headlamps
to suit the vehicle load.
X Start the engine.
X Turn the headlamp range control to the cor-
responding position. Headlamp cleaning system*
The headlamps are cleaned automatically if
the "Wipe with washer fluid" function is oper-
ated while the lights are on and the engine is
running. The headlamps are cleaned again
every tenth time the windscreen is wiped with
washer fluid. When you switch off the ignition,
the automatic headlamp cleaning system is
reset and counting is resumed from 0. 98
LightsControls
* optional
212_AKB; 2; 4, en-GB
mkalafa,
Version: 2.11.8.1 2009-05-05T14:17:16+02:00 - Seite 98
Dateiname: 6515346702_buchblock.pdf; erzeugt am 07. May 2009 14:16:01; WK
Page 158 of 373
i
The "Raised Level" setting is cancelled if:
R you drive at a speed of more than
120 km/h
R you drive at a speed between 80 km/h
and 120 km/hf or three minutes or more
The "Raised Level" remains saved when you
are not driving within these speed ranges.
Suspension tuning The electronically controlled damping system
works continuously. This improves driving
safety and ride comfort.
The damping is tuned individually to each
wheel and depends on:
R your driving style, e.g. sporty
R the road surface condition, e.g. bumps
R your individual selection, i.e. sports or com-
fort
Your selection remains stored even if you
remove the key from the ignition lock. Sports tuning
The firmer suspension tuning in sports mode
ensures even better contact with the road.
Select this mode when employing a sporty
driving style, e. g. on winding country roads.
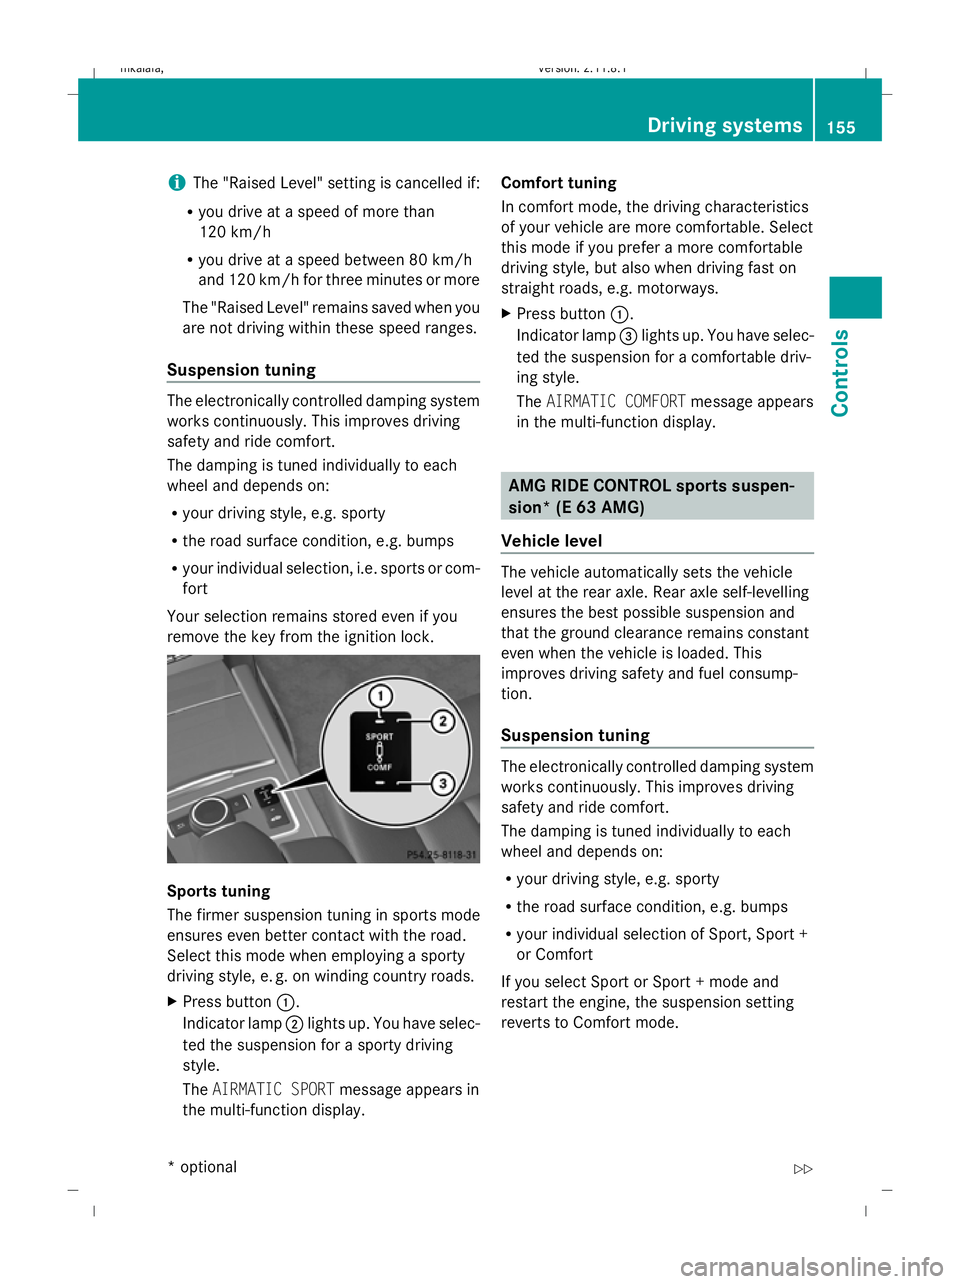
X
Press button :.
Indicator lamp ;lights up. You have selec-
ted the suspension for a sporty driving
style.
The AIRMATIC SPORT message appears in
the multi-function display. Comfort tuning
In comfort mode, the driving characteristics
of your vehicle are more comfortable. Select
this mode if you prefer a more comfortable
driving style, but also when driving fast on
straight roads, e.g. motorways.
X Press button :.
Indicator lamp =lights up. You have selec-
ted the suspension for a comfortable driv-
ing style.
The AIRMATIC COMFORT message appears
in the multi-function display. AMG RIDE CONTROL sports suspen-
sion* (E 63 AMG)
Vehicle level The vehicle automatically sets the vehicle
level at the rear axle. Rear axle self-levelling
ensures the best possible suspension and
that the ground clearance remains constant
even when the vehicle is loaded. This
improves driving safety and fuel consump-
tion.
Suspension tuning
The electronically controlled damping system
works continuously. This improves driving
safety and ride comfort.
The damping is tuned individually to each
wheel and depends on:
R
your driving style, e.g. sporty
R the road surface condition, e.g. bumps
R your individual selection of Sport, Sport +
or Comfort
If you select Sport or Sport + mode and
restart the engine, the suspension setting
reverts to Comfort mode. Driving systems
155Controls
* optional
212_AKB; 2; 4, en-GB
mkalafa,
Version: 2.11.8.1 2009-05-05T14:17:16+02:00 - Seite 155 Z
Dateiname: 6515346702_buchblock.pdf; erzeugt am 07. May 2009 14:16:22; WK
Page 191 of 373
Even if you follow all the loading guidelines,
the load will increase the risk of injury in the
event of an accident.
The handling characteristics of a laden vehi-
cle are dependent on the distribution of the
load within the vehicle. For this reason, you
should observe the following notes when
transporting a load:
R when transporting a load, never exceed the
maximum permissible gross vehicle weight
or the permissible axle loads for the vehicle
(including occupants).
R position heavy loads as far forwards and as
low in the boot or luggage compartment as
possible.
R the load must not protrude above the upper
edge of the seat backrests.
R always place the load against the rear or
front seat backrests. Make sure that the
seat backrests are securely locked into
place.
R always place the load behind unoccupied
seats if possible.
R secure the load with sufficiently strong and
wear-resistant load restraints. pad sharp
edges for protection.
i Load restraints are available at any quali-
fied specialist workshop, e.g. a Mercedes-
Benz Service Centre. Stowage compartments
G
Risk of injury
The stowage compartments must be closed
when items are stored in them. Luggage nets
are not designed to secure heavy items of
luggage.
You or other vehicle occupants could be
injured by objects being thrown around if you: R
brake sharply
R change direction suddenly
R are involved in an accident
Sharp-edged and fragile objects must not be
placed in the luggage net.
Do not place hard objects in the map pockets.
Objects must not protrude from the map
pockets.
Glove compartment i
Depending on the vehicle's equipment,
there is an AUX-IN connection installed in
the glove compartment, or a Media Inter-
face*, which is a universal interface for
portable audio equipment, e.g. for an iPod
or USB device; see the separate Audio or
COMAND APS* operating instructions. X
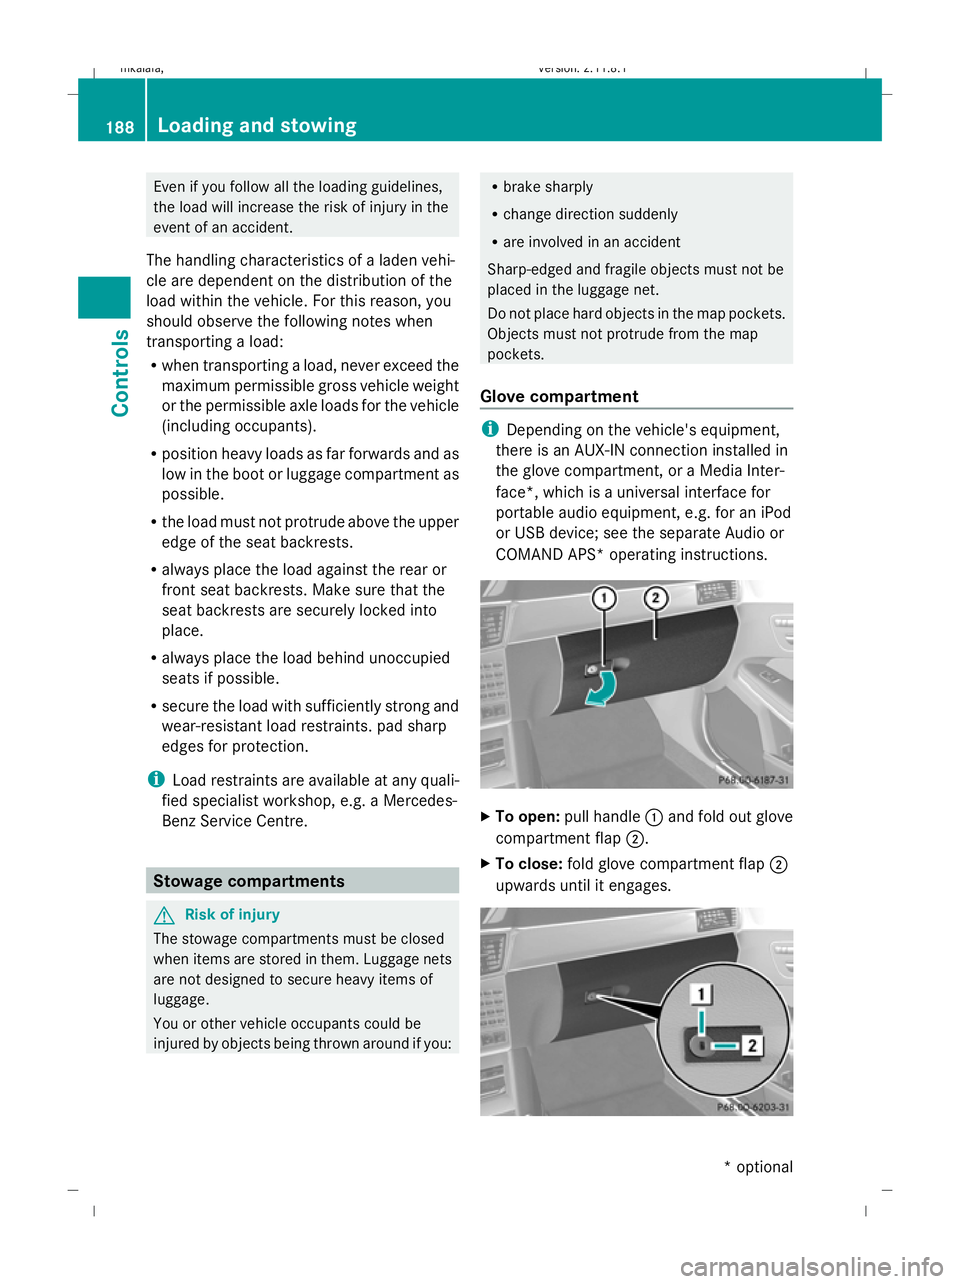
To open: pull handle :and fold out glove
compartment flap ;.
X To close: fold glove compartment flap ;
upwards until it engages. 188
Loading and sto
wingControls
* optional
212_AKB; 2; 4, en-GB
mkalafa
,V ersion: 2.11.8.1
2009-05-05T14:17:16+02:00 - Seite 188
Dateiname: 6515346702_buchblock.pdf; erzeugt am 07. May 2009 14:16:34; WK
Page 219 of 373
Running-in notes
The first 1,500 km
G
Risk of accident
New brake pads/linings only have optimal
braking performance after several hundred
kilometres. Until then, compensate for this by
applying greater force to the brake pedal. This
also applies when brake pads/linings or
brake discs have been changed.
If you treat the engine with sufficient care
from the very start, you will be rewarded with
excellent performance for the remainder of
the engine's life.
R Therefore, you should drive at varying road
and engine speeds for the first 1,500 km.
R Avoid heavy loads, e.g. driving at full throt-
tle, during this time. Do not exceed 2
/ 3 of
the maximum permissible engine speed for
each gear.
R Change gear in good time.
R Do not shift down a gear manually in order
to brake.
Vehicles with automatic transmission*:
R try to avoid depressing the accelerator
pedal beyond the pressure point (kick-
down).
R only use ranges 3,2or 1for slow driving,
e.g. in mountainous terrain.
After 1,500 km, you may gradually bring the
vehicle up to full road and engine speeds.
Additional notes on running in AMG vehicles:
R do not drive faster than 140 km/h for the
first 1,500 km.
R only bring the engine up to a maximum
engine speed of 4,500 rpm for a brief
period.
i These running-in instructions must also
be observed if you have the engine, the dif-
ferenial gear or the front axle differential of
your vehicle replaced. AMG vehicles with a rear axle differ-
ential lock*
Your vehicle is equipped with a self-locking
differential on the rear axle. For optimum pro-
tection of the differential gear on the rear
axle, change the oil after running in the vehi-
cle over a distance of 3,000 km. This oil
change will increase the service life of your
differential. Have the oil change performed at
a qualified specialist workshop. Mercedes-
Benz recommends that you use a Mercedes-
Benz Service Centre for this purpose. Refuelling
Refuelling
G
Risk of explosion
Fuel is highly flammable. Fire, naked flames
and smoking are therefore prohibited when
handling fuels.
Switch off the engine and the auxiliary heat-
ing* before refuelling. G
Risk of injury
Do not come into direct contact with fuel.
Direct skin contact with fuels or the inhalation
of fuel vapours is a health hazard. G
Risk of fire
Do not use petrol to refuel vehicles with a die-
sel engine. Never mix diesel with petrol. This
causes damage to the fuel system and engine
and could result in the vehicle catching fire.
! Do not use petrol to refuel vehicles with a
diesel engine. Do not use diesel to refuel
vehicles with a petrol engine. Even small
amounts of the wrong fuel will cause dam-
age to the injection system and engine.
Damage resulting from adding the wrong
fuel is not covered by the warranty.
! Do not start the engine if you accidentally
refuel with the wrong fuel. Otherwise, the
fuel could enter the fuel lines. This would 216
RefuellingOperation
* optional
212_AKB; 2; 4, en-GB
mkalafa
,V ersion: 2.11.8.1
2009-05-05T14:17:16+02:00 - Seite 216
Dateiname: 6515346702_buchblock.pdf; erzeugt am 07. May 2009 14:16:54; WK
Page 226 of 373
Tyres and wheels
Points to remember
! For safety reasons, Mercedes-Benz rec-
ommends that you only use tyres, wheels
and accessories which have been approved
by Mercedes-Benz specifically for your
vehicle. These tyres have been specially
adapted for use with the control systems,
such as ABS or ESP ®
, and are marked as
follows:
R MO = Mercedes-Benz Original
R MOE = Mercedes-Benz Original Exten-
ded* (tyres with run-flat characteristics)
R MO1 = Mercedes-Benz Original (only
specific AMG tyres)
Only use Mercedes-Benz Original Extended
tyres* on wheels that have been specifi-
cally approved by Mercedes-Benz.
If you use other tyres, wheels and acces-
sories, Mercedes-Benz cannot accept any
responsibility for damage that may result
from this. Further information about tyres,
wheels and approved combinations can be
obtained from any Mercedes-Benz Service
Centre.
! If you fit tyres other than those tested and
recommended by Mercedes-Benz, charac-
teristics such as handling, noise levels and
fuel consumption, etc. may be adversely
affected. In addition, when driving with a
load, tyre dimensional variations could
cause the tyres to come into contact with
the bodywork and axle components. This
could result in damage to the tyres or the
vehicle.
! Retreaded tyres are neither tested nor
recommended by Mercedes-Benz, since
previous damage cannot always be detec-
ted on retreaded tyres. As a result,
Mercedes-Benz cannot guarantee vehicle
safety if retreaded tyres are fitted. Do not
fit used tyres if you have no information
about their previous usage. G
Risk of accident
Tyres, wheels or accessories which have not
been approved by Mercedes-Benz for your
vehicle or are not used as they should be, can
impair driving safety. As a result, you could
cause an accident. Before purchasing and
using them, enquire about their suitability,
legal stipulations and factory recommenda-
tions at a Mercedes-Benz Service Centre.
Modification work on the brake system and
wheels is not permitted, nor is the use of
spacer plates or brake dust shields. This inva-
lidates the General Operating Permit for the
vehicle.
Notes on selecting, fitting and replac-
ing tyres R
Only fit tyres and wheels of the same type
and make.
R Only fit tyres of the correct size onto the
wheels.
R After fitting new tyres, run them in at mod-
erate speeds for the first 100 km as they
only reach their full performance after this
distance.
R Fit new tyres on the front wheels first if
tyres of the same size are required on the
front and rear wheels.
R Replace the tyres after six years at the lat-
est, regardless of wear. This also applies to
the spare wheel*.
R Do not drive with tyres which have too little
tread depth, as this significantly reduces
the traction on wet roads (aquaplaning).
! Store tyres that are not being used in a
cool, dry and preferably dark place. Protect
the tyres against oil, grease, petrol and die-
sel.
Notes on regularly inspecting wheels
and tyres R
Regularly check the wheels and tyres of
your vehicle for damage (e.g. cuts, punctu- Tyres and
wheels
223Operation
* optional
212_AKB; 2; 4, en-GB
mkalafa,
Version: 2.11.8.1 2009-05-05T14:17:16+02:00 - Seite 223 Z
Dateiname: 6515346702_buchblock.pdf; erzeugt am 07. May 2009 14:16:56; WK
Page 238 of 373
X
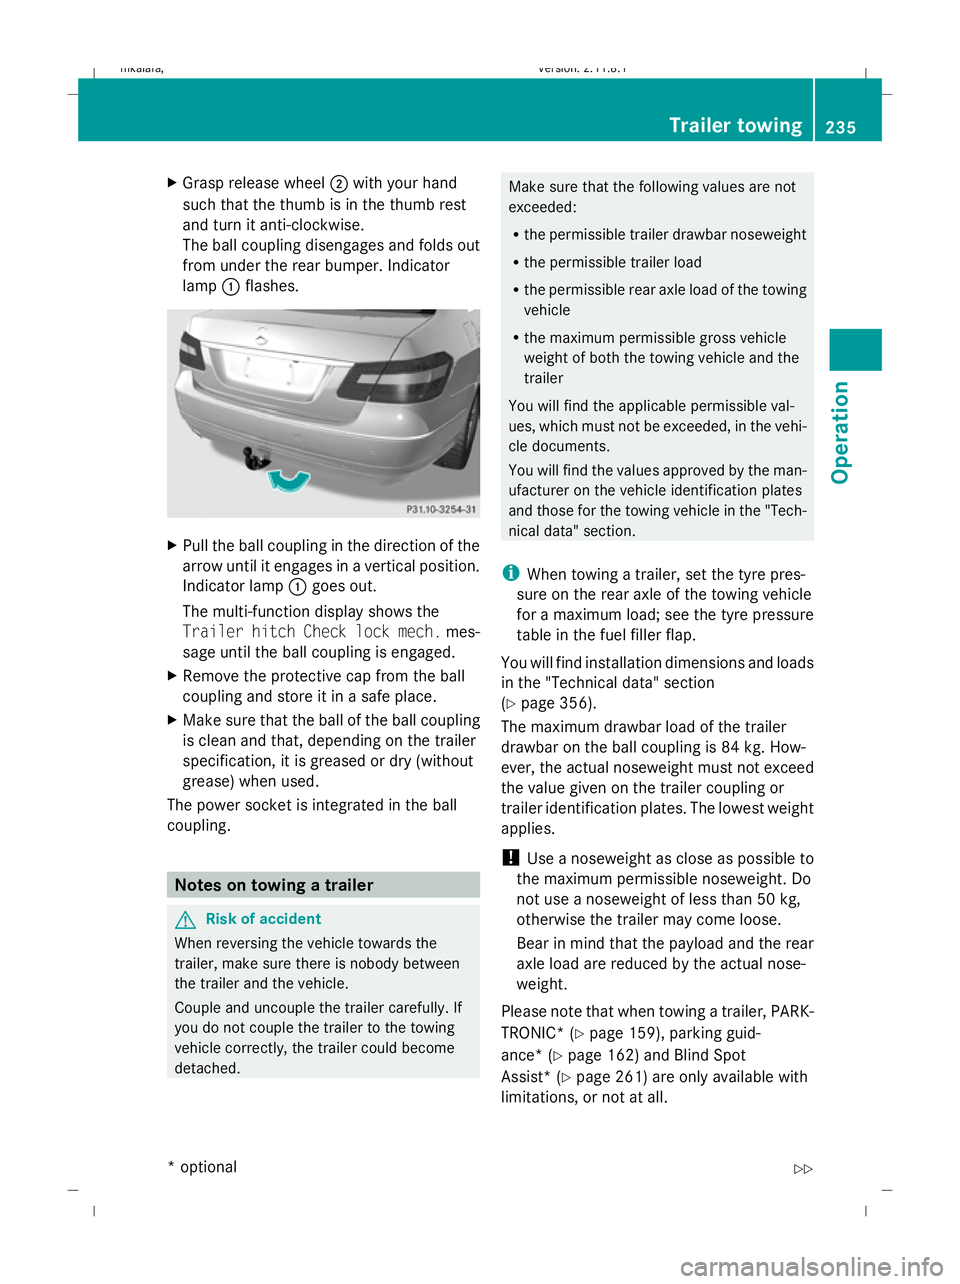
Grasp release wheel ;with your hand
such that the thumb is in the thumb rest
and turn it anti-clockwise.
The ball coupling disengages and folds out
from under the rear bumper. Indicator
lamp :flashes. X
Pull the ball coupling in the direction of the
arrow until it engages in a vertical position.
Indicator lamp :goes out.
The multi-function display shows the
Trailer hitch Check lock mech. mes-
sage until the ball coupling is engaged.
X Remove the protective cap from the ball
coupling and store it in a safe place.
X Make sure that the ball of the ball coupling
is clean and that, depending on the trailer
specification, it is greased or dry (without
grease) when used.
The power socket is integrated in the ball
coupling. Notes on towing a trailer
G
Risk of accident
When reversing the vehicle towards the
trailer, make sure there is nobody between
the trailer and the vehicle.
Couple and uncouple the trailer carefully. If
you do not couple the trailer to the towing
vehicle correctly, the trailer could become
detached. Make sure that the following values are not
exceeded:
R
the permissible trailer drawbar noseweight
R the permissible trailer load
R the permissible rear axle load of the towing
vehicle
R the maximum permissible gross vehicle
weight of both the towing vehicle and the
trailer
You will find the applicable permissible val-
ues, which must not be exceeded, in the vehi-
cle documents.
You will find the values approved by the man-
ufacturer on the vehicle identification plates
and those for the towing vehicle in the "Tech-
nical data" section.
i When towing a trailer, set the tyre pres-
sure on the rear axle of the towing vehicle
for a maximum load; see the tyre pressure
table in the fuel filler flap.
You will find installation dimensions and loads
in the "Technical data" section
(Y page 356).
The maximum drawbar load of the trailer
drawbar on the ball coupling is 84 kg. How-
ever, the actual noseweight must not exceed
the value given on the trailer coupling or
trailer identification plates. The lowest weight
applies.
! Use a noseweight as close as possible to
the maximum permissible noseweight. Do
not use a noseweight of less than 50 kg,
otherwise the trailer may come loose.
Bear in mind that the payload and the rear
axle load are reduced by the actual nose-
weight.
Please note that when towing a trailer, PARK-
TRONIC* ( Ypage 159), parking guid-
ance* (Y page 162) and Blind Spot
Assist* (Y page 261) are only available with
limitations, or not at all. Trailer towing
235Operation
* optional
212_AKB; 2; 4, en-GB
mkalafa
,V ersion: 2.11.8.1
2009-05-05T14:17:16+02:00 - Seite 235 Z
Dateiname: 6515346702_buchblock.pdf; erzeugt am 07. May 2009 14:16:59; WK