2009 MERCEDES-BENZ E-CLASS ESTATE manual radio set
[x] Cancel search: manual radio setPage 16 of 373

Rain closing feature
.......................186
Resetting ....................................... 187
Park Assist
Parking Guidance ........................... 159
Parking ............................................... 107
Parking aid Exterior mirror on the front-
passenger side ................................. 88
PARKTRONIC ................................. 157
Reversing camera ..........................162
Parking brake .................................... 107
Display message ............................ 266
Parking Guidance .............................. 159
Display message ............................ 257
Trailer towing ................................. 162
Parking lamps
Display message ............................ 273
Parking lock
Releasing manually (automatic
transmission) ................................. 301
Parking position
Exterior mirror on the front-
passenger side ................................. 88
PARKTRONIC ...................................... 157
Activating/deactivating .................159
Malfunction ................................... .293
Range of the sensors .....................157
Trailer towing ................................. 159
Warning displa y............................. 158
PASSENGER AIRBAG OFF warning
lamp ............................................. 45, 280
Pelvisbag .............................................. 41
Permanent display (on-board com-
puter) ................................................. .132
Permanent four-wheel drive see 4MATIC ................................... 156
Permanent Speedtronic ....................150
Petrol Minimum grade ............................ .217
see Fuel
Plastic hooks ..................................... 197
Plastic trim Cleaning ......................................... 245
Power supply (trailer) .......................238
Power window switch see Side windows Pre-emptive occupant safety system
see PRE-SAFE ®
PRE-SAFE ®
Brake (vehicles with
Distronic Plus) Activating/deactivating (on-
board computer) ............................ 130
Display message ............................ 260
PRE-SAFE ®
system .............................. 42
Display message ............................ 260
PRE-SAFE Brake (vehicles with Dis-
tronic Plus) .......................................... .63
Program selector button ..................113
Pulling away ...................................... 105 R
RACE START (E 63 AMG) ...................153
RACETIMER (on-board computer) ....123
Radar sensor system Country overview ........................... 362
Display message ............................ 261
Radar system sensors
Switching on/off (on-board com-
puter) ............................................. 135
Radio
Selecting a station (on-board
computer) ...................................... 126
Rain closing feature
Panorama sliding sunroo f.............. 186
Sliding/tilting sunroof ...................185
Range
Calling up (on-board computer) .....121
Rear compartment
Setting the airflow .........................178
Setting the air vents ......................177
Setting the temperature ................176
Rear-compartment seat belt sta-
tus indicator ........................................ 91
Rear foglamp Display message ............................ 272
Rear seat backrest
Display message ............................ 277
Folding forwards/back ..................195
Rear-view mirror
Adjusting ......................................... 86
Anti-dazzle (manual) ......................... 86
Anti-dazzle mode (automatic) ..........87
Rear window blind ............................208 Index
13 212_AKB; 2; 4, en-GB
mkalafa,
Version: 2.11.8.1 2009-05-05T14:17:16+02:00 - Seite 13Dateiname: 6515346702_buchblock.pdf; erzeugt am 07. May 2009 14:15:27; WK
Page 185 of 373

mode to heating mode or from heating mode
to ventilation mode.
You cannot use the auxiliary ventilation to
cool the vehicle interior to a temperature
lower than the outside temperature.
Before activating X
Turn the key to position 2in the ignition
lock.
X Set the temperature.
The auxiliary heating/ventilation can be acti-
vated even when the air conditioning is being
controlled manually. Optimum comfort can
be attained when the system is set to auto-
matic mode. Set the temperature to 22 †.
The auxiliary heating/ventilation can be acti-
vated or deactivated using the remote control
or the button on the centre console.
The on-board computer can be used to spec-
ify up to three departure times, one of which
may be preselected (Y page 135).
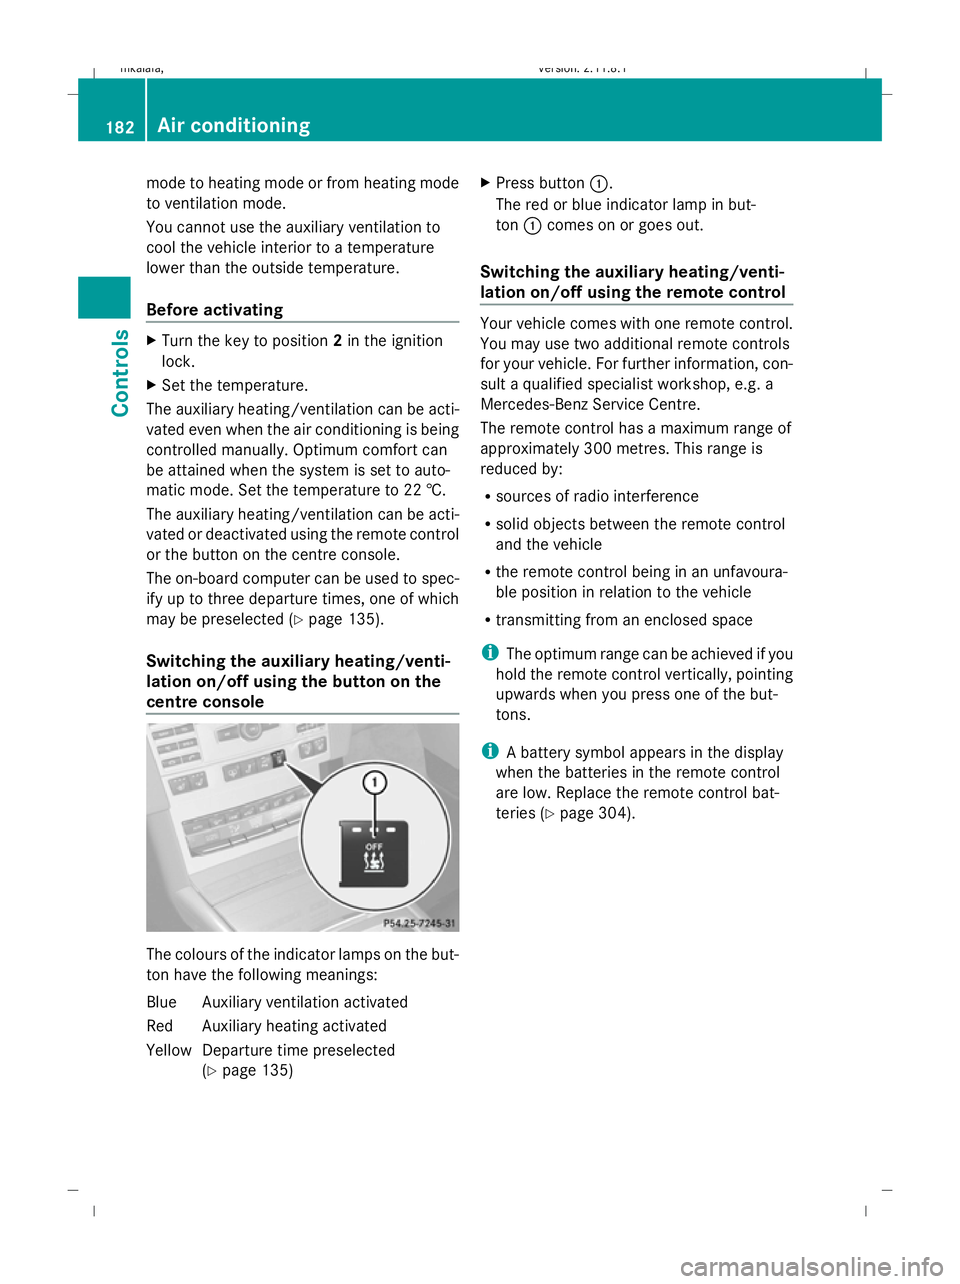
Switching the auxiliary heating/venti-
lation on/off using the button on the
centre console The colours of the indicator lamps on the but-
ton have the following meanings:
Blue Auxiliary ventilation activated
Red Auxiliary heating activated
Yellow Departure time preselected (Ypage 135) X
Press button :.
The red or blue indicator lamp in but-
ton :comes on or goes out.
Switching the auxiliary heating/venti-
lation on/off using the remote control Your vehicle comes with one remote control.
You may use two additional remote controls
for your vehicle. For further information, con-
sult a qualified specialist workshop, e.g. a
Mercedes-Benz Service Centre.
The remote control has a maximum range of
approximately 300 metres. This range is
reduced by:
R
sources of radio interference
R solid objects between the remote control
and the vehicle
R the remote control being in an unfavoura-
ble position in relation to the vehicle
R transmitting from an enclosed space
i The optimum range can be achieved if you
hold the remote control vertically, pointing
upwards when you press one of the but-
tons.
i A battery symbol appears in the display
when the batteries in the remote control
are low. Replace the remote control bat-
teries (Y page 304). 182
Air conditioningControls
212_AKB; 2; 4, en-GB
mkalafa,
Version: 2.11.8.1 2009-05-05T14:17:16+02:00 - Seite 182
Dateiname: 6515346702_buchblock.pdf; erzeugt am 07. May 2009 14:16:31; WK
Page 231 of 373

X
Press the abutton.
The tyre pressure values stored at the last
restart will continue to be monitored. Tyre pressure monitor*
If a tyre pressure monitor system is fitted, the
vehicle's wheels have sensors fitted that
monitor the tyre pressures in all four tyres.
The tyre pressure monitor warns you when
the pressure drops in one or more of the
tyres. The tyre pressure monitor only func-
tions if the correct wheel electronics units are
fitted to all wheels. G
Risk of accident
The tyre pressure monitor does not warn you
of an incorrectly set tyre pressure. The table
on the inside of the fuel filler flap will help you
decide whether the tyre pressures should be
corrected.
The tyre pressure monitor is not able to warn
you of a sudden loss of pressure, e.g. if the
tyre is penetrated by a foreign object. In the
event of a sudden loss of pressure, bring the
vehicle to a halt by braking carefully. Do not
make any sudden steering movements when
doing so.
i The operation of the tyre pressure moni-
tor can be affected by interference from
radio transmitting equipment (e.g. radio
headphones, two-way radios) that may be
being operated in or near the vehicle.
Checking tyre pressure electronically X
Make sure that the key is in posi-
tion 2(Y page 75) in the ignition lock.
X Press the =or; button to select the
Service menu.
X Press the 9or: button to select
Tyre press.
X Press the abutton.
The current tyre pressure for each wheel will
be displayed in the multi-function display. If the vehicle has been parked for longer than
20 minutes or if you have not driven faster
than 25 km/h since starting the vehicle, the
following message appears:
Tyre pressures will be displayed
after a few minutes of driving
i
The tyre pressure values indicated by the
on-board computer may differ from those
measured at a filling station with a pressure
gauge. The tyre pressures shown by the on-
board computer refer to those measured at
sea level. At high altitudes, the tyre pres-
sure values indicated by a pressure gauge
are higher than those shown by the on-
board computer. In this case, do not reduce
the tyre pressures.
i After a teach-in period, the tyre pressure
monitor automatically recognises new
wheels or new sensors. As long as a clear
allocation of the tyre pressure values to the
individual wheels is not possible, the dis-
play message Tyre pressure monitor
active is shown instead of the tyre pres-
sure display. The tyre pressures are already
being monitored.
Restarting the tyre pressure monitor When you restart the tyre pressure monitor,
all existing warning messages are deleted and
the warning lamps go out. The monitor uses
the currently set tyre pressures as the speci-
fied values for monitoring.
In most cases, the tyre pressure monitor will
automatically detect the new reference val-
ues, e.g. if you have:
R
changed the tyre pressure
R changed the wheels or tyres
R fitted new wheels or tyres
i You will find the menu overview on
(Y page 120).
If you wish to define the new reference values
manually: 228
Tyres and wheelsOperation
* optional
212_AKB; 2; 4, en-GB
mkalafa,
Version: 2.11.8.1 2009-05-05T14:17:16+02:00 - Seite 228
Dateiname: 6515346702_buchblock.pdf; erzeugt am 07. May 2009 14:16:57; WK
Page 326 of 373

the jump-starting procedure
(Y
page 323).
Fitting the battery X
Install the battery. To do this, follow the
steps described in "Removing the battery"
(Y page 322) in reverse order.
X Reconnect the battery (Y page 323).Reconnecting the battery
! Always connect the battery in the order
described below. Never swap the terminal
clamps. Otherwise, you may damage the
vehicle electronics.
X Switch off all electrical consumers (e.g.
radio, blower, etc.).
X Connect the positive terminal clamp and
secure the cover.
X Connect the negative terminal clamp.
X Connect the breather hose.
X On vehicles with the battery in the
engine compartment: put the filter box
back in place, then clip in and close the
retaining clamps.
Close the bonnet.
X Vehicles with the battery in the boot:
close the boot.
i If the battery power supply has been inter-
rupted (e.g. if it has been reconnected), you
must carry out the following tasks:
R set the time ( Ypage 132)
R reset the function for folding the exterior
mirrors in/out automatically* by folding
the mirrors out once ( Ypage 87) Jump-starting
If your vehicle's battery is discharged, the
engine can be jump-started from another
vehicle or from an external battery using jump
leads. Observe the following points:
R
you may only jump-start when the engine
and catalytic converter are cold.
R do not start the engine if the battery is fro-
zen. Let the battery thaw first.
R jump-starting may only be performed from
batteries with a nominal voltage of 12 V.
R only use jump leads which have a sufficient
cross-section and insulated terminal
clamps.
i Jump leads and further information about
jump-starting can be obtained from any
Mercedes-Benz Service Centre.
! Avoid repeated and lengthy starting
attempts.
Do not use a rapid-charging device to start
the engine. G
Risk of injury
There is a risk of acid burns when jump-start-
ing a vehicle due to the gases which escape
from the battery. Do not lean over the battery
while the engine is being jump-started. G
Risk of explosion
Gases escaping from the battery during jump-
starting may cause minor explosions. Avoid
creating sparks. Keep naked flames away
from the battery, and do not smoke.
Comply with safety precautions and take pro-
tective measures when handling batteries.
You will find these under "Battery" in the
index.
X Make sure that the two vehicles do not
touch.
X Depress the parking brake firmly.
X Manual transmission: engage neutral.
X Automatic transmission*: shift the trans-
mission to position P.
X Switch off all electrical consumers (e.g.
radio, blower, etc.).
X Open the bonnet (Y page 219). Jump-starting
323Practical advice
* optional
212_AKB; 2; 4, en-GB
mkalafa
,V ersion: 2.11.8.1
2009-05-05T14:17:16+02:00 - Seite 323 Z
Dateiname: 6515346702_buchblock.pdf; erzeugt am 07. May 2009 14:17:26; WK