2009 MERCEDES-BENZ E-CLASS ESTATE ignition
[x] Cancel search: ignitionPage 160 of 373
i
In wintry driving conditions, the maximum
effect of 4MATIC can only be achieved if
you use winter tyres (M+S tyres), with snow
chains if necessary. PARKTRONIC*
G
Risk of accident
PARKTRONIC is only an aid and may not
detect all obstacles. This system does not
relieve you of the need to pay attention.
You are always responsible for safety and
must continue to pay attention to your imme-
diate surroundings when parking and
manoeuvring. You could otherwise endanger
yourself and others. G
Risk of injury
Make sure that no persons or animals are in
the manoeuvring range. Otherwise, they
could be injured.
PARKTRONIC is an electronic parking aid with
ultrasound. It indicates visually and audibly
the distance between your vehicle and an
object.
PARKTRONIC is automatically activated when
you switch on the ignition and release the
handbrake.
PARKTRONIC is deactivated at speeds above
18 km/h. It is reactivated at lower speeds.
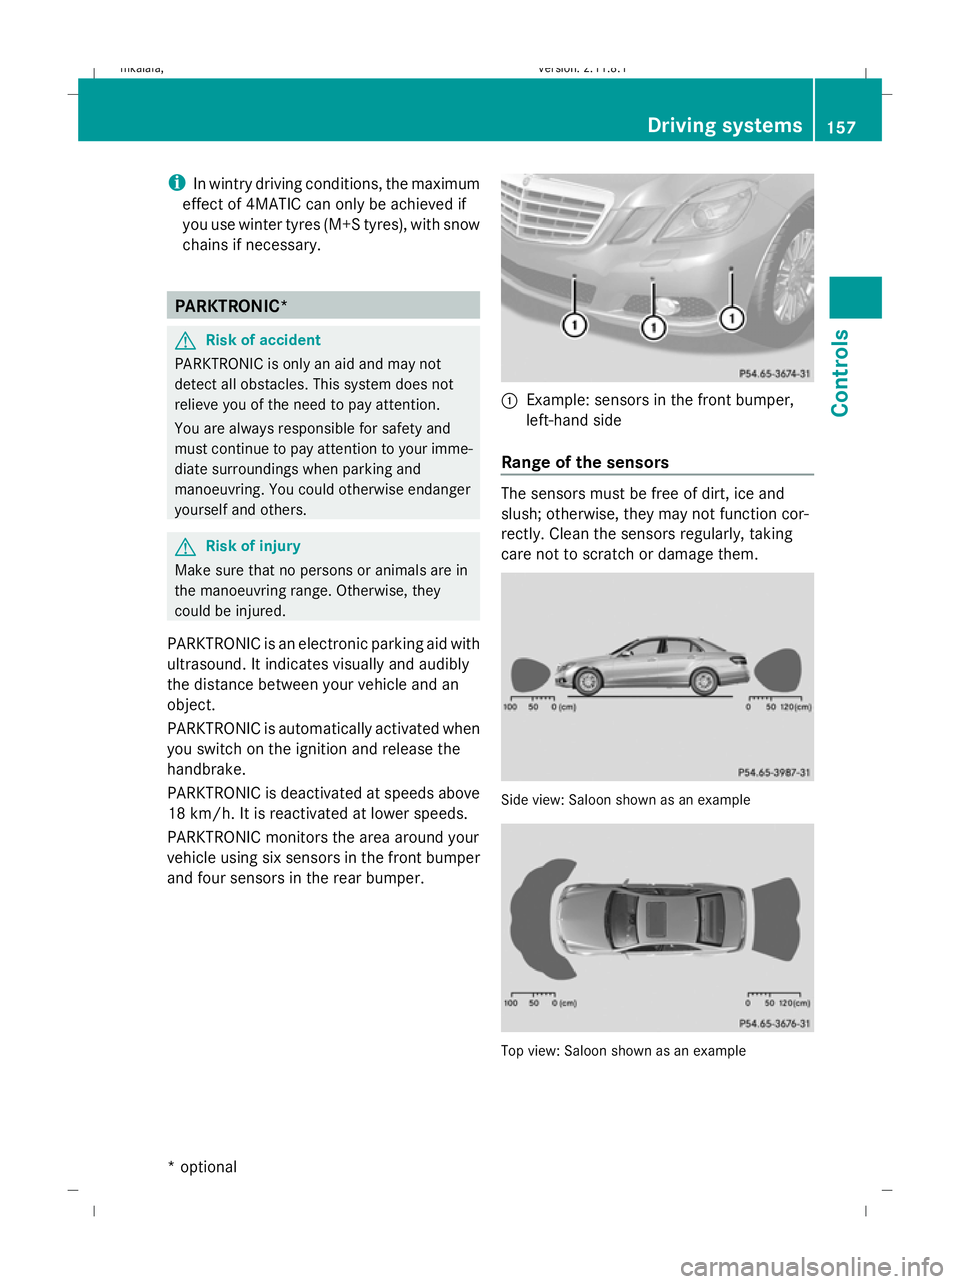
PARKTRONIC monitors the area around your
vehicle using six sensors in the front bumper
and four sensors in the rear bumper. :
Example: sensors in the front bumper,
left-hand side
Range of the sensors The sensors must be free of dirt, ice and
slush; otherwise, they may not function cor-
rectly. Clean the sensors regularly, taking
care not to scratch or damage them.
Side view: Saloon shown as an example
Top view: Saloon shown as an example Driving systems
157Controls
* optional
212_AKB; 2; 4, en-GB
mkalafa
,V ersion: 2.11.8.1
2009-05-05T14:17:16+02:00 - Seite 157 Z
Dateiname: 6515346702_buchblock.pdf; erzeugt am 07. May 2009 14:16:23; WK
Page 162 of 373
One or more segments light up as the vehicle
approaches an obstacle, depending on the
vehicle's distance to the obstacle.
From the:
R
sixth segment onwards, you will hear an
intermittent warning tone for approx-
imately two seconds.
R seventh segment onwards, you will hear a
warning tone for approximately two sec-
onds. You have reached the minimum dis-
tance.
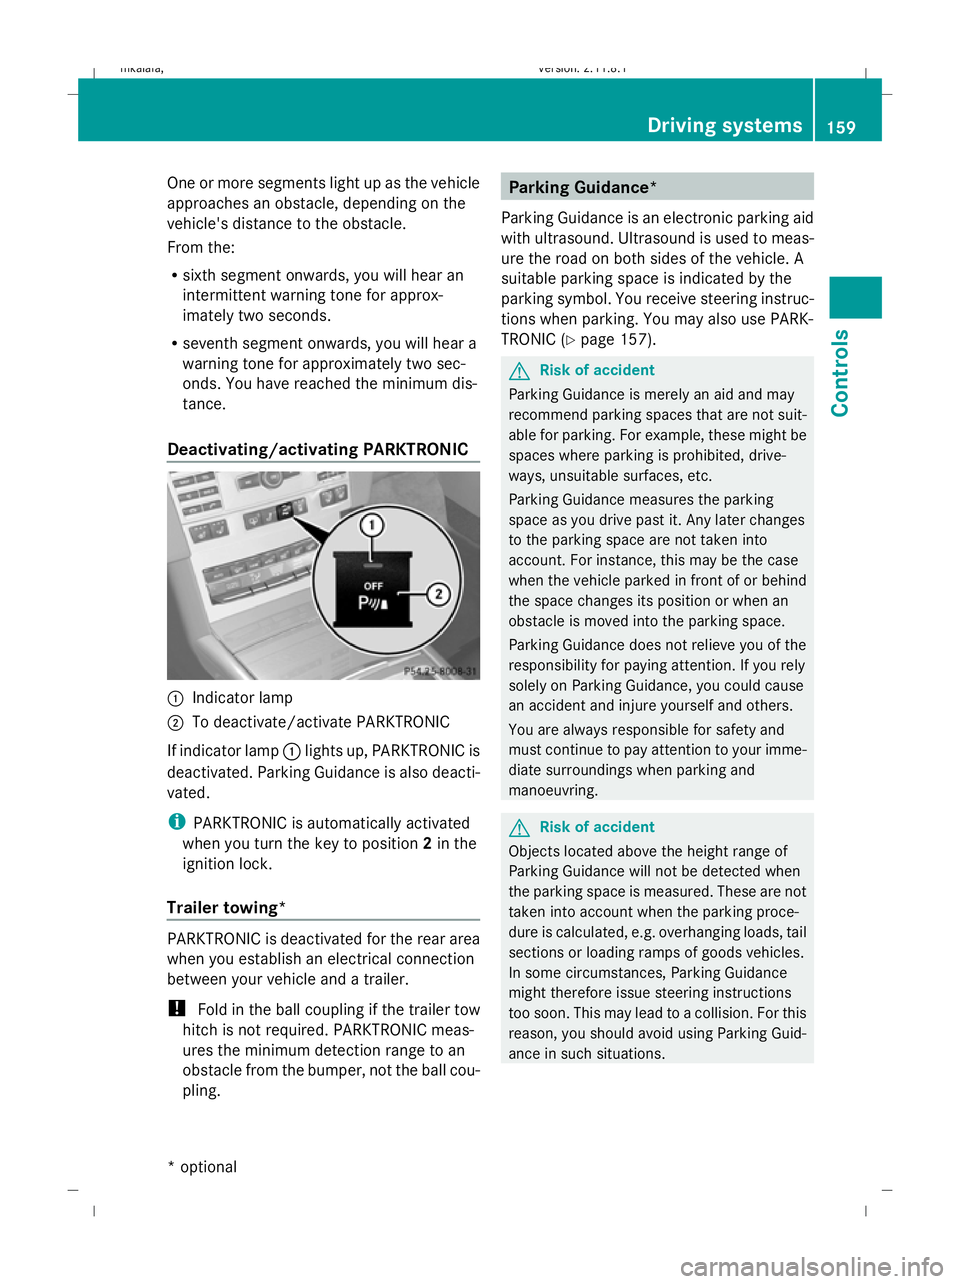
Deactivating/activating PARKTRONIC :
Indicator lamp
; To deactivate/activate PARKTRONIC
If indicator lamp :lights up, PARKTRONIC is
deactivated. Parking Guidance is also deacti-
vated.
i PARKTRONIC is automatically activated
when you turn the key to position 2in the
ignition lock.
Trailer towing* PARKTRONIC is deactivated for the rear area
when you establish an electrical connection
between your vehicle and a trailer.
!
Fold in the ball coupling if the trailer tow
hitch is not required. PARKTRONIC meas-
ures the minimum detection range to an
obstacle from the bumper, not the ball cou-
pling. Parking Guidance*
Parking Guidance is an electronic parking aid
with ultrasound. Ultrasound is used to meas-
ure the road on both sides of the vehicle. A
suitable parking space is indicated by the
parking symbol. You receive steering instruc-
tions when parking. You may also use PARK-
TRONIC (Y page 157). G
Risk of accident
Parking Guidance is merely an aid and may
recommend parking spaces that are not suit-
able for parking. For example, these might be
spaces where parking is prohibited, drive-
ways, unsuitable surfaces, etc.
Parking Guidance measures the parking
space as you drive past it. Any later changes
to the parking space are not taken into
account. For instance, this may be the case
when the vehicle parked in front of or behind
the space changes its position or when an
obstacle is moved into the parking space.
Parking Guidance does not relieve you of the
responsibility for paying attention. If you rely
solely on Parking Guidance, you could cause
an accident and injure yourself and others.
You are always responsible for safety and
must continue to pay attention to your imme-
diate surroundings when parking and
manoeuvring. G
Risk of accident
Objects located above the height range of
Parking Guidance will not be detected when
the parking space is measured. These are not
taken into account when the parking proce-
dure is calculated, e.g. overhanging loads, tail
sections or loading ramps of goods vehicles.
In some circumstances, Parking Guidance
might therefore issue steering instructions
too soon. This may lead to a collision. For this
reason, you should avoid using Parking Guid-
ance in such situations. Driving systems
159Controls
* optional
212_AKB; 2; 4, en-GB
mkalafa,
Version: 2.11.8.1 2009-05-05T14:17:16+02:00 - Seite 159 Z
Dateiname: 6515346702_buchblock.pdf; erzeugt am 07. May 2009 14:16:23; WK
Page 166 of 373
R
the boot lid/tail gate is open
R in heavy rain, snow or fog
R at night or in very dark places
R if the camera is exposed to very bright light
R if the area is lit by fluorescent light (the dis-
play may flicker)
R if there is a sudden change in temperature,
e.g. when driving into a heated garage in
winter
R if the camera lens is dirty or obstructed
R if the rear of your vehicle is damaged. In this
event have the camera position and setting
checked at a qualified specialist workshop.
Mercedes-Benz recommends that you use
a Mercedes-Benz Service Centre for this
purpose.
Do not use the reversing camera in these
types of situation. You could, otherwise,
injure others or damage objects and your
vehicle while you are parking.
Activating the reversing camera X
Make sure that the key is in position 2in
the ignition lock.
X Make sure that the "Reversing camera"
function is selected in COMAND APS (see
the separate operating instructions for
COMAND APS).
X Engage reverse gear.
The area behind the vehicle is shown in the
COMAND APS display.
You can select not to show the area behind
the vehicle in the COMAND APS display (see
the separate operating instructions for
COMAND APS). ATTENTION ASSIST
ATTENTION ASSIST helps you on long, monot-
onous journeys such as on motorways and
trunk roads. It is active at speeds between 80
and 180 km/h. If ATTENTION ASSIST detects tiredness or increasing lapses in concentra-
tion on the part of the driver, it suggests a
break. G
Risk of accident
ATTENTION ASSIST is only an aid and may
detect your tiredness or lapses in concentra-
tion too late or not at all. It is not a substitute
for a well rested and attentive driver.
Fatigue may cause you to recognise hazard-
ous situations too late, misjudge a situation
or react slower. For this reason, make sure
you feel rested before you begin driving and
during your journey. Always take breaks in
good time and regularly, especially during
long journeys. Otherwise, you may fail to rec-
ognise dangers in time, cause an accident and
injure yourself and others.
ATTENTION ASSIST assesses your level of
fatigue or increasing inattentiveness taking
into consideration the following criteria:
R personal driving style, e.g. steering charac-
teristics
R driving conditions, e. g. time, driving time
ATTENTION ASSIST's functionality is restric-
ted and warnings are delayed or do not
appear at all:
R if the road condition is poor, e.g. large
bumps or potholes
R there is a strong side wind
R you have adopted a very sporty driving style
with high cornering speeds or driving with
a high rate of acceleration
R if you are predominantly driving slower
than 80 km/h or faster than 180 km/h
R if you are currently operating or making a
call using COMAND APS*
R in active driving situations, for example, if
you are changing lanes or changing the
vehicle speed Driving systems
163Controls
* optional
212_AKB; 2; 4, en-GB
mkalafa
,V ersion: 2.11.8.1
2009-05-05T14:17:16+02:00 - Seite 163 Z
Dateiname: 6515346702_buchblock.pdf; erzeugt am 07. May 2009 14:16:24; WK
Page 169 of 373
could otherwise endanger yourself and oth-
ers.
The system may be impaired or may not func-
tion if:
R there is poor visibility, e.g. due to snow,
rain, fog or spray.
R the windscreen is dirty, misted up or cov-
ered, for instance by a sticker, in the vicinity
of the camera.
R on bends, on uphill gradients or downhill
gradients.
Light from the headlamps of oncoming vehi-
cles does not affect the Night View Assist Plus
display in the multi-function display. This is
also the case if you cannot switch on the
main-beam headlamps because of oncoming
traffic. G
Risk of accident
Night View Assist Plus does not detect
objects in the immediate vicinity of the vehi-
cle. Look through the windscreen when
manoeuvring. Make sure that there are no
people or animals in the area in which you are
manoeuvring.
i Infrared light cannot be seen by the
human eye and therefore does not dazzle.
Night View Assist Plus can therefore
remain switched on even if there is oncom-
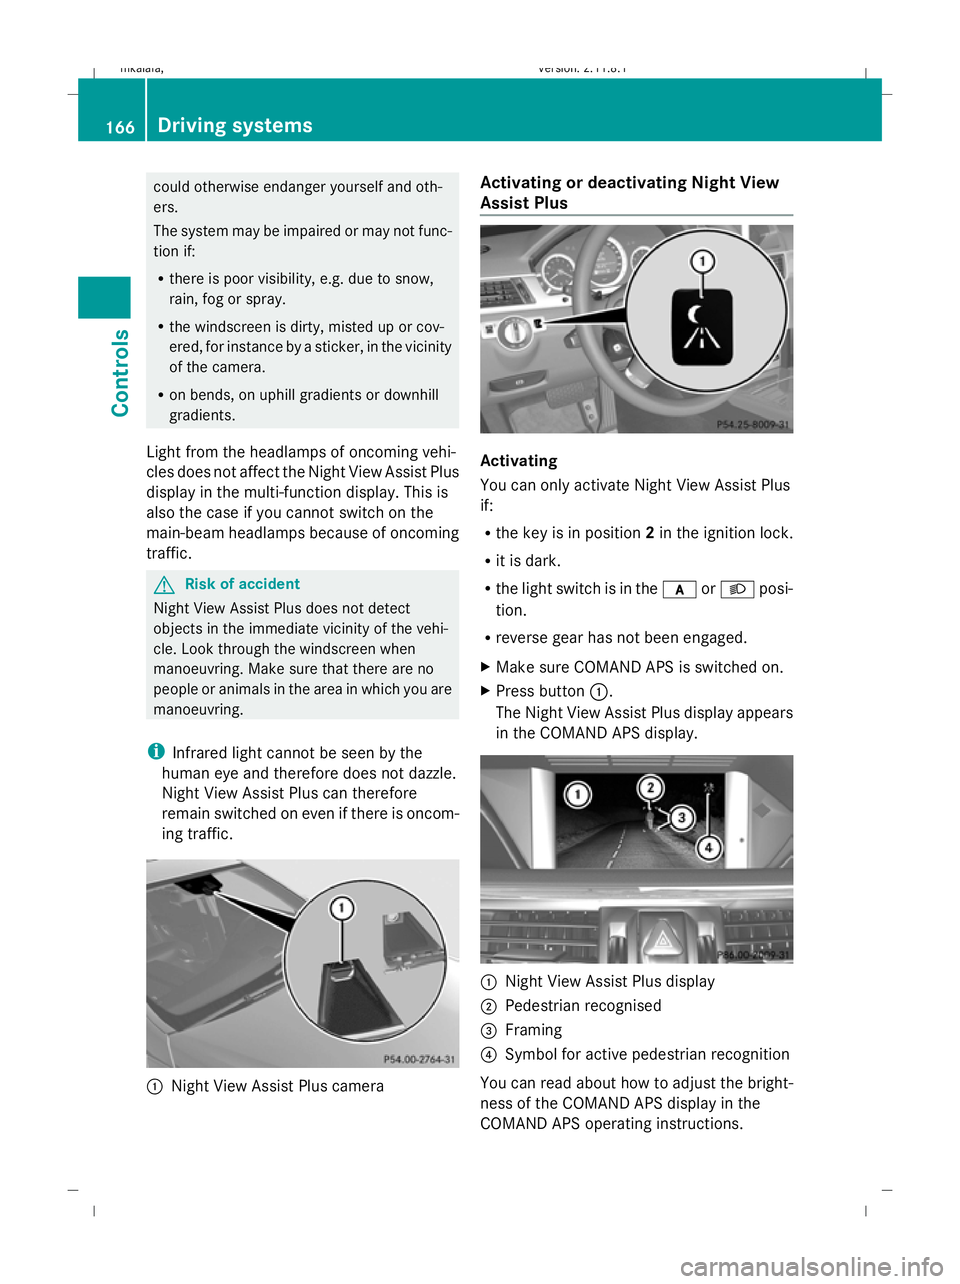
ing traffic. :
Night View Assist Plus camera Activating or deactivating Night View
Assist Plus
Activating
You can only activate Night View Assist Plus
if:
R
the key is in position 2in the ignition lock.
R it is dark.
R the light switch is in the corL posi-
tion.
R reverse gear has not been engaged.
X Make sure COMAND APS is switched on.
X Press button :.
The Night View Assist Plus display appears
in the COMAND APS display. :
Night View Assist Plus display
; Pedestrian recognised
= Framing
? Symbol for active pedestrian recognition
You can read about how to adjust the bright-
ness of the COMAND APS display in the
COMAND APS operating instructions. 166
Driving systemsControls
212_AKB; 2; 4, en-GB
mkalafa
,V ersion: 2.11.8.1
2009-05-05T14:17:16+02:00 - Seite 166
Dateiname: 6515346702_buchblock.pdf; erzeugt am 07. May 2009 14:16:26; WK
Page 172 of 373

Information and warning display
:
Yellow indicator lamp/red warning lamp
When you turn the key to position 2in the
ignition lock, warning lamps :in the exterior
mirrors light up red.
If Blind Spot Assist is switched on and the
engine is running, indicator lamps :in the
exterior mirrors light up yellow up to a speed
of 30 km/h. At speeds above 30 km/h, the
indicator lamp goes out and Blind Spot Assist
is operational.
If a vehicle is detected within the monitoring
range of Blind Spot Assist at speeds above
30 km/h, warning lamp :on the corre-
sponding side lights up red. This warning is
always issued when a vehicle enters the blind
spot monitoring range from behind or from
the side. When you overtake a vehicle, the
warning only occurs if the difference in speed
is less than 12 km/h.
The yellow indicator lamp goes out after
reverse gear is engaged. In this event, Blind
Spot Assist is no longer active.
The brightness of the indicator/warning
lamps is adjusted automatically according to
the ambient light. G
Risk of accident
Blind Spot Assist is not active at speeds below
30 km/h, and the indicator lamps in the exte-
rior mirrors are yellow. Vehicles in the moni-
toring range are then not indicated.
Always pay attention to traffic conditions and
your surroundings. Otherwise, you may fail to recognise dangers in time, cause an accident
and injure yourself and others.
Collision warning
If a vehicle is detected in the monitoring range
of Blind Spot Assist and you switch on the turn
signal, a double warning tone sounds. Red
warning lamp :flashes. If the turn signal
remains on, detected vehicles are indicated
by the flashing of red warning lamp :. There
are no further warning tones.
Switching on Blind Spot Assist
X Make sure that the radar sensor system
(Y page 134) and Blind Spot Assist
(Y page 130) are activated in the on-board
computer.
X Turn the key to position 2in the ignition
lock.
Red warning lamps :in the exterior mir-
rors are lit.
X Start the engine.
Warning lamps :in the exterior mirrors
now light up yellow.
Trailer towing*
Blind Spot Assist is deactivated when you
connect the trailer to your vehicle electrically.
The Blind Spot Assist currently
unavailable See Owner's Manual mes-
sage appears in the multi-function display.
Lane Keeping Assist If you select
kmon the on-board computer in
the Speed-/odometer: function
(Y page 131), Lane Keeping Assist is activa-
ted starting at a speed of 60 km/h. If the
miles display unit is selected, the assistance
range begins at between 35 and 40 mph.
Lane Keeping Assist is designed to detect
lane markings on the road and warn you
before you leave your lane unintentionally.
Usually the warning is given when a front
wheel passes over a lane marking. It will warn
you by means of intermittent vibration in the
steering wheel for up to 1.5 seconds. Driving systems
169Controls
* optional
212_AKB; 2; 4, en-GB
mkalafa
,V ersion: 2.11.8.1
2009-05-05T14:17:16+02:00 - Seite 169 Z
Dateiname: 6515346702_buchblock.pdf; erzeugt am 07. May 2009 14:16:27; WK
Page 174 of 373
X
Activate Lane Keeping Assist using the on-
board computer (Y page 130).
Symbol :appears. Air conditioning
Overview of air-conditioning systems
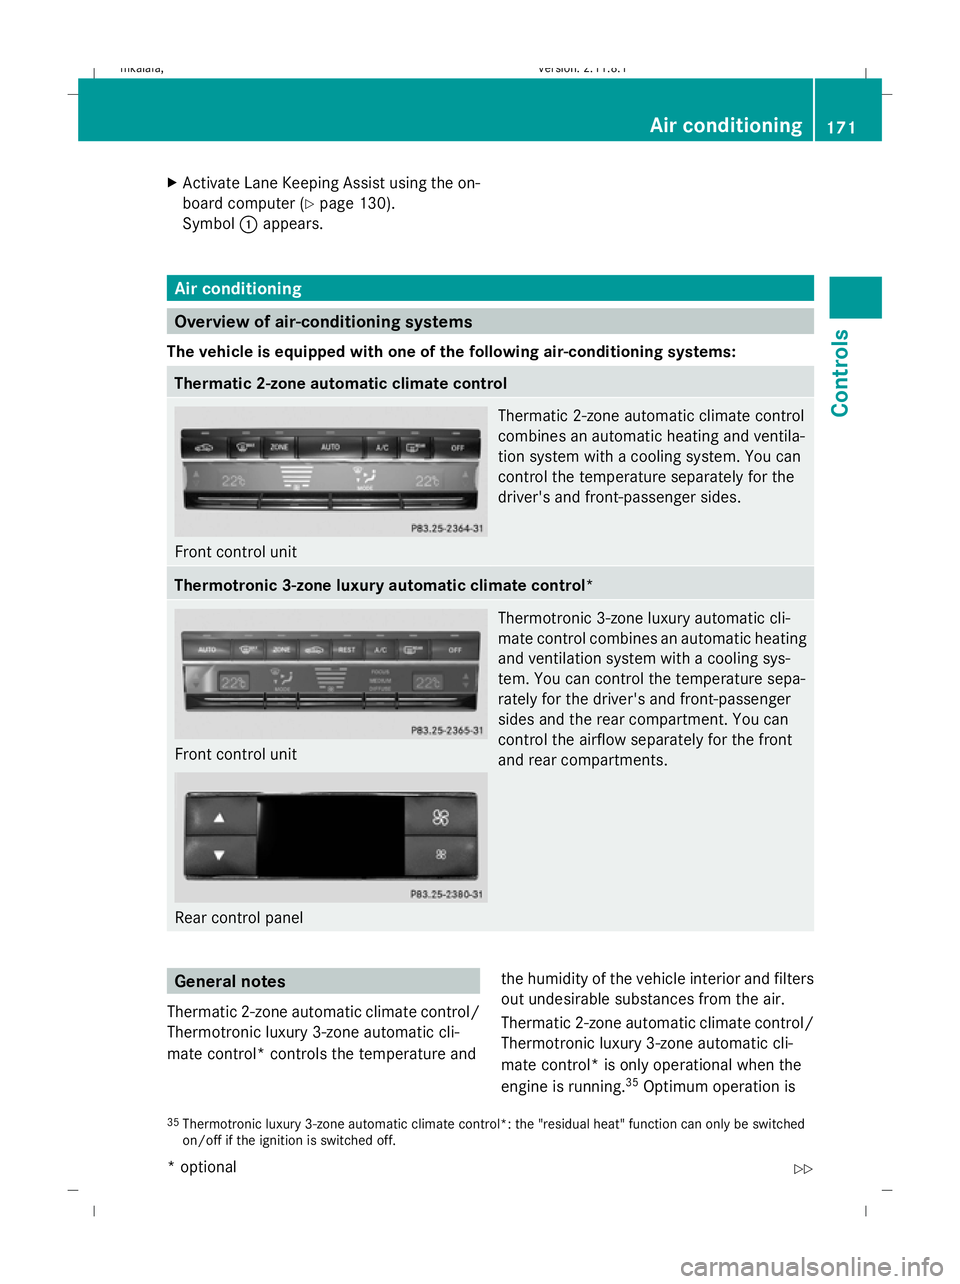
The vehicle is equipped with one of the following air-conditioning systems: Thermatic 2-zone automatic climate control
Front control unit Thermatic 2-zone automatic climate control
combines an automatic heating and ventila-
tion system with a cooling system. You can
control the temperature separately for the
driver's and front-passenger sides. Thermotronic 3-zone luxury automatic climate control*
Front control unit
Rear control panel Thermotronic 3-zone luxury automatic cli-
mate control combines an automatic heating
and ventilation system with a cooling sys-
tem. You can control the temperature sepa-
rately for the driver's and front-passenger
sides and the rear compartment. You can
control the airflow separately for the front
and rear compartments. General notes
Thermatic 2-zone automatic climate control/
Thermotronic luxury 3-zone automatic cli-
mate control* controls the temperature and the humidity of the vehicle interior and filters
out undesirable substances from the air.
Thermatic 2-zone automatic climate control/
Thermotronic luxury 3-zone automatic cli-
mate control* is only operational when the
engine is running. 35
Optimum operation is
35 Thermotronic luxury 3-zone automatic climate control*: the "residual heat" function can only be switched
on/off if the ignition is switched off. Air conditioning
171Controls
* optional
212_AKB; 2; 4, en-GB
mkalafa,
Version: 2.11.8.1 2009-05-05T14:17:16+02:00 - Seite 171 Z
Dateiname: 6515346702_buchblock.pdf; erzeugt am 07. May 2009 14:16:28; WK
Page 177 of 373
Function
G
Controls the air conditioning auto-
matically (FOCUS/MEDIUM/DIF-
FUSE) 36 H
Setting the airflow
I
Setting the air distribution
J
Sets the temperature, left
Rear control panel
K
Increases the temperature
L
Display
M
Increases the airflow
N
Reduces the airflow
O
Reduces the temperature
i
Instructions and recommendations for
optimum air conditioning:
R activate the air conditioning using
the à and¿ buttons. The indica-
tor lamps above the Ãand¿ but-
tons come on. You can also set the air-
flow and air distribution of the automatic
air conditioning to one of three levels
(FOCUS/MEDIUM/DIFFUSE). You can
set the desired level using button G. The
MEDIUM level is recommended.
R set the temperature to 22 †.
R only use the "demisting" function briefly,
until the windscreen is clear again.
R only use the "air-recirculation" mode
briefly, e.g. if there are unpleasant out-
side odours or when in a tunnel. Other-
wise, the windows could mist up due to
a lack of fresh air.
R use the "ZONE" function to adopt the
temperature settings on the driver's side for the front-passenger side and the rear
compartment as well. The indicator lamp
above the ábutton goes out.
R use the "residual heat" function if you
want to heat or ventilate the vehicle inte-
rior when the ignition is switched off. The
"residual heat" function can only be acti-
vated or deactivated with the ignition
switched off. Switching the air conditioning on/off
i When the air conditioning is switched off,
the air supply and air circulation are also
switched off. Only select this setting briefly,
otherwise the windows may mist up.
i Activate the air conditioning primarily
using the Ãbutton (Y page 175).
X Turn the key to position 2in the ignition
lock.
X To activate: press theÃbutton.
The indicator lamp above the Ãbutton
lights up. Airflow and air distribution are set
to automatic mode.
or
X Press the ^button.
The indicator lamp above the ^button
goes out. The previously selected settings
come into effect again.
X To switch off: press the^button.
The indicator lamp above the ^button
lights up. Switching cooling with air dehumidi-
fication on/off
The "cooling with air dehumidification" func-
tion is only available when the engine is run-
ning. The air inside the vehicle is cooled and
36 Press the Ãbutton. The air conditioning is set to automatic mode. You can also set the airflow and air
distribution of the automatic air conditioning to one of three levels (FOCUS/MEDIUM/DIFFUSE) using button
G. 174
Air conditioningControls
212_AKB; 2; 4, en-GB
mkalafa
,V ersion: 2.11.8.1
2009-05-05T14:17:16+02:00 - Seite 174
Dateiname: 6515346702_buchblock.pdf; erzeugt am 07. May 2009 14:16:29; WK
Page 178 of 373
dehumidified according to the temperature
selected.
G
Risk of accident
If you switch off the "Cooling with air dehu-
midification" function, the air inside the vehi-
cle will not be cooled (in warm weather) or
dehumidified. The windows could mist up
more quickly. This may prevent you from
observing the traffic conditions and thereby
cause an accident.
Condensation may drip from the underside of
the vehicle when Thermatic is in cooling
mode.
X To activate: press the¿button.
The indicator lamp above the ¿button
comes on.
X To switch off: press the¿button.
The indicator lamp above the ¿button
goes out. The cooling with air dehumidifi-
cation function has a delayed switch-off
feature. Controlling the air conditioning auto-
matically
In automatic mode, the set temperature is
maintained automatically at a constant level.
The system automatically regulates the tem-
perature of the dispensed air, the airflow and
the air distribution.
The automatic air conditioning will achieve
optimal operation if "cooling with air dehu-
midification" is also activated. If necessary,
cooling with air dehumidification can be deac-
tivated.
X Turn the key to position 2in the ignition
lock.
X Set the desired temperature. X
To switch on: press theÃbutton.
The indicator lamp above the Ãbutton
lights up. Automatic air distribution and air-
flow are activated.
X Thermotronic 3-zone luxury automatic cli-
mate control*: press button Gup or down
and select the desired level (Y page 173).
FOCUS Air flow high/air distribution via the centre and side vents
MEDIUM Air flow medium/air distribution via the centre and side vents
DIFFUS EAir flow low/air distribution via the
centre, side and defroster vents
i This setting is especially effective in auto-
matic mode when outside temperatures
are high.
X To deactivate: press the air distribution
button.
Thermatic 2-zone automatic climate con-
trol: press button F(Ypage 172).
Thermotronic 3-zone luxury automatic cli-
mate control*: press button I
(Y page 173).
The indicator lamp above the Ãbutton
goes out.
or
X Press the airflow button.
Thermatic 2-zone automatic climate con-
trol: press button G(Ypage 172).
Thermotronic 3-zone luxury automatic cli-
mate control*: press button H
(Y page 173).
The indicator lamp above the Ãbutton
goes out. Setting the temperature
Thermatic 2-zone automatic climate
control Different temperatures can be set for the
driver's and front-passenger sides. Air conditioning
175Controls
* optional
212_AKB; 2; 4, en-GB
mkalafa,
Version: 2.11.8.1 2009-05-05T14:17:16+02:00 - Seite 175 Z
Dateiname: 6515346702_buchblock.pdf; erzeugt am 07. May 2009 14:16:29; WK