2009 MERCEDES-BENZ E-CLASS ESTATE door lock
[x] Cancel search: door lockPage 90 of 373
i
Make sure that the exterior mirrors are
always folded out fully while the vehicle is
in motion; otherwise, they may vibrate.
Resetting the exterior mirrors If the battery has been disconnected or has
become discharged, the exterior mirrors
must be reset. Otherwise, the exterior mirrors
will not fold in when you select the "Fold in
mirrors when locking" function in the on-
board computer (Y page 136).
X Make sure that the key is in position 1in
the ignition lock.
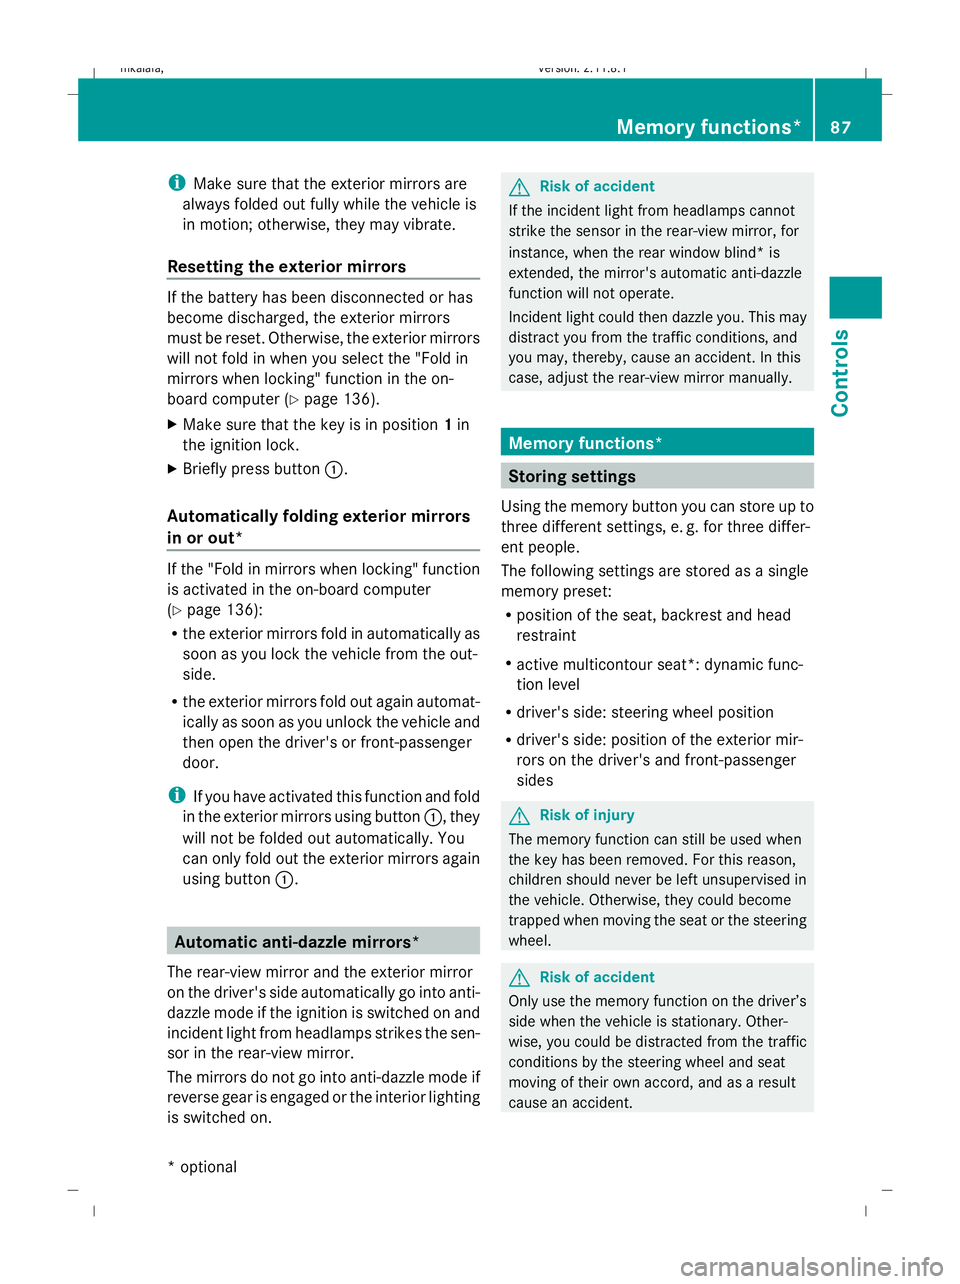
X Briefly press button :.
Automatically folding exterior mirrors
in or out* If the "Fold in mirrors when locking" function
is activated in the on-board computer
(Y
page 136):
R the exterior mirrors fold in automatically as
soon as you lock the vehicle from the out-
side.
R the exterior mirrors fold out again automat-
ically as soon as you unlock the vehicle and
then open the driver's or front-passenger
door.
i If you have activated this function and fold
in the exterior mirrors using button :, they
will not be folded out automatically. You
can only fold out the exterior mirrors again
using button :. Automatic anti-dazzle mirrors*
The rear-view mirror and the exterior mirror
on the driver's side automatically go into anti-
dazzle mode if the ignition is switched on and
incident light from headlamps strikes the sen-
sor in the rear-view mirror.
The mirrors do not go into anti-dazzle mode if
reverse gear is engaged or the interior lighting
is switched on. G
Risk of accident
If the incident light from headlamps cannot
strike the sensor in the rear-view mirror, for
instance, when the rear window blind* is
extended, the mirror's automatic anti-dazzle
function will not operate.
Incident light could then dazzle you. This may
distract you from the traffic conditions, and
you may, thereby, cause an accident. In this
case, adjust the rear-view mirror manually. Memory functions*
Storing settings
Using the memory button you can store up to
three different settings, e. g. for three differ-
ent people.
The following settings are stored as a single
memory preset:
R position of the seat, backrest and head
restraint
R active multicontour seat*: dynamic func-
tion level
R driver's side: steering wheel position
R driver's side: position of the exterior mir-
rors on the driver's and front-passenger
sides G
Risk of injury
The memory function can still be used when
the key has been removed. For this reason,
children should never be left unsupervised in
the vehicle. Otherwise, they could become
trapped when moving the seat or the steering
wheel. G
Risk of accident
Only use the memory function on the driver’s
side when the vehicle is stationary. Other-
wise, you could be distracted from the traffic
conditions by the steering wheel and seat
moving of their own accord, and as a result
cause an accident. Memory functions*
87Controls
* optional
212_AKB; 2; 4, en-GB
mkalafa,
Version: 2.11.8.1 2009-05-05T14:17:16+02:00 - Seite 87 Z
Dateiname: 6515346702_buchblock.pdf; erzeugt am 07. May 2009 14:15:56; WK
Page 96 of 373
It should:
R
fit snugly across your body.
R be routed across the middle of your
shoulder.
R be routed in your pelvic area across the
hip joints. Lights
Exterior lighting
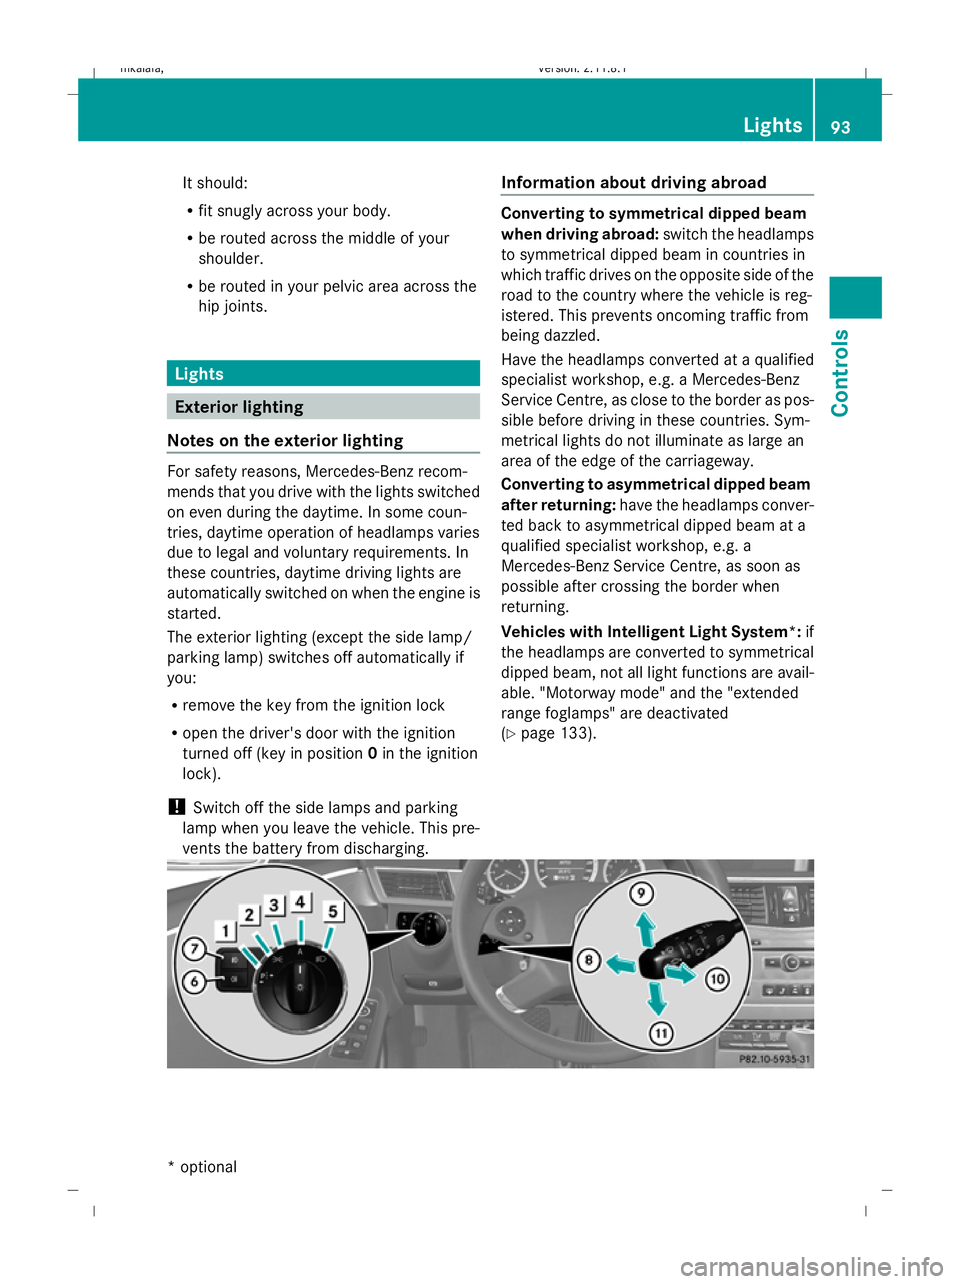
Notes on the exterior lighting For safety reasons, Mercedes-Benz recom-
mends that you drive with the lights switched
on even during the daytime. In some coun-
tries, daytime operation of headlamps varies
due to legal and voluntary requirements. In
these countries, daytime driving lights are
automatically switched on when the engine is
started.
The exterior lighting (except the side lamp/
parking lamp) switches off automatically if
you:
R remove the key from the ignition lock
R open the driver's door with the ignition
turned off (key in position 0in the ignition
lock).
! Switch off the side lamps and parking
lamp when you leave the vehicle. This pre-
vents the battery from discharging. Information about driving abroad Converting to symmetrical dipped beam
when driving abroad:
switch the headlamps
to symmetrical dipped beam in countries in
which traffic drives on the opposite side of the
road to the country where the vehicle is reg-
istered. This prevents oncoming traffic from
being dazzled.
Have the headlamps converted at a qualified
specialist workshop, e.g. a Mercedes-Benz
Service Centre, as close to the border as pos-
sible before driving in these countries. Sym-
metrical lights do not illuminate as large an
area of the edge of the carriageway.
Converting to asymmetrical dipped beam
after returning: have the headlamps conver-
ted back to asymmetrical dipped beam at a
qualified specialist workshop, e.g. a
Mercedes-Benz Service Centre, as soon as
possible after crossing the border when
returning.
Vehicles with Intelligent Light System*: if
the headlamps are converted to symmetrical
dipped beam, not all light functions are avail-
able. "Motorway mode" and the "extended
range foglamps" are deactivated
(Y page 133). Lights
93Controls
* optional
212_AKB; 2; 4, en-GB
mkalafa
,V ersion: 2.11.8.1
2009-05-05T14:17:16+02:00 - Seite 93 Z
Dateiname: 6515346702_buchblock.pdf; erzeugt am 07. May 2009 14:15:59; WK
Page 102 of 373
Interior lighting
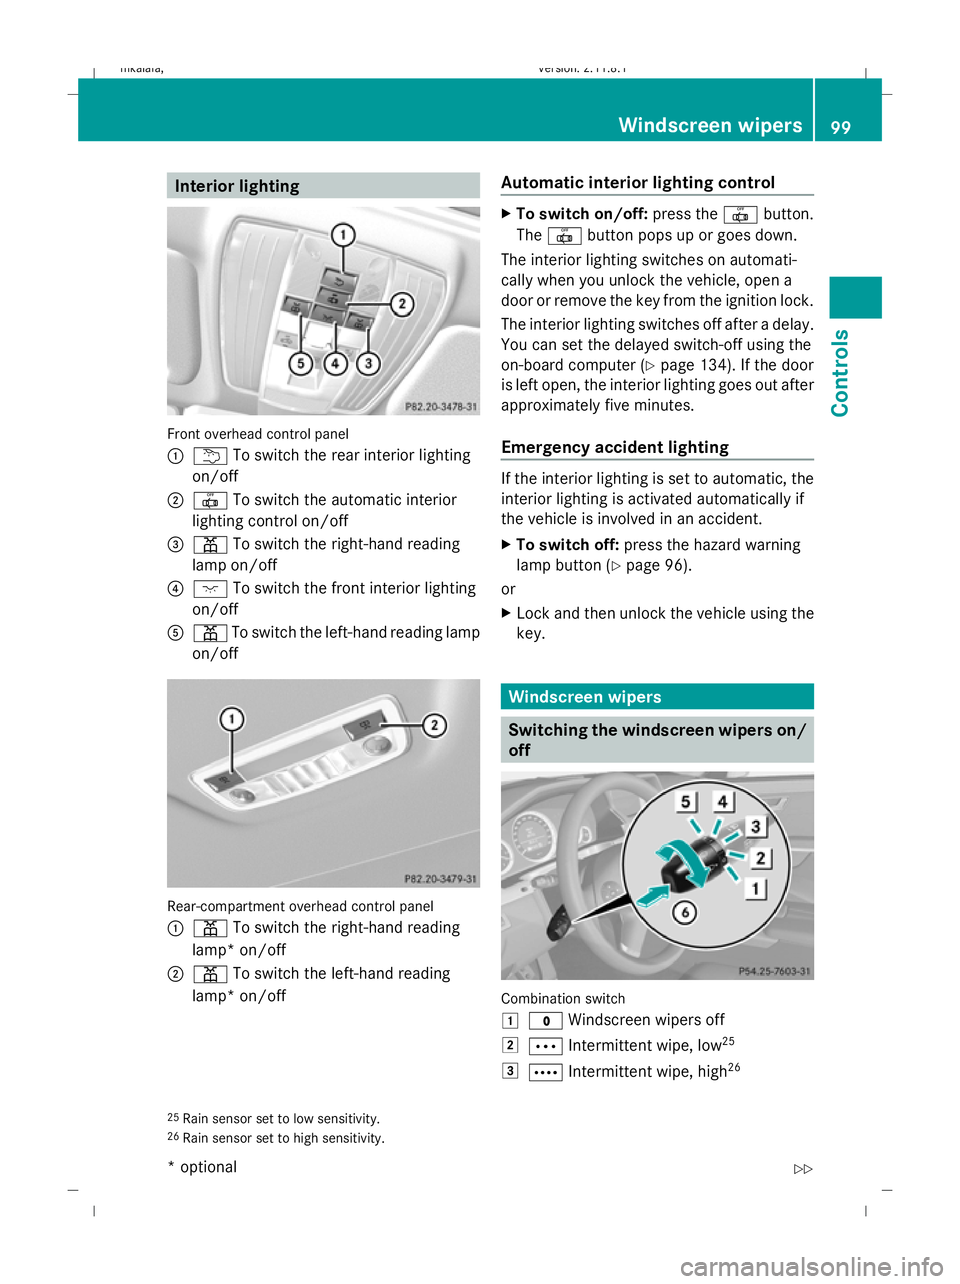
Front overhead control panel
: u To switch the rear interior lighting
on/off
; | To switch the automatic interior
lighting control on/off
= p To switch the right-hand reading
lamp on/off
? c To switch the front interior lighting
on/off
A p To switch the left-hand reading lamp
on/off Rear-compartment overhead control panel
:
p To switch the right-hand reading
lamp* on/off
; p To switch the left-hand reading
lamp* on/off Automatic interior lighting control X
To switch on/off: press the|button.
The | button pops up or goes down.
The interior lighting switches on automati-
cally when you unlock the vehicle, open a
door or remove the key from the ignition lock.
The interior lighting switches off after a delay.
You can set the delayed switch-off using the
on-board computer (Y page 134). If the door
is left open, the interior lighting goes out after
approximately five minutes.
Emergency accident lighting If the interior lighting is set to automatic, the
interior lighting is activated automatically if
the vehicle is involved in an accident.
X To switch off: press the hazard warning
lamp button (Y page 96).
or
X Lock and then unlock the vehicle using the
key. Windscreen wipers
Switching the windscreen wipers on/
off
Combination switch
1
$ Windscreen wipers off
2 Ä Intermittent wipe, low 25
3 Å Intermittent wipe, high 26
25 Rain sensor set to low sensitivity.
26 Rain sensor set to high sensitivity. Windscreen wipers
99Controls
* optional
212_AKB; 2; 4, en-GB
mkalafa
,V ersion: 2.11.8.1
2009-05-05T14:17:16+02:00 - Seite 99 Z
Dateiname: 6515346702_buchblock.pdf; erzeugt am 07. May 2009 14:16:01; WK
Page 103 of 373

4
° Continuous wipe, slow
5 ¯ Continuous wipe, fast
B í Single wipe/ îTo wipe the
windscreen using washer fluid
! With intermittent wiping with rain sensor:
Due to optical influences and the wind-
screen becoming dirty in dry weather con-
ditions, the windscreen wipers may be acti-
vated inadvertently. This could then dam-
age the windscreen wiper blades or scratch
the windscreen.
For this reason, you should always switch
off the windscreen wipers in dry weather.
X Turn the key to position 1or 2in the ignition
lock.
X Turn the combination switch to the corre-
sponding position.
In the ÄorÅ position, the appropriate
wiping frequency is set automatically accord-
ing to the intensity of the rain. In the Å
position, the rain sensor is more sensitive
than in the Äposition and therefore the
windscreen wiper will wipe more frequently. Rear window wiper (Estate)
Combination switch
:
è Switch
2 ô To wipe with washer fluid
3 ITo switch on intermittent wiping
4 0To switch off intermittent wiping
5 ô To wipe with washer fluid X
Turn the key to position 1or 2in the ignition
lock.
X Turn switch :on the combination switch
to the corresponding position.
When the rear window wiper is switched on
the icon appears in the instrument cluster. Side windows
Opening and closing the side win-
dows
G
Risk of injury
When opening the side windows, make sure
that nobody can become trapped between the
side window and the door frame. Keep clear
of the side window during the opening proce-
dure. Otherwise, you could be drawn in or
trapped between the side window and the
door frame by the downwards movement of
the window. If there is a risk of becoming
trapped, release the switch or pull it upwards
to close the side window again. G
Risk of injury
Make sure that nobody can become trapped
as you close the side windows. If there is a
risk of entrapment, release the button or
press the button again to open the side win-
dow. G
Risk of injury
Children may injure themselves if they oper-
ate the side windows.
Never leave children unsupervised in the vehi-
cle. Always take the key with you when leaving
the vehicle, even if you are only leaving it for
a short time. 100
Side windowsCont
rols
212_AKB; 2; 4, en-GB
mkalafa,V ersion: 2.11.8.1
2009-05-05T14:17:16+02:00 - Seite 100
Dateiname: 6515346702_buchblock.pdf; erzeugt am 07. May 2009 14:16:02; WK
Page 104 of 373
G
Risk of injury
Do not leave children unsupervised in the
vehicle, even if they are secured in a child
restraint system. The children could:
R be seriously or even fatally injured on parts
of the vehicle
R be seriously or even fatally injured by pro-
longed exposure to extremely high or
extremely low temperatures
If children open a door, they could:
R seriously or even fatally injure other people
R get out of the vehicle and injure them-
selves, or be seriously or even fatally
injured by a passing vehicle
Activate the child-proof locks/override fea-
ture if children are travelling in the vehicle.
They could otherwise open doors or side win-
dows while the vehicle is in motion and
thereby injure themselves or others.
i Related topics:
R convenience opening from the out-
side (Y page 102) or from the inside
(Y page 180)
R convenience closing from the out-
side (Y page 102) or from the inside
(Y page 180)
R disabling the controls in the rear com-
partment (override feature)
R automatic closing of the side windows
(PRE-SAFE ®
) (Y page 42) :
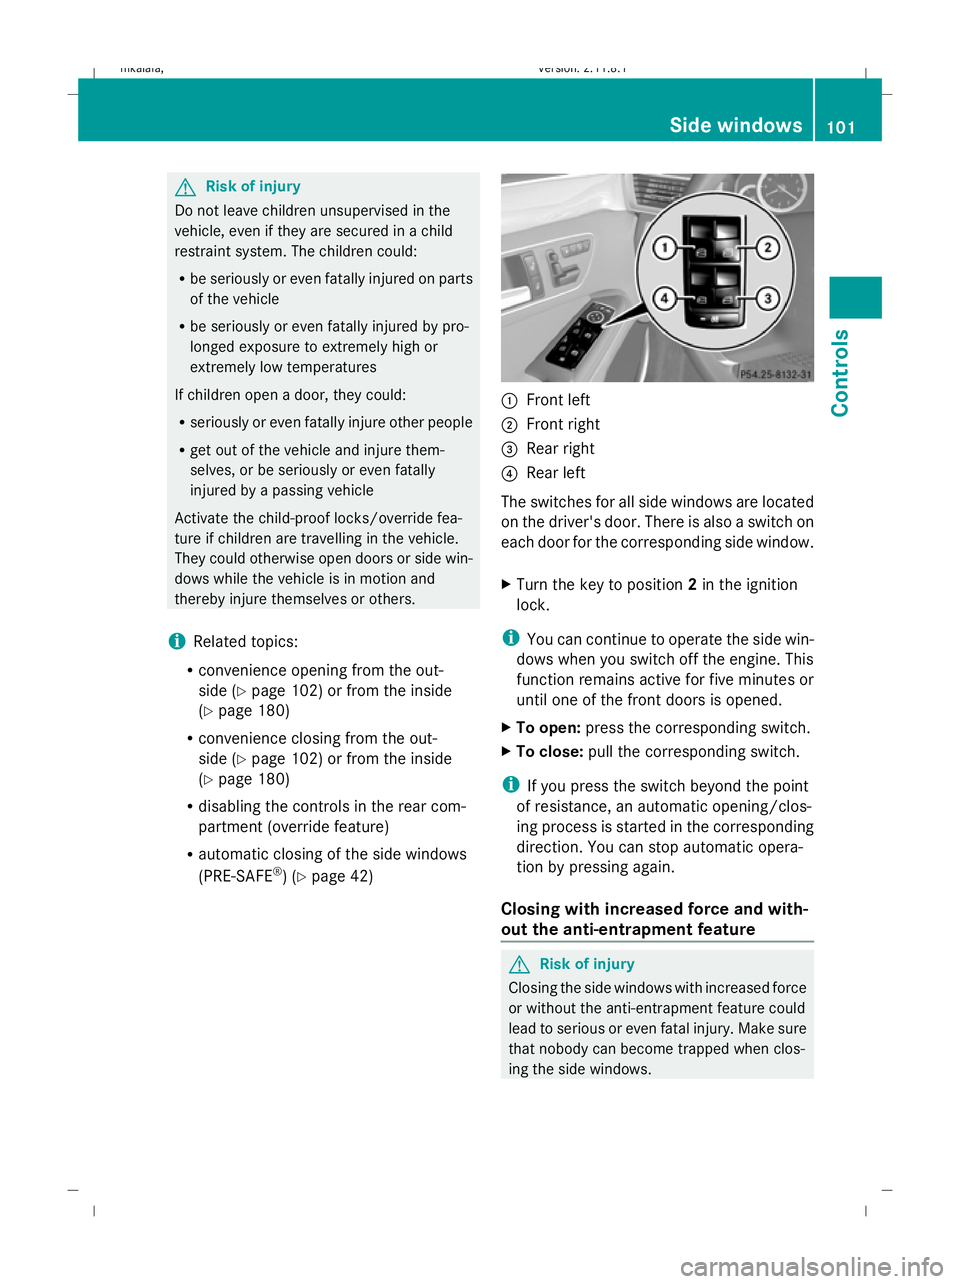
Front left
; Front right
= Rear right
? Rear left
The switches for all side windows are located
on the driver's door. There is also a switch on
each door for the corresponding side window.
X Turn the key to position 2in the ignition
lock.
i You can continue to operate the side win-
dows when you switch off the engine. This
function remains active for five minutes or
until one of the front doors is opened.
X To open: press the corresponding switch.
X To close: pull the corresponding switch.
i If you press the switch beyond the point
of resistance, an automatic opening/clos-
ing process is started in the corresponding
direction. You can stop automatic opera-
tion by pressing again.
Closing with increased force and with-
out the anti-entrapment feature G
Risk of injury
Closing the side windows with increased force
or without the anti-entrapment feature could
lead to serious or even fatal injury. Make sure
that nobody can become trapped when clos-
ing the side windows. Side windows
101Controls
212_AKB; 2; 4, en-GB
mkalafa,V ersion: 2.11.8.1
2009-05-05T14:17:16+02:00 - Seite 101 Z
Dateiname: 6515346702_buchblock.pdf; erzeugt am 07. May 2009 14:16:02; WK
Page 105 of 373
If a side window blocks during closing and
reopens slightly:
X Immediately after the window blocks, pull
on the corresponding switch again until the
side window has closed.
The side window is closed with increased
force.
If a side window blocks again during closing
and reopens slightly:
X Immediately after the window blocks, pull
on the corresponding switch again until the
side window has closed.
The side window is closed without the anti-
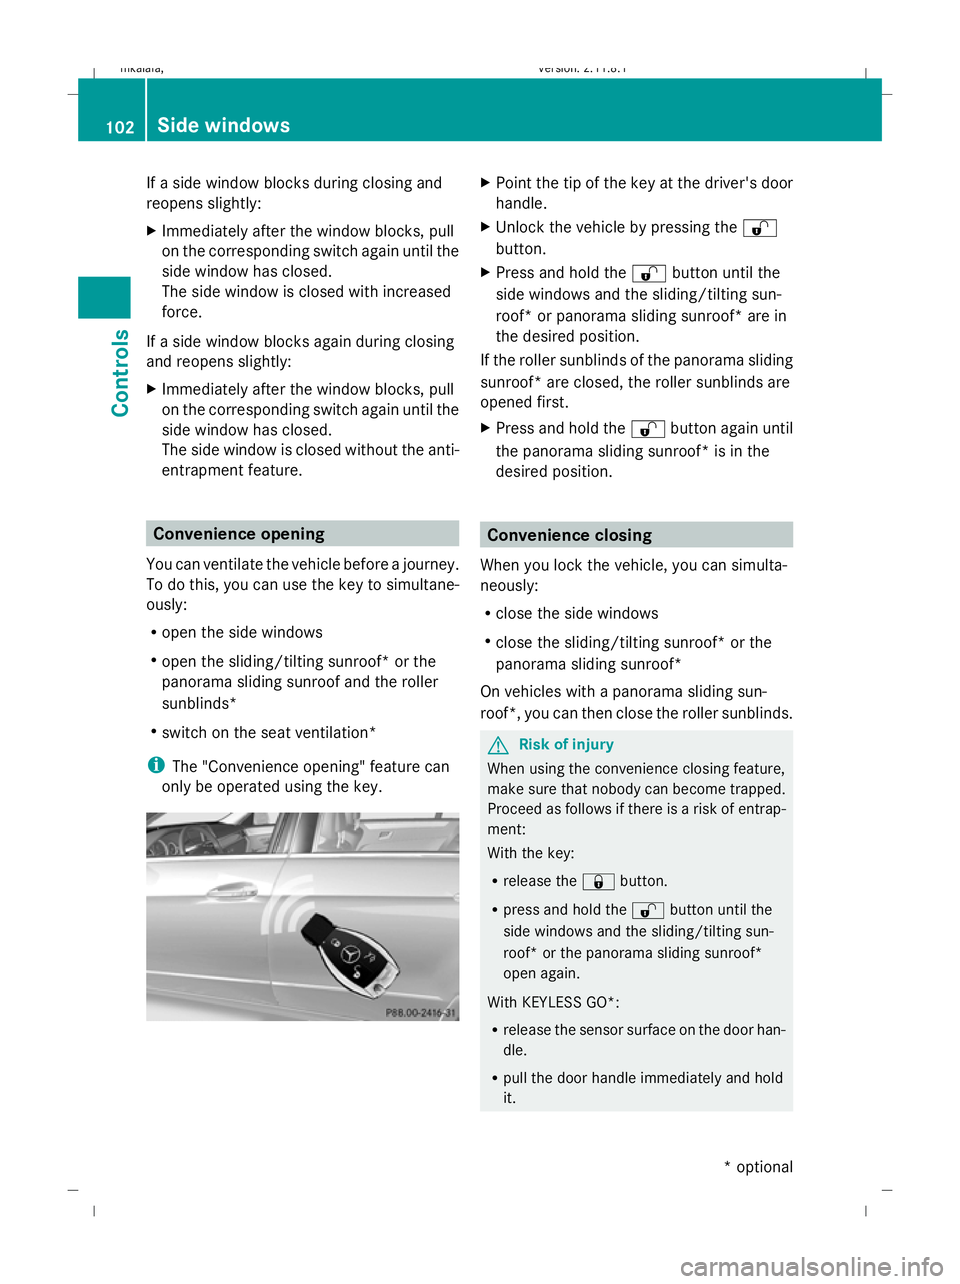
entrapment feature. Convenience opening
You can ventilate the vehicle before a journey.
To do this, you can use the key to simultane-
ously:
R open the side windows
R open the sliding/tilting sunroof* or the
panorama sliding sunroof and the roller
sunblinds*
R switch on the seat ventilation*
i The "Convenience opening" feature can
only be operated using the key. X
Point the tip of the key at the driver's door
handle.
X Unlock the vehicle by pressing the %
button.
X Press and hold the %button until the
side windows and the sliding/tilting sun-
roof* or panorama sliding sunroof* are in
the desired position.
If the roller sunblinds of the panorama sliding
sunroof* are closed, the roller sunblinds are
opened first.
X Press and hold the %button again until
the panorama sliding sunroof* is in the
desired position. Convenience closing
When you lock the vehicle, you can simulta-
neously:
R close the side windows
R close the sliding/tilting sunroof* or the
panorama sliding sunroof*
On vehicles with a panorama sliding sun-
roof*, you can then close the roller sunblinds. G
Risk of injury
When using the convenience closing feature,
make sure that nobody can become trapped.
Proceed as follows if there is a risk of entrap-
ment:
With the key:
R release the &button.
R press and hold the %button until the
side windows and the sliding/tilting sun-
roof* or the panorama sliding sunroof*
open again.
With KEYLESS GO*:
R release the sensor surface on the door han-
dle.
R pull the door handle immediately and hold
it. 102
Side windowsControls
* optional
212_AKB; 2; 4, en-GB
mkalafa
,V ersion: 2.11.8.1
2009-05-05T14:17:16+02:00 - Seite 102
Dateiname: 6515346702_buchblock.pdf; erzeugt am 07. May 2009 14:16:02; WK
Page 106 of 373
The side windows and the sliding/tilting
sunroof* or the panorama sliding sun-
roof* open.
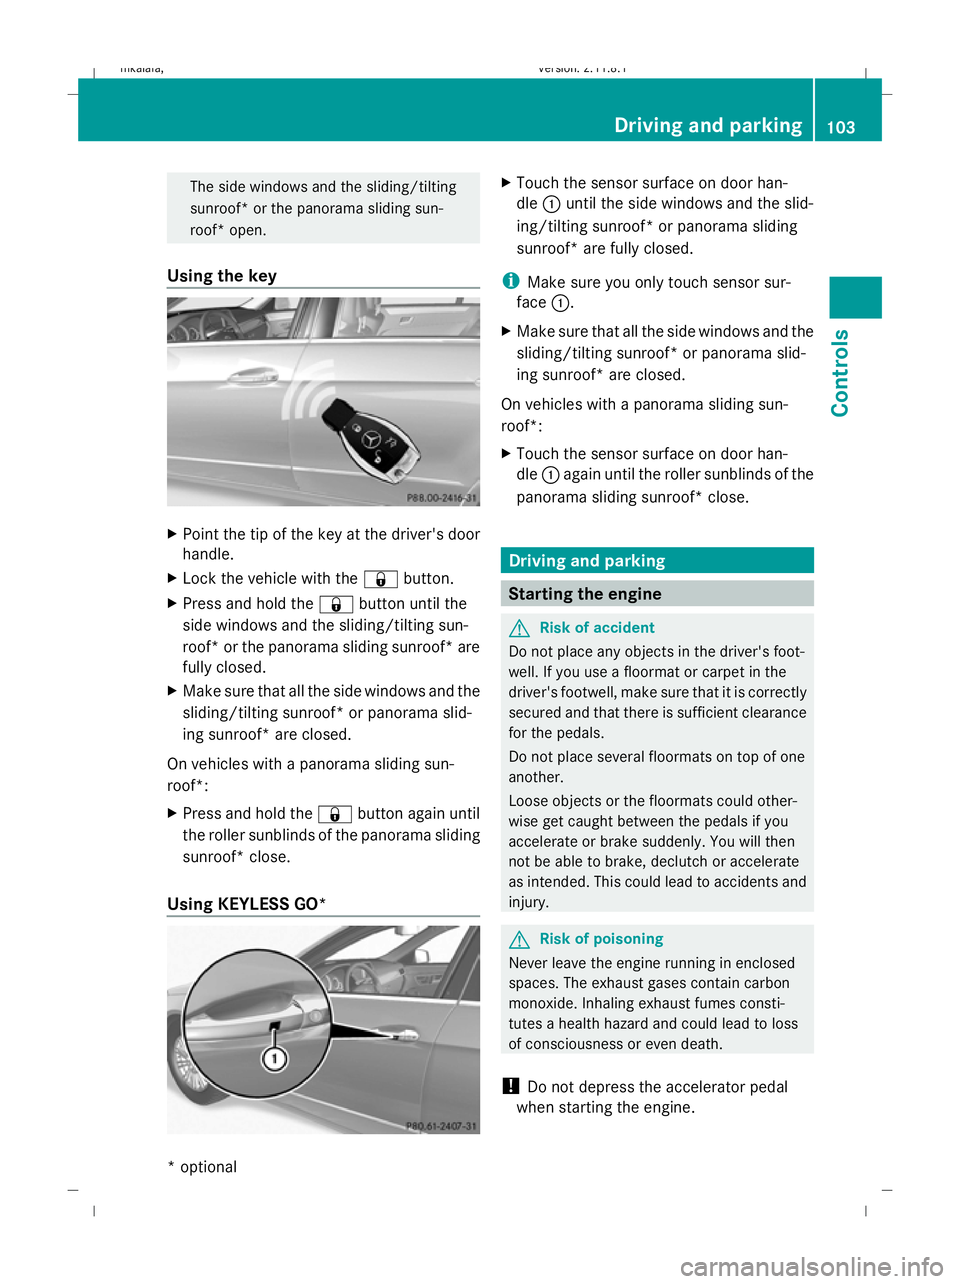
Using the key X
Point the tip of the key at the driver's door
handle.
X Lock the vehicle with the &button.
X Press and hold the &button until the
side windows and the sliding/tilting sun-
roof* or the panorama sliding sunroof* are
fully closed.
X Make sure that all the side windows and the
sliding/tilting sunroof* or panorama slid-
ing sunroof* are closed.
On vehicles with a panorama sliding sun-
roof*:
X Press and hold the &button again until
the roller sunblinds of the panorama sliding
sunroof* close.
Using KEYLESS GO* X
Touch the sensor surface on door han-
dle :until the side windows and the slid-
ing/tilting sunroof* or panorama sliding
sunroof* are fully closed.
i Make sure you only touch sensor sur-
face :.
X Make sure that all the side windows and the
sliding/tilting sunroof* or panorama slid-
ing sunroof* are closed.
On vehicles with a panorama sliding sun-
roof*:
X Touch the sensor surface on door han-
dle :again until the roller sunblinds of the
panorama sliding sunroof* close. Driving and parking
Starting the engine
G
Risk of accident
Do not place any objects in the driver's foot-
well. If you use a floormat or carpet in the
driver's footwell, make sure that it is correctly
secured and that there is sufficient clearance
for the pedals.
Do not place several floormats on top of one
another.
Loose objects or the floormats could other-
wise get caught between the pedals if you
accelerate or brake suddenly. You will then
not be able to brake, declutch or accelerate
as intended. This could lead to accidents and
injury. G
Risk of poisoning
Never leave the engine running in enclosed
spaces. The exhaust gases contain carbon
monoxide. Inhaling exhaust fumes consti-
tutes a health hazard and could lead to loss
of consciousness or even death.
! Do not depress the accelerator pedal
when starting the engine. Driving and parking
103Controls
* optional
212_AKB; 2; 4, en-GB
mkalafa,
Version: 2.11.8.1 2009-05-05T14:17:16+02:00 - Seite 103 Z
Dateiname: 6515346702_buchblock.pdf; erzeugt am 07. May 2009 14:16:03; WK
Page 109 of 373
Where possible, avoid spinning the drive
wheels when pulling away on slippery
roads. Otherwise, you could damage the
drive train.
! AMG vehicles: at low engine tempera-
tures (below +20 †), the maximum engine
speed is restricted in order to protect the
engine. Avoid driving at full throttle when
the engine is cold in order to protect the
engine and maintain smooth engine oper-
ation.
i It is only possible to move the selector
lever/DIRECT SELECT lever to the desired
position if you depress the brake pedal.
i The vehicle locks centrally once you have
pulled away. The locking knobs in the doors
drop down.
You can open the doors from the inside at
any time.
You can also switch off the automatic door
lock (Y page 134).
Manual transmission X
Depress the brake pedal and keep it
depressed.
X Depress the clutch pedal.
X Shift to either first or reverse gear.
X Release the parking brake (Y page 107).
X Release the brake pedal.
X Slowly release the clutch pedal and gently
depress the accelerator pedal.
! Change gear in good time and avoid spin-
ning the wheels. Otherwise, you could dam-
age the vehicle.
i BlueEFFICIENCY* vehicles: follow the
gearshift recommendations that appears in
the multi-function display, as these help to
improve fuel economy. Automatic transmission* X
Depress the brake pedal and keep it
depressed.
X Shift the transmission to position Dor R.
X Release the parking brake (Y page 107).
X Release the brake pedal.
X Carefully depress the accelerator pedal.
i Upshifts take place at higher engine
speeds after a cold start. This helps the
catalytic converter to reach its operating
temperature more quickly.
Hill start assist Hill start assist helps you when pulling away
forwards or in reverse on an uphill gradient.
It holds the vehicle for a short time after you
have removed your foot from the brake pedal.
This gives you time to move your foot from
the brake pedal to the accelerator pedal and
depress it before the vehicle begins to roll. G
Risk of accident
Never leave the vehicle when it is held by hill
start assist. After approximately one second,
hill start assist will no longer brake your vehi-
cle and it could roll away.
X Take your foot off the brake pedal.
i Once you have taken your foot off the
brake pedal, the vehicle is held for around
one second.
X Pull away.
Hill start assist will not function if:
R you are pulling away on a level road or a
downhill gradient.
R the transmission is in position Non vehi-
cles with automatic transmission*.
R the vehicle is secured with the parking
brake.
R ESP ®
is malfunctioning. 106
Driving and parkingControls
* optional
212_AKB; 2; 4, en-GB
mkalafa,
Version: 2.11.8.1 2009-05-05T14:17:16+02:00 - Seite 106
Dateiname: 6515346702_buchblock.pdf; erzeugt am 07. May 2009 14:16:04; WK