2009 MERCEDES-BENZ E-CLASS ESTATE charging
[x] Cancel search: chargingPage 8 of 373
ASSYST PLUS service interval dis-
play ..................................................... 239
Calling up the date (on-board
computer) ...................................... 239
Display message ............................ 239
ATA (anti-theft alarm system) ............65
Switching off the alarm ....................66
ATTENTION ASSIST ...........................163
Activating/deactivating (on-
board computer) ............................ 130
Display message ............................ 265
AUTO lights
Display message ............................ 271
Automatic car wash ..........................240
Automatic engine start With ECO Start/Stop function .......109
Automatic engine switch-off
Using the ECO Start/Stop func-
tion ................................................ 108
Automatic lane recognition system
see Lane Keeping Assist ................130
Automatic transmission
Changing gear yoursel f.................. 112
Display message ............................ 253
Driving tips .................................... 114
Emergency running mode ..............293
Kickdown ....................................... 114
Malfunction ................................... .293
One-touch gearshifting ..................112
Program selector button ................113
Releasing the parking lock man-
ually ............................................... 301
Selector lever positions .................111
Shift ranges ................................... 113
Trailer towing ................................. 114
Auxiliary heating ............................... 181
Display message ............................ 276
Notes ............................................. 181
Remote control .............................. 182
Setting (on-board computer) .......... 135
Auxiliary ventilation ..........................181 B
Backrest Display message ............................ 277
Bag hook ............................................ 200Ball coupling
Folding in ....................................... 237
Folding out ..................................... 234
BAS (Brake Assist) ............................... 59
BAS PLUS (Brake Assist System
Plus*) .................................................... 59
Battery Changing (auxiliary heating
remote control) .............................. 304
Changing (key )............................... 304
Charging ........................................ 322
Checking (key) ............................... 304
Check lamp (key )........................... 304
Disconnecting ................................ 321
Display message ...........253, 265, 274
Fitting the battery ..........................323
Jump-starting ................................. 323
Maintenance (vehicle) .................... 319
Reconnecting ................................. 323
Removing/fitting ........................... 322
Vehicle battery .............................. 319
Belt force limiters
Activation ......................................... 37
Belt height adjustment .......................91
Belt tensioners Activation ......................................... 37
Belt warning ......................................... 91
Blind Spot Assist ............................... 167
Activating/deactivating (on-
board computer) ............................ 130
Display message ............................ 261
Indicator lamp ................................ 280
Trailer towing ................................. 169
Warning lamp ................................. 280
BlueTEC
AdBlue ®
......................................... 335
Bonnet
Active bonnet (pedestrian protec-
tion) ............................................... 219
Bonnet catch ................................. 220
Display message ............................ 263
Opening/closing ........................... 219
Resetting the active bonnet
(pedestrian protection) after
being triggered .............................. 302
Bonnet release lever
Release leve r................................. 220 Index
5 212_AKB; 2; 4, en-GB
mkalafa,
Version: 2.11.8.1 2009-05-05T14:17:16+02:00 - Seite 5Dateiname: 6515346702_buchblock.pdf; erzeugt am 07. May 2009 14:15:26; WK
Page 96 of 373
It should:
R
fit snugly across your body.
R be routed across the middle of your
shoulder.
R be routed in your pelvic area across the
hip joints. Lights
Exterior lighting
Notes on the exterior lighting For safety reasons, Mercedes-Benz recom-
mends that you drive with the lights switched
on even during the daytime. In some coun-
tries, daytime operation of headlamps varies
due to legal and voluntary requirements. In
these countries, daytime driving lights are
automatically switched on when the engine is
started.
The exterior lighting (except the side lamp/
parking lamp) switches off automatically if
you:
R remove the key from the ignition lock
R open the driver's door with the ignition
turned off (key in position 0in the ignition
lock).
! Switch off the side lamps and parking
lamp when you leave the vehicle. This pre-
vents the battery from discharging. Information about driving abroad Converting to symmetrical dipped beam
when driving abroad:
switch the headlamps
to symmetrical dipped beam in countries in
which traffic drives on the opposite side of the
road to the country where the vehicle is reg-
istered. This prevents oncoming traffic from
being dazzled.
Have the headlamps converted at a qualified
specialist workshop, e.g. a Mercedes-Benz
Service Centre, as close to the border as pos-
sible before driving in these countries. Sym-
metrical lights do not illuminate as large an
area of the edge of the carriageway.
Converting to asymmetrical dipped beam
after returning: have the headlamps conver-
ted back to asymmetrical dipped beam at a
qualified specialist workshop, e.g. a
Mercedes-Benz Service Centre, as soon as
possible after crossing the border when
returning.
Vehicles with Intelligent Light System*: if
the headlamps are converted to symmetrical
dipped beam, not all light functions are avail-
able. "Motorway mode" and the "extended
range foglamps" are deactivated
(Y page 133). Lights
93Controls
* optional
212_AKB; 2; 4, en-GB
mkalafa
,V ersion: 2.11.8.1
2009-05-05T14:17:16+02:00 - Seite 93 Z
Dateiname: 6515346702_buchblock.pdf; erzeugt am 07. May 2009 14:15:59; WK
Page 323 of 373
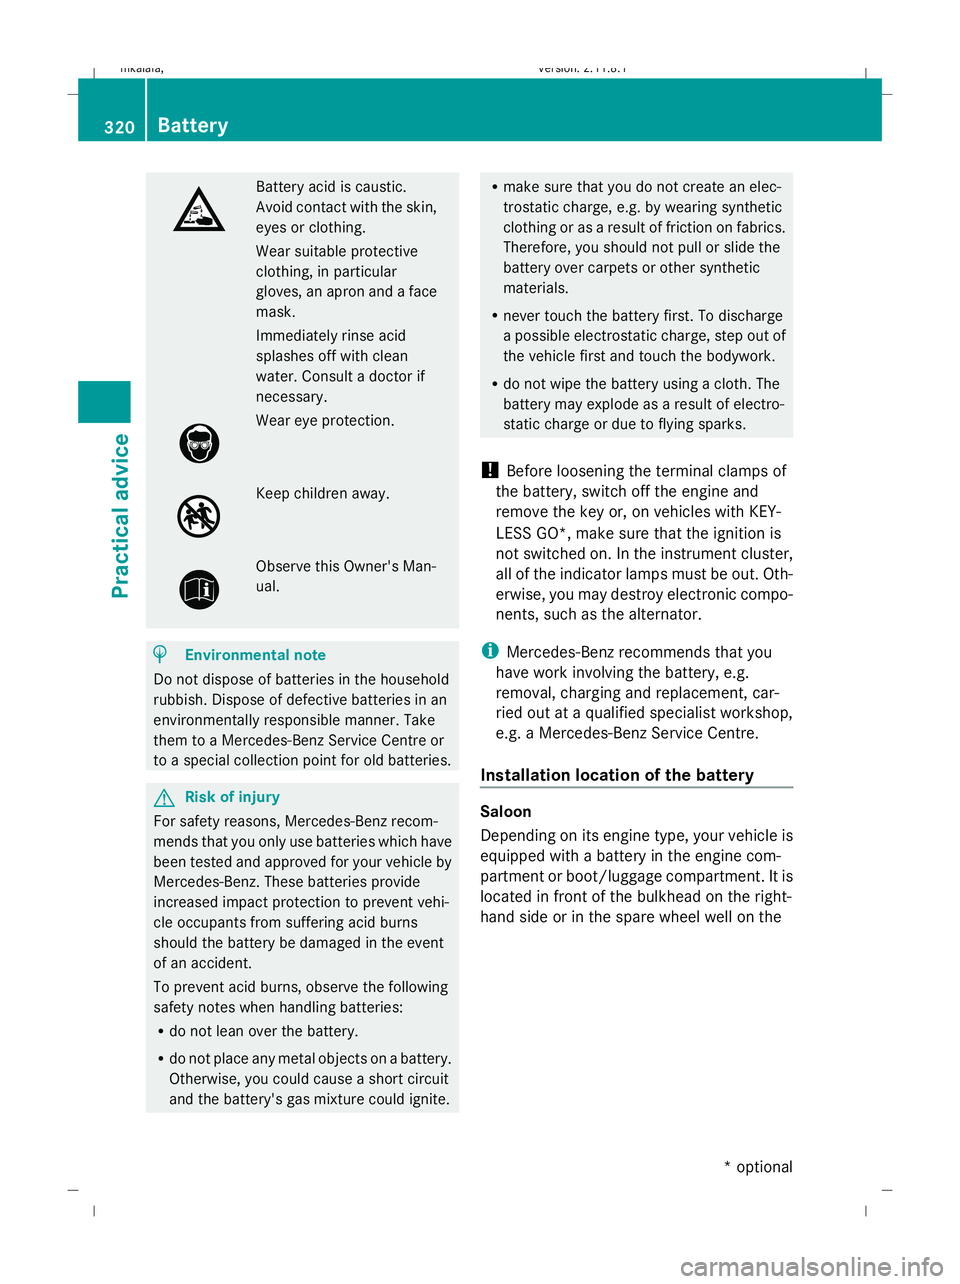
Battery acid is caustic.
Avoid contact with the skin,
eyes or clothing.
Wear suitable protective
clothing, in particular
gloves, an apron and a face
mask.
Immediately rinse acid
splashes off with clean
water. Consult a doctor if
necessary.
Wear eye protection.
Keep children away.
Observe this Owner's Man-
ual.
H
Environmental note
Do not dispose of batteries in the household
rubbish. Dispose of defective batteries in an
environmentally responsible manner. Take
them to a Mercedes-Benz Service Centre or
to a special collection point for old batteries. G
Risk of injury
For safety reasons, Mercedes-Benz recom-
mends that you only use batteries which have
been tested and approved for your vehicle by
Mercedes-Benz. These batteries provide
increased impact protection to prevent vehi-
cle occupants from suffering acid burns
should the battery be damaged in the event
of an accident.
To prevent acid burns, observe the following
safety notes when handling batteries:
R do not lean over the battery.
R do not place any metal objects on a battery.
Otherwise, you could cause a short circuit
and the battery's gas mixture could ignite. R
make sure that you do not create an elec-
trostatic charge, e.g. by wearing synthetic
clothing or as a result of friction on fabrics.
Therefore, you should not pull or slide the
battery over carpets or other synthetic
materials.
R never touch the battery first. To discharge
a possible electrostatic charge, step out of
the vehicle first and touch the bodywork.
R do not wipe the battery using a cloth. The
battery may explode as a result of electro-
static charge or due to flying sparks.
! Before loosening the terminal clamps of
the battery, switch off the engine and
remove the key or, on vehicles with KEY-
LESS GO*, make sure that the ignition is
not switched on. In the instrument cluster,
all of the indicator lamps must be out. Oth-
erwise, you may destroy electronic compo-
nents, such as the alternator.
i Mercedes-Benz recommends that you
have work involving the battery, e.g.
removal, charging and replacement, car-
ried out at a qualified specialist workshop,
e.g. a Mercedes-Benz Service Centre.
Installation location of the battery Saloon
Depending on its engine type, your vehicle is
equipped with a battery in the engine com-
partment or boot/luggage compartment. It is
located in front of the bulkhead on the right-
hand side or in the spare wheel well on the320
BatteryPractical advice
* optional
212_AKB; 2; 4, en-GB
mkalafa
,V ersion: 2.11.8.1
2009-05-05T14:17:16+02:00 - Seite 320
Dateiname: 6515346702_buchblock.pdf; erzeugt am 07. May 2009 14:17:25; WK
Page 325 of 373
X
Firmly depress the parking brake and on
vehicles with automatic transmission*,
shift the transmission to position P.
X Switch off all electrical consumers (e.g.
radio, blower, etc.).
X Turn the key to 0(Y page 75) in the ignition
lock and remove it or make sure that no
ignition position has been selected with
KEYLESS GO*. In the instrument cluster, all
of the indicator lamps must be out.
X Vehicles with the battery in the engine
compartment: open the bonnet.
X Vehicles with the battery in the boot:
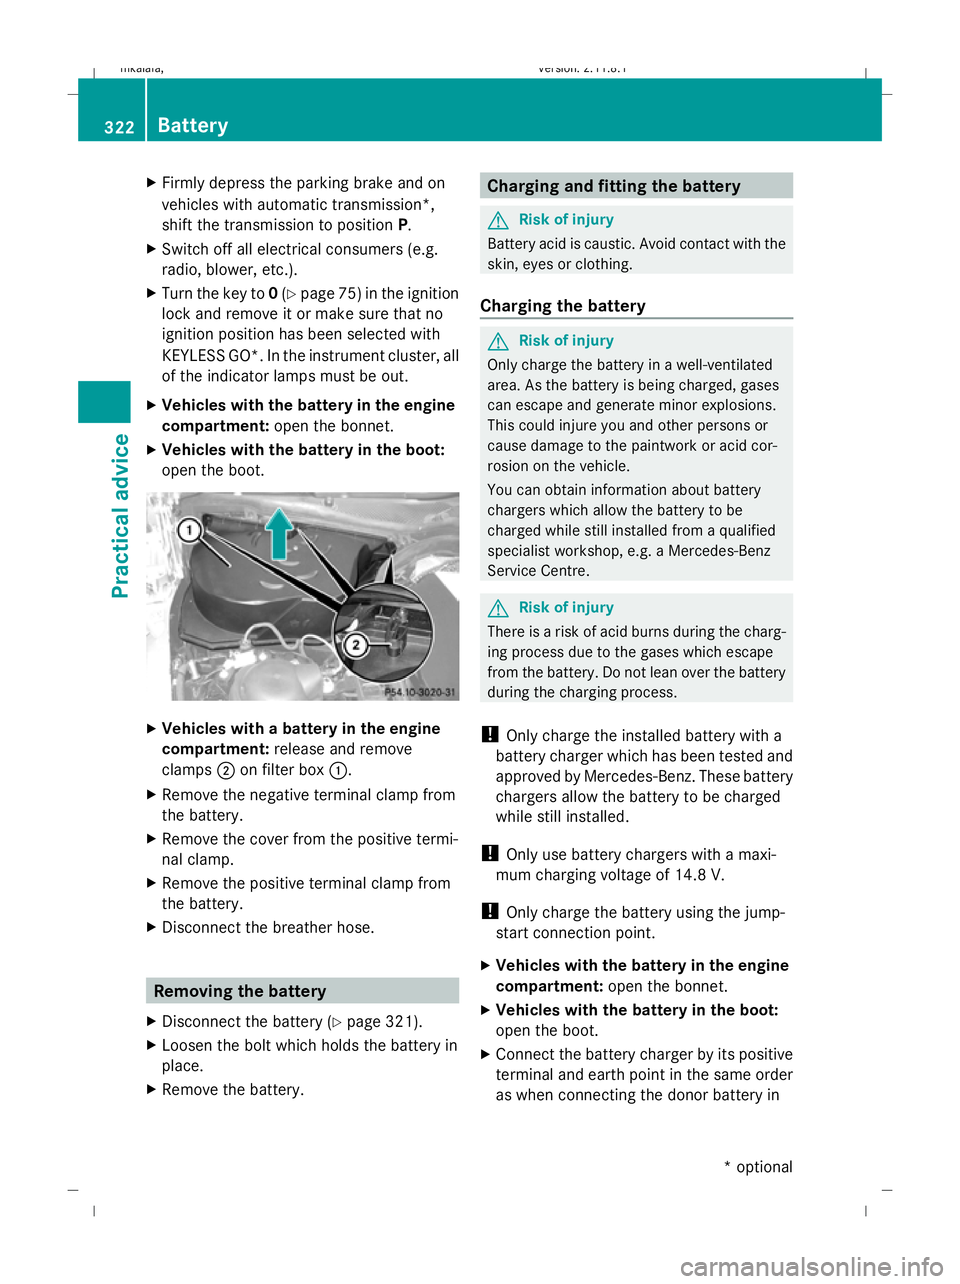
open the boot. X
Vehicles with a battery in the engine
compartment: release and remove
clamps ;on filter box :.
X Remove the negative terminal clamp from
the battery.
X Remove the cover from the positive termi-
nal clamp.
X Remove the positive terminal clamp from
the battery.
X Disconnect the breather hose. Removing the battery
X Disconnect the battery ( Ypage 321).
X Loosen the bolt which holds the battery in
place.
X Remove the battery. Charging and fitting the battery
G
Risk of injury
Battery acid is caustic. Avoid contact with the
skin, eyes or clothing.
Charging the battery G
Risk of injury
Only charge the battery in a well-ventilated
area. As the battery is being charged, gases
can escape and generate minor explosions.
This could injure you and other persons or
cause damage to the paintwork or acid cor-
rosion on the vehicle.
You can obtain information about battery
chargers which allow the battery to be
charged while still installed from a qualified
specialist workshop, e.g. a Mercedes-Benz
Service Centre. G
Risk of injury
There is a risk of acid burns during the charg-
ing process due to the gases which escape
from the battery. Do not lean over the battery
during the charging process.
! Only charge the installed battery with a
battery charger which has been tested and
approved by Mercedes-Benz. These battery
chargers allow the battery to be charged
while still installed.
! Only use battery chargers with a maxi-
mum charging voltage of 14.8 V.
! Only charge the battery using the jump-
start connection point.
X Vehicles with the battery in the engine
compartment: open the bonnet.
X Vehicles with the battery in the boot:
open the boot.
X Connect the battery charger by its positive
terminal and earth point in the same order
as when connecting the donor battery in 322
BatteryPractical advice
* optional
212_AKB; 2; 4, en-GB
mkalafa
,V ersion: 2.11.8.1
2009-05-05T14:17:16+02:00 - Seite 322
Dateiname: 6515346702_buchblock.pdf; erzeugt am 07. May 2009 14:17:26; WK
Page 326 of 373
the jump-starting procedure
(Y
page 323).
Fitting the battery X
Install the battery. To do this, follow the
steps described in "Removing the battery"
(Y page 322) in reverse order.
X Reconnect the battery (Y page 323).Reconnecting the battery
! Always connect the battery in the order
described below. Never swap the terminal
clamps. Otherwise, you may damage the
vehicle electronics.
X Switch off all electrical consumers (e.g.
radio, blower, etc.).
X Connect the positive terminal clamp and
secure the cover.
X Connect the negative terminal clamp.
X Connect the breather hose.
X On vehicles with the battery in the
engine compartment: put the filter box
back in place, then clip in and close the
retaining clamps.
Close the bonnet.
X Vehicles with the battery in the boot:
close the boot.
i If the battery power supply has been inter-
rupted (e.g. if it has been reconnected), you
must carry out the following tasks:
R set the time ( Ypage 132)
R reset the function for folding the exterior
mirrors in/out automatically* by folding
the mirrors out once ( Ypage 87) Jump-starting
If your vehicle's battery is discharged, the
engine can be jump-started from another
vehicle or from an external battery using jump
leads. Observe the following points:
R
you may only jump-start when the engine
and catalytic converter are cold.
R do not start the engine if the battery is fro-
zen. Let the battery thaw first.
R jump-starting may only be performed from
batteries with a nominal voltage of 12 V.
R only use jump leads which have a sufficient
cross-section and insulated terminal
clamps.
i Jump leads and further information about
jump-starting can be obtained from any
Mercedes-Benz Service Centre.
! Avoid repeated and lengthy starting
attempts.
Do not use a rapid-charging device to start
the engine. G
Risk of injury
There is a risk of acid burns when jump-start-
ing a vehicle due to the gases which escape
from the battery. Do not lean over the battery
while the engine is being jump-started. G
Risk of explosion
Gases escaping from the battery during jump-
starting may cause minor explosions. Avoid
creating sparks. Keep naked flames away
from the battery, and do not smoke.
Comply with safety precautions and take pro-
tective measures when handling batteries.
You will find these under "Battery" in the
index.
X Make sure that the two vehicles do not
touch.
X Depress the parking brake firmly.
X Manual transmission: engage neutral.
X Automatic transmission*: shift the trans-
mission to position P.
X Switch off all electrical consumers (e.g.
radio, blower, etc.).
X Open the bonnet (Y page 219). Jump-starting
323Practical advice
* optional
212_AKB; 2; 4, en-GB
mkalafa
,V ersion: 2.11.8.1
2009-05-05T14:17:16+02:00 - Seite 323 Z
Dateiname: 6515346702_buchblock.pdf; erzeugt am 07. May 2009 14:17:26; WK