Page 143 of 371

Knowing your vehicle134
3
1
2
3
4
5
6
7
8
9
In case the iPod exclusive cable is
connected to the multiple terminal
inside the console on the right hand
side of the driver’s seat. When the
iPod is connected, the ‘iPod’ icon will
be displayed on the top right corner
of the display screen.1. iPod Selection ButtonIf iPod is connected, it switches to
the iPod mode from the Radio and
CD mode to play the song files
stored in the iPod.
If there are no CD and AUX mode
from the Radio mode, it displays "NO
MEDIA".2. Track Moving Button Press the [SEEK ] b utton for less
than 0.8 second to play from the
beginning of the song currently
played.
Press the button for less than 0.8
second and press it again within 1
second to move to and play the
previous track. Press the button for
0.8 second or longer to play the
song in reverse direction in fast
speed. Press the [SEEK ] button for
less
than 0.8 second to move to the
next track.
Press the button for 0.8 second or
longer to play the song in forward
direction in fast speed.
3. INFO Selection ButtonDisplays the information of the file
currently played in the order of FILE
NAME
➟TITLE
➟ARTIST
➟ALBUM
➟
FILE NAME
➟… (Displays no infor-
mation if the file has no song infor-
mation.)
4. Category Selection ButtonMoves to the upper category from
currently played category of the iPod.
To move to (play) the category
(song) displayed, press TUNE/
ENTER key.
You will be able to search through
the lower category of the selected
category.
The order of iPod’s category is
SONG, ALBUMES, ARTISTS, GEN-
RES, and iPod.
5. TUNE/ENTER ButtonWhen you turn the button clockwise,
it will display the songs (category)
next to the song currently played
(category in the same level).
Also, when you turn the button coun-
terclockwise, it will display the songs
(category) before the song currently
played (category in the same level).
If you want to listen to the song dis-
played in the song category, press
the button, then it will skip to the
selected song and play.6. RANDOM Playback ButtonPress the button for less than 0.8
second to activate or deactivate the
random playback of the songs within
the current category.
Press the button for longer than 0.8
second to randomly play all songs in
the entire album of the iPod.
Press the button once again to can-
cel the mode.7. REPEAT Selection ButtonRepeats the song currently played.
Page 145 of 371
Knowing your vehicle136
3
1
2
3
4
5
6
7
8
9
1. SATELLITE RADIO Selection Button
2. Channel Selection Button
3. Power ON/OFF button and VOLUME knob
4. SCAN Selection Button
5. MUTE Selection Button
6. INFO Selection Button
7. SETUP Selection Button
8. CAT FOLDER Button
9. Tune knob and Enter button
10. Preset Selection Button
A-300KMU
SIRIUS SATELLITE RADIO
Page 146 of 371

3137
Knowing your vehicle
1
2
3
4
5
6
7
8
9
How to Use SIRIUS Satellite
RadioYour vehicle is equipped with a 90
day complimentary period of SIRIUS
Satellite Radio so you have access
to over 130 channels of music, infor-
mation, and entertainment program-
ming.ActivationIn order to extend or reactivate your
subscription to SIRIUS Satellite
Radio, you will need to contact SIR-
IUS Customer Care at 888-539-
7474. Have your 12 digit SID
(Sirius Identification Number)/ESN
(Electronic Serial Number) ready. To
retrieve the SID/ESN, turn on the
radio, press the “SAT” button, and
tune to channel zero. Please note
that the vehicle will need to be turned
on, in Sirius mode, and have an
unobstructed view of the sky in order
for the radio to receive the activation
signal.
1. SATELLITE RADIO Selectionbutton (SIRIUS Satellite
Radio)Press the [SAT] button to switch to
SIRIUS Satellite Radio. It cycles
through the different bands as noted
below.
SAT1➝SAT2➝SAT3➝SAT12. Channel Selection Button When the [SEEK ] button is
pressed, it decreases automatically
select channel.
When the [SEEK ] button is pressed, it increases automatically
select channel.3. Power ON/OFF button and Volume knobTurns on/off the radio when the IGNI-
TION SWITCH is on ACC or ON. If
the knob is turned to the right, it
increases the volume; if it is turned to
the left, it decreases the volume.
4. SCAN Selection ButtonWhen the button is pressed, it auto-
matically only scans the radio sta-
tions upwards. The sound hearing for
10 seconds per all searched station
preset.
The SCAN feature steps through
each channel, starting from the initial
channel, for ten seconds.
Press the [SCAN] button again to
stop the scan feature and to listen to
the currently selected channel.5. MUTE Selection ButtonWhen the [MUTE] key is pressed,
the display will say "AUDIO MUTE"
and the audio will be muted.
Page 147 of 371

Knowing your vehicle138
3
1
2
3
4
5
6
7
8
9
6. INFO Selection ButtonDisplays the information of the chan-
nel currently played by in the order of
CATEGORY NAME
➟ARTIST NAME
➟COMPOSER NAME
➟CHANNEL
NAME
➟...(CAT /CH Selection)
Displays the information of the chan-
nel currently played in the order of
SONG TITLE
➟ARTIST NAME
➟
COMPOSER NAME
➟... (CH/TITLE
Selection) (If there is no information
of COMPOSER NAME, it returns to
main display.)
7. SETUP Selection ButtonPress this button to adjust to the
SCROLL, SDVC, SIRIUS and adjust-
ment modes.
If no action is taken for 5 seconds
after pressing the button, it will return
to the play mode. (After entering SET
UP mode, move between items
using the left, right and PUSH func-
tions of the TUNE button.)
The set up item changes from
SCROLL
➟ SDVC
➟SIRIUS
➟SCROLL
➟...
8. CAT/FOLDER ButtonPress this button to turn to the
Category search mode. Turn the tune
knob to see available categories.
Press the tune button to go to the
desired category.9. TUNE knob /ENTER ButtonTurn this button clockwise by one
notch to increase the channel.
Turn this button counterclockwise by
one notch to decrease the channel.
Press this button while holding SET
UP button to activate / inactivate the
item to.
Select SET UP item using left and
right function of the Tune button.10. Preset Selection ButtonPush [1]~[6] buttons less than 0.8
second to play the channel saved in
each button.
Hold down the preset button for 0.8
second or longer to save current
channel to the respective button with
a beep.
Troubleshooting1. Antenna Error
If this message is displayed, the
antenna or antenna cable is broken
or unplugged. Please consult with
your Kia dealership.
2. Acquiring Signal
If this message is displayed, it
means that the antenna is covered
and that the SIRIUS Satellite Radio
signal is not available. Ensure the
antenna is uncovered and has a
clear view of the sky.
Page 278 of 371

Driving tips46
5
1
2
3
4
5
6
7
8
9
ProgrammingYour vehicle may require the ignition
switch to be turned to the ACC posi-
tion for programming and/or opera-
tion of HomeLink. It is also recom-
mended that a new battery be
replaced in the hand-held transmitter
of the device being programmed to
HomeLink for quicker training and
accurate transmission of the radio-
frequency.
Follow these steps to train your
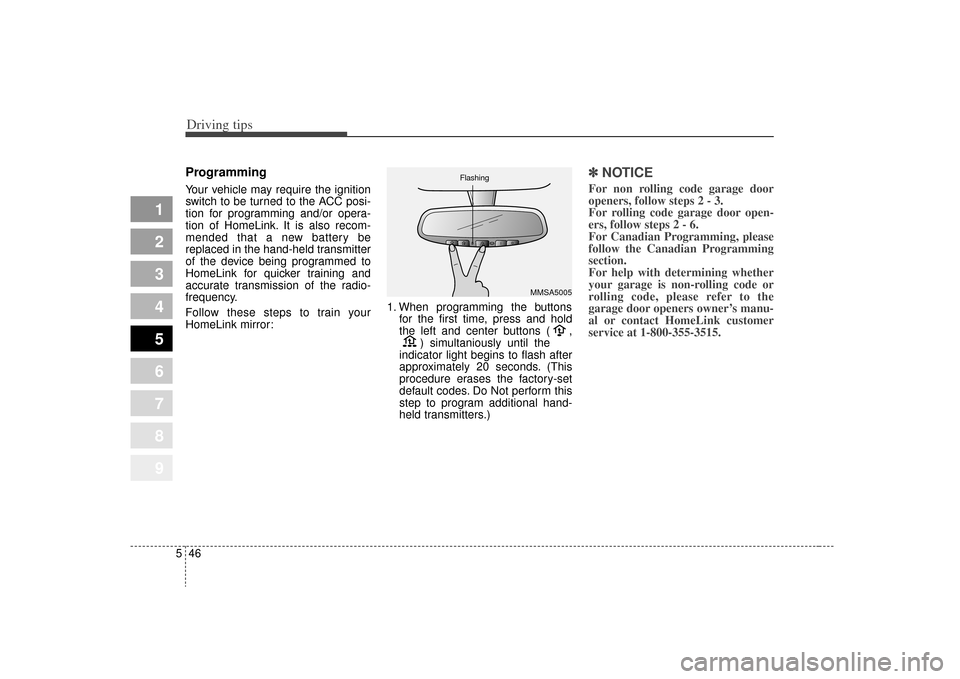
HomeLink mirror: 1. When programming the buttons
for the first time, press and hold
the left and center buttons ( , ) simultaniously until the
indicator light begins to flash after
approximately 20 seconds. (This
procedure erases the factory-set
default codes. Do Not perform this
step to program additional hand-
held transmitters.)
✽ ✽ NOTICEFor non rolling code garage door
openers, follow steps 2 - 3.
For rolling code garage door open-
ers, follow steps 2 - 6.
For Canadian Programming, please
follow the Canadian Programming
section.
For help with determining whether
your garage is non-rolling code or
rolling code, please refer to the
garage door openers owner’s manu-
al or contact HomeLink customer
service at 1-800-355-3515.
MMSA5005
Flashing