2009 KIA Rio ESP
[x] Cancel search: ESPPage 58 of 219
349
Knowing your vehicle
Air bag system components The main components of your SRS are:
To indicate that your vehicle isequipped with air bags, the correspon-
ding air bag covers are marked with
“SRS AIR BAG”.
- Driver’s air bag
- Passenger’s air bag
- Side air bag (if equipped)
- Curtain air bag (if equipped)
A diagnostic system that continually monitors the system operation.
Air bag warning light to warn you of a possible problem with the system.
Emergency power backup in case your car’s electrical system is disconnected
in a crash.
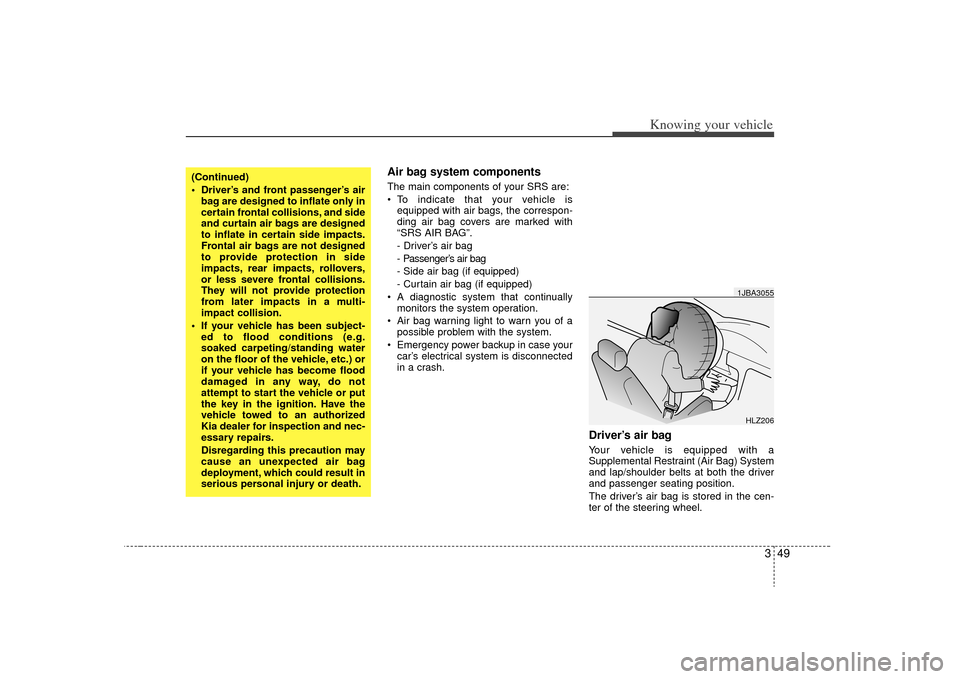
Driver’s air bag Your vehicle is equipped with a
Supplemental Restraint (Air Bag) System
and lap/shoulder belts at both the driver
and passenger seating position.
The driver’s air bag is stored in the cen-
ter of the steering wheel.
(Continued)
Driver’s and front passenger’s airbag are designed to inflate only in
certain frontal collisions, and side
and curtain air bags are designed
to inflate in certain side impacts.
Frontal air bags are not designed
to provide protection in side
impacts, rear impacts, rollovers,
or less severe frontal collisions.
They will not provide protection
from later impacts in a multi-
impact collision.
If your vehicle has been subject- ed to flood conditions (e.g.
soaked carpeting/standing water
on the floor of the vehicle, etc.) or
if your vehicle has become flood
damaged in any way, do not
attempt to start the vehicle or put
the key in the ignition. Have the
vehicle towed to an authorized
Kia dealer for inspection and nec-
essary repairs.
Disregarding this precaution may
cause an unexpected air bag
deployment, which could result in
serious personal injury or death.
HLZ2061JBA3055
Page 67 of 219
Knowing your vehicle58
3Air bag system operation Air bags only operate when the ignition
switch is turned to the ON or START
positions.
Air bags inflate instantly in the event of serious frontal or side collision (if
equipped with side air bag or curtain
air bag) in order to help protect the
occupants from serious physical injury.
There is no single vehicle speed at which the air bags will inflate.
Air bag deployment depends on a number of factors including vehicle
speed, angles of impact and the densi-
ty and stiffness of the vehicles or
objects which your vehicle hits in the
collision. However, factors are not limit-
ed to those mentioned above.
The front air bags will completely inflate and deflate in an instant.
It is virtually impossible for you to see
the air bags inflate during an accident.
It is much more likely that you will sim-
ply see the deflated air bags hanging
out of their storage compartments after
the collision. In order to help provide protection in a
severe collision, the air bags must
inflate rapidly. The speed of air bag
inflation is a consequence of the
extremely short time in which a collision
occurs and the need to get the air bag
between the occupant and the vehicle
structures before the occupant impacts
those structures. This speed of inflation
reduces the risk of serious or life-
threatening injuries in a severe collision
and is thus a necessary part of air bag
design.
However, air bag inflation can also
cause injuries which normally can
include facial abrasions, bruises and
broken bones, and sometimes more
serious injuries because the inflation
speed also causes the air bags to
expand with a great deal of force.
There are even circumstances under which contact with the steer-
ing wheel air bag can cause fatal
injuries, especially if the occupant
is positioned excessively close to
the steering wheel.
WARNING -
Seated
positioning
To avoid severe personal injury ordeath caused by deploying air
bags in a collision, the driver
should sit as far back from the
steering wheel air bag as possible
(at least 250 mm (10 inches) away).
The front passenger should
always move their seat as far back
as possible and sit back in their
seat.
Air bag inflates instantly in an event of collision, passengers
may be injured by the air bag
expansion force if they are not in
proper position.
Air bag inflation may cause injuries which normally include
facial or bodily abrasions, injuries
by the broken glasses or burns by
the explosives.
Page 76 of 219

367
Knowing your vehicle
✽
✽NOTICE• Make sure to refuel with unleaded
fuel only.
• Check to make sure the fuel filler cap is securely closed after refueling. A
loose fuel filler cap may cause the
“Check fuel filler cap ( )” light in
the instrument panel to illuminate
unnecessarily.
• If the fuel filler cap requires replace- ment, use only a genuine Kia cap or
the equivalent specified for your vehi-
cle. An incorrect fuel filler cap can
result in a serious malfunction of the
fuel system or emission control sys-
tem.
• Do not spill fuel on the exterior sur- faces of the vehicle. Any type of fuel
spilled on painted surfaces may dam-
age the paint.
(Continued)
DO NOT use matches or a lighter
and DO NOT SMOKE or leave a lit
cigarette in your vehicle while at a
gas station especially during
refueling. Automotive fuel is high-
ly flammable and can, when ignit-
ed, result in fire.
If a fire breaks out during refuel- ing, leave the vicinity of the vehi-
cle, and immediately contact the
manager of the gas station and
then contact the local fire depart-
ment or 911.
(Continued)
Static electricity discharge from
the container can ignite fuel
vapors causing a fire. Once refu-
eling has begun, contact with the
vehicle should be maintained
until the filling is complete.
Use only portable plastic fuel
containers designed to carry and
store gasoline.
Do not use cellular phones while refueling. Electric current and/or
electronic interference from cellu-
lar phones can potentially ignite
fuel vapors causing a fire.
When refueling, always shut the engine off. Sparks produced by
electrical components related to
the engine can ignite fuel vapors
causing a fire. Once refueling is
complete, check to make sure the
filler cap and filler door are
securely closed, before starting
the engine.
(Continued)
Page 78 of 219
369
Knowing your vehicle
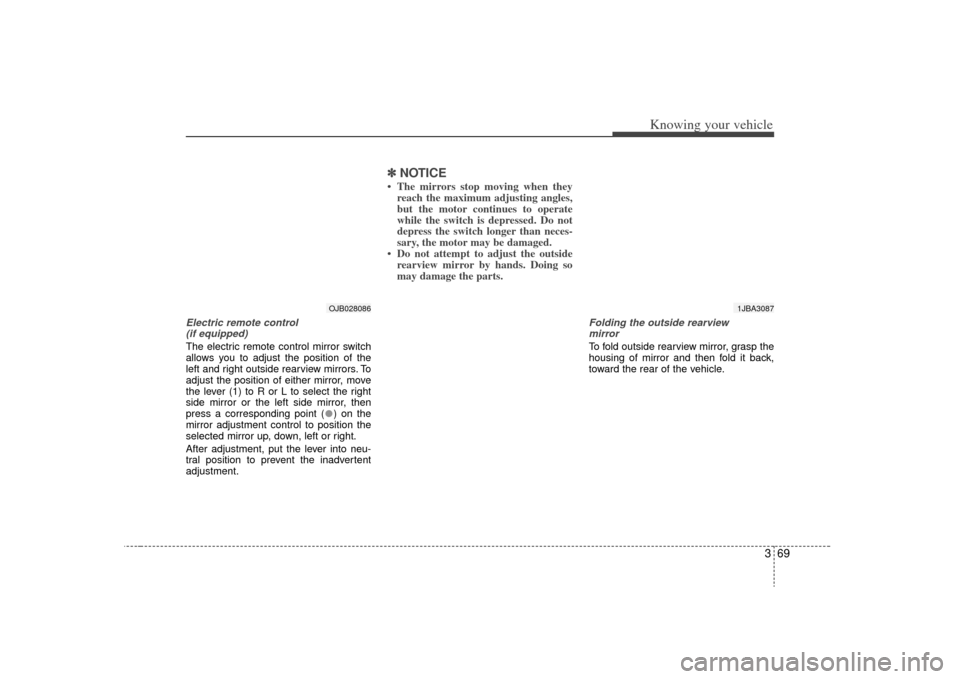
Electric remote control (if equipped)The electric remote control mirror switch
allows you to adjust the position of the
left and right outside rearview mirrors. To
adjust the position of either mirror, move
the lever (1) to R or L to select the right
side mirror or the left side mirror, then
press a corresponding point ( ) on the
mirror adjustment control to position the
selected mirror up, down, left or right.
After adjustment, put the lever into neu-
tral position to prevent the inadvertent
adjustment.
✽ ✽ NOTICE• The mirrors stop moving when they
reach the maximum adjusting angles,
but the motor continues to operate
while the switch is depressed. Do not
depress the switch longer than neces-
sary, the motor may be damaged.
• Do not attempt to adjust the outside rearview mirror by hands. Doing so
may damage the parts.
Folding the outside rearview
mirrorTo fold outside rearview mirror, grasp the
housing of mirror and then fold it back,
toward the rear of the vehicle.
1JBA3087
OJB028086
Page 80 of 219
371
Knowing your vehicle
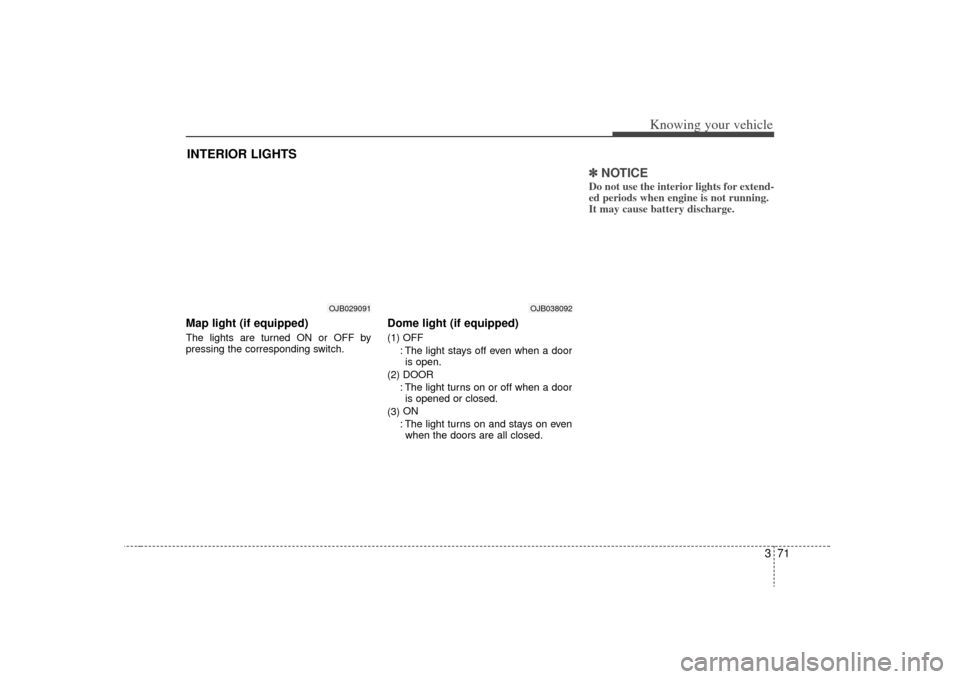
Map light (if equipped)The lights are turned ON or OFF by
pressing the corresponding switch.
Dome light (if equipped)(1) OFF: The light stays off even when a dooris open.
(2) DOOR : The light turns on or off when a dooris opened or closed.
(3) ON
: The light turns on and stays on even when the doors are all closed.
✽ ✽ NOTICEDo not use the interior lights for extend-
ed periods when engine is not running.
It may cause battery discharge.
INTERIOR LIGHTS
OJB038092
OJB029091
Page 87 of 219
Knowing your vehicle78
3Sunshade The sunshade will be opened with the
glass panel automatically when the glass
panel is slid. You will have to close it man-
ually if you want it closed.
✽ ✽
NOTICE• Do not press any sunroof control but-
ton longer than necessary. Damage to
the motor or system components
could occur.
• Periodically remove any dirt that may accumulate on the guide rail.
• If you try to open the sunroof when the temperature is below freezing or
when the sunroof is covered with snow
or ice, the glass or the motor could be
damaged.
• The sunroof is made to slide together with sunshade. Do not leave the sun-
shade closed while the sunroof is open.
Resetting the sunroofWhenever the vehicle battery is discon-
nected or discharged, you have to reset
your sunroof system as follows:
1. Turn the ignition key to the ON posi-
tion.
2. Set the sunroof to the maximum TILT- UP position using the corresponding
sunroof switch.
3. Then, release it.
4. Press and hold the TILT UP button once again until the sunroof has
returned to the original position of TILT
UP after it is raised a little higher than
the maximum TILT UP position. This
may take several seconds.
When this is complete, the sunroof system is reset.
1JBA3110
WARNING
Do not extend face or arms out- side through the sunroof opening
while driving.
Make sure hand and face are safely out of the way before clos-
ing a sunroof.
Page 95 of 219
Knowing your vehicle86
31. AM Selection ButtonTurns to AM mode, and toggles in the
order of AM1
➟ AM2
➟ ...➟ AM1...when
the button is pressed each time.
2. FM Selection ButtonTurns to FM mode and toggles FM1 and
FM2 when the button is pressed each
time.3. Automatic Channel Selection Button When the [SEEK ] button is pressed,
it reduces the band frequency by
200khz to automatically select channel.
Stops at the previous frequency if no
channel is found.
When the [SEEK ] button is pressed, it increases the band frequency by
50khz to automatically select channel.
Stops at the previous frequency if no
channel is found.4. Power ON/OFF Button &
Volume Control KnobTurns on/off the set when the IGNITION
SWITCH is on ACC or ON. If the button
is turned to the right, it increases the vol-
ume and left, decreases the volume.
5. Preset ButtonPush [1]~[6] buttons less than 0.8 second
to play the channel saved in each button.
Push [PRESET] button for 0.8 second or
longer to save current channel to the
respective button with a beep.6.Manual Channel Selection &
Sound Quality Control KnobTurn this control while listening to a radio
channel to manually adjust frequency.
Turn clockwise to increase frequency and
counterclockwise to reduce frequency.
Pressing the button changes the BASS,
MIDDLE, TREBLE, FADER and BAL-
ANCE TUNE mode. The mode selected
is shown on the display. After selecting
each mode, rotate the Audio control knob
clockwise or counterclockwise.
BASS Control
To increase the BASS, rotate the knob
clockwise, while to decrease the BASS,
rotate the knob counterclockwise.
MIDDLE Control
To increase the MIDDLE, rotate the knob
clockwise, while to decrease the MID-
DLE, rotate the knob counterclockwise. TREBLE Control
To increase the TREBLE, rotate the knob
clockwise, while to decrease the TRE-
BLE, rotate the knob counterclockwise.
FADER Control
Turn the control knob clockwise to
emphasize rear speaker sound(front
speaker sound will be attenuated). When
the control knob is turned counterclock-
wise, front speaker sound will be empha-
sized(rear speaker sound will be attenu-
ated).
BALANCE Control
Rotate the knob clockwise to emphasize
right speaker sound(left speaker sound
will be attenuated). When the control
knob is turned counter clockwise, left
speaker sound will be emphasized(right
speaker sound will be attenuated).
Page 96 of 219
387
Knowing your vehicle
7. SETUP ButtonPress this button to access the TEXT
SCROLL adjustment mode. If no action is
taken for 5 seconds after pressing the
button, it will return to the play mode.
(After entering SETUPmode, PUSH
functions of the [TUNE] button)
The setup item changes from TEXT
SCROLL
➟ RETURN...
8. MUTE ButtonPress to temporarily cut off the Sound.9. SCAN ButtonIf this button is pressed, the frequencies
will become increased and receive the
corresponding broadcasts.
This function will play the frequencies for
10 seconds each and find other broad-
casts as the frequency increases.
Press the button again when desiring to
continue listening to the currently playing
broadcast.