2009 KIA Rio clock
[x] Cancel search: clockPage 71 of 219

Knowing your vehicle62
3Outside the vehicle To open the trunk, insert the key into
the lock and turn it to the right (clock-
wise).
To close the trunk, use both hands to push the trunk lid down. Check to see
if the trunk is completely shut.
Trunk room lampTrunk room lamp turns on when the trunk
is opened. It remains on until the trunk is
securely closed.✽ ✽ NOTICEMake sure to close the trunk securely. If
it remains open while engine is not run-
ning, it may cause battery discharge
because trunk room lamp remains on.
TRUNK (IF EQUIPPED)
1JBN3079
1JBA3076
PROPOSITION 65
WARNING
Engine exhaust and a wide variety
of automobile components and
parts, including components found
in the interior furnishings in a vehi-
cle, contain or emit chemicals
known to the State of California to
cause cancer and birth defects and
reproductive harm. In addition, cer-
tain fluids contained in vehicles
and certain products of component
wear contain or emit chemicals
known to the State of California to
cause cancer and birth defects or
other reproductive harm.
Page 75 of 219
Knowing your vehicle66
33. Pull the fuel filler lid out to open.
4. To remove the cap, turn the fuel tank
cap counterclockwise.
5. Refuel as needed.
6. To install the cap, turn it clockwise until it “clicks”. This indicates that the cap is
securely tightened.
7. Close the fuel filler lid and push it light- ly and make sure that it is securely
closed.
1JBA3083
WARNING
- Refueling
If pressurized fuel sprays out, it can
cover your clothes or skin and thus
subject you to the risk of fire and
burns. Always remove the fuel cap
carefully and slowly. If the cap is
venting fuel or if you hear a hissing
sound, wait until the condition
stops before completely removing
the cap.
WARNING -
Refueling dan-
gers
Automotive fuels are flammable
materials. When refueling, please
note the following guidelines care-
fully. Failure to follow these guide-
lines may result in severe personal
injury, severe burns or death by fire
or explosion.
Before refueling note the locationof the Emergency Gasoline Shut-
Off, if available, at the gas station
facility.
(Continued)
(Continued)
Before touching the fuel nozzle,you should eliminate potentially
dangerous static electricity dis-
charge by touching another metal
part of the vehicle, a safe distance
away from the fuel filler neck,
nozzle, or other gas source.
Do not get back into a vehicle once you have begun refueling
since you can generate static
electricity by touching, rubbing or
sliding against any item or fabric
(polyester, satin, nylon, etc.)
capable of producing static elec-
tricity. Static electricity discharge
can ignite fuel vapors resulting in
rapid burning. If you must re-
enter the vehicle, you should
once again eliminate potentially
dangerous static electricity dis-
charge by touching a metal part
of the vehicle, away from the fuel
filler neck, nozzle or other gaso-
line source.
When using a portable fuel con- tainer be sure to place the con-
tainer on the ground prior to refu-
eling.
(Continued)
Page 85 of 219
Knowing your vehicle76
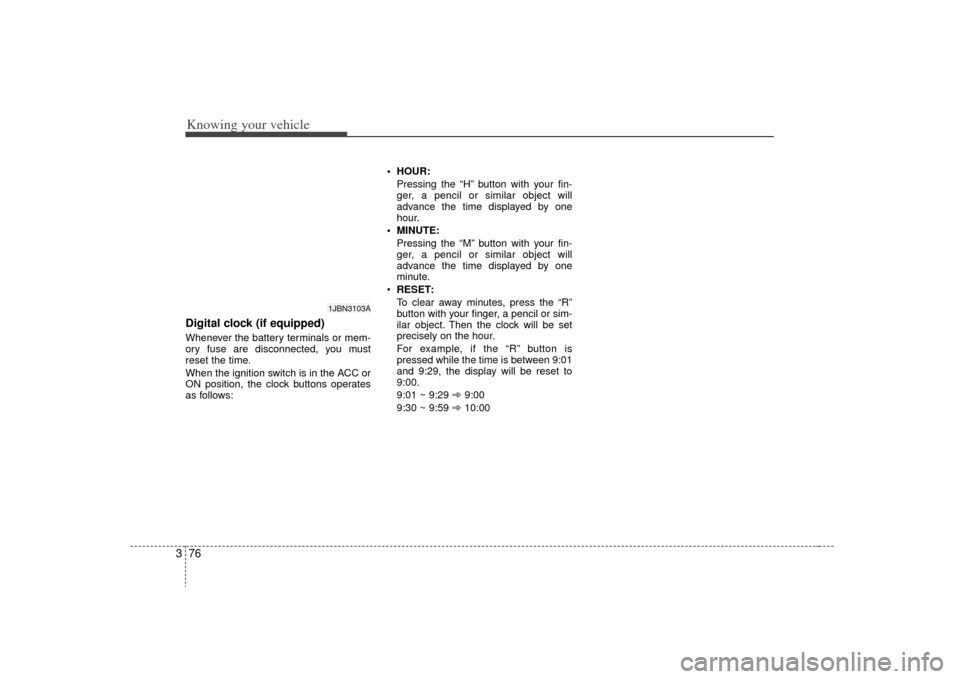
3Digital clock (if equipped)Whenever the battery terminals or mem-
ory fuse are disconnected, you must
reset the time.
When the ignition switch is in the ACC or
ON position, the clock buttons operates
as follows: HOUR:
Pressing the “H” button with your fin-
ger, a pencil or similar object will
advance the time displayed by one
hour.
MINUTE: Pressing the “M” button with your fin-
ger, a pencil or similar object will
advance the time displayed by one
minute.
RESET:
To clear away minutes, press the “R”
button with your finger, a pencil or sim-
ilar object. Then the clock will be set
precisely on the hour.
For example, if the “R” button is
pressed while the time is between 9:01
and 9:29, the display will be reset to
9:00.
9:01 ~ 9:29 ➾ 9:00
9:30 ~ 9:59 ➾ 10:00
1JBN3103A
Page 95 of 219
Knowing your vehicle86
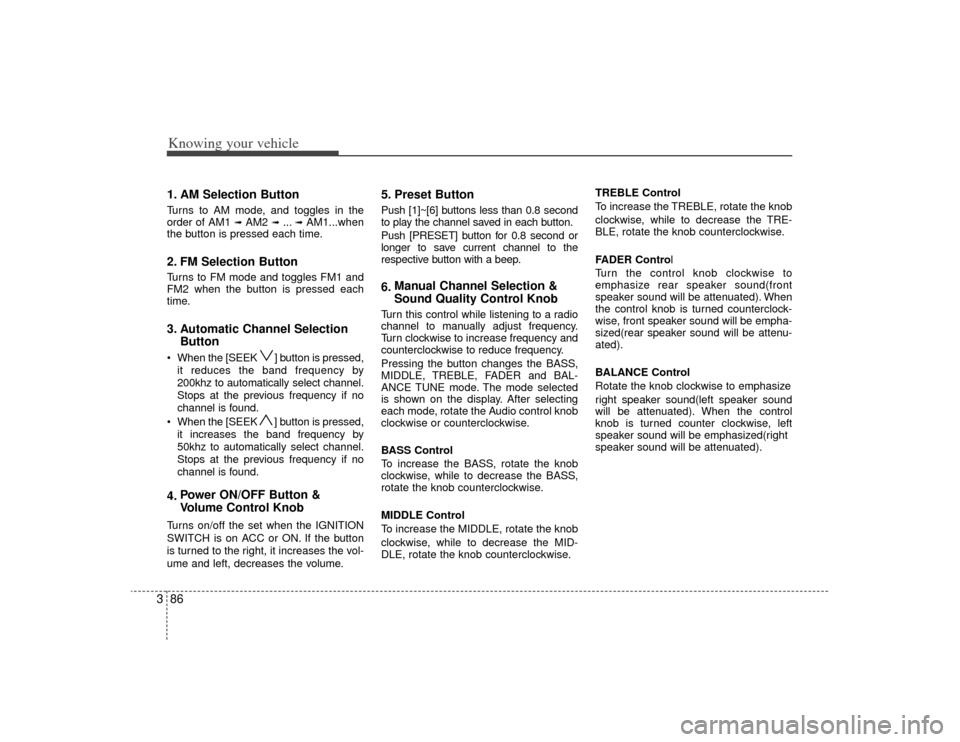
31. AM Selection ButtonTurns to AM mode, and toggles in the
order of AM1
➟ AM2
➟ ...➟ AM1...when
the button is pressed each time.
2. FM Selection ButtonTurns to FM mode and toggles FM1 and
FM2 when the button is pressed each
time.3. Automatic Channel Selection Button When the [SEEK ] button is pressed,
it reduces the band frequency by
200khz to automatically select channel.
Stops at the previous frequency if no
channel is found.
When the [SEEK ] button is pressed, it increases the band frequency by
50khz to automatically select channel.
Stops at the previous frequency if no
channel is found.4. Power ON/OFF Button &
Volume Control KnobTurns on/off the set when the IGNITION
SWITCH is on ACC or ON. If the button
is turned to the right, it increases the vol-
ume and left, decreases the volume.
5. Preset ButtonPush [1]~[6] buttons less than 0.8 second
to play the channel saved in each button.
Push [PRESET] button for 0.8 second or
longer to save current channel to the
respective button with a beep.6.Manual Channel Selection &
Sound Quality Control KnobTurn this control while listening to a radio
channel to manually adjust frequency.
Turn clockwise to increase frequency and
counterclockwise to reduce frequency.
Pressing the button changes the BASS,
MIDDLE, TREBLE, FADER and BAL-
ANCE TUNE mode. The mode selected
is shown on the display. After selecting
each mode, rotate the Audio control knob
clockwise or counterclockwise.
BASS Control
To increase the BASS, rotate the knob
clockwise, while to decrease the BASS,
rotate the knob counterclockwise.
MIDDLE Control
To increase the MIDDLE, rotate the knob
clockwise, while to decrease the MID-
DLE, rotate the knob counterclockwise. TREBLE Control
To increase the TREBLE, rotate the knob
clockwise, while to decrease the TRE-
BLE, rotate the knob counterclockwise.
FADER Control
Turn the control knob clockwise to
emphasize rear speaker sound(front
speaker sound will be attenuated). When
the control knob is turned counterclock-
wise, front speaker sound will be empha-
sized(rear speaker sound will be attenu-
ated).
BALANCE Control
Rotate the knob clockwise to emphasize
right speaker sound(left speaker sound
will be attenuated). When the control
knob is turned counter clockwise, left
speaker sound will be emphasized(right
speaker sound will be attenuated).
Page 98 of 219
389
Knowing your vehicle
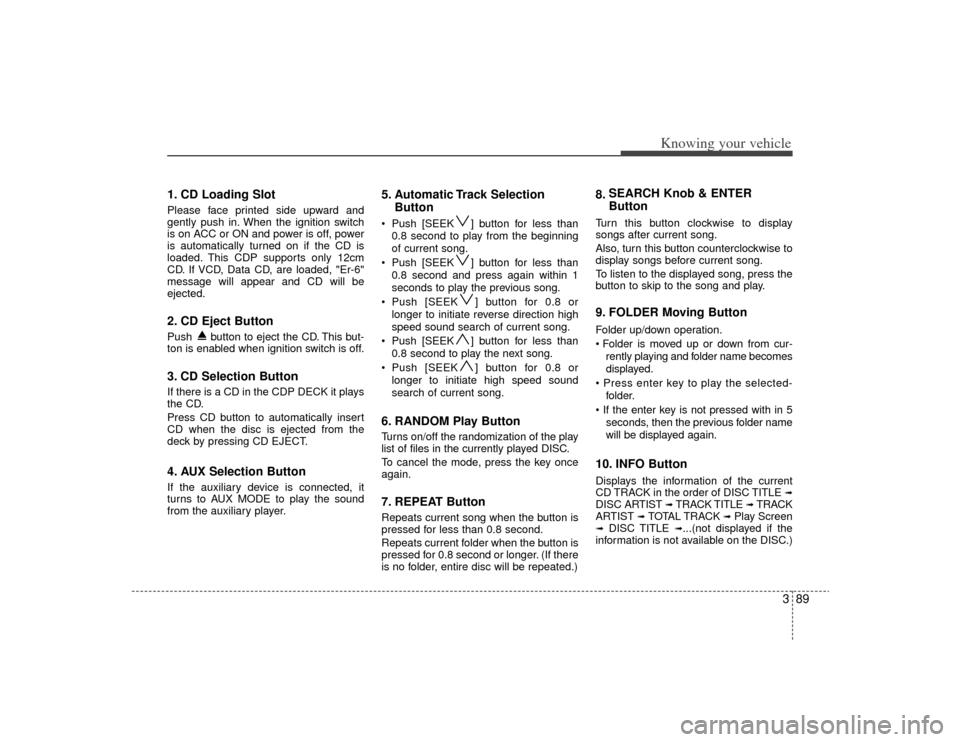
1. CD Loading SlotPlease face printed side upward and
gently push in. When the ignition switch
is on ACC or ON and power is off, power
is automatically turned on if the CD is
loaded. This CDP supports only 12cm
CD. If VCD, Data CD, are loaded, "Er-6"
message will appear and CD will be
ejected.2. CD Eject ButtonPush button to eject the CD. This but-
ton is enabled when ignition switch is off.3. CD Selection ButtonIf there is a CD in the CDP DECK it plays
the CD.
Press CD button to automatically insert
CD when the disc is ejected from the
deck by pressing CD EJECT.4. AUX Selection ButtonIf the auxiliary device is connected, it
turns to AUX MODE to play the sound
from the auxiliary player.
5. Automatic Track SelectionButton Push [SEEK ] button for less than
0.8 second to play from the beginning
of current song.
Push [SEEK ] button for less than 0.8 second and press again within 1
seconds to play the previous song.
Push [SEEK ] button for 0.8 or longer to initiate reverse direction high
speed sound search of current song.
Push [SEEK ] button for less than 0.8 second to play the next song.
Push [SEEK ] button for 0.8 or longer to initiate high speed sound
search of current song.6. RANDOM Play ButtonTurns on/off the randomization of the play
list of files in the currently played DISC.
To cancel the mode, press the key once
again.7. REPEAT ButtonRepeats current song when the button is
pressed for less than 0.8 second.
Repeats current folder when the button is
pressed for 0.8 second or longer. (If there
is no folder, entire disc will be repeated.)
8. SEARCH Knob & ENTER
ButtonTurn this button clockwise to display
songs after current song.
Also, turn this button counterclockwise to
display songs before current song.
To listen to the displayed song, press the
button to skip to the song and play.9. FOLDER Moving ButtonFolder up/down operation.
rently playing and folder name becomes
displayed.
folder.
seconds, then the previous folder name
will be displayed again.10. INFO ButtonDisplays the information of the current
CD TRACK in the order of DISC TITLE
➟
DISC AR TIST
➟ TRACK TITLE
➟ TRACK
ARTIST
➟ TOTAL TRACK
➟ Play Screen
➟
DISC TITLE
➟...(not displayed if the
information is not available on the DISC.)
Page 103 of 219
Knowing your vehicle94
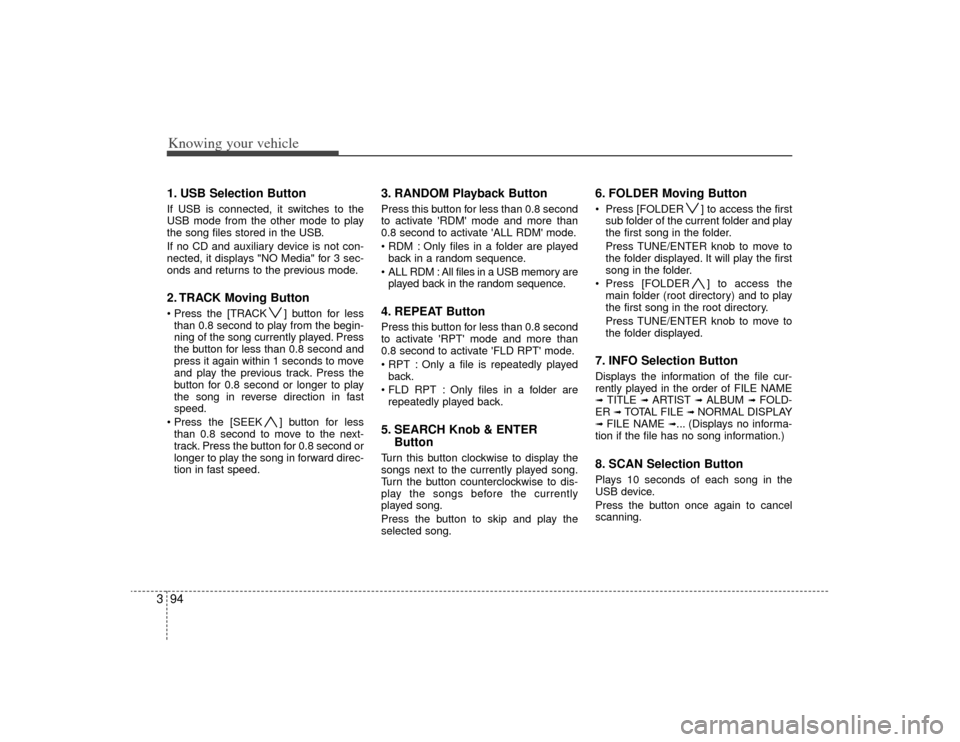
31. USB Selection ButtonIf USB is connected, it switches to the
USB mode from the other mode to play
the song files stored in the USB.
If no CD and auxiliary device is not con-
nected, it displays "NO Media" for 3 sec-
onds and returns to the previous mode.2. TRACK Moving Button ] button for less
than 0.8 second to play from the begin-
ning of the song currently played. Press
the button for less than 0.8 second and
press it again within 1 seconds to move
and play the previous track. Press the
button for 0.8 second or longer to play
the song in reverse direction in fast
speed.
] button for less than 0.8 second to move to the next-
track. Press the button for 0.8 second or
longer to play the song in forward direc-
tion in fast speed.
3. RANDOM Playback ButtonPress this button for less than 0.8 second
to activate 'RDM' mode and more than
0.8 second to activate 'ALL RDM' mode.
Only files in a folder are playedback in a random sequence.
ALL RDM : All files in a USB memory are played back in the random sequence.4. REPEAT ButtonPress this button for less than 0.8 second
to activate 'RPT' mode and more than
0.8 second to activate 'FLD RPT' mode.
Only a file is repeatedly playedback.
Only files in a folder are repeatedly played back.5. SEARCH Knob & ENTER ButtonTurn this button clockwise to display the
songs next to the currently played song.
Turn the button counterclockwise to dis-
play the songs before the currently
played song.
Press the button to skip and play the
selected song.
6. FOLDER Moving Button Press [FOLDER ] to access the first
sub folder of the current folder and play
the first song in the folder.
Press TUNE/ENTER knob to move to
the folder displayed. It will play the first
song in the folder.
Press [FOLDER ] to access the main folder (root directory) and to play
the first song in the root directory.
Press TUNE/ENTER knob to move to
the folder displayed.7. INFO Selection ButtonDisplays the information of the file cur-
rently played in the order of FILE NAME➟ TITLE
➟ ARTIST
➟ ALBUM
➟ FOLD-
ER
➟ TOTAL FILE
➟ NORMAL DISPLAY
➟ FILE NAME
➟... (Displays no informa-
tion if the file has no song information.)
8. SCAN Selection ButtonPlays 10 seconds of each song in the
USB device.
Press the button once again to cancel
scanning.
Page 105 of 219
Knowing your vehicle96
3In case the iPod exclusive cable is con-
nected to the multiple terminal inside the
console on the right hand side of the dri-
ver's seat. When the iPod is connected,
the 'iPod' icon will be displayed on the top
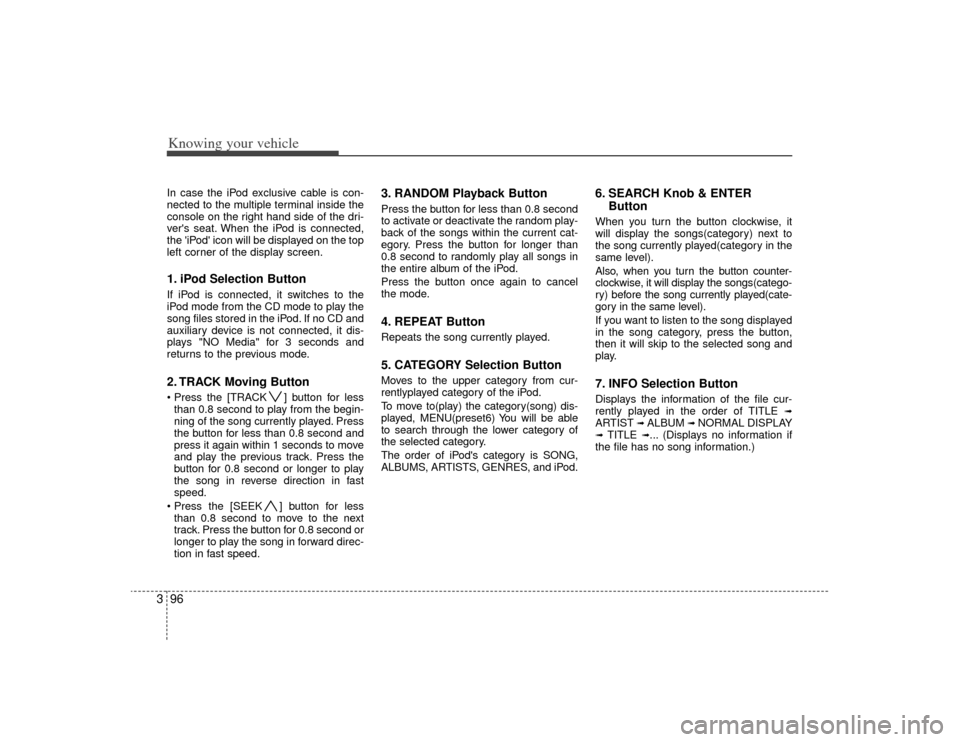
left corner of the display screen.1. iPod Selection ButtonIf iPod is connected, it switches to the
iPod mode from the CD mode to play the
song files stored in the iPod. If no CD and
auxiliary device is not connected, it dis-
plays "NO Media" for 3 seconds and
returns to the previous mode.2. TRACK Moving Button ] button for less
than 0.8 second to play from the begin-
ning of the song currently played. Press
the button for less than 0.8 second and
press it again within 1 seconds to move
and play the previous track. Press the
button for 0.8 second or longer to play
the song in reverse direction in fast
speed.
] button for less than 0.8 second to move to the next
track. Press the button for 0.8 second or
longer to play the song in forward direc-
tion in fast speed.
3. RANDOM Playback ButtonPress the button for less than 0.8 second
to activate or deactivate the random play-
back of the songs within the current cat-
egory. Press the button for longer than
0.8 second to randomly play all songs in
the entire album of the iPod.
Press the button once again to cancel
the mode.4. REPEAT ButtonRepeats the song currently played.5. CATEGORY Selection ButtonMoves to the upper category from cur-
rentlyplayed category of the iPod.
To move to(play) the category(song) dis-
played, MENU(preset6) You will be able
to search through the lower category of
the selected category.
The order of iPod's category is SONG,
ALBUMS, ARTISTS, GENRES, and iPod.
6. SEARCH Knob & ENTER ButtonWhen you turn the button clockwise, it
will display the songs(category) next to
the song currently played(category in the
same level).
Also, when you turn the button counter-
clockwise, it will display the songs(catego-
ry) before the song currently played(cate-
gory in the same level).
If you want to listen to the song displayed
in the song category, press the button,
then it will skip to the selected song and
play.7. INFO Selection ButtonDisplays the information of the file cur-
rently played in the order of TITLE
➟
ARTIST
➟ ALBUM
➟ NORMAL DISPLAY
➟ TITLE
➟... (Displays no information if
the file has no song information.)
Page 165 of 219

611
In case of an emergency
Driver-side knee bolster
Description Fuse rating Protected component
RR WIPER15A Rear wiper
H/LP(LH) 10A Headlight (left)
FR WIPER 25A Front wiper
BLOWER 10A Blower
H/LP(RH) 10A Headlight (right)
S/ROOF 20A Sunroof
STOP LP 15A Stop light
C/DR LOCK 20A Central door lock
IGN COIL 15A Ignition coil
ABS 10A ABS
B/UP LP 10A Back-up light
SPARE - Spare fuse
C/LIGHTER 25A Cigar lighter
FOLD'G 10A Outside rearview mirror folding
HTD SEAT 20A Seat warmer
AMP 25A Amplifier
FR FOG LP 10A Front fog light
SPARE - Spare fuse
ECU 10A Engine control unit
CLUSTER 10A Cluster
P/WDW RH 25A Power window (right)
AUDIO 10A Audio
RR FOG LP 10A Rear fog light
IGN 10A Ignition
Description Fuse rating Protected component
HTD GLASS30A Rear window defroster
A/BAG 15A Air bag
TCU 10A Automatic transaxle control
SNSR 10A Sensors
SPARE - Spare fuse
MULT B/UP 10A Cluster, ETACS, A/C, Clock,
Room lamp
AUDIO 15A Audio
P/WDW LH 25A Power window (left)
HTD MIRR 10A Outside rearview mirror heater
TAIL LP(LH) 10A Taillight (left)
TAIL LP(RH) 10A Taillight (right)
HAZARD 10A Hazard warning light
T/SIG LP 10A Turn signal light
A/BAG IND 10A Air bag warning
START 10A Start motor