Page 293 of 457

the conventional brake system will continue to operate
normally if the BRAKE warning light is not on.
If the ABS light is on, the brake system should be serviced
as soon as possible to restore the benefits of Anti-Lock
brakes. If the ABS light does not come on when the
ignition switch is turned to the ON position, have the
bulb repaired as soon as possible.
If both the Brake Warning light and the ABS light remain
on, the ABS and Electronic Brake Force Distribution
(EBD) systems are not functioning. Immediate repair to
the ABS is required.
When the vehicle is driven over 7 mph (11 km/h), you
may also hear a slight clicking sound as well as some
related motor noises. These noises are the system per-
forming its self-check cycle to ensure that the ABS
working properly. This self-check occurs each time the
vehicle is started and accelerated past 7 mph (11 km/h).ABS is activated during braking under certain road or
stopping conditions. ABS-inducing conditions can in-
clude ice, snow, gravel, bumps, railroad tracks, loose
debris, or panic stops.
You may also experience the following when the brake
system goes into Anti-Lock mode:
•the ABS motor running (it may continue to run for a
short time after the stop)
•the clicking sound of solenoid valves
•brake pedal pulsations
•a slight drop or fall away of the brake pedal at the end
of the stop
These are all normal characteristics of ABS.
STARTING AND OPERATING 291
5
Page 366 of 457

▫Brake System....................... 384
▫Automatic Transaxle (CVT).............. 386
▫Manual Transaxle.................... 386
▫Rear Drive Assembly (RDA) – AWD/4WD
Models Only........................ 387
▫Power Transfer Unit (PTU) – AWD/4WD
Models Only........................ 388
▫Appearance Care And Protection From
Corrosion.......................... 388
�Fuses.............................. 394
▫Integrated Power Module (IPM).......... 394
�Vehicle Storage....................... 397
�Replacement Bulbs..................... 397�Bulb Replacement..................... 398
▫Headlamps......................... 398
▫Fog Lights......................... 400
▫Tail Lights, Rear Turn Signals And Backup
Lights............................. 400
▫License Lights....................... 401
▫Center High-Mounted Stoplight.......... 402
▫Auxiliary Off-Road Light............... 402
�Fluids And Capacities................... 404
�Fluids, Lubricants, And Genuine Parts....... 405
▫Engine............................ 405
▫Chassis............................ 406
364 MAINTAINING YOUR VEHICLE
Page 369 of 457
persists, the message will appear the next time the
vehicle is started. This might indicate a damaged cap. If
the problem is detected twice in a row, the system will
turn on the MIL. Resolving the problem will turn the MIL
light off.
EMISSIONS INSPECTION AND MAINTENANCE
PROGRAMS
In some localities, it may be a legal requirement to pass
an inspection of your vehicle’s emissions control system.
Failure to pass could prevent vehicle registration.
For states that require an Inspection and Mainte-
nance (I/M), this check verifies the Malfunction
Indicator Light (MIL) is functioning and is not on
when the engine is running, and that the OBD II system
is ready for testing.
Normally, the OBD II system will be ready. The OBD II
system maynotbe ready if your vehicle was recentlyserviced, recently had a dead battery or a battery replace-
ment. If the OBD II system should be determined not
ready for the I/M test, your vehicle may fail the test.
Your vehicle has a simple ignition key-actuated test,
which you can use prior to going to the test station. To
check if your vehicle’s OBD II system is ready, you must
do the following:
1. Insert your ignition key into the ignition switch.
2. Turn the ignition to the ON position, but do not crank
or start the engine.
3. If you crank or start the engine, you will have to start
this test over.
4. As soon as you turn your key to the ON position, you
will see the MIL symbol come on as part of a normal bulb
check.
MAINTAINING YOUR VEHICLE 367
7
Page 399 of 457

CAUTION! (Continued)
•When replacing a blown fuse, it is important to
use only a fuse having the correct amperage rating.
The use of a fuse with a rating other than indicated
may result in a dangerous electrical system over-
load. If a properly rated fuse continues to blow, it
indicates a problem in the circuit that must be
corrected.
VEHICLE STORAGE
If you will not be using your vehicle for more than
21 days, you may want to take steps to preserve your
battery.
•Disengage the mini-fuse in the Power Distribution
Center labeled IOD (Ignition Off-Draw).
•Disconnect the negative cable from the battery.
REPLACEMENT BULBS
All the inside bulbs are brass or glass wedge base.
Aluminum base bulbs are not approved and should not
be used for replacement.
LIGHT BULBS — Interior Bulb Number
Front Header Lamp......................T578
Center Dome Lamp......................T578
Rear Cargo/Flashlight.................8–A35LF
LIGHTS BULBS — Exterior Bulb No.
Low Beam/High Beam Headlight............ H13
Front Park/Turn Signal/Side Marker
Light.......................3157AK or 3157A
Front Fog Light.........................9145
Center High Mounted Stop Light
(CHMSL)...................... LEDAssembly
Rear Tail/Turn/Stop.....................3157
Backup Light.....................W16W (921)
License Light.......................... W5W
Off-Road Light........................... H3
MAINTAINING YOUR VEHICLE 397
7
Page 400 of 457
BULB REPLACEMENT
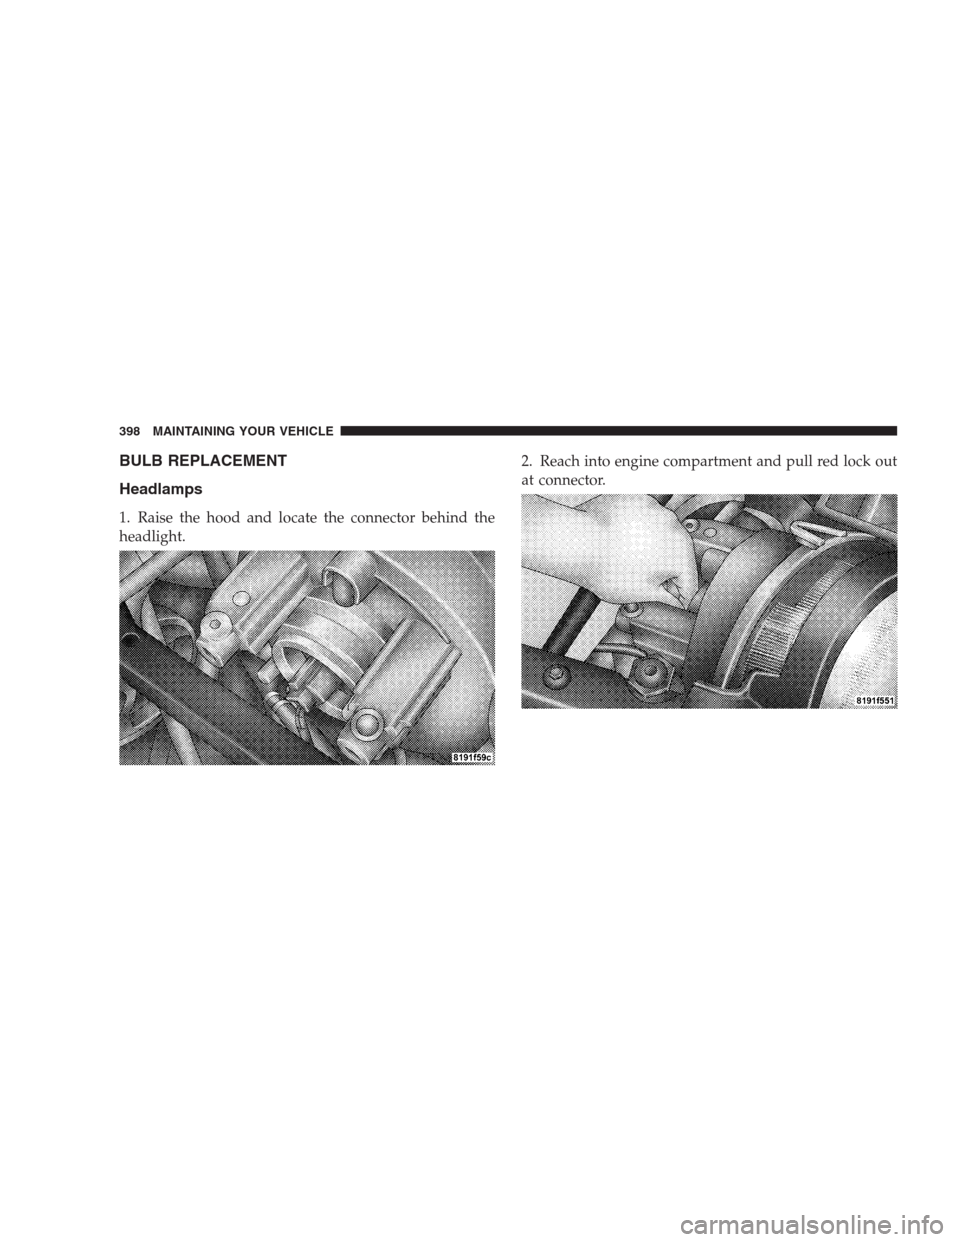
Headlamps
1. Raise the hood and locate the connector behind the
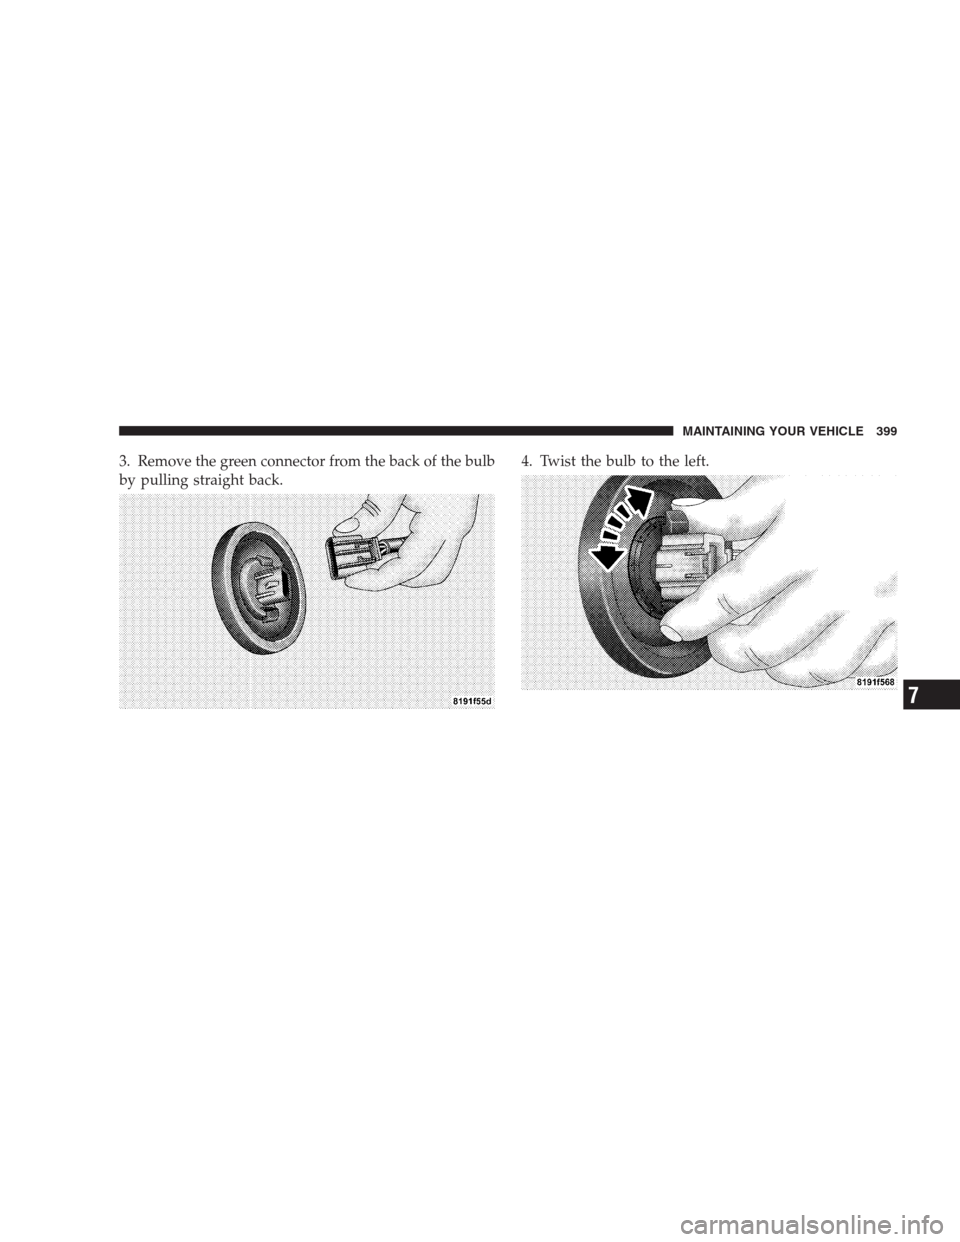
headlight.2. Reach into engine compartment and pull red lock out
at connector.
398 MAINTAINING YOUR VEHICLE
Page 401 of 457
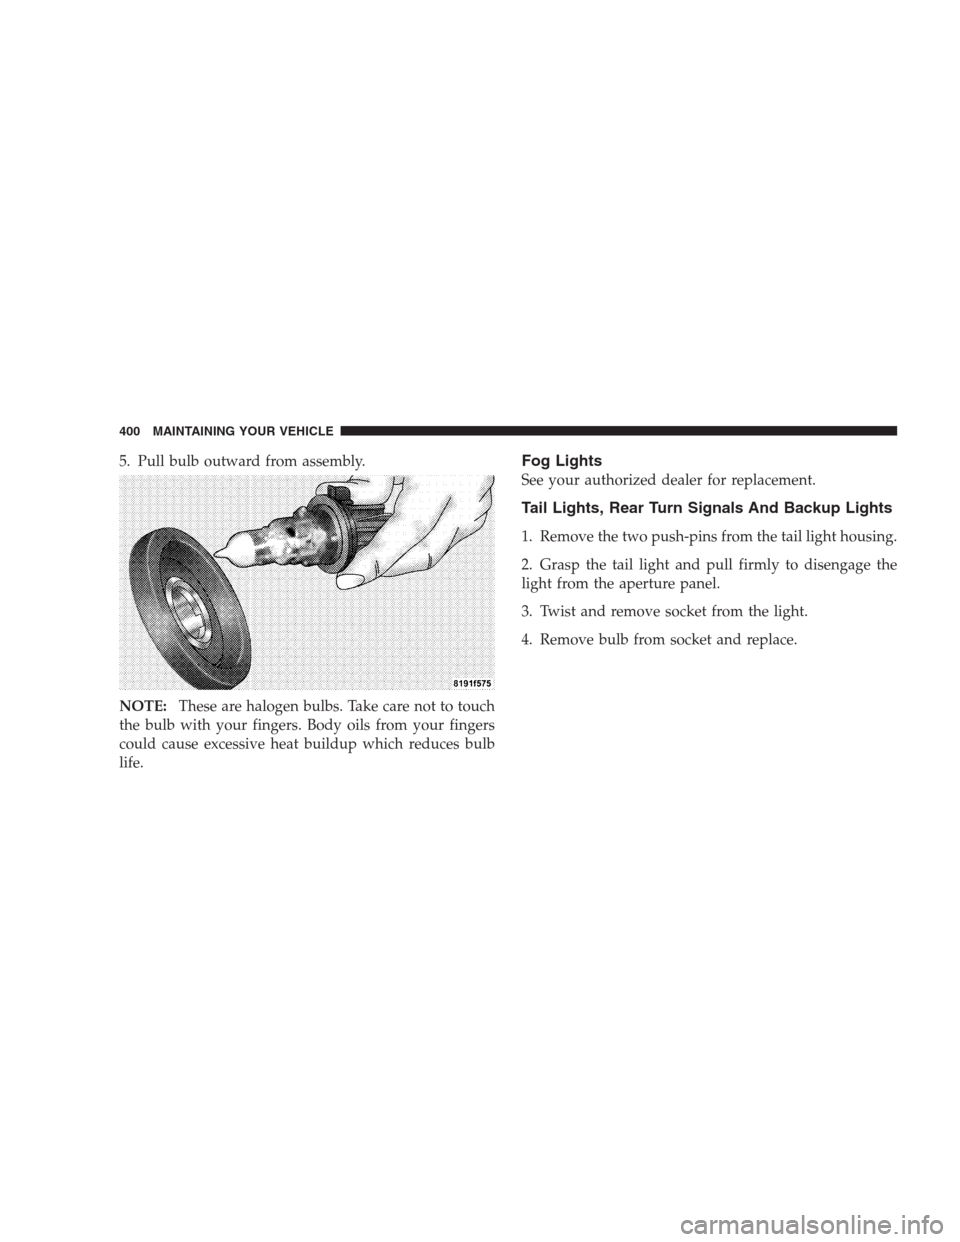
3. Remove the green connector from the back of the bulb
by pulling straight back.4. Twist the bulb to the left.
MAINTAINING YOUR VEHICLE 399
7
Page 402 of 457
5. Pull bulb outward from assembly.
NOTE:These are halogen bulbs. Take care not to touch
the bulb with your fingers. Body oils from your fingers
could cause excessive heat buildup which reduces bulb
life.Fog Lights
See your authorized dealer for replacement.
Tail Lights, Rear Turn Signals And Backup Lights
1. Remove the two push-pins from the tail light housing.
2. Grasp the tail light and pull firmly to disengage the
light from the aperture panel.
3. Twist and remove socket from the light.
4. Remove bulb from socket and replace.
400 MAINTAINING YOUR VEHICLE
Page 404 of 457
3. Pull the bulb from the socket.
Center High-Mounted Stoplight
Light is an LED assembly. See your authorized dealer for
replacement.
Auxiliary Off-Road Light
1. Remove the three screws attaching the lens to the
housing.
402 MAINTAINING YOUR VEHICLE