2009 JAGUAR XF Rear seat
[x] Cancel search: Rear seatPage 3 of 391

Contents
3
Introduction
SYMBOLS GLOSSARY ...................................... 9
LABEL LOCATIONS ........................................... 9
HEALTH AND SAFETY ..................................... 10
DATA RECORDING.......................................... 11
DISABILITY MODIFICATIONS ......................... 11
FASCIA AND CONTROLS ................................ 12
PARTS AND ACCESSORIES ............................ 14
Keys and remote controls
PRINCIPLE OF OPERATION ............................ 16
GENERAL INFORMATION ON RADIO
FREQUENCIES ................................................ 16
USING THE REMOTE CONTROL ..................... 17
UNLOCKING AND DISARMING THE VEHICLE. 18
LOCKING AND ARMING THE VEHICLE ........... 19
DOCKING/UNDOCKING THE JAGUAR SMART
KEY ................................................................. 20
PROGRAMMING THE REMOTE CONTROL...... 21
CHANGING THE REMOTE CONTROL BATTERY ...
24
EMERGENCY KEY BLADE ............................... 25
Locks
LOCKING AND UNLOCKING............................ 26
USING THE EMERGENCY KEY BLADE ............ 28
VALET MODE .................................................. 30
JAGUAR SMART KEY SYSTEM TRANSMITTERS
32
KEYLESS ENTRY ............................................ 33
GLOBAL OPENING AND CLOSING .................. 35
Alarm
ARMING THE ALARM ..................................... 37
DISARMING THE ALARM ............................... 38
SECURITY SENSORS ...................................... 39
Seats
SITTING IN THE CORRECT POSITION ............ 41
ELECTRIC SEATS ............................................ 42
HEAD RESTRAINTS ........................................ 44
REAR SEATS ................................................... 45
HEATED SEATS............................................... 47
CLIMATE SEATS ............................................. 48
Seat belts
PRINCIPLE OF OPERATION ............................ 49 SEAT BELT REMINDER .................................. 50
USING SEAT BELTS DURING PREGNANCY.... 51
FASTENING THE SEAT BELTS ........................ 51
SEAT BELT HEIGHT ADJUSTMENT ................ 52
Supplementary restraints system
PRINCIPLE OF OPERATION ............................ 53
AIRBAG WARNING LAMP .............................. 57
WHIPLASH PROTECTION ............................... 57
AIRBAG LABELS ............................................. 58
AIRBAG SERVICE INFORMATION................... 58
Child safety
CHILD SEATS ................................................. 59
CHILD SEAT POSITIONING ............................ 60
BOOSTER CUSHIONS ..................................... 61
CHILD SEAT ANCHOR POINTS ....................... 62
CHILD SAFETY LOCKS ................................... 65
Pedestrian protection
PRINCIPLE OF OPERATION ............................ 66
AFTER DEPLOYMENT OF THE PEDESTRIAN
PROTECTION SYSTEM ................................... 66
Steering wheel
ADJUSTING THE STEERING WHEEL .............. 67
HORN ............................................................. 68
HEATED STEERING WHEEL............................ 68
AUDIO CONTROL ........................................... 69
VOICE CONTROL ............................................ 69
CRUISE CONTROL.......................................... 74
Lighting
LIGHTING CONTROL ...................................... 75
AUTOLAMPS .................................................. 76
REAR FOG LAMPS.......................................... 77
HAZARD WARNING FLASHERS...................... 77
DIRECTION INDICATORS ............................... 78
HEADLAMPS - DRIVING ABROAD.................. 78
HEADLAMP LEVELLING ................................. 79
CORNERING OR STATIC BENDING LAMPS.... 79
INTERIOR LAMPS .......................................... 80
APPROACH LAMPS ........................................ 81
REMOVING A HEADLAMP .............................. 81
REMOVING A REAR LAMP ............................. 82
CHANGING A BULB ........................................ 83
HEADLAMP UNIT BULBS ............................... 83
Page 43 of 391

43
Seats
1.Cushion length adjustment.
2. Bolster adjustment:
A. Bolster inflate.
B. Bolster deflate.
3. Lumbar support adjustment.
4. Seat back angle adjustment.
5. Head restraint height adjustment.
6. Height adjustment.
7. Fore and aft adjustment.
8. Cushion front tilt adjustment.
To adjust the seats, the Jaguar Smart Key must
be in the vehicle and the ignition turned on.Driving position memory
1. Memory preset 1.
2. Memory preset 2.
3. Memory Set button.
4. Indicator light.
Once you have adjusted the driver's seat,
steering column and exte rior mirrors for your
ideal driving position, the vehicle can
memorise these settings for future use.
1. Press the memory set button to activate
the memory function.
2. Press one of the preset buttons within five
seconds to memorise the current settings.
An audible chime will sound and MEMORY
1 (or 2) SETTINGS SAVED is displayed in
the message centre, to confirm the
settings have been memorised.
A seat position can onl y be memorised during
the five second active period.
Any existing settings for a memory preset will
be over-written when programming a memory
position.
Recalling a memorised position
Press the appropriate memory preset button (1
or 2), MEMORY 1 (or 2) SETTINGS RECALLED
will be displayed in the message centre.
WARNINGS
Do not adjust a seat while the vehicle
is moving. Failure to follow this
instruction could potentially cause
personal injury or loss of vehicle control.
Before making rearward, height or
reclining seat adjustments, check that
the rear passenger has adequate leg
room.
The driver and front passenger must
not ride with the seat fully reclined.
E93239
4
3
2
1
Page 44 of 391

Seats
44
HEAD RESTRAINTS
For information on adjusting power-operated
head restraints, refer to the Electric seats
section. SeeELECTRIC SEATS (page 42).
Whiplash protection
Both front seats are equi pped with Active Head
Restraints (AHR), which reduce the risk of neck
and spinal injury (whiplash) in the event of a
rear impact. See WHIPLASH PROTECTION
(page 57).
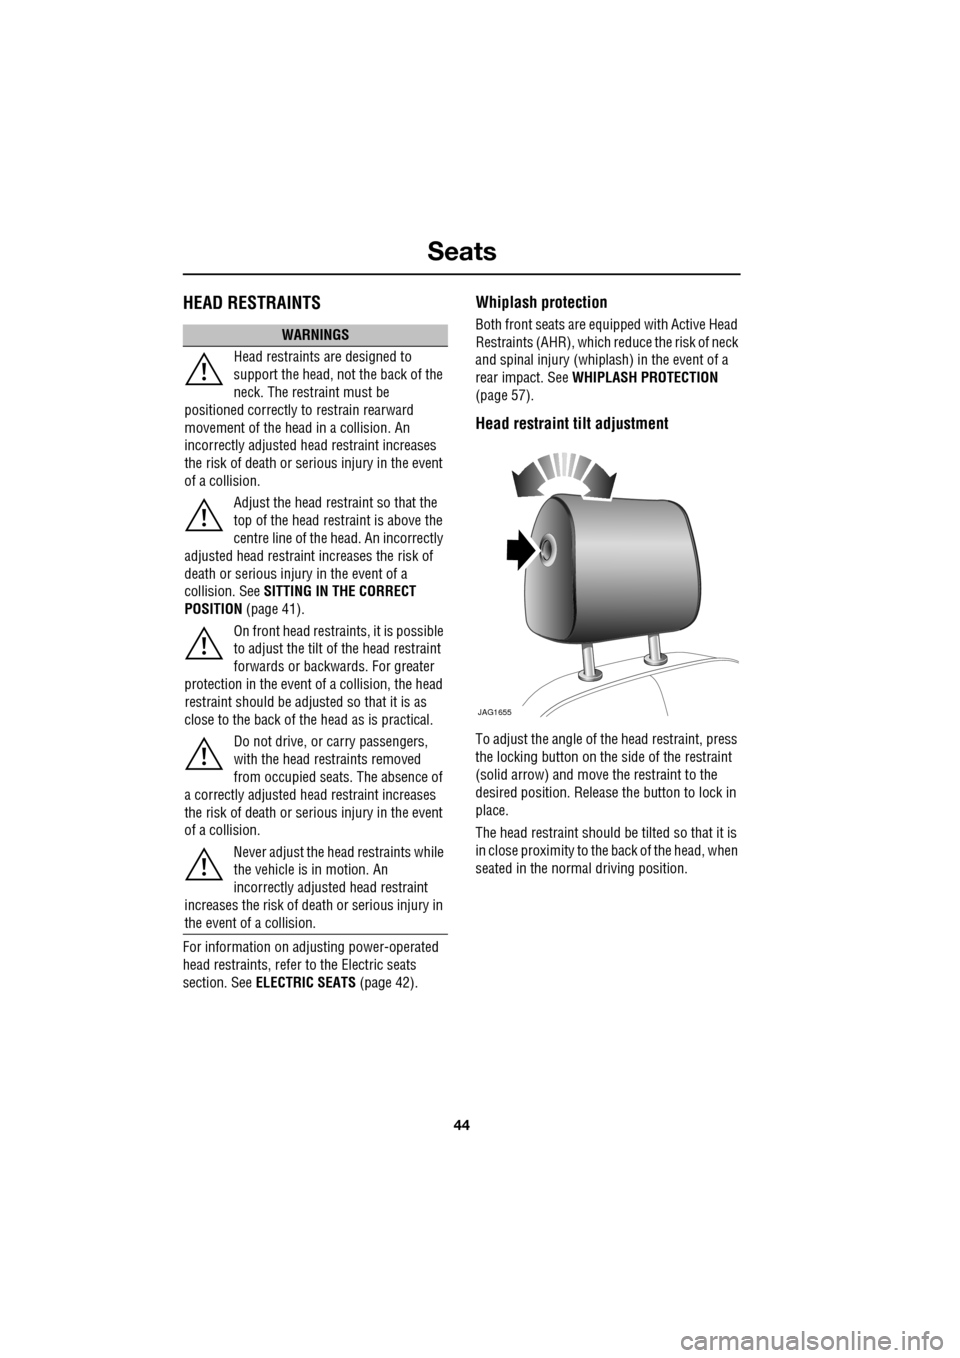
Head restraint tilt adjustment
To adjust the angle of the head restraint, press
the locking button on the side of the restraint
(solid arrow) and move the restraint to the
desired position. Release the button to lock in
place.
The head restraint should be tilted so that it is
in close proximity to the back of the head, when
seated in the normal driving position.
WARNINGS
Head restraints are designed to
support the head, not the back of the
neck. The restraint must be
positioned correctly to restrain rearward
movement of the head in a collision. An
incorrectly adjusted head restraint increases
the risk of death or seri ous injury in the event
of a collision.
Adjust the head restraint so that the
top of the head restraint is above the
centre line of the head. An incorrectly
adjusted head restraint increases the risk of
death or serious injury in the event of a
collision. See SITTING IN THE CORRECT
POSITION (page 41).
On front head restra ints, it is possible
to adjust the tilt of the head restraint
forwards or backwards. For greater
protection in the event of a collision, the head
restraint should be adjust ed so that it is as
close to the back of the head as is practical.
Do not drive, or carry passengers,
with the head restraints removed
from occupied seat s. The absence of
a correctly adjusted head restraint increases
the risk of death or seri ous injury in the event
of a collision.
Never adjust the head restraints while
the vehicle is in motion. An
incorrectly adjusted head restraint
increases the risk of death or serious injury in
the event of a collision.
JAG1655
Page 45 of 391

45
Seats
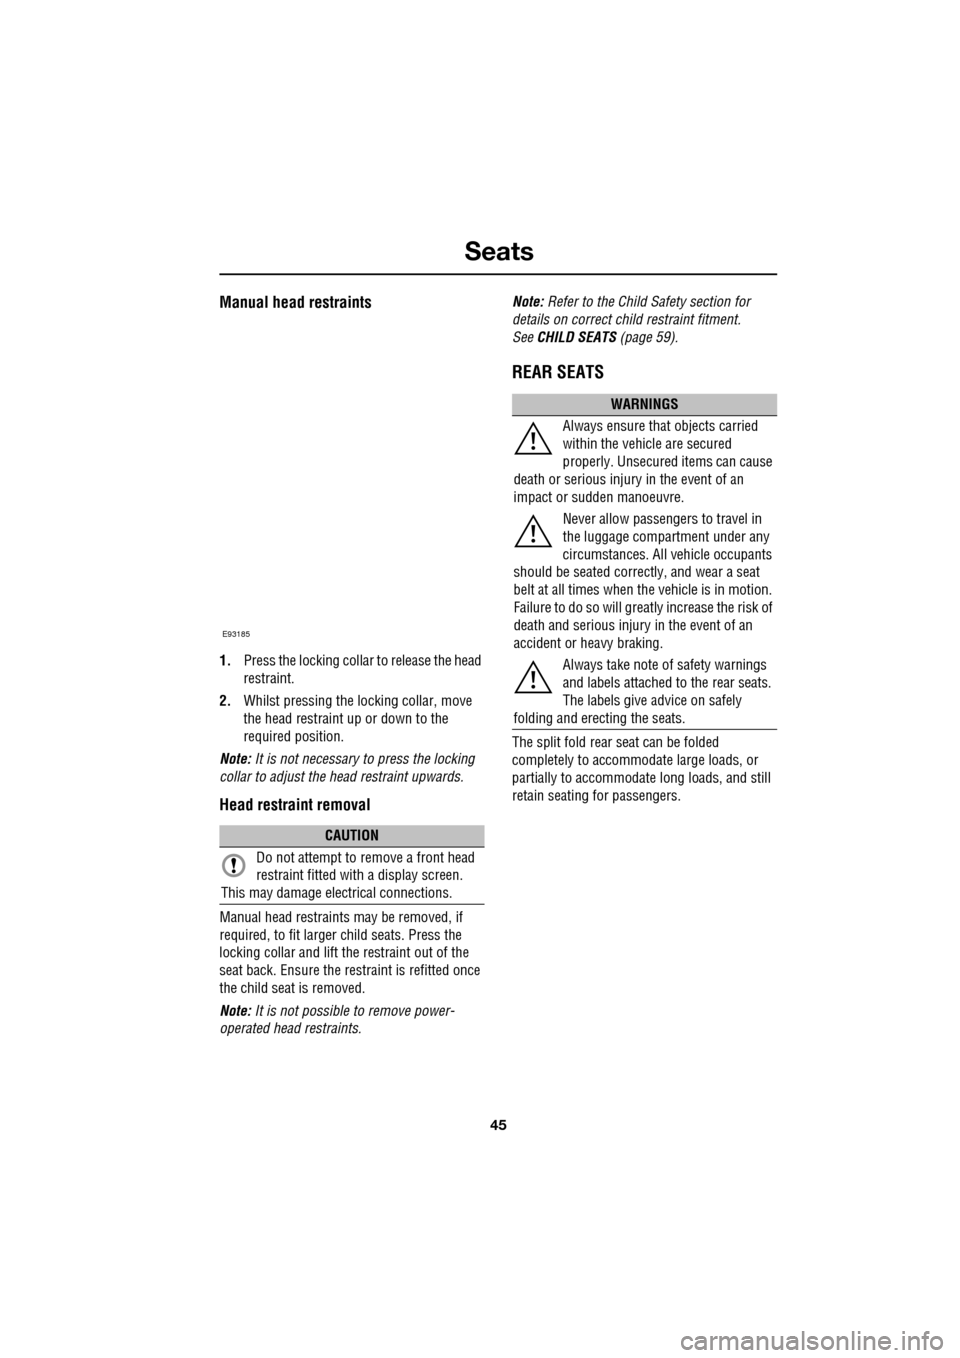
Manual head restraints
1.Press the locking collar to release the head
restraint.
2. Whilst pressing the locking collar, move
the head restraint up or down to the
required position.
Note: It is not necessary to press the locking
collar to adjust the head restraint upwards.
Head restraint removal
Manual head restraints may be removed, if
required, to fit larger child seats. Press the
locking collar and lift the restraint out of the
seat back. Ensure the restraint is refitted once
the child seat is removed.
Note: It is not possible to remove power-
operated head restraints. Note:
Refer to the Child Safety section for
details on correct child restraint fitment.
See CHILD SEATS (page 59).
REAR SEATS
The split fold rear seat can be folded
completely to accommodate large loads, or
partially to accommodate long loads, and still
retain seating for passengers.
CAUTION
Do not attempt to remove a front head
restraint fitted with a display screen.
This may damage elec trical connections.
E93185
WARNINGS
Always ensure that objects carried
within the vehicle are secured
properly. Unsecure d items can cause
death or serious injury in the event of an
impact or sudden manoeuvre.
Never allow passengers to travel in
the luggage compartment under any
circumstances. All vehicle occupants
should be seated correct ly, and wear a seat
belt at all times when the vehicle is in motion.
Failure to do so will greatl y increase the risk of
death and serious injury in the event of an
accident or heavy braking.
Always take note of safety warnings
and labels attached to the rear seats.
The labels give advice on safely
folding and erecting the seats.
Page 46 of 391

Seats
46
Folding the rear seats
Stow the rear seat armrest.
With the luggage compartment open, pull the
relevant seat release handle, located as shown
(illustration shows view from the rear of the
vehicle, with the luggage compartment open).Fold the seat back part-way forward and
remove the head restraint(s) from the folded
seat back. See
HEAD RESTRAINTS (page 44).
Fully fold the seat back forward and, if required,
repeat the process for the second seat section.
JAG0925
JAG0926
WARNING
Ensure that the removed rear head
restraints are stored securely. Never
leave them loose in the vehicle, as
they can cause serious injury or death in the
event of an accident, he avy braking, or sudden
manoeuvres.
JAG0927
JAG0928
Page 47 of 391

47
Seats
Raising the rear seats
The process for raising the rear seat is the
reverse of folding.
HEATED SEATS
Note: To prevent the battery from becoming
discharged the seat heaters will only operate
when the engine is running.
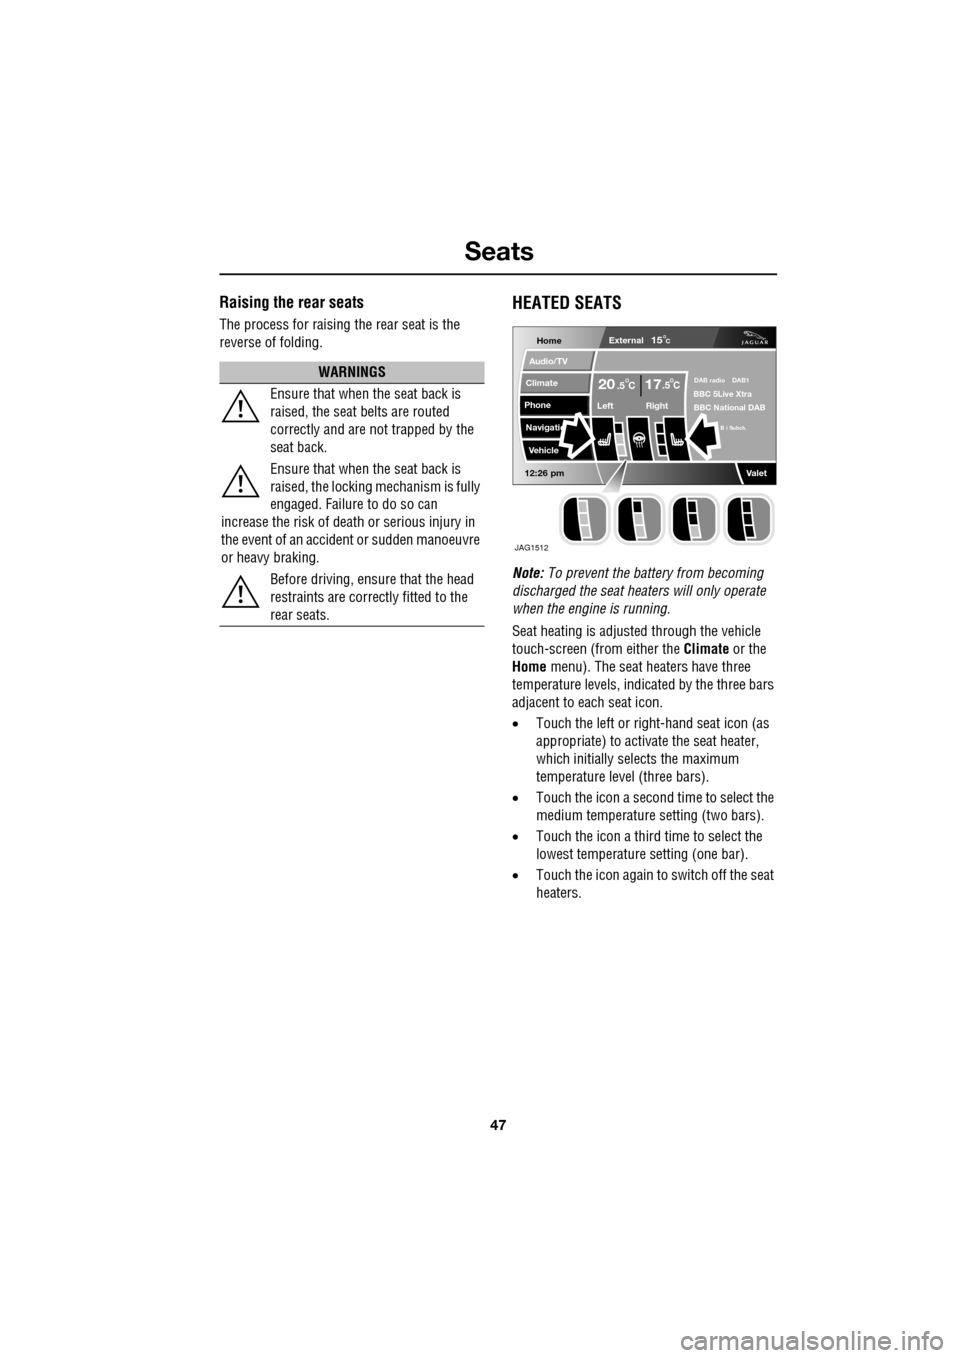
Seat heating is adjusted through the vehicle
touch-screen (from either the Climate or the
Home menu). The seat heaters have three
temperature levels, indica ted by the three bars
adjacent to each seat icon.
• Touch the left or right -hand seat icon (as
appropriate) to activate the seat heater,
which initially selects the maximum
temperature level (three bars).
• Touch the icon a second time to select the
medium temperature setting (two bars).
• Touch the icon a third time to select the
lowest temperature setting (one bar).
• Touch the icon again to switch off the seat
heaters.
WARNINGS
Ensure that when the seat back is
raised, the seat belts are routed
correctly and are not trapped by the
seat back.
Ensure that when the seat back is
raised, the locking mechanism is fully
engaged. Failure to do so can
increase the risk of death or serious injury in
the event of an accident or sudden manoeuvre
or heavy braking.
Before driving, ensure that the head
restraints are correctly fitted to the
rear seats.
Home
Audio/TV
Climate
Phone
Navigatio
Vehicle
Left Right
20 17CC.5 .5
Valet12:26 pm
External15C
DAB radio DAB1BBC 5Live Xtra
BBC National DAB
B i Subch.
JAG1512
Page 52 of 391

Seat belts
52
SEAT BELT HEIGHT ADJUSTMENT
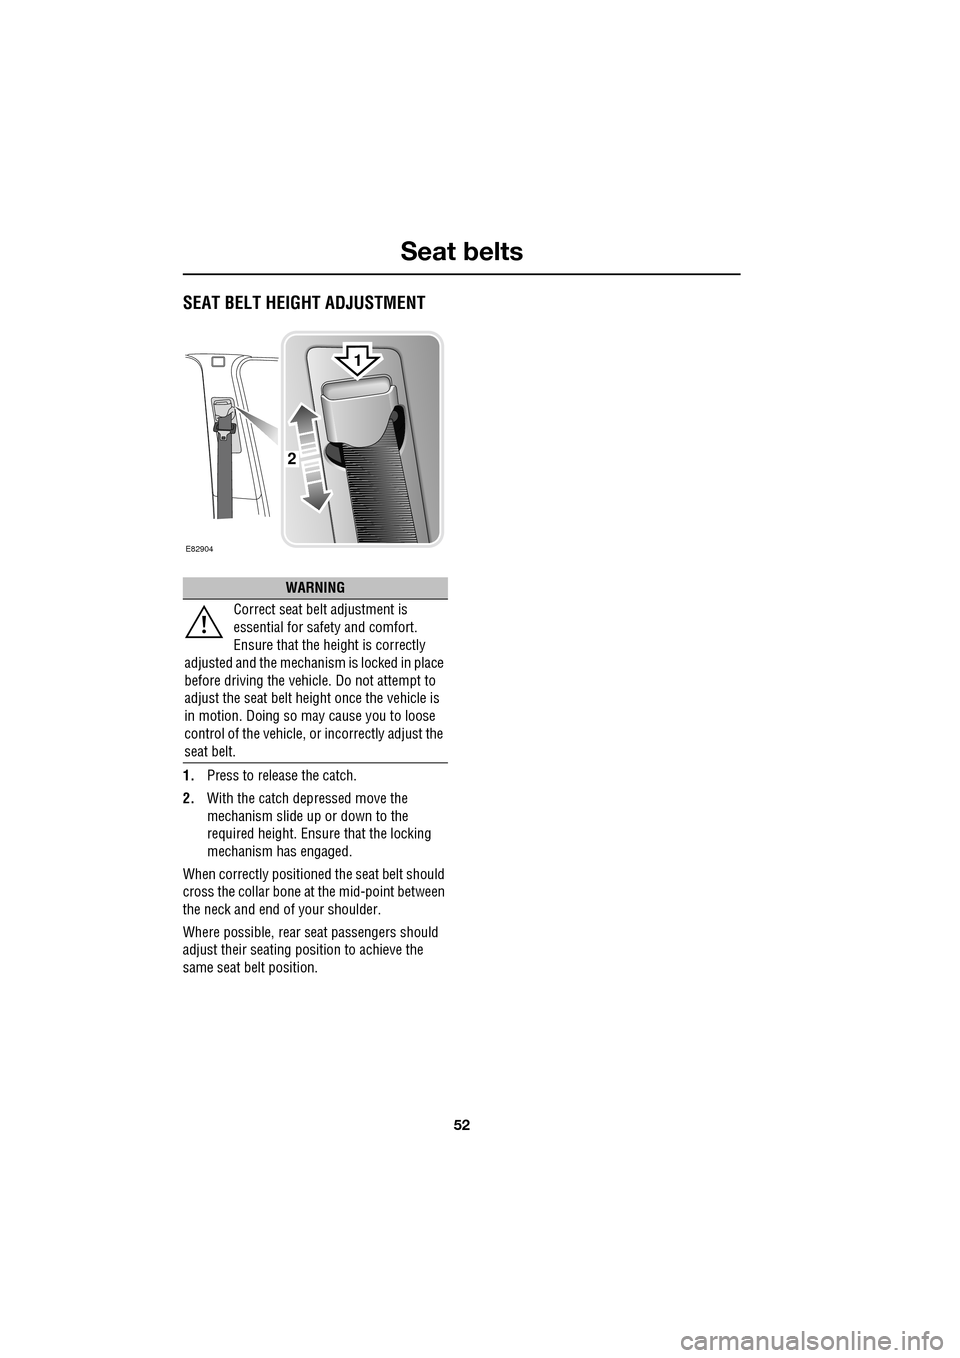
1.Press to release the catch.
2. With the catch depressed move the
mechanism slide up or down to the
required height. Ensure that the locking
mechanism has engaged.
When correctly positione d the seat belt should
cross the collar bone at the mid-point between
the neck and end of your shoulder.
Where possible, rear seat passengers should
adjust their seating pos ition to achieve the
same seat belt position.
WARNING
Correct seat belt adjustment is
essential for safety and comfort.
Ensure that the height is correctly
adjusted and the mechanism is locked in place
before driving the vehicl e. Do not attempt to
adjust the seat belt height once the vehicle is
in motion. Doing so may cause you to loose
control of the vehicle, or incorrectly adjust the
seat belt.
E82904
2
1
Page 53 of 391

53
Supplementary restraints system
PRINCIPLE OF OPERATION
Introduction
In the event of a collision, the airbag control
unit monitors the rate of deceleration caused
by the collision. This information is then used
to determine whether airbags should be
deployed.
Airbag deployment is de pendent on the rate at
which the passenger compartment changes
velocity following the collision. The
circumstances affecting different collisions
(vehicle speed, angle of impact, type and size
of object hit, etc.), vary considerably and will
affect the rate of de celeration accordingly.
The Supplementary Restraint System (SRS)
components include:-
• SRS warning indicator.
• Rotary coupler.
• Airbag modules.
• Seat belt pre-te nsioners (front seat belts).
• Restraints control module.
• Crash sensors.
• Airbag wiring harnesses. The SRS is not designed to
operate as a result
of:
• Rear impacts.
• Minor front impacts.
• Minor side impacts.
• Heavy braking.
• Driving over bumps and pot holes.
Therefore, it follows that considerable
superficial damage to the vehicle can occur,
without causing the airbags to deploy.