2009 JAGUAR XF tow
[x] Cancel search: towPage 35 of 391

35
Locks
Steering column lock
Your vehicle is fitted with an electronic steering
column lock. The column unlocks when it
detects a Jaguar Smart Key inside the vehicle.
The steering column automatically locks when
the starter switch is turned off and the driver's
door is opened.
Any malfunction of the steering column lock
will be indicated by the message STEERING
COLUMN LOCKED displaying in the message
centre. If this occurs:
1. Press the starter button to return to the
convenience mode.
2. Try again to unlock the steering column
lock, by turning the steering wheel gently
to the left and right.
3. If the malfunction st ill persists, seek
qualified assistance as soon as possible.
GLOBAL OPENING AND CLOSING
Global opening and closi ng is enabled/disabled
via the touch-screen.See PROGRAMMING THE
REMOTE CONTROL (page 21).
Window global opening
Press and hold the unlock button
on the Jaguar Smart Key for at least
three seconds. The alarm will
disarm, all doors and the luggage
compartment will unlock and all the windows
and sunroof will open.
Note: The windows and sunroof will continue
to open when the unlock button is released.
Press and hold the inte rior unlock button on
the fascia. After three seconds, all the windows
and the sunroof will open.
Note: The windows and sunroof will stop
opening when the unlock button is released.
CAUTION
During vehicle recovery, the Jaguar
Smart Key must remain inside the
vehicle (or be stowed in the starter control unit
in the centre console), so that the steering
column remains unlocked.WARNING
Accidental closing of an electrically
operated window or sunroof on
fingers, hands or any vulnerable part
of the body, can result in serious injury.
Always observe the following precautions:
Ensure that you have a clear view of all open
apertures on the vehicle and that all apertures
are unobstructed before activating global
closing.
Page 39 of 391

39
Alarm
Alarm trigger information
If you have reason to believe that the alarm was
triggered when you were away from the
vehicle, it is possible to check on your return
using the touch-screen.
From the touch-screen Home menu, select
Vehicle and then Veh. settings . The Security
menu is displayed automatically as the default.
Use the arrow icons to scroll to the second
screen.
A text display (arrowed) will indicate if the
alarm has been triggere d, and also indicate
what the cause of the trigger was (e.g. Driver
door, Passenger door, Inclination sensor,
Trunk, etc.).
SECURITY SENSORS
Note: If the vehicle is to be transported by
road, rail or sea, the vehicle should not be
double-locked or the tilt and intrusion sensors
should be deactivated using the touch-screen.
See PROGRAMMING THE REMOTE CONTROL
(page 21). This prevents the alarm from
sounding as the vehi cle pitches and rolls.
Tilt sensor
The tilt sensor detect s any change in the
vehicle's inclination to the ground. When the
alarm is armed and the vehicle double-locked,
any change in the vehicle's inclination will
activate the tilt alarm. This feature protects
against unauthorised towing away or
jacking-up of the vehicle.
The tilt alarm is disarmed when the vehicle
security system is disarmed using the Jaguar
Smart Key.
Intrusion sensor
The intrusion sensor is mounted in the roof
console and detects any movement within the
vehicle cabin via the use of ultrasonic sound
waves. When the alarm is armed and the
vehicle double-locked, an y movement detected
inside the cabin will activate the alarm.
Note: It takes approximately 30 seconds for
the sensor to create an ultrasonic profile of the
cabin and be fully armed.
The intrusion alarm is disarmed when the
vehicle security system is disarmed using the
Jaguar Smart Key.
Note: Ensure all windows and sunroof are
closed prior to arming the alarm and
double-locking the vehicl e. Failure to do so
may result in false al arms being sounded due
to movements detected outside the vehicle.
Vehicle
Security
Parking
Passive armf On
Alarm sensors Of f On
12:26 pm
Off On
Auto-relock and
armValet mode
Passenger door
Alarm triggered by:
JAG1309
Page 46 of 391

Seats
46
Folding the rear seats
Stow the rear seat armrest.
With the luggage compartment open, pull the
relevant seat release handle, located as shown
(illustration shows view from the rear of the
vehicle, with the luggage compartment open).Fold the seat back part-way forward and
remove the head restraint(s) from the folded
seat back. See
HEAD RESTRAINTS (page 44).
Fully fold the seat back forward and, if required,
repeat the process for the second seat section.
JAG0925
JAG0926
WARNING
Ensure that the removed rear head
restraints are stored securely. Never
leave them loose in the vehicle, as
they can cause serious injury or death in the
event of an accident, he avy braking, or sudden
manoeuvres.
JAG0927
JAG0928
Page 64 of 391

Child safety
64
Tether anchorage points (Australia only)
Note: A tether anchorage is provided for the
centre seat position. Do not use this anchor
position with an ISOFIX child seat.
Attaching tether straps
1. Install the child restrain t securely in one of
the rear seating positions.
2. Pass the tether strap over the seat back
and beneath the head restraint.
3. Attach the tether strap hook to the tether
anchor point on the back of the seat.
Ensure that the tether strap hook is facing
the correct way. See illustration.
4. Tighten the tether strap according to the
manufacturer's instructions.
WARNING
Child restraint anchorages are
designed to withstand only those
loads imposed by correctly fitted
child restraints. Under no circumstances are
they to be used for adult seat belts, harnesses
or for attaching other items or equipment to
the vehicle.
If a child seat or restraint system is to
be fitted to the centre seating
position, the centre armrest must be
in the stowed position (folded into the seat).
E94105
Page 75 of 391

75
Lighting
LIGHTING CONTROL
Note: If the ignition system is switched off and
the lamps are left on, the message centre will
display LIGHTS ON.
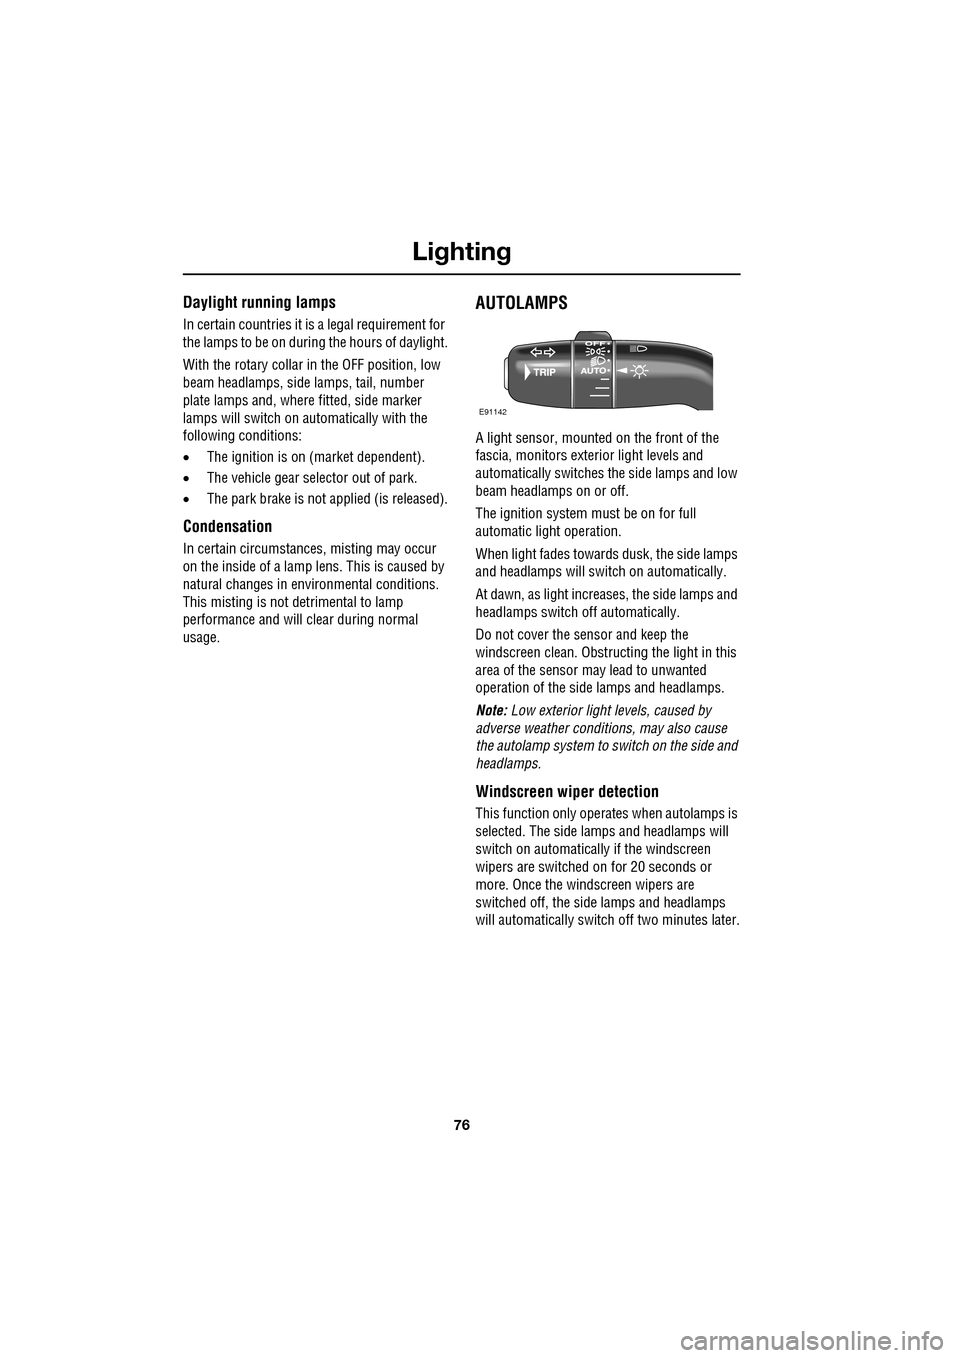
The exterior lamps are controlled by the
left-hand column stalk switch.
The rotary collar on the stalk has three
positions for turning the exterior lamps on or
off and positions for auto lamps and exit delay.
Off
All exterior lamps off (except vehicles provided
with daylight running lamps).
Side lamps
Switches on the side lamps, tail, number plate
and any other marker lamps required by local
legislation. The instrument panel will also be lit.
Headlamps
Select this positi on to switch on the
headlamps. Headlamp flash:
Pull the switch towards the
steering wheel and release to flash the high
beam on and off. The high beam will remain on
for as long as the switch is held.
High beam: With the headlamps on, push the
switch away from the steering wheel to switch
to high beam.
The blue warning indicator on the instrument
panel will illuminate.
To turn high beam off and return to low beam,
pull the column switch towards the steering
wheel.
Note: If the rotary control switch is moved to
the OFF position, with hi gh beam still activated,
both low and high beam will be extinguished.
Both low and high beam will illuminate when
the headlamps are turned on again.
E91137
E91138
E91139
E91140
E91141
Page 76 of 391

Lighting
76
Daylight running lamps
In certain countries it is a legal requirement for
the lamps to be on during the hours of daylight.
With the rotary collar in the OFF position, low
beam headlamps, side lamps, tail, number
plate lamps and, where fitted, side marker
lamps will switch on automatically with the
following conditions:
• The ignition is on (market dependent).
• The vehicle gear selector out of park.
• The park brake is not applied (is released).
Condensation
In certain circumstances, misting may occur
on the inside of a lamp lens. This is caused by
natural changes in environmental conditions.
This misting is not detrimental to lamp
performance and will clear during normal
usage.
AUTOLAMPS
A light sensor, mounted on the front of the
fascia, monitors exteri or light levels and
automatically switches the side lamps and low
beam headlamps on or off.
The ignition system must be on for full
automatic light operation.
When light fades towards dusk, the side lamps
and headlamps will sw itch on automatically.
At dawn, as light increases, the side lamps and
headlamps switch off automatically.
Do not cover the sensor and keep the
windscreen clean. Obstruct ing the light in this
area of the sensor may lead to unwanted
operation of the side lamps and headlamps.
Note: Low exterior light levels, caused by
adverse weather conditi ons, may also cause
the autolamp system to switch on the side and
headlamps.
Windscreen wiper detection
This function only operat es when autolamps is
selected. The side lamps and headlamps will
switch on automatically if the windscreen
wipers are switched on for 20 seconds or
more. Once the windscreen wipers are
switched off, the side lamps and headlamps
will automatically switch off two minutes later.
E91142
Page 88 of 391

Wipers and washers
88
WINDSCREEN WIPERS
Note: If the wiper blades become stuck or
jammed, an electronic cut-out may temporarily
halt wiper operation. If this happens, switch off
the wipers and the ignition. Clear any
obstructions and free th e wiper blades, before
attempting to switch on the ignition.
Wiper operation
1. Windscreen wipers off and parked.
2. Rain sensor activated wipe.
3. Low speed wipe.
4. High speed wipe.
5. Rain sensor sensitivity control.
Rain sensor variable delay
1.Maximum sensitivity.
2. Rotate control to adjust sensitivity.
3. Minimum sensitivity.
With the rain sensor acti vated, the sensitivity of
the rain sensor can be adjusted. Rotate the
control upwards to reduce the sensitivity of the
rain sensor.
Single wipe
Pull the stalk towards the steering wheel for a
single wipe. Holding the sw itch in this position,
operates the wipers at normal speed until the
switch is released.
CAUTIONS
Do not operate the windscreen wipers
on a dry screen. The drag on the wiper
mechanism may cause damage.
In freezing or very hot conditions,
ensure that the wipers have not stuck to
the windscreen before operating. The drag on
the wiper mechanism may cause damage.
Remove any snow, ice or frost from the
windscreen, around the wiper arms and
blades, and the screen scuttle, before
operating the wipers. S now and ice can cause
damage to the wiper mechanism, if left
uncleared.
JAG1620
5
1
2
3
4
1
2
3
JAG1622
JAG1621
Page 91 of 391

91
Wipers and washers
CHANGING THE WIPER BLADES
Service position
The windscreen wiper service position allows
the wipers to be parked in a more accessible
position. This makes it easier to change wiper
blades.
Setting the service position
1.With the ignition switched off, pull the
wiper stalk towards the steering wheel to
the single wipe position. Hold the stalk in
this position.
2. Make sure the brake pedal is not applied
and, while still holding the wiper stalk in
the single wipe positi on, press the ignition
START/STOP button to switch on the
ignition.
The wipers will move to the vertical (service)
position. Release the wiper stalk.
To return the wiper blades to the operating
position, turn the ignition off.
CAUTIONS
When checking or changing the wiper
blades, they can be set to the service
position or parked normally.
E94746
JAG1625
1
2