2009 INFINITI QX56 check engine
[x] Cancel search: check enginePage 3743 of 4171
BRAKE SIGNAL CIRCUITTM-95
< COMPONENT DIAGNOSIS >
CEF
G H
I
J
K L
M A
B
TM
N
O P
BRAKE SIGNAL CIRCUIT
CONSULT-III Reference Val ue in Data Monitor ModeINFOID:0000000003771978
Diagnosis ProcedureINFOID:0000000003771979
1.CHECK CAN COMMUNICATION LINE
Perform the self-diagnosis. Refer to TM-32, "CONSULT-III Function (TRANSMISSION)"
.
Is a malfunction in the CAN communication indicated in the results?
YES >> Check CAN communication line. Refer to TM-39, "Diagnosis Procedure".
NO >> GO TO 2.
2.CHECK STOP LAMP SWITCH CIRCUIT
With CONSULT-III
1. Turn ignition switch “ON”. (Do not start engine.)
2. Select “ECU INPUT SIGNALS” in “DATA MONITO R” mode for “TRANSMISSION” with CONSULT-III.
3. Read out ON/OFF switching action of the “BRAKE SW”.
OK or NG
OK >> INSPECTION END
NG >> GO TO 3.
3.CHECK STOP LAMP SWITCH
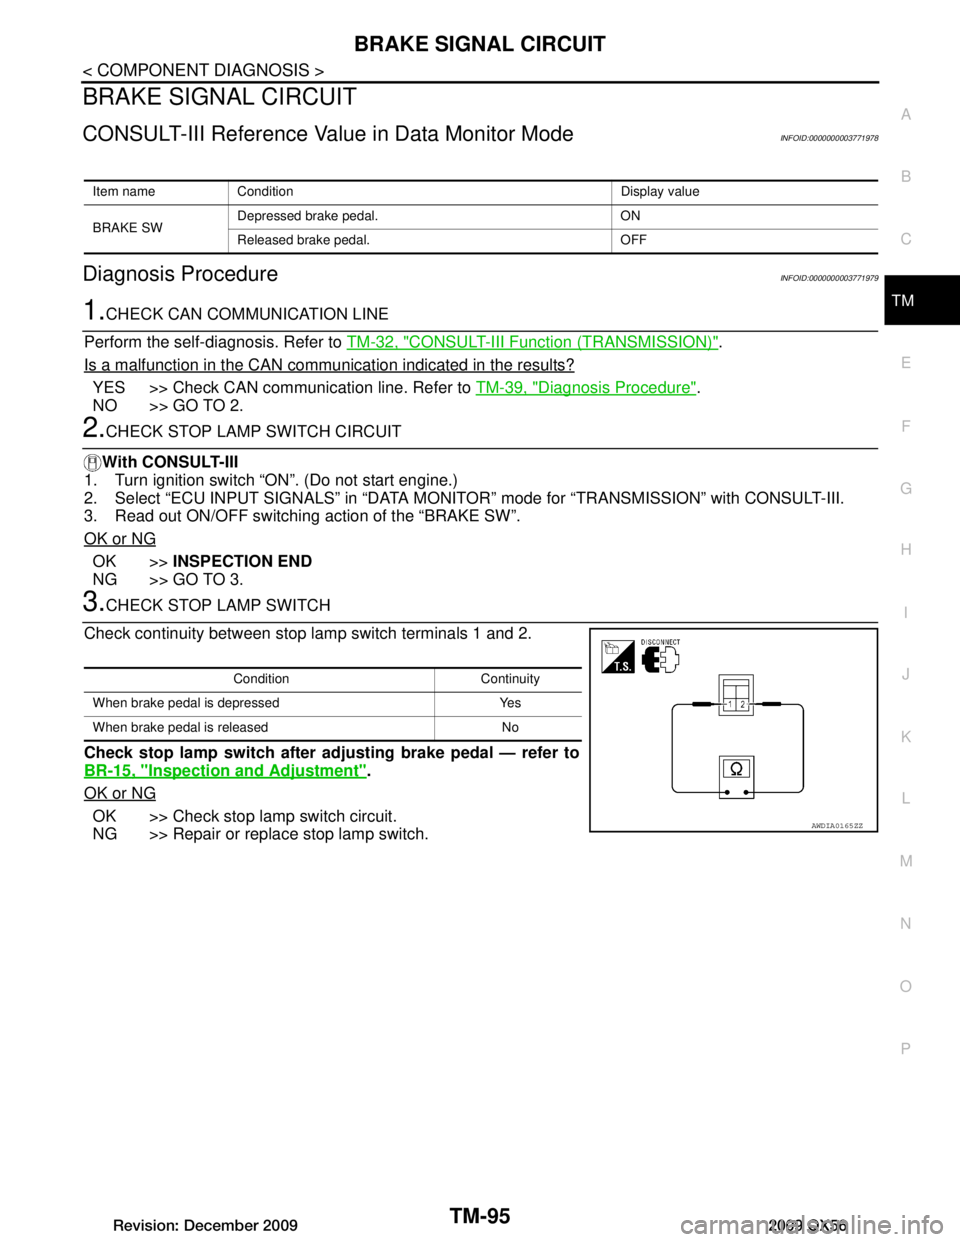
Check continuity between stop lamp switch terminals 1 and 2.
Check stop lamp switch after adjusting brake pedal — refer to
BR-15, "Inspection and Adjustment"
.
OK or NG
OK >> Check stop lamp switch circuit.
NG >> Repair or replace stop lamp switch.
Item name Condition Display value
BRAKE SW Depressed brake pedal. ON
Released brake pedal. OFF
Condition Continuity
When brake pedal is depressed Yes
When brake pedal is released No
AWDIA0165ZZ
Revision: December 20092009 QX56
Page 3744 of 4171
TM-96
< COMPONENT DIAGNOSIS >
TOW MODE SWITCH
TOW MODE SWITCH
DescriptionINFOID:0000000003771980
When tow mode switch is “ON”, tow mode switch signals are sent to TCM from combination meter by CAN
communication line.Then it`s a tow mode condition.
Diagnosis ProcedureINFOID:0000000003771981
1.CHECK CAN COMMUNICATION LINE
Perform the self-diagnosis. Refer to TM-32, "CONSULT-III Function (TRANSMISSION)"
.
Is any malfunction in the CAN communication indicated in the results?
YES >> Check CAN communication line. Refer to TM-39.
NO >> GO TO 2.
2.CHECK POWER SOURCE
1. Turn ignition switch “ON”. (Do not start engine.)
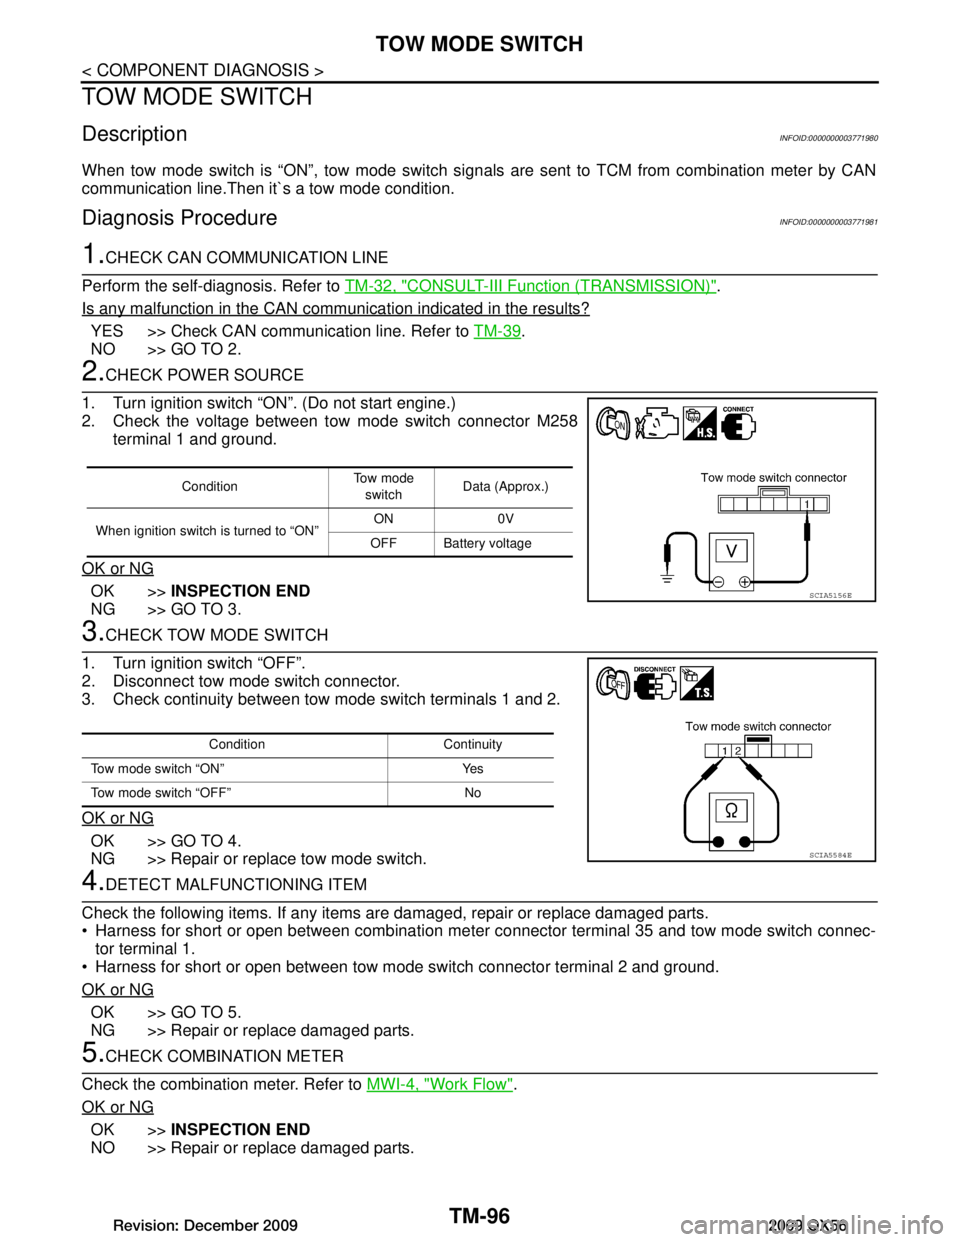
2. Check the voltage between tow mode switch connector M258 terminal 1 and ground.
OK or NG
OK >> INSPECTION END
NG >> GO TO 3.
3.CHECK TOW MODE SWITCH
1. Turn ignition switch “OFF”.
2. Disconnect tow mode switch connector.
3. Check continuity between tow mode switch terminals 1 and 2.
OK or NG
OK >> GO TO 4.
NG >> Repair or replace tow mode switch.
4.DETECT MALFUNCTIONING ITEM
Check the following items. If any items are damaged, repair or replace damaged parts.
Harness for short or open between combination meter connector terminal 35 and tow mode switch connec- tor terminal 1.
Harness for short or open between tow mode switch connector terminal 2 and ground.
OK or NG
OK >> GO TO 5.
NG >> Repair or replace damaged parts.
5.CHECK COMBINATION METER
Check the combination meter. Refer to MWI-4, "Work Flow"
.
OK or NG
OK >> INSPECTION END
NO >> Repair or replace damaged parts.
Condition To w m o d e
switch Data (Approx.)
When ignition switch is turned to “ON” ON 0V
OFF Battery voltage
SCIA5156E
Condition Continuity
Tow mode switch “ON” Yes
Tow mode switch “OFF” No
SCIA5584E
Revision: December 20092009 QX56
Page 3752 of 4171
TM-104
< ECU DIAGNOSIS >
TCM
ECU DIAGNOSIS
TCM
Reference ValueINFOID:0000000003771985
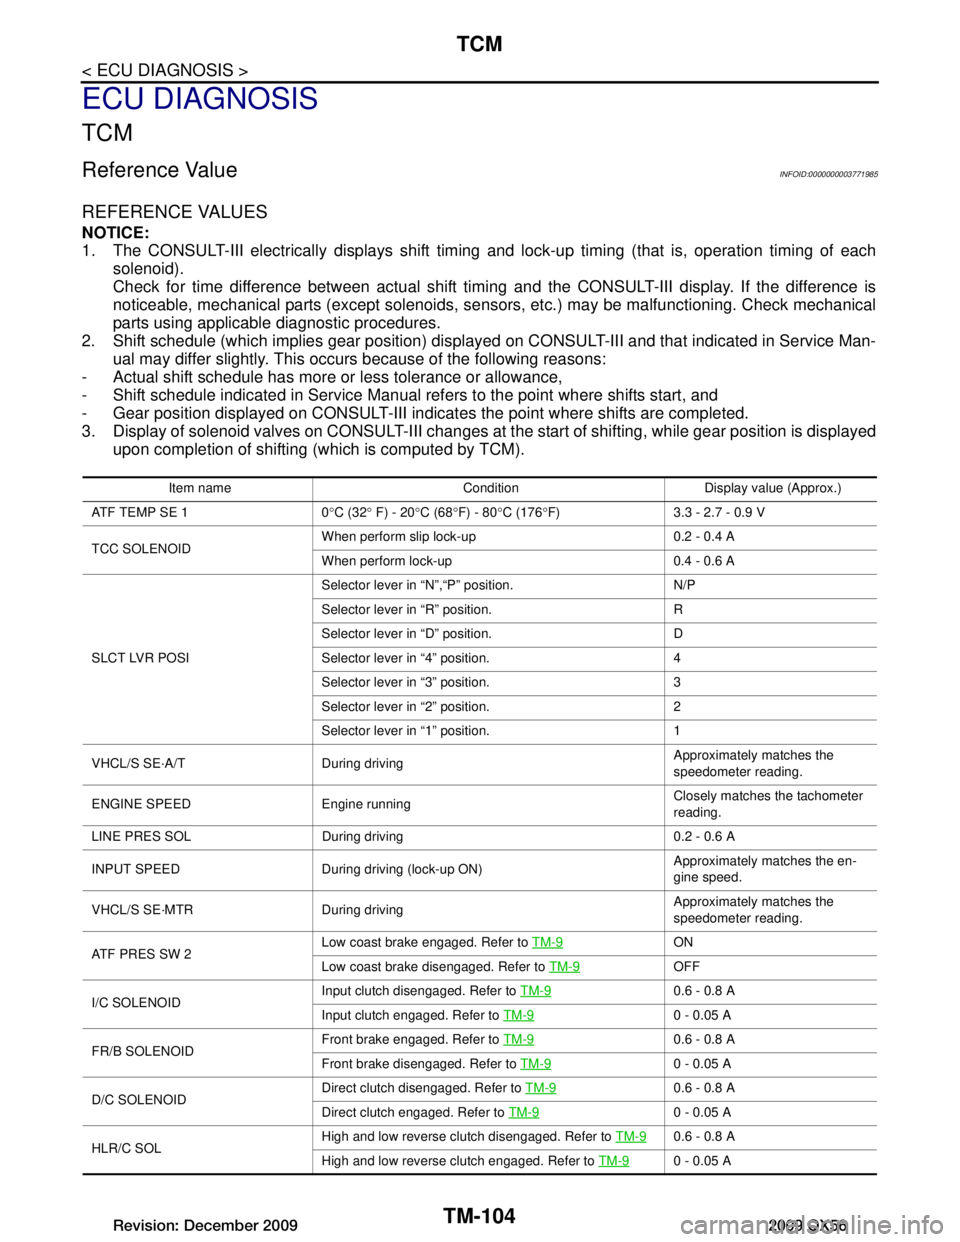
REFERENCE VALUES
NOTICE:
1. The CONSULT-III electrically displays shift timing and lock-up timing (that is, operation timing of each
solenoid).
Check for time difference between actual shift timi ng and the CONSULT-III display. If the difference is
noticeable, mechanical parts (except solenoids, sens ors, etc.) may be malfunctioning. Check mechanical
parts using applicable diagnostic procedures.
2. Shift schedule (which implies gear position) display ed on CONSULT-III and that indicated in Service Man-
ual may differ slightly. This occurs because of the following reasons:
- Actual shift schedule has more or less tolerance or allowance,
- Shift schedule indicated in Service Manual refers to the point where shifts start, and
- Gear position displayed on CONSULT-III indicates the point where shifts are completed.
3. Display of solenoid valves on CONSULT-III changes at t he start of shifting, while gear position is displayed
upon completion of shifting (which is computed by TCM).
Item name Condition Display value (Approx.)
AT F T E M P S E 1 0 °C (32 ° F) - 20 °C (68 °F) - 80 °C (176 °F) 3.3 - 2.7 - 0.9 V
TCC SOLENOID When perform slip lock-up 0.2 - 0.4 A
When perform lock-up 0.4 - 0.6 A
SLCT LVR POSI Selector lever in “N”,“P” position. N/P
Selector lever in “R” position. R
Selector lever in “D” position. D
Selector lever in “4” position. 4
Selector lever in “3” position. 3
Selector lever in “2” position. 2
Selector lever in “1” position. 1
VHCL/S SE·A/T During driving Approximately matches the
speedometer reading.
ENGINE SPEED Engine running Closely matches the tachometer
reading.
LINE PRES SOL During driving 0.2 - 0.6 A
INPUT SPEED During driving (lock-up ON) Approximately matches the en-
gine speed.
VHCL/S SE·MTR During driving Approximately matches the
speedometer reading.
ATF PRES SW 2 Low coast brake engaged. Refer to
TM-9
ON
Low coast brake disengaged. Refer to TM-9
OFF
I/C SOLENOID Input clutch disengaged. Refer to
TM-9
0.6 - 0.8 A
Input clutch engaged. Refer to TM-9
0 - 0.05 A
FR/B SOLENOID Front brake engaged. Refer to
TM-9
0.6 - 0.8 A
Front brake disengaged. Refer to TM-9
0 - 0.05 A
D/C SOLENOID Direct clutch disengaged. Refer to
TM-9
0.6 - 0.8 A
Direct clutch engaged. Refer to TM-9
0 - 0.05 A
HLR/C SOL High and low reverse clutch disengaged. Refer to
TM-9
0.6 - 0.8 A
High and low reverse clutch engaged. Refer to TM-9
0 - 0.05 A
Revision: December 20092009 QX56
Page 3767 of 4171
SYSTEM SYMPTOMTM-119
< SYMPTOM DIAGNOSIS >
CEF
G H
I
J
K L
M A
B
TM
N
O P
SYMPTOM DIAGNOSIS
SYSTEM SYMPTOM
A/T Check Indicator Lamp Does Not Come OnINFOID:0000000003771991
SYMPTOM:
AT CHECK indicator lamp does not come on for about 2 seconds when turning ignition switch to
“ON”.
DIAGNOSTIC PROCEDURE
1.CHECK CAN COMMUNICATION LINE
Perform the self-diagnosis. Refer to TM-32, "CONSULT-III Function (TRANSMISSION)"
.
Is a malfunction in the CAN communication indicated in the results?
YES >> Check CAN communication line. Refer to TM-21, "CAN Communication".
NO >> GO TO 2.
2.CHECK A/T CHECK INDICATOR LAMP CIRCUIT
Check the combination meter. Refer to MWI-19, "WARNING LAMPS/INDICATOR LAMPS : System Descrip-
tion".
OK or NG
OK >> GO TO 3.
NG >> Repair or replace damaged parts.
3.CHECK TCM POWER SUPPLY AND GROUND CIRCUIT
Check TCM power supply and ground circuit. Refer to TM-92, "Diagnosis Procedure"
.
OK or NG
OK >> INSPECTION END
NG >> Repair or replace damaged parts.
Engine Cannot Be Started in "P" or "N" PositionINFOID:0000000003771992
SYMPTOM:
Engine cannot be started with select or lever in “P” or “N” position.
Engine can be started with select or lever in “D”or “R” position.
DIAGNOSTIC PROCEDURE
1.CHECK SELF-DIAGNOSIS RESULTS
Perform self-diagnosis. Refer to TM-32, "CONSULT-III Function (TRANSMISSION)"
.
Do the self-diagnosis results i ndicate transmission range switch?
YES >> Check the malfunctioning system. Refer to TM-44, "Diagnosis Procedure".
NO >> GO TO 2.
2.CHECK CONTROL CABLE
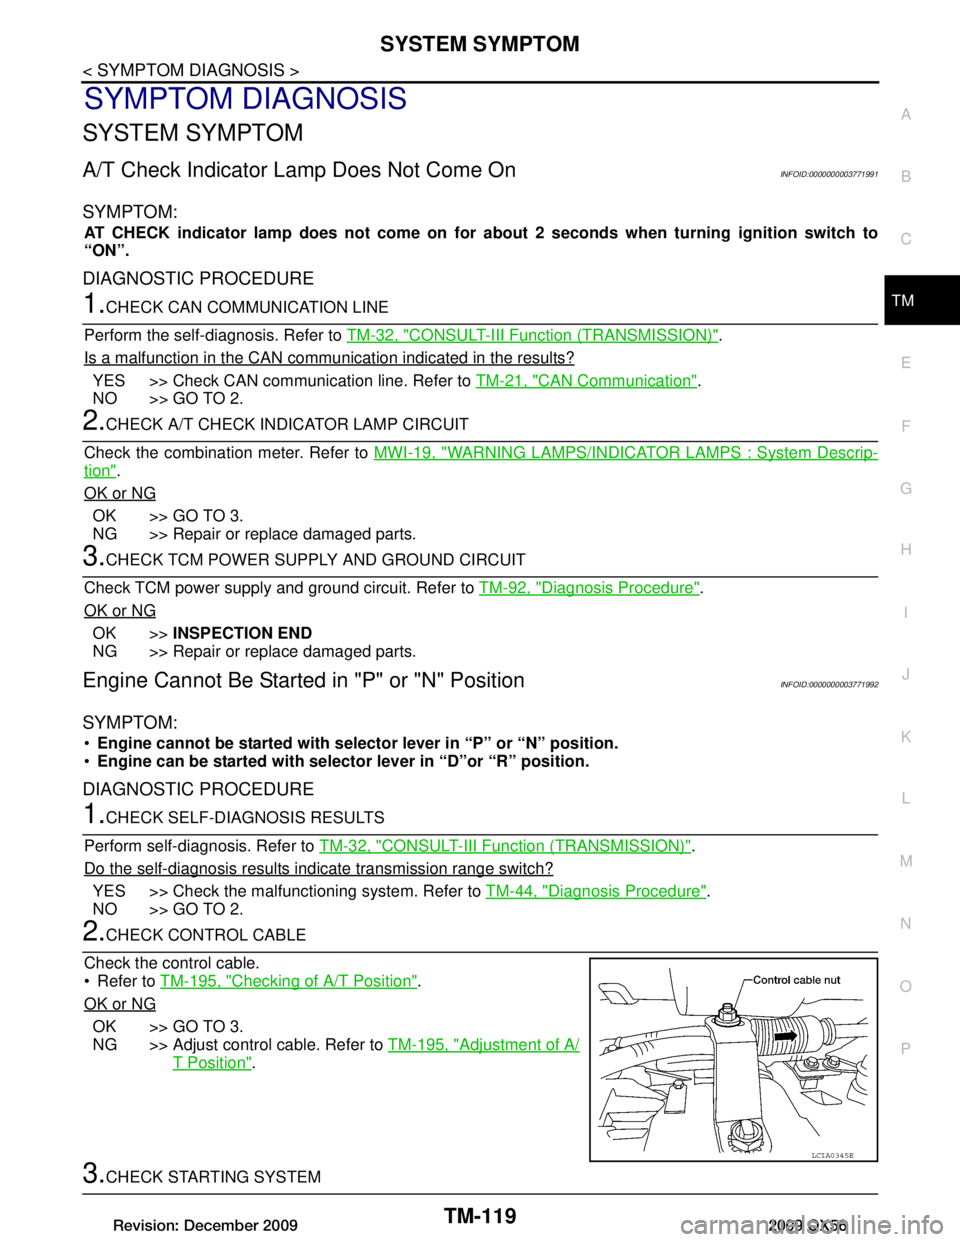
Check the control cable.
Refer to TM-195, "Checking of A/T Position"
.
OK or NG
OK >> GO TO 3.
NG >> Adjust control cable. Refer to TM-195, "Adjustment of A/
T Position".
3.CHECK STARTING SYSTEM
LCIA0345E
Revision: December 20092009 QX56
Page 3770 of 4171
TM-122
< SYMPTOM DIAGNOSIS >
SYSTEM SYMPTOM
OK >>INSPECTION END
NG >> Repair or replace damaged parts.
Large Shock("N" to "D" Position)INFOID:0000000003771995
SYMPTOM:
A noticeable shock occurs when the selector lever is shifted from the “N” to “D” position.
DIAGNOSTIC PROCEDURE
1.CHECK SELF-DIAGNOSTIC RESULTS
Perform self-diagnosis. Refer to TM-32, "CONSULT-III Function (TRANSMISSION)"
.
Do the self-diagnostic results indicate A/T fluid temperature sensor, engine speed signal, accelerator pedal
position sensor, front brake solenoid valve, CAN communication line?
YES >> Check the malfunctioning system. Refer to TM-72, "Diagnosis Procedure", TM-52, "Diagnosis
Procedure", TM-70, "Diagnosis Procedure", TM-82, "Diagnosis Procedure", TM-39, "Diagnosis
Procedure".
NO >> GO TO 2.
2.ENGINE IDLE SPEED
Check the engine idle speed. Refer to EC-17, "Idle Speed and Ignition Timing Check"
.
OK or NG
OK >> GO TO 3.
NG >> Repair.
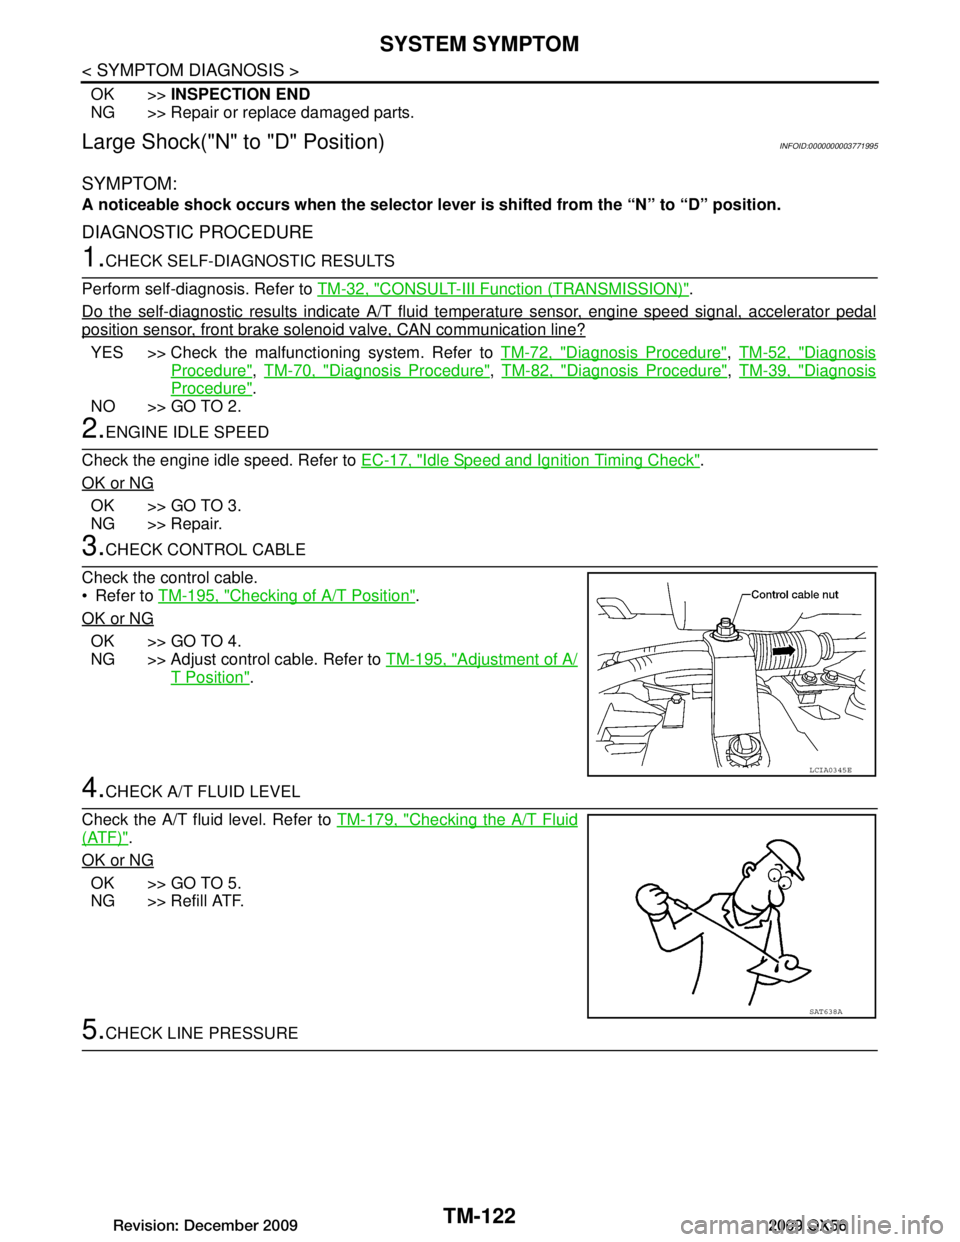
3.CHECK CONTROL CABLE
Check the control cable.
Refer to TM-195, "Checking of A/T Position"
.
OK or NG
OK >> GO TO 4.
NG >> Adjust control cable. Refer to TM-195, "Adjustment of A/
T Position".
4.CHECK A/T FLUID LEVEL
Check the A/T fluid level. Refer to TM-179, "Checking the A/T Fluid
(ATF)".
OK or NG
OK >> GO TO 5.
NG >> Refill ATF.
5.CHECK LINE PRESSURE
LCIA0345E
SAT638A
Revision: December 20092009 QX56
Page 3773 of 4171

SYSTEM SYMPTOMTM-125
< SYMPTOM DIAGNOSIS >
CEF
G H
I
J
K L
M A
B
TM
N
O P
Refer to TM-186, "Inspection and Judgment".
OK or NG
OK >> GO TO 6.
OK in “1” position, NG in “R” position>>GO TO 5.
NG in both “1” and “R” positions>>GO TO 8.
5.DETECT MALFUNCTIONING ITEM
1. Disassemble A/T. Refer to TM-232, "Disassembly"
.
2. Check the following items:
- Reverse brake. Refer to TM-232, "Disassembly"
.
OK or NG
OK >> GO TO 9.
NG >> Repair or replace damaged parts.
6.CHECK LINE PRESSURE
Check the line pressure with the engine idling. Refer to TM-188,
"Inspection and Judgment".
OK or NG
OK >> GO TO 9.
NG - 1 >> Line pressure high. GO TO 7.
NG - 2 >> Line pressure low. GO TO 8.
7.DETECT MALFUNCTIONING ITEM
1. Check control valve with TCM. Refer to TM-203, "Control Valve with TCM and A/T Fluid Temperature Sen-
sor 2".
2. Disassemble A/T. Refer to TM-232, "Disassembly"
.
3. Check the following items:
- Oil pump assembly. Refer to TM-249, "Oil Pump"
.
OK or NG
OK >> GO TO 9.
NG >> Repair or replace damaged parts.
8.DETECT MALFUNCTIONING ITEM
1. Check control valve with TCM. Refer to TM-203, "Control Valve with TCM and A/T Fluid Temperature Sen-
sor 2".
2. Disassemble A/T. Refer to TM-232, "Disassembly"
.
3. Check the following items:
- Oil pump assembly. Refer to TM-249, "Oil Pump"
.
- Power train system. Refer to TM-232, "Disassembly"
.
- Transmission case. Refer to TM-232, "Disassembly"
.
OK or NG
OK >> GO TO 9.
NG >> Repair or replace damaged parts.
9.CHECK A/T FLUID CONDITION
1. Remove oil pan. Refer to TM-201, "Oil Pan"
.
SAT493G
SAT494G
Revision: December 20092009 QX56
Page 3777 of 4171
SYSTEM SYMPTOMTM-129
< SYMPTOM DIAGNOSIS >
CEF
G H
I
J
K L
M A
B
TM
N
O P
Vehicle Cannot Be Started from D1INFOID:0000000003771998
SYMPTOM:
Vehicle cannot be started from D1 on cruise test - Part 1.
DIAGNOSTIC PROCEDURE
1.CONFIRM THE SYMPTOM
Check if vehicle creeps in “R” position.
OK or NG
OK >> GO TO 2.
NG >> Refer to TM-124, "Vehicle Does Not Creep Backward in "R" Position"
.
2.CHECK SELF-DIAGNOSTIC RESULTS
Perform self-diagnosis. Refer to TM-32, "CONSULT-III Function (TRANSMISSION)"
.
Is any malfunction detected by self-diagnostic results?
YES >> Check the malfunctioning system.
NO >> GO TO 3.
3.CHECK ACCELERATOR PEDA L POSITION(APP) SENSOR
Check accelerator pedal position (APP) sensor. Refer to TM-70, "Diagnosis Procedure"
.
OK or NG
OK >> GO TO 4.
NG >> Repair or replace accelerator pedal position (APP) sensor.
4.CHECK A/T FLUID LEVEL
Check A/T fluid level. Refer to TM-179, "Checking the A/T Fluid
(ATF)".
OK or NG
OK >> GO TO 5.
NG >> Refill ATF.
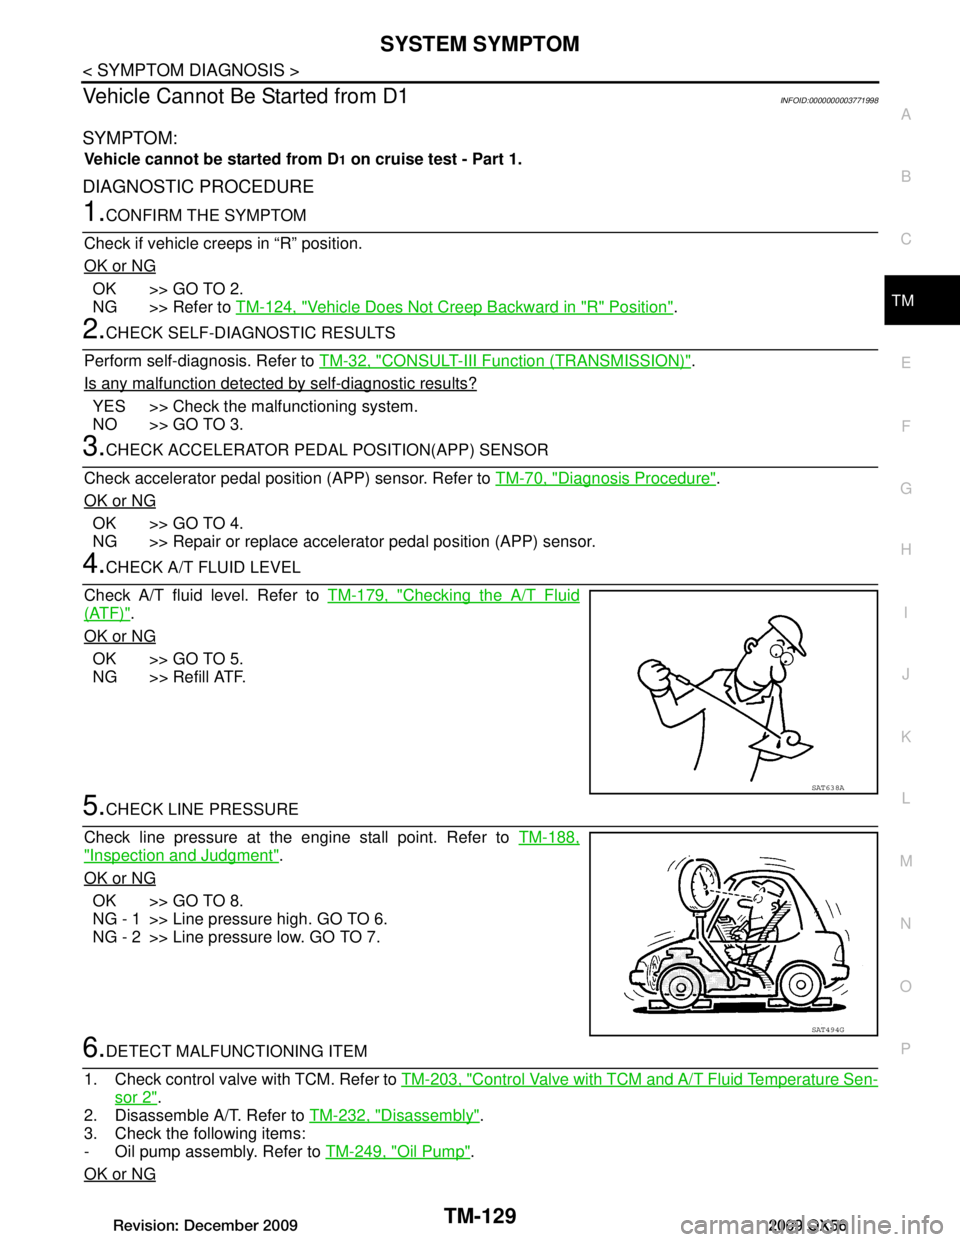
5.CHECK LINE PRESSURE
Check line pressure at the engine stall point. Refer to TM-188,
"Inspection and Judgment".
OK or NG
OK >> GO TO 8.
NG - 1 >> Line pressure high. GO TO 6.
NG - 2 >> Line pressure low. GO TO 7.
6.DETECT MALFUNCTIONING ITEM
1. Check control valve with TCM. Refer to TM-203, "Control Valve with TCM and A/T Fluid Temperature Sen-
sor 2".
2. Disassemble A/T. Refer to TM-232, "Disassembly"
.
3. Check the following items:
- Oil pump assembly. Refer to TM-249, "Oil Pump"
.
OK or NG
SAT638A
SAT494G
Revision: December 20092009 QX56
Page 3779 of 4171

SYSTEM SYMPTOMTM-131
< SYMPTOM DIAGNOSIS >
CEF
G H
I
J
K L
M A
B
TM
N
O P
A/T Does Not Shift: D1 →D2INFOID:0000000003771999
SYMPTOM:
The vehicle does not shift-up from the D1 to D2 gear at the specified speed.
DIAGNOSTIC PROCEDURE
1.CONFIRM THE SYMPTOM
Check if vehicle creeps forward in “D” position and vehicle can be started from D
1.
OK or NG
OK >> GO TO 2.
NG >> Refer to TM-126, "Vehicle Does Not Creep Forward in "D" Position"
, TM-129, "Vehicle Cannot Be
Started from D1".
2.CHECK SELF-DIAGNOSTIC RESULTS
Perform self-diagnosis. Refer to TM-32, "CONSULT-III Function (TRANSMISSION)"
.
Do the self-diagnostic results indicate, direct clutch solenoid valve, accelerator pedal position sensor, output
speed sensor and vehicle speed signal?
YES >> Check the malfunctioning system. Refer to TM-84, "Diagnosis Procedure", EC-374, "Diagnosis
Procedure", TM-50, "Diagnosis Procedure", TM-74, "Diagnosis Procedure".
NO >> GO TO 3.
3.CHECK A/T FLUID LEVEL
Check A/T fluid level. Refer to TM-179, "Checking the A/T Fluid
(ATF)".
OK or NG
OK >> GO TO 4.
NG >> Refill ATF.
4.CHECK LINE PRESSURE
Check line pressure at the engine stall point. Refer to TM-188,
"Inspection and Judgment".
OK or NG
OK >> GO TO 7.
NG - 1 >> Line pressure high. GO TO 5.
NG - 2 >> Line pressure low. GO TO 6.
5.DETECT MALFUNCTIONING ITEM
1. Check control valve with TCM. Refer to TM-203, "Control Valve with TCM and A/T Fluid Temperature Sen-
sor 2".
2. Disassemble A/T. Refer to TM-232, "Disassembly"
.
3. Check the following items:
- Oil pump assembly. Refer to TM-249, "Oil Pump"
.
OK or NG
OK >> GO TO 7.
NG >> Repair or replace damaged parts.
6.DETECT MALFUNCTIONING ITEM
SAT638A
SAT494G
Revision: December 20092009 QX56