2009 INFINITI QX56 radiator cap
[x] Cancel search: radiator capPage 768 of 4171

CO-24
< SERVICE DATA AND SPECIFICATIONS (SDS)
SERVICE DATA AND SPECIFICATIONS (SDS)
SERVICE DATA AND SPECIFICATIONS (SDS)
SERVICE DATA AND SPECIFICATIONS (SDS)
Standard and LimitINFOID:0000000003771292
ENGINE COOLANT CAPACITY (APPROXIMATE)
Unit: (US qt, Imp qt)
THERMOSTAT
RADIATOR
Unit: kPa (kg/cm2, psi)
Engine coolant capacity with reservoir ("MAX" level)14.4 (15 1/4, 12 5/8)
Valve opening temperature80 - 84°C (176 - 183 °F)
Full-open lift amount More than 10 mm/95°C (0.39 in/203°F)
Valve closing temperature 77°C (171 °F) or higher
Reservoir cap relief pressure Standard 95 - 125 (0.97- 1.28, 14 - 18)
Leakage test pressure 137 (1.4, 20)
Revision: December 20092009 QX56
Page 1625 of 4171
![INFINITI QX56 2009 Factory Service Manual
EC-298
< COMPONENT DIAGNOSIS >[VK56DE]
P1217 ENGINE OVER TEMPERATURE
P1217 ENGINE OVER TEMPERATURE
On Board Diagn
osis LogicINFOID:0000000003771589
NOTE:
If DTC P1217 is displayed with DTC U1000 or INFINITI QX56 2009 Factory Service Manual
EC-298
< COMPONENT DIAGNOSIS >[VK56DE]
P1217 ENGINE OVER TEMPERATURE
P1217 ENGINE OVER TEMPERATURE
On Board Diagn
osis LogicINFOID:0000000003771589
NOTE:
If DTC P1217 is displayed with DTC U1000 or](/manual-img/42/57031/w960_57031-1624.png)
EC-298
< COMPONENT DIAGNOSIS >[VK56DE]
P1217 ENGINE OVER TEMPERATURE
P1217 ENGINE OVER TEMPERATURE
On Board Diagn
osis LogicINFOID:0000000003771589
NOTE:
If DTC P1217 is displayed with DTC U1000 or U1001, first perform the trouble diagnosis for DTC
U1000, U1001. Refer to EC-86
.
If DTC P1217 is displayed with DTC P0607, first pe rform the trouble diagnosis for DTC P0607. Refer
to EC-284
.
If the cooling fan or another component in the coo ling system malfunctions, engine coolant temperature will
rise.
When the engine coolant temperature reaches an abnorma lly high temperature condition, a malfunction is
indicated.
This self-diagnosis has the one trip detection logic.
CAUTION:
When a malfunction is indicated, be su re to replace the coolant. Refer to CO-11, "Changing Engine
Coolant". Also, replace the engine oil. Refer to LU-9, "Changing Engine Oil".
1. Fill radiator with coolant up to specified level with a filling speed of 2 liters per minute. Be sure to
use coolant with the proper mixture ratio. Refer to CO-10
.
2. After refilling coolant, run engine to en sure that no water-flow noise is emitted.
Overall Function CheckINFOID:0000000003771590
Use this procedure to check the overall function of the cooling fan. During this check, a DTC might not be con-
firmed.
WARNING:
Never remove the radiator cap and/or reservoir tank cap when the engine is hot. Serious burns could
be caused by high pressure fluid escaping fr om the radiator and/or reservoir tank.
Wrap a thick cloth around cap. Carefully remove the cap by turning it a quarter turn to allow built-up
pressure to escape. Then turn the cap all the way off.
WITH CONSULT-III
1. Check the coolant level in the reservoir tank and radiator. Allow engine to cool before checking coolant level.
If the coolant level in the reservoir tank and/or radiator is below
the proper range, skip the following steps and go to EC-388,
"Diagnosis Procedure".
2. Confirm whether customer filled the coolant or not. If customer
filled the coolant, skip the following steps and go to EC-388,
"Diagnosis Procedure".
3. Turn ignition switch ON.
DTC No. Trouble diagnosis name DTC detecting condition Possible cause
P1217
1217 Engine over tempera-
ture (Overheat) Cooling fan does not operate properly (Over-
heat).
Cooling fan system does not operate proper-
ly (Overheat).
Engine coolant was not added to the system using the proper filling method.
Engine coolant is not within the specified range. Harness or connectors
(The cooling fan circuit is open or short-
ed.)
Cooling fan
Cooling fan (crankshaft diven)
IPDM E/R (Cooling fan relay)
Radiator hose
Radiator
Radiator cap
Reservoir tank
Reservoir tank cap
Water pump
Thermostat
For more informat ion, refer to EC-300,
"Main 13 Causes of Overheating".
SEF621W
Revision: December 20092009 QX56
Page 1627 of 4171
![INFINITI QX56 2009 Factory Service Manual
EC-300
< COMPONENT DIAGNOSIS >[VK56DE]
P1217 ENGINE OVER TEMPERATURE
4. Make sure that cooling fan operates.
OK or NG
OK >> GO TO 4.
NG >> Check cooling fan control circuit. (Go to "PROCEDURE
A".)
4. INFINITI QX56 2009 Factory Service Manual
EC-300
< COMPONENT DIAGNOSIS >[VK56DE]
P1217 ENGINE OVER TEMPERATURE
4. Make sure that cooling fan operates.
OK or NG
OK >> GO TO 4.
NG >> Check cooling fan control circuit. (Go to "PROCEDURE
A".)
4.](/manual-img/42/57031/w960_57031-1626.png)
EC-300
< COMPONENT DIAGNOSIS >[VK56DE]
P1217 ENGINE OVER TEMPERATURE
4. Make sure that cooling fan operates.
OK or NG
OK >> GO TO 4.
NG >> Check cooling fan control circuit. (Go to "PROCEDURE
A".)
4.CHECK COOLING SYSTEM FOR LEAK
Refer to CO-10, "Inspection"
.
OK or NG
OK >> GO TO 5.
NG >> Check the following for leak. Hose
Radiator
Radiator cap
Water pump
Reservoir tank
5.CHECK COMPONENT PARTS
Check the following.
RESERVOIR TANK CAP (Refer to CO-10, "Inspection"
.)
Thermostat. (Refer to CO-22, "Removal and Installation"
.)
Engine coolant temperature sensor. (Refer to EC-122, "Component Inspection"
.)
OK or NG
OK >> GO TO 7.
NG >> Replace malfunctioning component.
6.CHECK MAIN 13 CAUSES
If the cause cannot be isolated, go to EC-300, "Main 13 Causes of Overheating"
.
>> INSPECTION END
Main 13 Causes of OverheatingINFOID:0000000003771592
SEF882V
Engine Step Inspection item Equipment Standard Reference page
OFF 1 Blocked radiator Blocked condenser
Blocked radiator grille
Blocked bumper Visual No blocking —
2 Coolant mixture Coolant tester 50 - 50% coolant mixture CO-10
3 Coolant level Visual Coolant up to MAX level in
reservoir tank and radiator
filler neckCO-11, "Changing Engine
Coolant"
4 Reservoir tank cap Pre
ssure tester 95 - 125 kPa
(0.97 - 1.28 kg/cm2, 14 -
18 psi) (Limit) CO-10, "Inspection"
ON*25 Coolant leaks Visual No leaks
CO-10, "Inspection"
ON*26 Thermostat Touch the upper and
lower radiator hosesBoth hoses should be hot
CO-22, "Removal and In-
stallation"
ON*17 Cooling fan CONSULT-III Operating See trouble diagnosis for
DTC P1217 (EC-36
).
Revision: December 20092009 QX56
Page 1805 of 4171
![INFINITI QX56 2009 Factory Service Manual
EC-478
< SYMPTOM DIAGNOSIS >[VK56DE]
ENGINE CONTROL SYSTEM SYMPTOMS
1 - 6: The numbers refer to the order of inspection.Exhaust Exhaust manifold/Tube/Muffler/
Gasket 55555 55 5 EM-30
,
EX-
5Three wa INFINITI QX56 2009 Factory Service Manual
EC-478
< SYMPTOM DIAGNOSIS >[VK56DE]
ENGINE CONTROL SYSTEM SYMPTOMS
1 - 6: The numbers refer to the order of inspection.Exhaust Exhaust manifold/Tube/Muffler/
Gasket 55555 55 5 EM-30
,
EX-
5Three wa](/manual-img/42/57031/w960_57031-1804.png)
EC-478
< SYMPTOM DIAGNOSIS >[VK56DE]
ENGINE CONTROL SYSTEM SYMPTOMS
1 - 6: The numbers refer to the order of inspection.Exhaust Exhaust manifold/Tube/Muffler/
Gasket 55555 55 5 EM-30
,
EX-
5Three way catalyst
Lubrica-
tion Oil pan/Oil strainer/Oil pump/Oil
filter/Oil gallery/Oil cooler
55555 55 5 EM-33
,
LU-
14 , LU-11 ,
LU-12
Oil level (Low)/Filthy oil LU-8, "In-spection"
Cooling Radiator/Hose/Radiator filler cap
55555 55 45 CO-15
Thermostat 5
CO-22
Water pumpCO-20
Water galleryCO-6
Cooling fan 5CO-18,
CO-
19
Coolant level (Low)/Contaminat-
ed coolant 5
CO-10
IVIS (INFINITI Vehicle Immobilizer System —
NATS) 11
SEC-6
SYMPTOM
Reference
page
HARD/NO START/RESTART (EXCP. HA)
ENGINE STALL
HESITATION/SURGING/FLAT SPOT
SPARK KNOCK/DETONATION
LACK OF POWER/POOR ACCELERATION
HIGH IDLE/LOW IDLE
ROUGH IDLE/HUNTING
IDLING VIBRATION
SLOW/NO RETURN TO IDLE
OVERHEATS/WATER TEMPERATURE HIGH
EXCESSIVE FUEL CONSUMPTION
EXCESSIVE OIL CONSUMPTION
BATTERY DEAD (UNDER CHARGE)
Warranty symptom code AA AB AC AD AE AF AG AH AJ AK AL AM HA
Revision: December 20092009 QX56
Page 1811 of 4171
![INFINITI QX56 2009 Factory Service Manual
EC-484
< PREPARATION >[VK56DE]
PREPARATION
PREPARATION
PREPARATION
Special Service ToolINFOID:0000000003771744
The actual shapes of Kent-Moore tool
s may differ from those of special service tools il INFINITI QX56 2009 Factory Service Manual
EC-484
< PREPARATION >[VK56DE]
PREPARATION
PREPARATION
PREPARATION
Special Service ToolINFOID:0000000003771744
The actual shapes of Kent-Moore tool
s may differ from those of special service tools il](/manual-img/42/57031/w960_57031-1810.png)
EC-484
< PREPARATION >[VK56DE]
PREPARATION
PREPARATION
PREPARATION
Special Service ToolINFOID:0000000003771744
The actual shapes of Kent-Moore tool
s may differ from those of special service tools illustrated here.
Tool number
(Kent-Moore No.)
Tool nameDescription
EG17650301
(J-33984-A)
Radiator cap tester
adapter Adapting radiator cap tester to radiator cap and ra-
diator filler neck
a: 28 (1.10) dia.
b: 31.4 (1.236) dia.
c: 41.3 (1.626) dia.
Unit: mm (in)
KV10117100
(J-36471-A)
Heated oxygen sensor
wrench Loosening or tightening heated oxygen sensors
with 22 mm (0.87 in) hexagon nut
KV10114400
(J-38365)
Heated oxygen sensor
wrench Loosening or tightening heated oxygen sensors
a: 22 mm (0.87 in)
(J-44626)
Air fuel ratio (A/F) sen-
sor wrench Loosening or tightening air fuel ratio (A/F) sensor 1
(J-44321)
Fuel pressure gauge
kit Checking fuel pressure
(J-44321-6)
Fuel pressure adapter Connecting fuel pressure gauge to quick connec-
tor type fuel lines.
S-NT564
S-NT379
S-NT636
LEM054
LEC642
LBIA0376E
Revision: December 20092009 QX56
Page 1902 of 4171

ENGINE ASSEMBLYEM-79
< REMOVAL AND INSTALLATION >
C
DE
F
G H
I
J
K L
M A
EM
NP
O
1. Release the fuel pressure. Refer to
EC-487, "Fuel Pressure Check".
2. Drain the engine coolant. Refer to CO-11, "
Changing Engine Coolant".
3. Drain the engine oil. Refer to LU-9, "
Changing Engine Oil".
4. Disconnect the battery negative and positive terminal. Refer to PG-76, "
Removal and Installation".
5. Remove the engine hood. Refer to DLK-230, "
Removal and Installation of Hood Assembly".
6. Remove the cowl extension. Refer to EXT-18, "
Removal and Installation".
7. Remove the air duct and air cleaner case assembly. Refer to EM-25, "
Removal and Installation".
8. Remove the radiator assembly and hoses. Refer to CO-15, "
Removal and Installation".
NOTE:
To prevent possible A/T fluid drain from transmissi on opening, use appropriate cap to close off transmis-
sion opening during operation.
9. Remove the drive belt. Refer to EM-13, "
Removal and Installation".
10. Remove the fan blade. Refer to CO-18, "
Removal and Installation (Crankshaft Driven Type)".
11. Disconnect the engine room harness from the fuse box and set it aside.
12. Disconnect the ECM.
13. Disconnect the engine room harness from the engine side and set it aside.
14. Disconnect the engine harness grounds.
15. Disconnect the power steering reservoir t ank from the engine and move it aside.
16. Disconnect the power steering oil pump from the engine. Move it aside and secure it using suitable wire or rope. Refer to ST-26, "
Removal and Installation"
17. Remove the A/C compressor bolts and set the compressor aside. Refer to HA-31, "Removal and Installa-
tion for Compressor" (ATC).
18. Disconnect the brake booster vacuum hose.
19. Disconnect the EVAP line.
20. Disconnect the fuel hose at the engine side connection. Refer to EM-40, "
Removal and Installation".
21. Disconnect the heater hoses at the cowl, and in stall plugs to avoid leakage of engine coolant.
22. Remove the A/T oil level indicator and indicator tube upper bolts.
23. Remove the front final drive assembly (4WD only). Refer to DLN-215, "
Removal and Installation".
24. Remove the exhaust manifolds. Refer to EM-30, "
Removal and Installation".
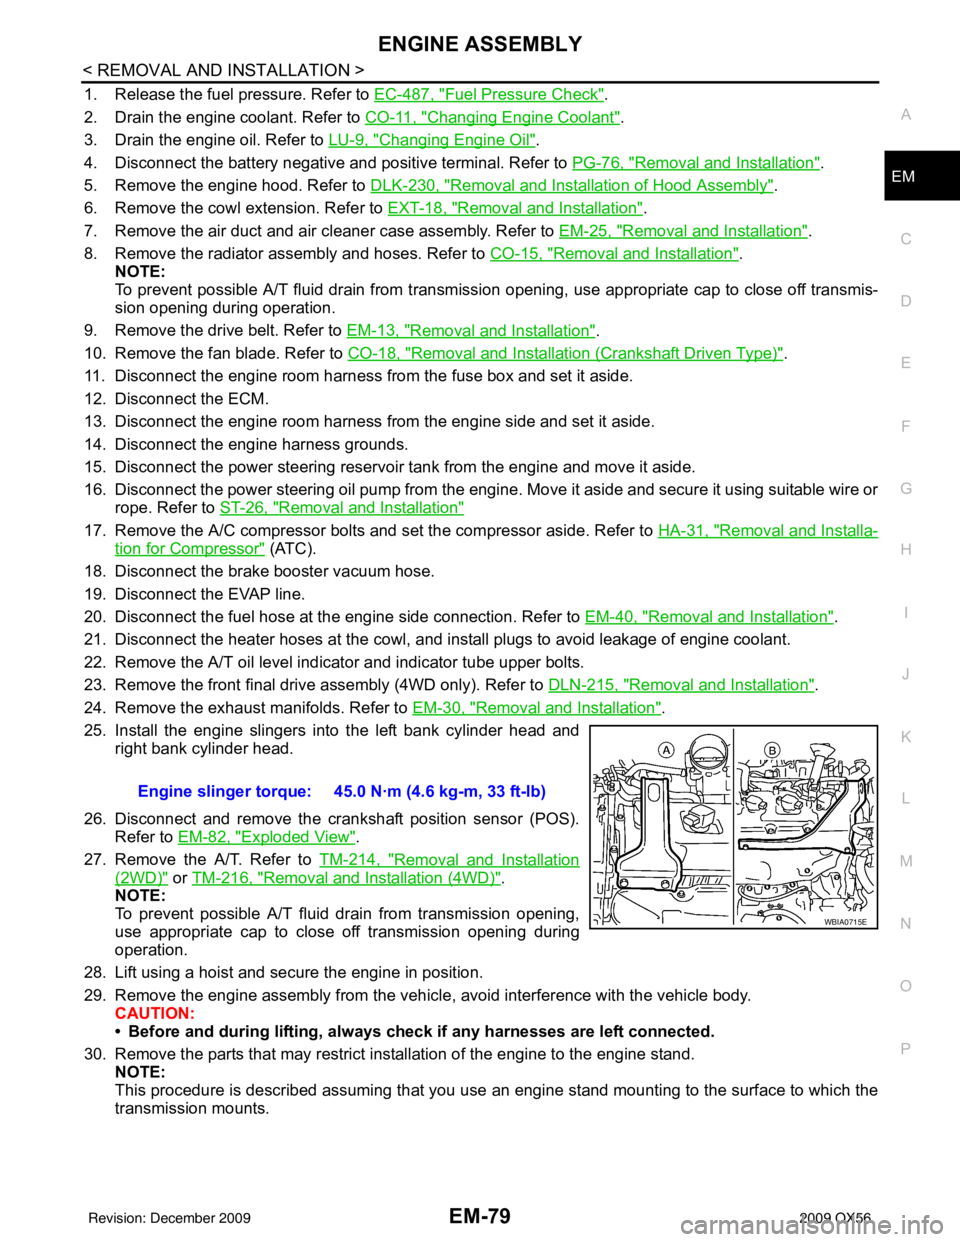
25. Install the engine slingers into the left bank cylinder head and right bank cylinder head.
26. Disconnect and remove the crankshaft position sensor (POS). Refer to EM-82, "
Exploded View".
27. Remove the A/T. Refer to TM-214, "
Removal and Installation
(2WD)" or TM-216, "Removal and Installation (4WD)".
NOTE:
To prevent possible A/T fluid drain from transmission opening,
use appropriate cap to close off transmission opening during
operation.
28. Lift using a hoist and secure the engine in position.
29. Remove the engine assembly from the vehicl e, avoid interference with the vehicle body.
CAUTION:
• Before and during lifting, always check if any harnesses are left connected.
30. Remove the parts that may restrict installation of the engine to the engine stand. NOTE:
This procedure is described assuming that you use an engine stand mounting to the surface to which the
transmission mounts. Engine slinger torque: 45.0 N·m (4.6 kg-m, 33 ft-lb)
WBIA0715E
Revision: December 20092009 QX56
Page 2220 of 4171

GI-26
< PRECAUTION >
PRECAUTIONS
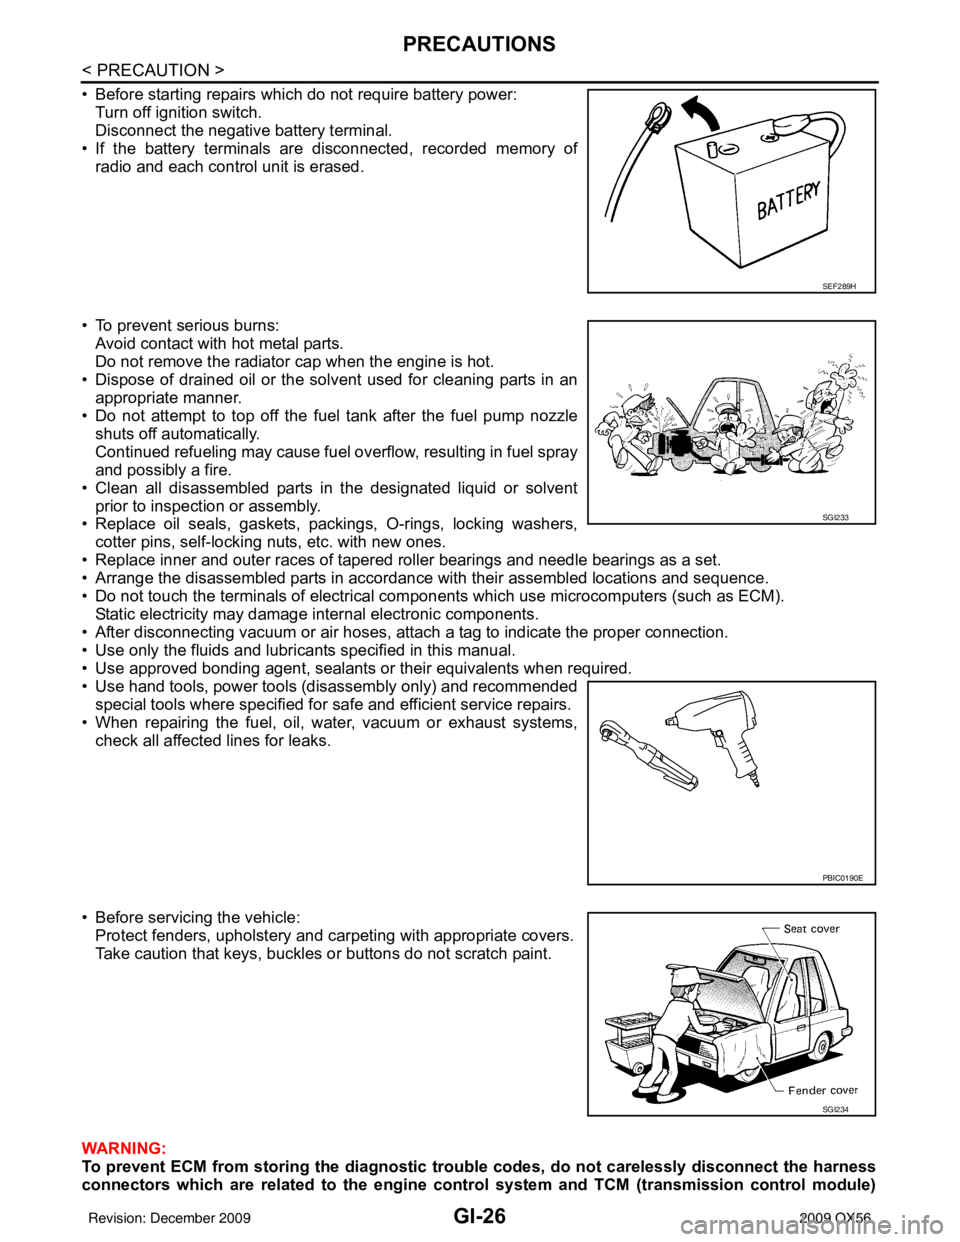
• Before starting repairs which do not require battery power:Turn off ignition switch.
Disconnect the negative battery terminal.
• If the battery terminals are disconnected, recorded memory of radio and each control unit is erased.
• To prevent serious burns: Avoid contact with hot metal parts.
Do not remove the radiator cap when the engine is hot.
• Dispose of drained oil or the solvent used for cleaning parts in an appropriate manner.
• Do not attempt to top off the fuel tank after the fuel pump nozzle
shuts off automatically.
Continued refueling may cause fuel overflow, resulting in fuel spray
and possibly a fire.
• Clean all disassembled parts in the designated liquid or solvent prior to inspection or assembly.
• Replace oil seals, gaskets, packings, O-rings, locking washers,
cotter pins, self-locking nuts, etc. with new ones.
• Replace inner and outer races of tapered roller bearings and needle bearings as a set.
• Arrange the disassembled parts in accordance with their assembled locations and sequence.
• Do not touch the terminals of electrical com ponents which use microcomputers (such as ECM).
Static electricity may damage internal electronic components.
• After disconnecting vacuum or air hoses, atta ch a tag to indicate the proper connection.
• Use only the fluids and lubricants specified in this manual.
• Use approved bonding agent, sealants or their equivalents when required.
• Use hand tools, power tools (disassembly only) and recommended special tools where specified for safe and efficient service repairs.
• When repairing the fuel, oil, water, vacuum or exhaust systems, check all affected lines for leaks.
• Before servicing the vehicle: Protect fenders, upholstery and carpeting with appropriate covers.
Take caution that keys, buckles or buttons do not scratch paint.
WARNING:
To prevent ECM from storing the diagnostic tro uble codes, do not carelessly disconnect the harness
connectors which are related to the engine control system and TCM (transmission control module)
SEF289H
SGI233
PBIC0190E
SGI234
Revision: December 20092009 QX56
Page 2308 of 4171

HA-44
< ON-VEHICLE REPAIR >
CONDENSER
CONDENSER
Removal and Installation for CondenserINFOID:0000000003775319
REMOVAL
1. Discharge the refrigerant. Refer to HA-20, "HFC-134a (R-134a) Service Procedure".
2. Remove the radiator. Refer to CO-15, "Removal and Installation"
.
CAUTION:
Be careful not to damage the core su rface of the condenser and the radiator.
3. Disconnect the high-pressure flexible hose and the high-pressure pipe from the condenser.
CAUTION:
Cap or wrap the joint of the pipe with suitable ma terial such as vinyl tape to avoid the entry of air.
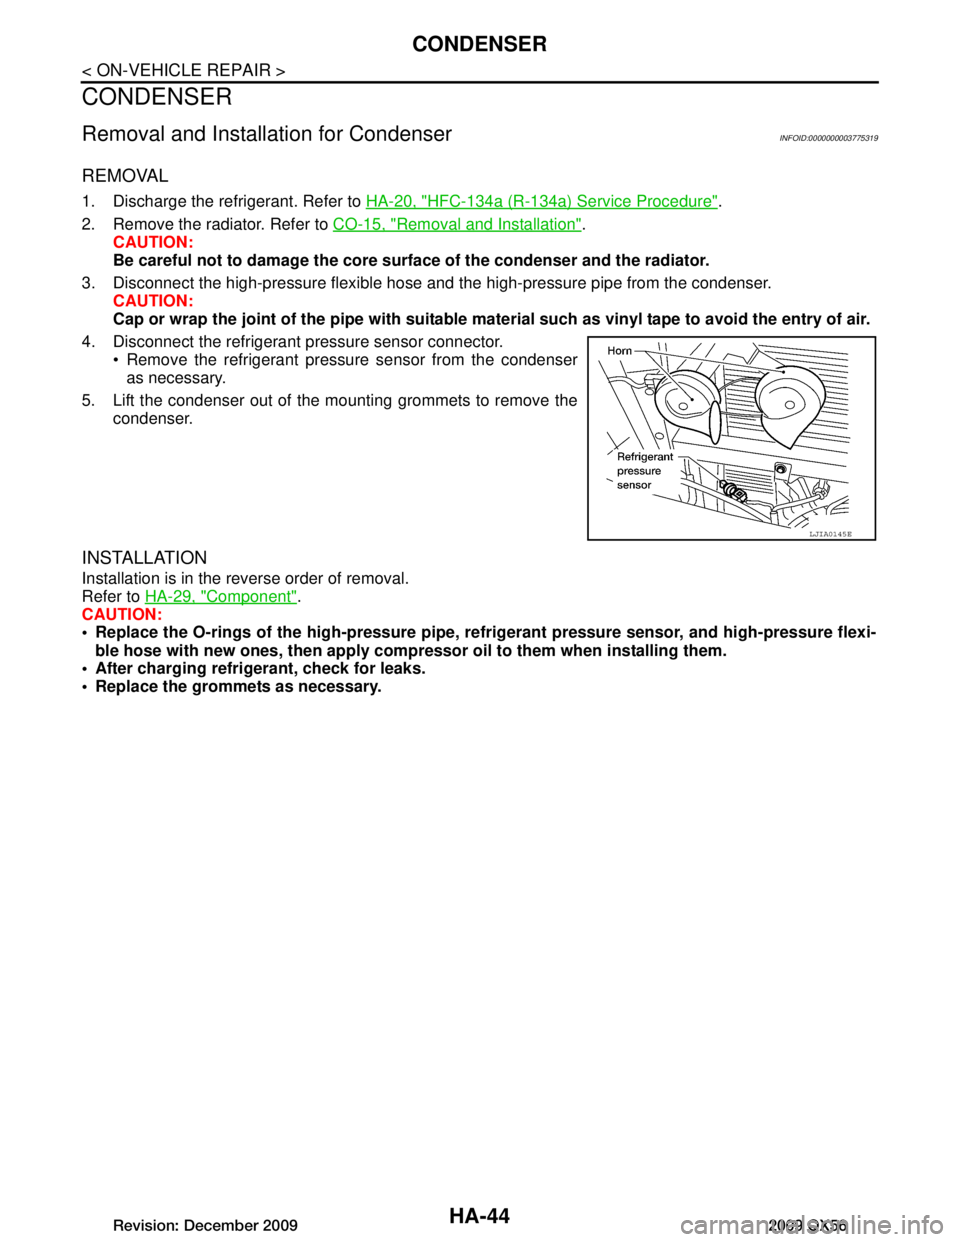
4. Disconnect the refrigerant pressure sensor connector. Remove the refrigerant pressure sensor from the condenseras necessary.
5. Lift the condenser out of the mounting grommets to remove the condenser.
INSTALLATION
Installation is in the reverse order of removal.
Refer to HA-29, "Component"
.
CAUTION:
Replace the O-rings of the high-p ressure pipe, refrigerant pressure sensor, and high-pressure flexi-
ble hose with new ones, then apply compr essor oil to them when installing them.
After charging refrigerant, check for leaks.
Replace the grommets as necessary.
LJIA0145E
Revision: December 20092009 QX56