2009 HYUNDAI TUCSON clock
[x] Cancel search: clockPage 10 of 273
F9
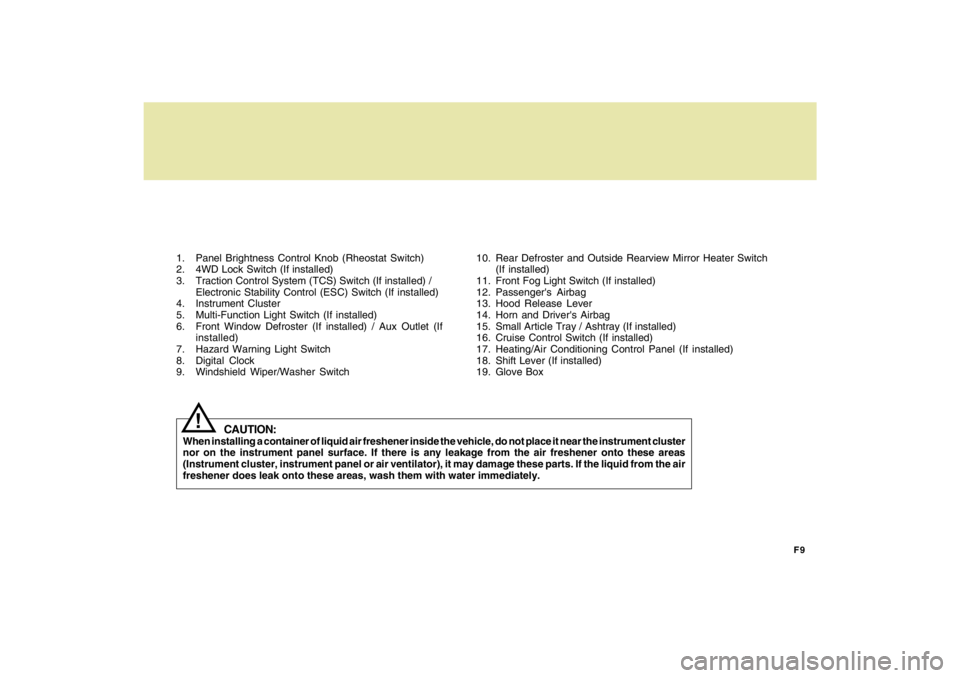
1. Panel Brightness Control Knob (Rheostat Switch)
2. 4WD Lock Switch (If installed)
3. Traction Control System (TCS) Switch (If installed) /
Electronic Stability Control (ESC) Switch (If installed)
4. Instrument Cluster
5. Multi-Function Light Switch (If installed)
6. Front Window Defroster (If installed) / Aux Outlet (If
installed)
7. Hazard Warning Light Switch
8. Digital Clock
9. Windshield Wiper/Washer Switch10. Rear Defroster and Outside Rearview Mirror Heater Switch
(If installed)
11. Front Fog Light Switch (If installed)
12. Passenger's Airbag
13. Hood Release Lever
14. Horn and Driver's Airbag
15. Small Article Tray / Ashtray (If installed)
16. Cruise Control Switch (If installed)
17. Heating/Air Conditioning Control Panel (If installed)
18. Shift Lever (If installed)
19. Glove Box
CAUTION:
When installing a container of liquid air freshener inside the vehicle, do not place it near the instrument cluster
nor on the instrument panel surface. If there is any leakage from the air freshener onto these areas
(Instrument cluster, instrument panel or air ventilator), it may damage these parts. If the liquid from the air
freshener does leak onto these areas, wash them with water immediately.
!
Page 56 of 273

1
FEATURES OF YOUR HYUNDAI
45
!
WARNING:
WARNING:
o The side impact airbag is supplemen-
tal to the driver's and the passenger's
seat belt systems and is not a substi-
tute for them. Your seat belts must be
worn at all times while the vehicle is in
motion. The airbags deploy only in
certain side impact conditions severe
enough to cause significant injury to
the vehicle occupants.
!
HTB072
Side airbag
sensor
o For best protection from the side im-
pact airbag system and to avoid being
injured by the deploying side impact
airbag, both front seat occupants
should sit in an upright position with
the seat belt properly fastened. The
driver's hands should be placed on
the steering wheel at the 9:00 and
3:00 o'clock positions. The
passenger's arms and hands should
be placed on their laps.
o Do not use any accessory seat covers.
o Use of seat covers could reduce or pre-
vent the effectiveness of the system.
o Do not install any accessories on or
near the side impact airbag.
o Do not place any objects over the airbag
or between the airbag and yourself.
o Do not place any objects (an umbrella,
bag, etc.) between the front door and
the front seat. Such objects may be-
come dangerous projectiles and
cause injury if the supplemental side
impact air bag inflates.
o To prevent unexpected deployment of
the side impact air bag that may result
in personal injury, avoid impact to the
side airbag sensor when the ignition
key is on.
B990C01LZ-GATCurtain AirbagCurtain airbags are located along both
sides of the roof rails above the front and
rear doors.
They are designed to help protect the
heads of the front seat occupants and the
rear outboard seat occupants in certain
side impact collisions.
The curtain airbags are designed to de-
ploy only during certain side impact colli-
sions, depending on the crash severity,
angle, speed and impact. The curtain
airbags are not designed to deploy in all
side impact situations, collisions from the
front or rear of the vehicle or in most rollover
situations.
HJM2056
Curtain Airbag
Page 77 of 273
1FEATURES OF YOUR HYUNDAI66
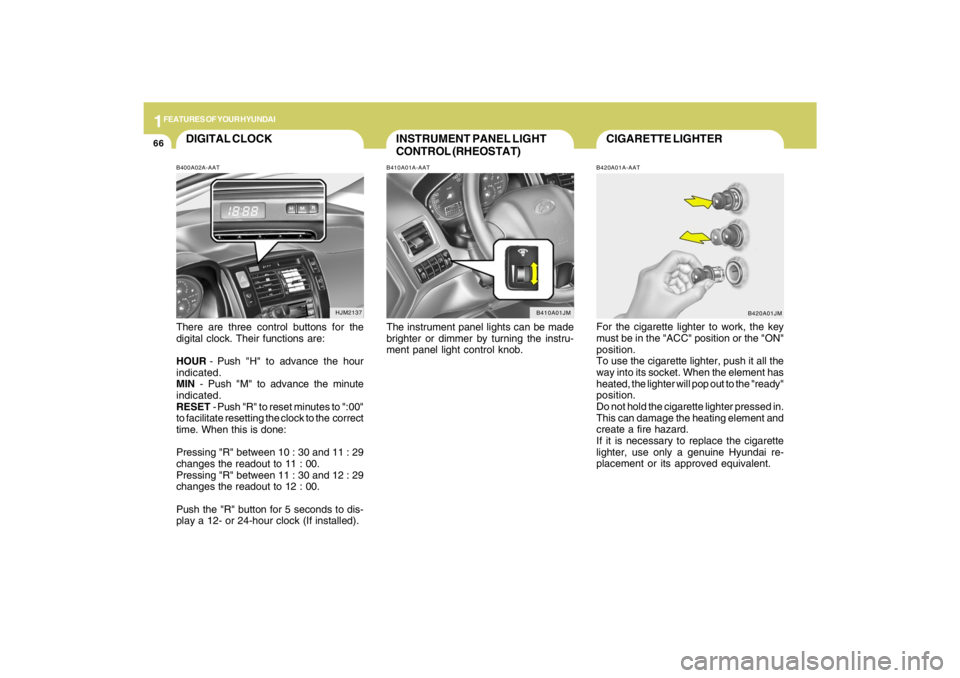
CIGARETTE LIGHTERB420A01A-AATFor the cigarette lighter to work, the key
must be in the "ACC" position or the "ON"
position.
To use the cigarette lighter, push it all the
way into its socket. When the element has
heated, the lighter will pop out to the "ready"
position.
Do not hold the cigarette lighter pressed in.
This can damage the heating element and
create a fire hazard.
If it is necessary to replace the cigarette
lighter, use only a genuine Hyundai re-
placement or its approved equivalent.
B420A01JM
INSTRUMENT PANEL LIGHT
CONTROL (RHEOSTAT)B410A01A-AATThe instrument panel lights can be made
brighter or dimmer by turning the instru-
ment panel light control knob.
B410A01JM
DIGITAL CLOCKB400A02A-AATThere are three control buttons for the
digital clock. Their functions are:
HOUR - Push "H" to advance the hour
indicated.
MIN - Push "M" to advance the minute
indicated.
RESET - Push "R" to reset minutes to ":00"
to facilitate resetting the clock to the correct
time. When this is done:
Pressing "R" between 10 : 30 and 11 : 29
changes the readout to 11 : 00.
Pressing "R" between 11 : 30 and 12 : 29
changes the readout to 12 : 00.
Push the "R" button for 5 seconds to dis-
play a 12- or 24-hour clock (If installed).
HJM2137
Page 122 of 273
1
FEATURES OF YOUR HYUNDAI
111111111111111
CARE OF DISCS
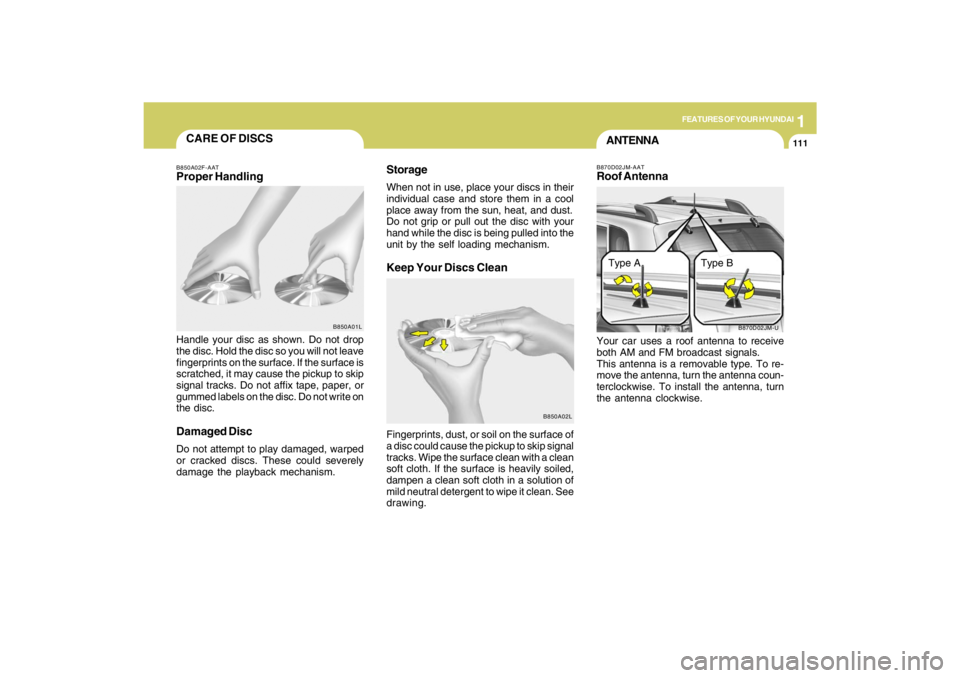
B850A02L B850A02F-AAT
Proper HandlingStorage
When not in use, place your discs in their
individual case and store them in a cool
place away from the sun, heat, and dust.
Do not grip or pull out the disc with your
hand while the disc is being pulled into the
unit by the self loading mechanism.Keep Your Discs Clean
Handle your disc as shown. Do not drop
the disc. Hold the disc so you will not leave
fingerprints on the surface. If the surface is
scratched, it may cause the pickup to skip
signal tracks. Do not affix tape, paper, or
gummed labels on the disc. Do not write on
the disc.Damaged DiscDo not attempt to play damaged, warped
or cracked discs. These could severely
damage the playback mechanism.Fingerprints, dust, or soil on the surface of
a disc could cause the pickup to skip signal
tracks. Wipe the surface clean with a clean
soft cloth. If the surface is heavily soiled,
dampen a clean soft cloth in a solution of
mild neutral detergent to wipe it clean. See
drawing.
B850A01L
ANTENNA
B870D02JM-U B870D02JM-AAT
Roof AntennaYour car uses a roof antenna to receive
both AM and FM broadcast signals.
This antenna is a removable type. To re-
move the antenna, turn the antenna coun-
terclockwise. To install the antenna, turn
the antenna clockwise.Type A Type B
Page 126 of 273
1
FEATURES OF YOUR HYUNDAI
115115115115115
11. TUNE/ENTER ButtonTurn this button clockwise by one notch to
increase frequency by 0.05Mhz from cur-
rent frequency.
Turn this button counterclockwise by one
notch to decrease frequency by 0.05Mhz
from current frequency.
Press this button while holding SET UP
button to activate / inactivate the item to.
Select SET UP item using left and right
function of the Tune button.
Pressing the changes the BASS, MIDR-
ANGE, TREBLE, FADER and BALANCE
TUNE mode.
The mode selected is shown on the dis-
play. After selecting each mode, rotate the
Audio control knob clockwise or counter-
clockwise.
o BASS Control
To increase the BASS, rotate the knob
clockwise, while to decrease the BASS,
rotate the knob counterclockwise.
o MID-RANGE Control
To increase the MID-RANGE, rotate the
knob clockwise, while to decrease the
MID-RANGE, rotate the knob counterclock-
wise.o TREBLE Control
To increase the TREBLE, rotate the knob
clockwise, while to decrease the TREBLE,
rotate the knob counterclockwise.
o FADER Control
Turn the control knob clockwise to emph-
asize rear speaker sound (front speaker
sound will be attenuated). When the con-
trol knob is turned counterclockwise, front
speaker sound will be emphasized (rear
speaker sound will be attenuated).
o BALANCE Control
Rotate the knob clockwise to emphasize
right speaker sound (left speaker sound
will be attenuated). When the control knob
is turned counter clockwise, left speaker
sound will be emphasized (right speaker
sound will be attenuated).
12. CAT(FLDR) ButtonMoves [CAT
] Button when Category Up
search operation.
o Category is moved Up from the cat-
egory currently being received and
Category Name becomes displayed.
o If the Enter Key is not pressed within 5
seconds, then the previous mode will
be restored.o If the Key is pressed while in the last
Category, then the first category will
become displayed and operation will
be repeated.
o Corresponding category can be se-
lected by pressing ENTER.
Moves [CAT
] Button when Category
Down search operation.
o Category is moved Down from the cat-
egory currently being received and
Category Name becomes displayed.
o If the Enter Key is not pressed within 5
seconds, then the previous mode will
be restored.
o If the [CAT ] Key is pressed while in
the first Category, then the last category
will become displayed and operation
will be repeated.
o Corresponding category can be se-
lected by pressing ENTER.
13. Preset ButtonPush [1]~[6] buttons less than 0.8 seconds
to play the channel saved in each button.
Push pre-set button for 0.8 seconds or
longer to save current channel to the re-
spective button with a beep.
Page 128 of 273
1
FEATURES OF YOUR HYUNDAI
117117117117117
1. CD Loading SlotPlease face printed side upward and gen-
tly push in. When the ignition switch is on
ACC or ON and power is off, power is
automatically turned on if the CD is loaded.
This CDP supports both 8cm and 12 cm
CDs. But if VCD, Data CD, MP3 CD are
loaded, "Er-6" message will appear and
CD will be ejected.2. CD IndicatorWhen car ignition switch is ACC or ON and
if the CD is loaded, this indicator is lighted.
If the CD is ejected the light is turned off.3. CD Eject ButtonPush
button to eject the CD during CD
playback. This button is enabled when
ignition switch is off.
4. CD/AUX Selection ButtonIf there is a cd in the CDP DECK it turns to
CD mode, and if a device is connected to
AUX then it toggles.
CD➟AUX➟CD··· when the button is
pressed each time.(It will not turn to AUX if
the auxiliary device is not connected)
5. Automatic Track Selection Buttono Push [SEEK
] button for less than 0.8
seconds to play from the beginning of
current song.
o Push [SEEK ] button for less than 0.8
seconds and press again within 1 sec-
onds to play the previous song.
o Push [SEEK ] button for 0.8 or longer
to initiate reverse direction high speed
sound search of current song.
o Push [SEEK ] button for less than 0.8
seconds to play the next song.
o Push [SEEK ] button for 0.8 or longer
to initiate high speed sound search of
current song.
6. INFO ButtonDisplays the information of the current CD
TRACK in the order of DISC TITLE ➟DISC
ARTIST➟TRACK TITLE➟ TRACK ART-
IST ➟TOTAL TRACK➟ Play Screen ➟DISC
TITLE➟···.(not displayed if the information
is not available on the DISC.)7. TUNE/ENTER ButtonTurn this button clockwise to display songs
after current song.
Also, turn this button counterclockwise to
display songs before current song.
To listen to the displayed song, press the
button to skip to the song and play.Pressing the changes the BASS, MIDR-
ANGE, TREBLE, FADER and BALANCE
TUNE mode.
The mode selected is shown on the dis-
play. After selecting each mode, rotate the
Audio control knob clockwise or counter-
clockwise.
o BASS Control
To increase the BASS, rotate the knob
clockwise, while to decrease the BASS,
rotate the knob counterclockwise.
o MID-RANGE Control
To increase the MID-RANGE, rotate the
knob clockwise, while to decrease the
MID-RANGE, rotate the knob counterclock-
wise.
o TREBLE Control
To increase the TREBLE, rotate the knob
clockwise, while to decrease the TREBLE,
rotate the knob counterclockwise.
o FADER Control
Turn the control knob clockwise to emph-
asize rear speaker sound (front speaker
sound will be attenuated). When the con-
trol knob is turned counterclockwise, front
speaker sound will be emphasized (rear
speaker sound will be attenuated).
Page 129 of 273
1FEATURES OF YOUR HYUNDAI
118
o BALANCE Control
Rotate the knob clockwise to emphasize
right speaker sound (left speaker sound
will be attenuated). When the control knob
is turned counter clockwise, left speaker
sound will be emphasized (right speaker
sound will be attenuated).8. RANDOM Play ButtonTurns on/off the randomization of the play
list of files in the currently played DISC.
To cancel the mode, press the key once
again.9. REPEAT ButtonRepeats current song when the button is
pressed for less than 0.8 seconds.
Repeats the entire DISC when the button
is pressed for 0.8 seconds or longer.10. SCAN Play ButtonPlays first 10 seconds of each song in the
DISC. To cancel the mode, press the key
once again.
11. FOLDER ButtonFolder up/down operation.
o Folder is moved up or down from cur-
rently playing and folder name becomes
displayed.
o Press enter key to play the selected
folder.
o If the enter key is not pressed with in 5
seconds, then the previous folder name
will be displayed again.
Page 132 of 273
1
FEATURES OF YOUR HYUNDAI
121121121121121
11. TUNE/ENTER ButtonTurn this button clockwise by one notch to
increase frequency by 0.05Mhz from cur-
rent frequency.
Turn this button counterclockwise by one
notch to decrease frequency by 0.05Mhz
from current frequency.
Press this button while holding SET UP
button to activate / inactivate the item to.
Select SET UP item using left and right
function of the Tune button.
Pressing the changes the BASS, MIDR-
ANGE, TREBLE, FADER and BALANCE
TUNE mode.
The mode selected is shown on the dis-
play. After selecting each mode, rotate the
Audio control knob clockwise or counter-
clockwise.
o BASS Control
To increase the BASS, rotate the knob
clockwise, while to decrease the BASS,
rotate the knob counterclockwise.
o MID-RANGE Control
To increase the MID-RANGE, rotate the
knob clockwise, while to decrease the
MID-RANGE, rotate the knob counterclock-
wise.o TREBLE Control
To increase the TREBLE, rotate the knob
clockwise, while to decrease the TREBLE,
rotate the knob counterclockwise.
o FADER Control
Turn the control knob clockwise to emph-
asize rear speaker sound (front speaker
sound will be attenuated). When the con-
trol knob is turned counterclockwise, front
speaker sound will be emphasized (rear
speaker sound will be attenuated).
o BALANCE Control
Rotate the knob clockwise to emphasize
right speaker sound (left speaker sound
will be attenuated). When the control knob
is turned counter clockwise, left speaker
sound will be emphasized (right speaker
sound will be attenuated).
12. CAT(FLDR) ButtonMoves [CAT
] Button when Category Up
search operation.
o Category is moved Up from the cat-
egory currently being received and
Category Name becomes displayed.
o If the Enter Key is not pressed within 5
seconds, then the previous mode will
be restored.o If the Key is pressed while in the last
Category, then the first category will
become displayed and operation will
be repeated.
o Corresponding category can be se-
lected by pressing ENTER.
Moves [CAT
] Button when Category
Down search operation.
o Category is moved Down from the cat-
egory currently being received and
Category Name becomes displayed.
o If the Enter Key is not pressed within 5
seconds, then the previous mode will
be restored.
o If the [CAT ] Key is pressed while in
the first Category, then the last category
will become displayed and operation
will be repeated.
o Corresponding category can be se-
lected by pressing ENTER.
13. Preset ButtonPush [1]~[6] buttons less than 0.8 seconds
to play the channel saved in each button.
Push pre-set button for 0.8 seconds or
longer to save current channel to the re-
spective button with a beep.