2009 HYUNDAI TUCSON service
[x] Cancel search: servicePage 62 of 273
1
FEATURES OF YOUR HYUNDAI
51
!
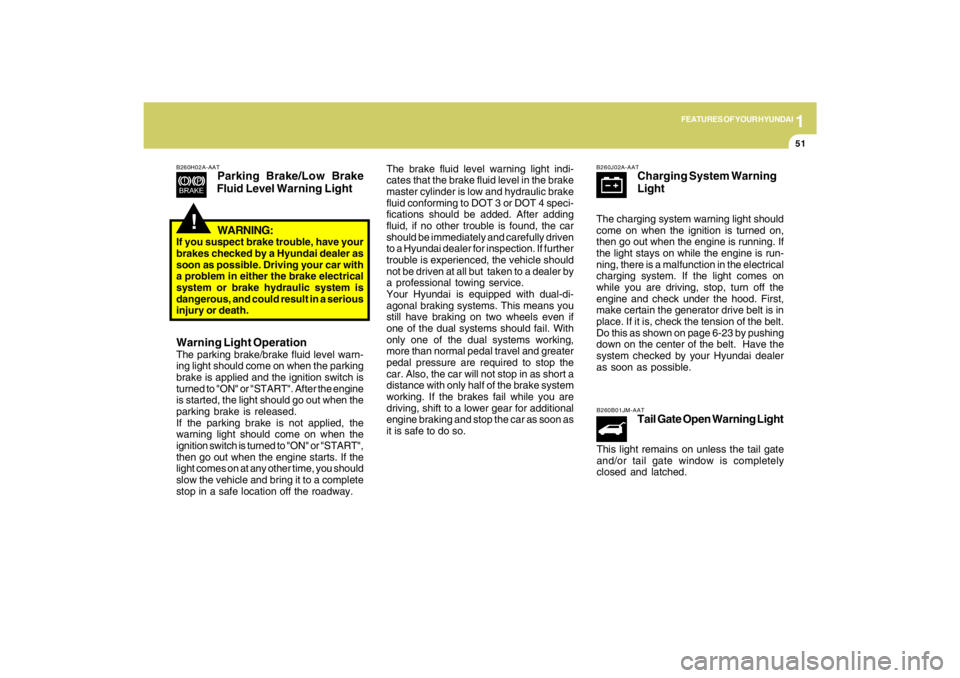
B260H02A-AAT
Parking Brake/Low Brake
Fluid Level Warning Light
The brake fluid level warning light indi-
cates that the brake fluid level in the brake
master cylinder is low and hydraulic brake
fluid conforming to DOT 3 or DOT 4 speci-
fications should be added. After adding
fluid, if no other trouble is found, the car
should be immediately and carefully driven
to a Hyundai dealer for inspection. If further
trouble is experienced, the vehicle should
not be driven at all but taken to a dealer by
a professional towing service.
Your Hyundai is equipped with dual-di-
agonal braking systems. This means you
still have braking on two wheels even if
one of the dual systems should fail. With
only one of the dual systems working,
more than normal pedal travel and greater
pedal pressure are required to stop the
car. Also, the car will not stop in as short a
distance with only half of the brake system
working. If the brakes fail while you are
driving, shift to a lower gear for additional
engine braking and stop the car as soon as
it is safe to do so.
WARNING:
If you suspect brake trouble, have your
brakes checked by a Hyundai dealer as
soon as possible. Driving your car with
a problem in either the brake electrical
system or brake hydraulic system is
dangerous, and could result in a serious
injury or death.Warning Light OperationThe parking brake/brake fluid level warn-
ing light should come on when the parking
brake is applied and the ignition switch is
turned to "ON" or "START". After the engine
is started, the light should go out when the
parking brake is released.
If the parking brake is not applied, the
warning light should come on when the
ignition switch is turned to "ON" or "START",
then go out when the engine starts. If the
light comes on at any other time, you should
slow the vehicle and bring it to a complete
stop in a safe location off the roadway.
B260J02A-AAT
Charging System Warning
Light
The charging system warning light should
come on when the ignition is turned on,
then go out when the engine is running. If
the light stays on while the engine is run-
ning, there is a malfunction in the electrical
charging system. If the light comes on
while you are driving, stop, turn off the
engine and check under the hood. First,
make certain the generator drive belt is in
place. If it is, check the tension of the belt.
Do this as shown on page 6-23 by pushing
down on the center of the belt. Have the
system checked by your Hyundai dealer
as soon as possible.B260B01JM-AAT
Tail Gate Open Warning Light
This light remains on unless the tail gate
and/or tail gate window is completely
closed and latched.
Page 63 of 273
1FEATURES OF YOUR HYUNDAI52
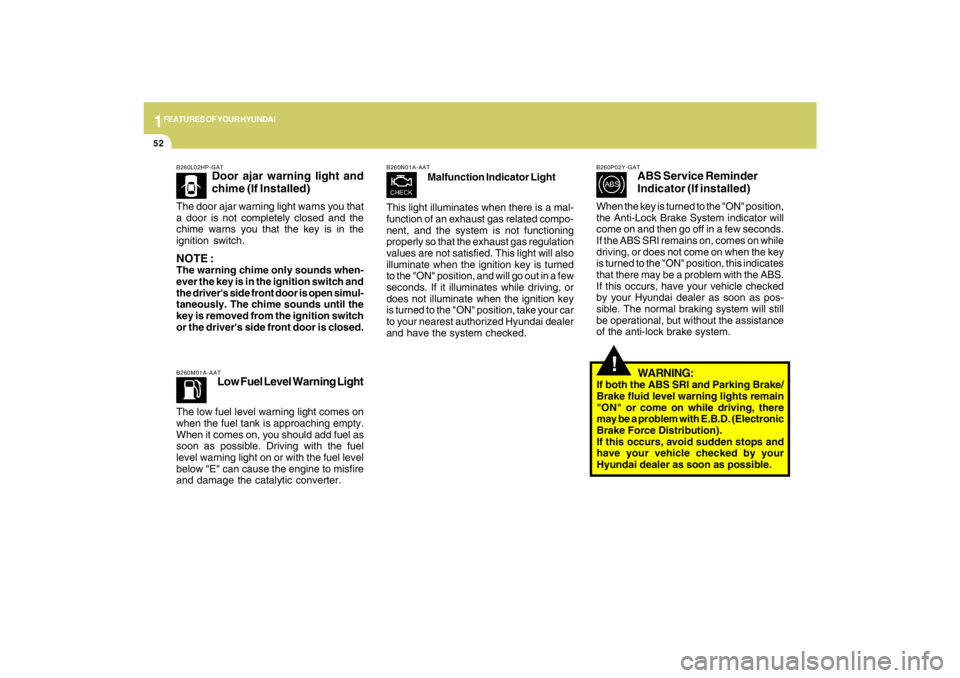
B260L02HP-GAT
Door ajar warning light and
chime (If Installed)
The door ajar warning light warns you that
a door is not completely closed and the
chime warns you that the key is in the
ignition switch.NOTE :The warning chime only sounds when-
ever the key is in the ignition switch and
the driver's side front door is open simul-
taneously. The chime sounds until the
key is removed from the ignition switch
or the driver's side front door is closed.
!
B260M01A-AAT
Low Fuel Level Warning Light
The low fuel level warning light comes on
when the fuel tank is approaching empty.
When it comes on, you should add fuel as
soon as possible. Driving with the fuel
level warning light on or with the fuel level
below "E" can cause the engine to misfire
and damage the catalytic converter.
B260N01A-AAT
Malfunction Indicator Light
This light illuminates when there is a mal-
function of an exhaust gas related compo-
nent, and the system is not functioning
properly so that the exhaust gas regulation
values are not satisfied. This light will also
illuminate when the ignition key is turned
to the "ON" position, and will go out in a few
seconds. If it illuminates while driving, or
does not illuminate when the ignition key
is turned to the "ON" position, take your car
to your nearest authorized Hyundai dealer
and have the system checked.
B260P02Y-GAT
ABS Service Reminder
Indicator (If installed)
When the key is turned to the "ON" position,
the Anti-Lock Brake System indicator will
come on and then go off in a few seconds.
If the ABS SRI remains on, comes on while
driving, or does not come on when the key
is turned to the "ON" position, this indicates
that there may be a problem with the ABS.
If this occurs, have your vehicle checked
by your Hyundai dealer as soon as pos-
sible. The normal braking system will still
be operational, but without the assistance
of the anti-lock brake system.
WARNING:
If both the ABS SRI and Parking Brake/
Brake fluid level warning lights remain
"ON" or come on while driving, there
may be a problem with E.B.D. (Electronic
Brake Force Distribution).
If this occurs, avoid sudden stops and
have your vehicle checked by your
Hyundai dealer as soon as possible.
Page 152 of 273
2
DRIVING YOUR HYUNDAI
17
HJM1029
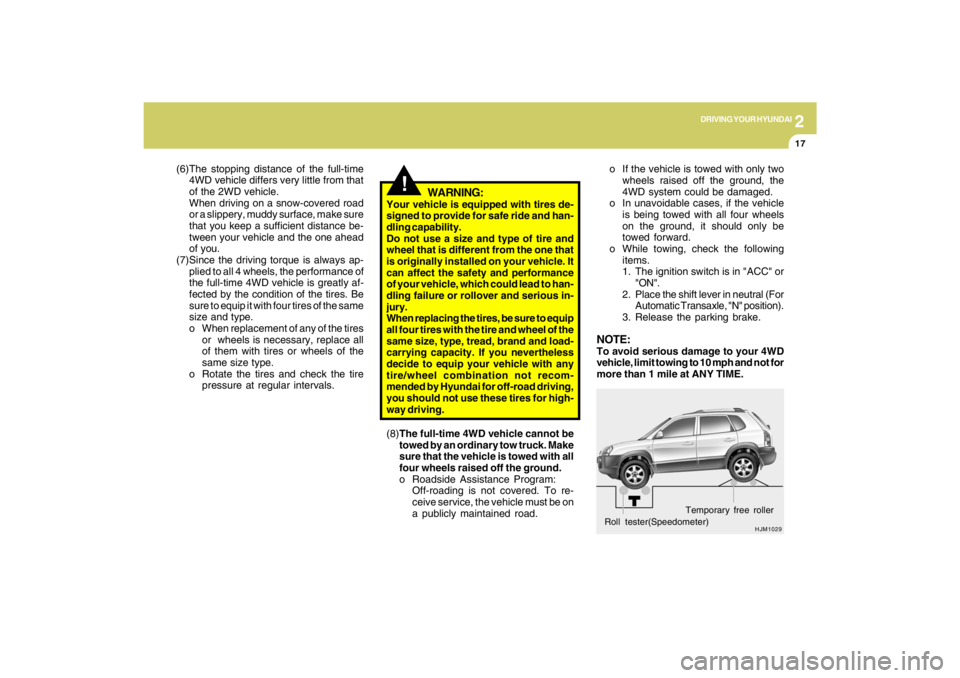
Roll tester(Speedometer)Temporary free rollero If the vehicle is towed with only two
wheels raised off the ground, the
4WD system could be damaged.
o In unavoidable cases, if the vehicle
is being towed with all four wheels
on the ground, it should only be
towed forward.
o While towing, check the following
items.
1. The ignition switch is in "ACC" or
"ON".
2. Place the shift lever in neutral (For
Automatic Transaxle, "N" position).
3. Release the parking brake.
NOTE:To avoid serious damage to your 4WD
vehicle, limit towing to 10 mph and not for
more than 1 mile at ANY TIME.
WARNING:
Your vehicle is equipped with tires de-
signed to provide for safe ride and han-
dling capability.
Do not use a size and type of tire and
wheel that is different from the one that
is originally installed on your vehicle. It
can affect the safety and performance
of your vehicle, which could lead to han-
dling failure or rollover and serious in-
jury.
When replacing the tires, be sure to equip
all four tires with the tire and wheel of the
same size, type, tread, brand and load-
carrying capacity. If you nevertheless
decide to equip your vehicle with any
tire/wheel combination not recom-
mended by Hyundai for off-road driving,
you should not use these tires for high-
way driving.
!
(6)The stopping distance of the full-time
4WD vehicle differs very little from that
of the 2WD vehicle.
When driving on a snow-covered road
or a slippery, muddy surface, make sure
that you keep a sufficient distance be-
tween your vehicle and the one ahead
of you.
(7)Since the driving torque is always ap-
plied to all 4 wheels, the performance of
the full-time 4WD vehicle is greatly af-
fected by the condition of the tires. Be
sure to equip it with four tires of the same
size and type.
o When replacement of any of the tires
or wheels is necessary, replace all
of them with tires or wheels of the
same size type.
o Rotate the tires and check the tire
pressure at regular intervals.
(8)The full-time 4WD vehicle cannot be
towed by an ordinary tow truck. Make
sure that the vehicle is towed with all
four wheels raised off the ground.
o Roadside Assistance Program:
Off-roading is not covered. To re-
ceive service, the vehicle must be on
a publicly maintained road.
Page 157 of 273

2
DRIVING YOUR HYUNDAI
22
o Take care of your tires. Keep them in-
flated to the recommended pressure.
Incorrect inflation, either too much or
too little, results in unnecessary tire
wear. Check the tire pressures at least
once a month.
o Be sure that the wheels are aligned
correctly. Improper alignment can re-
sult from hitting curbs or driving too fast
over irregular surfaces. Poor alignment
causes faster tire wear and may also
result in other problems as well as
greater fuel consumption.
o Keep your car in good condition. For
better fuel economy and reduced main-
tenance costs, maintain your car in ac-
cordance with the maintenance sched-
ule in Section 5. If you drive your car in
severe conditions, more frequent main-
tenance is required (see Section 5 for
details).
o Keep your car clean. For maximum
service, your Hyundai should be kept
clean and free of corrosive materials. It
is especially important that mud, dirt,
ice, etc. not be allowed to accumulate
on the underside of the car. This extra
weight can result in increased fuel con-
sumption and also contribute to corro-
sion.o Travel lightly. Don't carry unnecessary
weight in your car. Weight reduces fuel
economy.
o Don't let the engine idle longer than
necessary. If you are waiting (and not in
traffic), turn off your engine and restart
only when you're ready to go.
o Remember, your Hyundai does not re-
quire extended warm-up. After the en-
gine has started, allow the engine to run
for 10 to 20 seconds prior to placing the
vehicle in gear. In very cold weather,
however, give your engine a slightly
longer warm-up period.
o Don't "lug" or "over-rev" the engine.
Lugging is driving too slowly in too high
a gear resulting in the engine bucking.
If this happens, shift to a lower gear.
Over-revving is racing the engine be-
yond its safe limit. This can be avoided
by shifting at the recommended speeds.
o Use your air conditioning sparingly. The
air conditioning system is operated by
engine power so your fuel economy is
reduced when you use it.
DRIVING FOR ECONOMYC140A02A-AATYou can save fuel and get more miles from
your car if you follow these suggestions:
o Drive smoothly. Accelerate at a moder-
ate rate. Don't make "jack-rabbit" starts
or full-throttle shifts and maintain a
steady cruising speed. Don't race be-
tween stoplights. Try to adjust your
speed to that of the other traffic so you
don't have to change speeds unneces-
sarily. Avoid heavy traffic whenever pos-
sible. Always maintain a safe distance
from other vehicles so you can avoid
unnecessary braking. This also reduces
brake wear.
o Drive at a moderate speed. The faster
you drive, the more fuel your car uses.
Driving at a moderate speed, espe-
cially on the highway, is one of the most
effective ways to reduce fuel consump-
tion.
o Don't "ride" the brake or clutch pedal.
This can increase fuel consumption and
also increase wear on these compo-
nents. In addition, driving with your foot
resting on the brake pedal may cause
the brakes to overheat, which reduces
their effectiveness and may lead to more
serious consequences.
Page 176 of 273

3
WHAT TO DO IN AN EMERGENCY
7
Right, Rear Left, or Rear Right tire is
under-inflated, the low tire pressure tell-
tale may turn on at the same time as the
TPMS malfunction indicator.
Have the system checked by an autho-
rized Hyundai dealer as soon as pos-
sible to determine the cause of the
problem.
NOTE:
o The TPMS malfunction indicator
may be illuminated if the vehicle
is moving around electric power
supply cable or radio transmitter
such as police stations, govern-
ment and public offices, broad-
casting stations, military installa-
tions, airports, or transmitting
tower, etc. which can interfere with
normal operation of the Tire Pres-
sure Monitoring System (TPMS).
o The TPMS malfunction indicator
may be illuminated if snow chains
or some electronic devices, such
as notebook computer, are used
in the vehicle. This can interfere
with normal operation of the Tire
Pressure Monitoring System
(TPMS).o If there is a failed tire sensor, it is
possible for the TPMS to tempo-
rarily learn a replacement sensor
if closely driven to another ve-
hicle that is also equipped with
TPMS. In rare cases, this may
temporarily delay the TPMS mal-
function indicator from turning
on.
Changing a tire with TPMS
If you have a flat tire, the Low Tire
Pressure telltale will turn on. Have the
flat tire repaired by an authorized
Hyundai dealer as soon as possible or
replace the flat tire with the temporary
spare tire.
NOTE:
NEVER use a puncture-repairing
agent to repair and/or inflate a low
pressure tire. If used, you will have
to replace the tire pressure sensor.Each wheel is equipped with a tire
pressure sensor mounted inside the tire
behind the valve stem. You must use
TPMS specific wheels.
It is recommended that you always
have your tires serviced by an autho-
rized Hyundai dealer as soon as pos-
sible.
After you replace the low pressure tire
with the temporary spare tire, the TPMS
malfunction indicator may illuminate
after restarting and about 20 minutes of
continuous driving.
Once the low pressure tire is re-inflated
to the recommended pressure and in-
stalled on the vehicle, the TPMS mal-
function indicator and the low tire pres-
sure telltale will be soon extinguished.
If the low pressure and TPMS malfunc-
tion indicators are not extinguished af-
ter about 20 minutes of continuous
driving, please visit an authorized
Hyundai dealer.
You may not be able to identify a low tire
by simply looking at it. Always use a
good quality tire pressure gauge to
measure the tire's inflation pressure.
Page 184 of 273
3
WHAT TO DO IN AN EMERGENCY
15
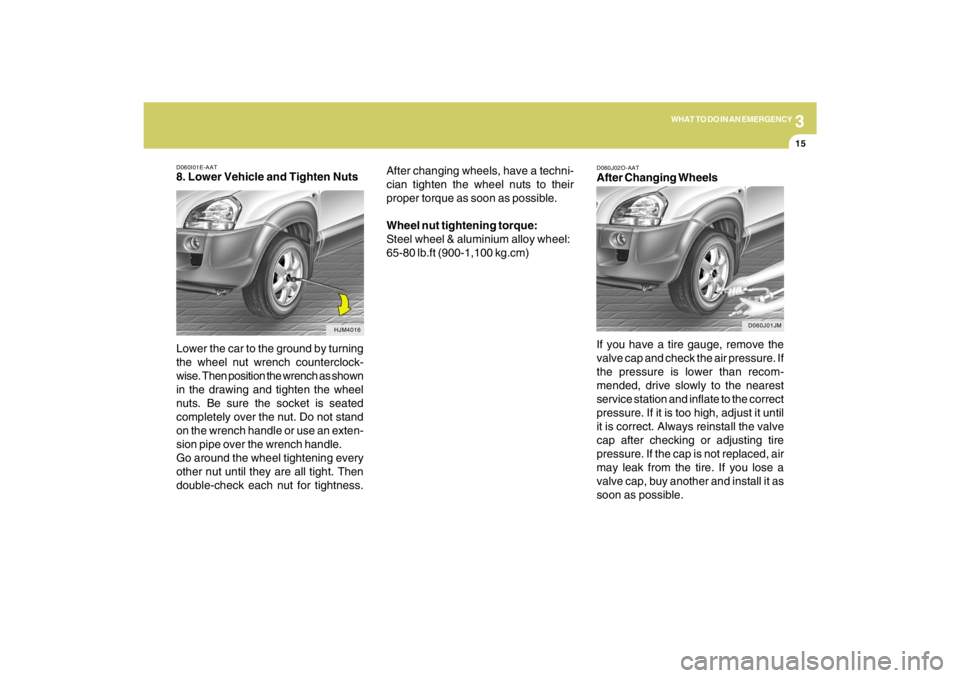
D060I01E-AAT8. Lower Vehicle and Tighten Nuts
Lower the car to the ground by turning
the wheel nut wrench counterclock-
wise. Then position the wrench as shown
in the drawing and tighten the wheel
nuts. Be sure the socket is seated
completely over the nut. Do not stand
on the wrench handle or use an exten-
sion pipe over the wrench handle.
Go around the wheel tightening every
other nut until they are all tight. Then
double-check each nut for tightness.
HJM4016
After changing wheels, have a techni-
cian tighten the wheel nuts to their
proper torque as soon as possible.
Wheel nut tightening torque:
Steel wheel & aluminium alloy wheel:
65-80 lb.ft (900-1,100 kg.cm)
D060J02O-AATAfter Changing Wheels
If you have a tire gauge, remove the
valve cap and check the air pressure. If
the pressure is lower than recom-
mended, drive slowly to the nearest
service station and inflate to the correct
pressure. If it is too high, adjust it until
it is correct. Always reinstall the valve
cap after checking or adjusting tire
pressure. If the cap is not replaced, air
may leak from the tire. If you lose a
valve cap, buy another and install it as
soon as possible.
D060J01JM
Page 185 of 273
316
WHAT TO DO IN AN EMERGENCY
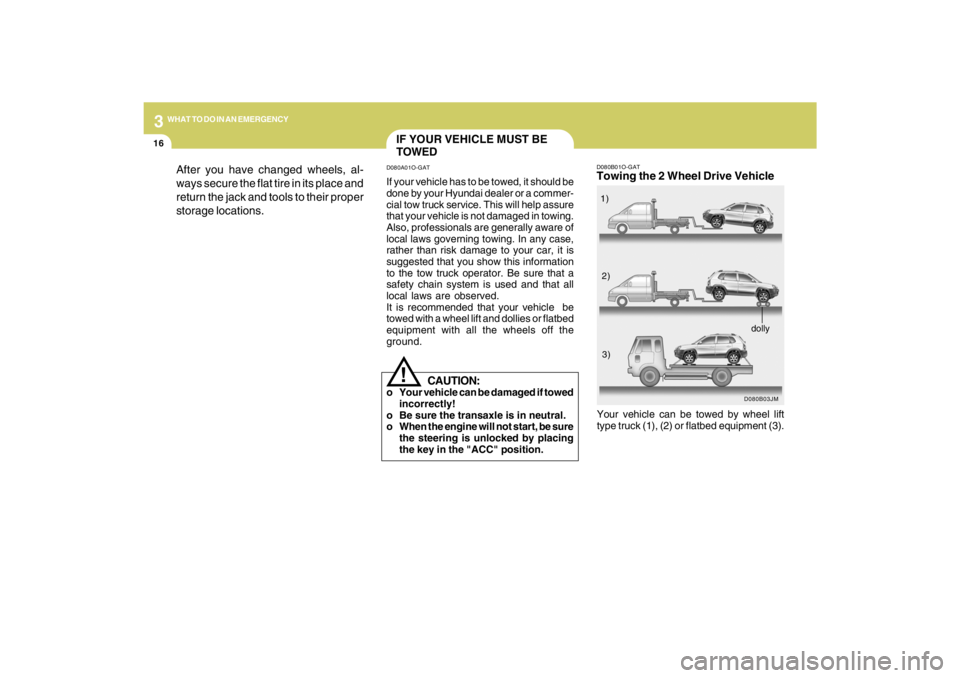
D080B01O-GATTowing the 2 Wheel Drive Vehicle
D080B03JM
Your vehicle can be towed by wheel lift
type truck (1), (2) or flatbed equipment (3).1)
2)
3)
dolly
After you have changed wheels, al-
ways secure the flat tire in its place and
return the jack and tools to their proper
storage locations.
IF YOUR VEHICLE MUST BE
TOWEDD080A01O-GATIf your vehicle has to be towed, it should be
done by your Hyundai dealer or a commer-
cial tow truck service. This will help assure
that your vehicle is not damaged in towing.
Also, professionals are generally aware of
local laws governing towing. In any case,
rather than risk damage to your car, it is
suggested that you show this information
to the tow truck operator. Be sure that a
safety chain system is used and that all
local laws are observed.
It is recommended that your vehicle be
towed with a wheel lift and dollies or flatbed
equipment with all the wheels off the
ground.
!
CAUTION:
o Your vehicle can be damaged if towed
incorrectly!
o Be sure the transaxle is in neutral.
o When the engine will not start, be sure
the steering is unlocked by placing
the key in the "ACC" position.
Page 196 of 273

5
VEHICLE MAINTENANCE REQUIREMENTS2
F010C01A-AATSpecified Scheduled ProceduresThese are the procedures such as inspec-
tions, adjustments and replacements that
are listed in the maintenance charts start-
ing on page 5-4. These procedures must
be performed at the intervals shown in the
maintenance schedule to assure that your
warranty remains in effect. Although it is
strongly recommended that they be per-
formed by the trained technicians at your
Hyundai dealer, these procedures may be
performed at any qualified service facility.
It is suggested that genuine Hyundai ser-
vice parts be used for any required repairs
or replacements. Other parts of equivalent
quality such as engine oil, engine coolant,
manual or auto transaxle oil, brake fluid
and so on which are not supplied by
Hyundai Motor Company or its distributor
may be used without affecting your war-
ranty coverage but you should always be
sure these are equivalent to the quality of
the original Hyundai parts. Your Owner's
Handbook provides further information
about your warranty coverage.
F010A01A-AATService RequirementsTo ensure that you receive the greatest
number of miles of satisfying operation
from your Hyundai, certain maintenance
procedures must be performed. Although
careful design and engineering have re-
duced these to a minimum, those that are
required are of the utmost importance.
It is your responsibility to have these main-
tenance procedures performed to comply
with the terms of the warranties covering
your new Hyundai. The Owner's Hand-
book supplied with your new vehicle pro-
vides further information about these war-
ranties.
F010B01A-AATMaintenance RequirementsThe maintenance required for your
Hyundai can be divided into three main
areas:
o Specified scheduled procedures
o General checks
o Do-it-yourself maintenance
MAINTENANCE INTERVALS