2009 HYUNDAI TUCSON coolant level
[x] Cancel search: coolant levelPage 212 of 273
6
DO-IT-YOURSELF MAINTENANCE
8
G050B01A-AATRecommended Engine CoolantUse a high quality ethylene-glycol coolant
in a 50/50 mix with water. The engine
coolant should be compatible with alumi-
num engine parts. Additional corrosion
inhibitors or additives should not be used.
The cooling system must be maintained
with the correct concentration and type of
engine coolant to prevent freezing and
corrosion. Never allow the concentration
of antifreeze to exceed the 60% level or go
below the 35% level, or damage to the
cooling system may result. For proper con-
centration when adding or replacing the
engine coolant, refer to the following table.
Ambient
temperature
°F (°C)
5 (-15)
-13 (-25)
-31 (-35)
-49 (-45)
65%
60%
50%
40% 35%
40%
50%
60%Water Antifreeze
solution Engine Coolant concentration
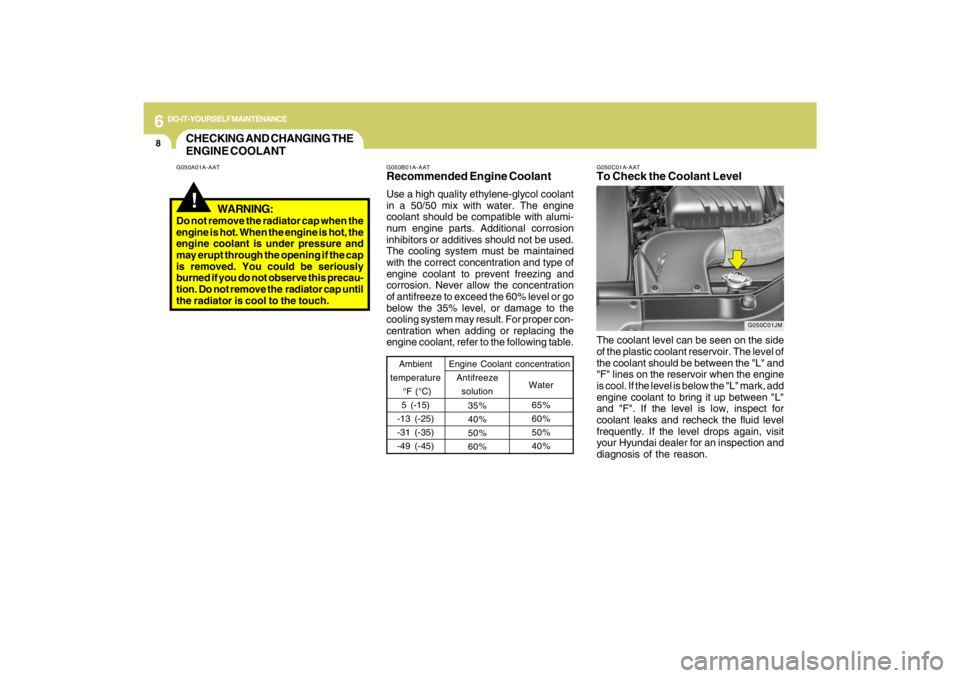
G050C01A-AATTo Check the Coolant LevelThe coolant level can be seen on the side
of the plastic coolant reservoir. The level of
the coolant should be between the "L" and
"F" lines on the reservoir when the engine
is cool. If the level is below the "L" mark, add
engine coolant to bring it up between "L"
and "F". If the level is low, inspect for
coolant leaks and recheck the fluid level
frequently. If the level drops again, visit
your Hyundai dealer for an inspection and
diagnosis of the reason.
CHECKING AND CHANGING THE
ENGINE COOLANT!
G050A01A-AAT
WARNING:
Do not remove the radiator cap when the
engine is hot. When the engine is hot, the
engine coolant is under pressure and
may erupt through the opening if the cap
is removed. You could be seriously
burned if you do not observe this precau-
tion. Do not remove the radiator cap until
the radiator is cool to the touch.
G050C01JM
Page 213 of 273
6
DO-IT-YOURSELF MAINTENANCE
9
!
!
WARNING:
The cooling fan is controlled by engine
coolant temperature and may some-
times operate even when the engine is
not running. Use extreme caution when
working near the blades of the coolant
fan so that you are not injured by a
rotating fan blade. As the engine coolant
temperature decreases, the fan will au-
tomatically shut off. This is a normal
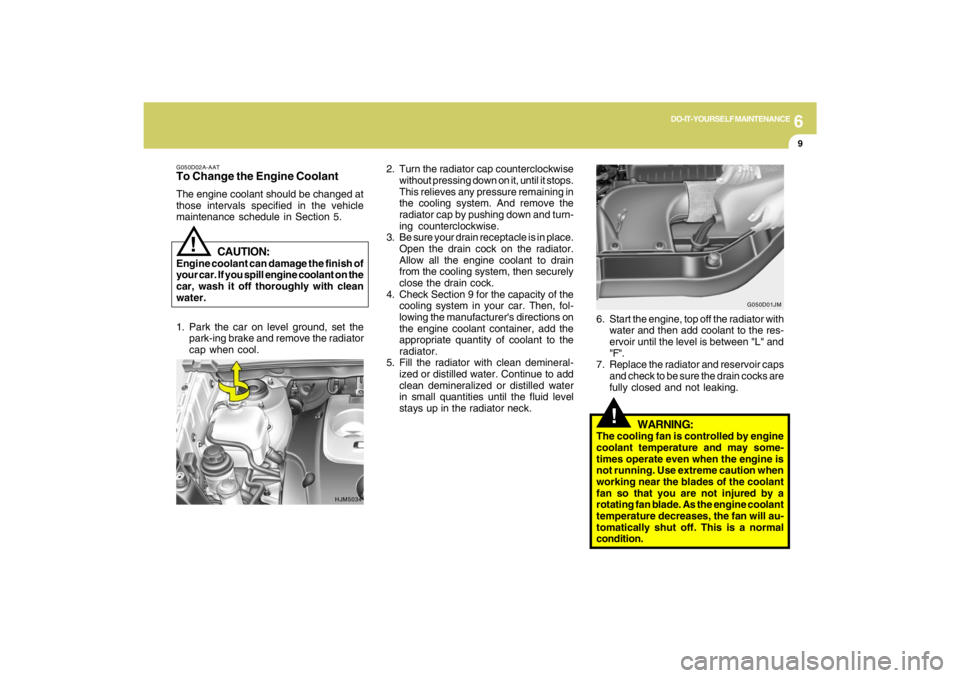
condition. 2. Turn the radiator cap counterclockwise
without pressing down on it, until it stops.
This relieves any pressure remaining in
the cooling system. And remove the
radiator cap by pushing down and turn-
ing counterclockwise.
3. Be sure your drain receptacle is in place.
Open the drain cock on the radiator.
Allow all the engine coolant to drain
from the cooling system, then securely
close the drain cock.
4. Check Section 9 for the capacity of the
cooling system in your car. Then, fol-
lowing the manufacturer's directions on
the engine coolant container, add the
appropriate quantity of coolant to the
radiator.
5. Fill the radiator with clean demineral-
ized or distilled water. Continue to add
clean demineralized or distilled water
in small quantities until the fluid level
stays up in the radiator neck.6. Start the engine, top off the radiator with
water and then add coolant to the res-
ervoir until the level is between "L" and
"F".
7. Replace the radiator and reservoir caps
and check to be sure the drain cocks are
fully closed and not leaking.
G050D02A-AATTo Change the Engine CoolantThe engine coolant should be changed at
those intervals specified in the vehicle
maintenance schedule in Section 5.
HJM5034G050D01JM
CAUTION:
Engine coolant can damage the finish of
your car. If you spill engine coolant on the
car, wash it off thoroughly with clean
water.
1. Park the car on level ground, set the
park-ing brake and remove the radiator
cap when cool.
Page 215 of 273
6
DO-IT-YOURSELF MAINTENANCE
11
G090A01JM
FILLING THE WASHER RESER-
VOIRG090A02JM-AATThe washer fluid reservoir supplies fluid to
the front and rear washer systems.
A good quality washer fluid should be
used to fill the washer reservoir. The fluid
level should be checked more frequently
during inclement weather or whenever the
washer system is in more frequent use.
The capacity of the washer reservoir is
3.59 U.S. quarts (3.4 Liters).
CAUTION:
o Radiator anti-freeze (engine coolant)
should not be used in the washer sys-
tem because it will damage the car's
finish.
o The washer should not be operated if
the washer reservoir is empty. This
can damage the washer fluid pump.
!!
WARNING:
o Windshield washer fluid agents con-
tain some amounts of alcohol and can
be flammable under certain circum-
stances. Do not allow sparks or flame
to contact the washer fluid or the
washer fluid reservoir. Damage to
the vehicle or its occupants could
occur.
o Windshield washer fluid is poisonous
to humans and animals. Do not drink
windshield washer fluid. Serious in-
jury or death could occur.
CHECKING THE TRANSAXLE
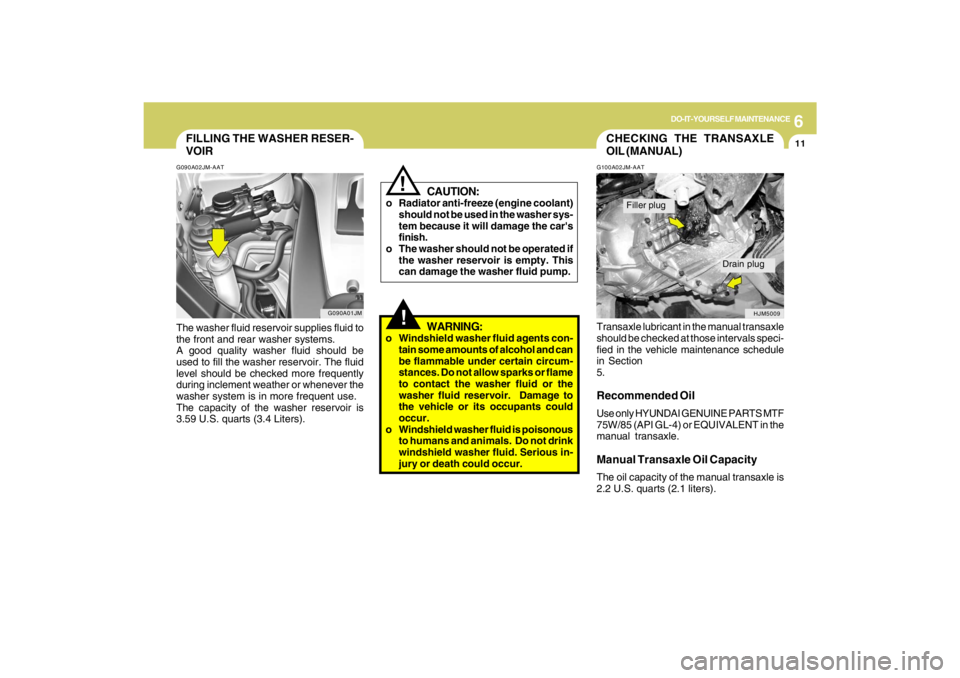
OIL (MANUAL)G100A02JM-AATTransaxle lubricant in the manual transaxle
should be checked at those intervals speci-
fied in the vehicle maintenance schedule
in Section
5.Recommended OilUse only HYUNDAI GENUINE PARTS MTF
75W/85 (API GL-4) or EQUIVALENT in the
manual transaxle.Manual Transaxle Oil CapacityThe oil capacity of the manual transaxle is
2.2 U.S. quarts (2.1 liters).
HJM5009
Filler plug
Drain plug
Page 218 of 273
6
DO-IT-YOURSELF MAINTENANCE
14
CHECKING THE BRAKES
!
G120B01A-AATChecking the Brake Fluid Level
WARNING:Use caution when handling brake fluid. It
can damage your vision if it gets into
your eyes. It will also damage your
vehicle's paint if spilled on it and not
removed immediately.
!
WARNING:
The cooling fan is controlled by engine
coolant temperature and may some-
times operate even when the engine is
not running. Use extreme caution when
working near the blades of the cooling
fan, so that you are not injured by a
rotating fan blade. As the engine coolant
temperature decreases, the fan will au-
tomatically shut off. This is a normal
condition.
G120A01A-AAT
CAUTION:
Because brakes are essential to the
safe operation of the car, it is suggested
that they be checked and inspected by
your Hyundai dealer. The brakes should
be checked and inspected for wear at
those intervals specified in the vehicle
maintenance schedule in Section 5.
!
G120C02A-AATRecommended Brake FluidUse only hydraulic brake fluid conforming
to DOT 3 or DOT 4 specifications in your
braking system. Follow the instructions
printed on the container.
Page 229 of 273
6
DO-IT-YOURSELF MAINTENANCE
25
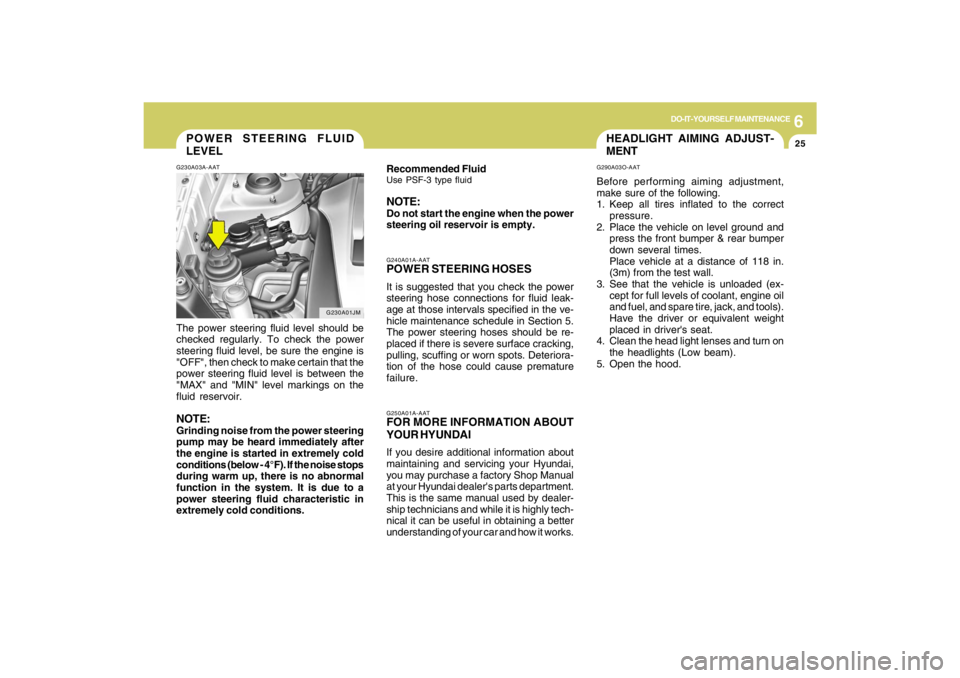
POWER STEERING FLUID
LEVELG230A03A-AATThe power steering fluid level should be
checked regularly. To check the power
steering fluid level, be sure the engine is
"OFF", then check to make certain that the
power steering fluid level is between the
"MAX" and "MIN" level markings on the
fluid reservoir.NOTE:Grinding noise from the power steering
pump may be heard immediately after
the engine is started in extremely cold
conditions (below - 4°F). If the noise stops
during warm up, there is no abnormal
function in the system. It is due to a
power steering fluid characteristic in
extremely cold conditions.
G230A01JM
HEADLIGHT AIMING ADJUST-
MENTG290A03O-AATBefore performing aiming adjustment,
make sure of the following.
1. Keep all tires inflated to the correct
pressure.
2. Place the vehicle on level ground and
press the front bumper & rear bumper
down several times.
Place vehicle at a distance of 118 in.
(3m) from the test wall.
3. See that the vehicle is unloaded (ex-
cept for full levels of coolant, engine oil
and fuel, and spare tire, jack, and tools).
Have the driver or equivalent weight
placed in driver's seat.
4. Clean the head light lenses and turn on
the headlights (Low beam).
5. Open the hood.
G250A01A-AATFOR MORE INFORMATION ABOUT
YOUR HYUNDAIIf you desire additional information about
maintaining and servicing your Hyundai,
you may purchase a factory Shop Manual
at your Hyundai dealer's parts department.
This is the same manual used by dealer-
ship technicians and while it is highly tech-
nical it can be useful in obtaining a better
understanding of your car and how it works.G240A01A-AATPOWER STEERING HOSESIt is suggested that you check the power
steering hose connections for fluid leak-
age at those intervals specified in the ve-
hicle maintenance schedule in Section 5.
The power steering hoses should be re-
placed if there is severe surface cracking,
pulling, scuffing or worn spots. Deteriora-
tion of the hose could cause premature
failure. Recommended FluidUse PSF-3 type fluidNOTE:Do not start the engine when the power
steering oil reservoir is empty.
Page 270 of 273

10
INDEX
3
Drive Belts.........................................................................................6-20
Driving
Driving for economy .....................................................................2-22
Smooth cornering.........................................................................2-23
Winter driving...............................................................................2-23
E
Emission Control System ................................................................... 7-2
Engine
Before starting the engine .............................................................. 2-4
Compartment................................................................................. 6-2
Coolant........................................................................................... 6-8
If the engine overheats .................................................................. 3-4
Number........................................................................................... 8-2
Oil ................................................................................................... 6-5
Starting........................................................................................... 2-6
Engine Exhaust Can Be Dangerous .................................................. 2-2
F
4WD Lock System ............................................................................2-19
Fan Speed Control............................................................................1-94
Floor Mat Anchor ..............................................................................1-86
Fog Light
Front.............................................................................................1-64
Front Seats
Adjustable front seats ..................................................................1-13
Adjustable headrests...................................................................1-14
Adjusting seat forward and rearward..........................................1-13
Adjusting seatback angle .............................................................1-13
Fuel
Capacity......................................................................................... 9-2
Gauge...........................................................................................1-55
Recommendations......................................................................... 1-2Fuel Filler Lid
Remote release............................................................................1-83
Full-time 4WD Operation..................................................................2-16
Fuses ................................................................................................6-21
Fuse panel description......................................................................6-35
G
General Checks.................................................................................. 6-4
Glove Box..........................................................................................1-72
H
Hazard Warning System ..................................................................1-64
Heating and Cooling Control.............................................................1-93
Heating and Ventilation
Air flow control..............................................................................1-95
Air intake control switch ............................................................1-105
Bi-level heating.............................................................................1-99
Defrosting / Defogging ..............................................................1-101
Fan speed control (Blower control).............................................1-94
Temperature control....................................................................1-98
High-Mounted Rear Stop Light .........................................................1-83
Hood Release....................................................................................1-85
Horn.................................................................................................1-88
How to Use Luggage Room.............................................................1-80
I
Ignition Switch ...................................................................................... 2-5
Instrument Cluster and Indicator Lights...........................................1-48
Instrument Panel Light Control (Rheostat).......................................1-66
Interior Light.......................................................................................1-71
J
Jump Starting...................................................................................... 3-3