2009 HYUNDAI TUCSON warning
[x] Cancel search: warningPage 216 of 273
6
DO-IT-YOURSELF MAINTENANCE
12
CHECKING THE TRANSAXLE
FLUID (AUTOMATIC)G110A01E-AATTransaxle fluid in the automatic transaxle
should be checked at those intervals speci-
fied in the vehicle maintenance schedule
in Section 5.NOTE:Automatic transaxle fluid is basically
red color. As driving distance increases,
the fluid color turns darkish red gradu-
ally. It is a normal condition and you
should not judge the need to replace
based upon the changing color.
You must replace the automatic
transaxle fluid in accordance with inter-
vals specified in the vehicle maintenance
schedule in section 5.
!
G110B05A-AATRecommended Fluid
Your Hyundai automatic transaxle is spe-
cially designed to operate with HYUNDAI
GENUINE ATF SP III, DIAMOND ATF SP III,
SK ATF SP III or other brands meeting the
SP III specification approved by Hyundai
Motor Co.. Damage caused by a
nonspecified fluid is not covered by your
new vehicle limited warranty.
CAUTION:
Use of aftermarket ATF additives may
cause damage to the automatic
transaxle.
Only use HYUNDAI GENUINE ATF SP III,
DIAMOND ATF SP III, SK ATF SP III or
other brands meeting the SP III specifi-
cation approved by Hyundai Motor Co..
If you are having your vehicle serviced
at a facility other than a Hyundai dealer,
verify that the correct ATF is used for
your vehicle.
!
WARNING:
It is always better to check the transaxle
oil level when the engine is cool or cold.
If the engine is hot, you should exercise
great caution to avoid burning yourself
on hot engine or exhaust parts.NOTE:It is recommended that the manual
transaxle fluid should be checked by an
authorized Hyundai dealer.
Page 217 of 273
6
DO-IT-YOURSELF MAINTENANCE
13
!
G110D03O-AATChecking the Automatic Transaxle
Fluid LevelThe automatic transaxle fluid level should
be checked regularly.
Keep the vehicle on the level ground with
the parking brake applied and check the
fluid level according to the following pro-
cedure.
1. Place the shift lever in N (Neutral) posi-
tion and confirm the engine is running
at normal idle speed.
2. After the transaxle is warmed up suffi-
ciently (fluid temperature 158~176°F),
for example by 10 minutes usual driv-
ing, move the shift lever through all
positions then place the shift lever in N
(Neutral) or P (Park) position.
G110C01JM-AATTransaxle Fluid CapacityThe fluid capacity of the automatic
transaxle is 8.2 U.S. quarts (7.8 liters).
WARNING:
The transaxle fluid level should be
checked when the engine is at normal
operating temperature. This means that
the engine, radiator, exhaust system
etc., are very hot so you should exercise
great care not to burn yourself during
this procedure.
HJM5011
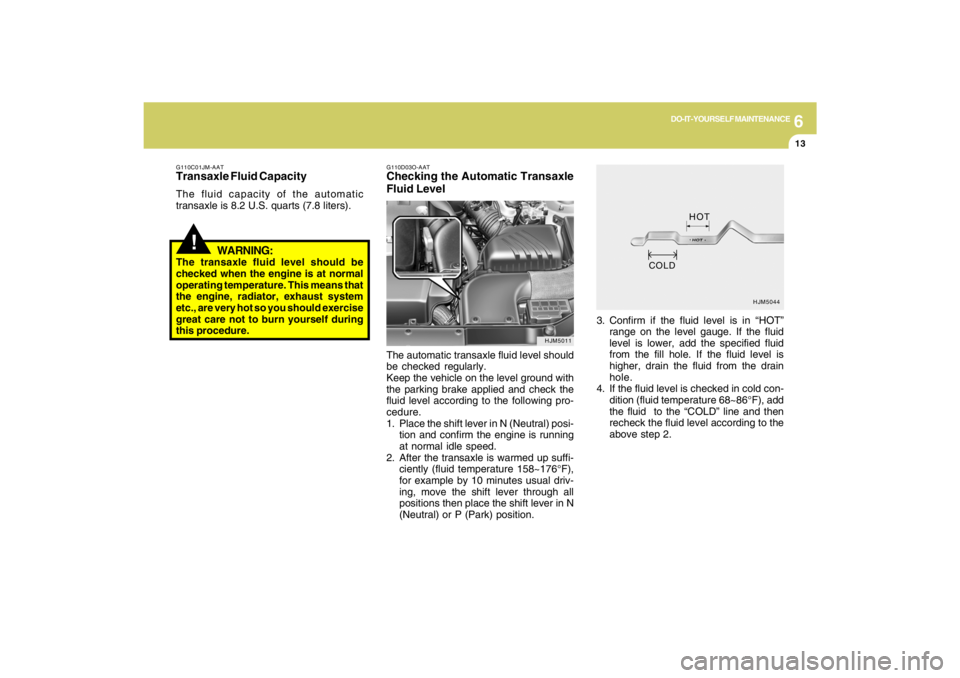
3. Confirm if the fluid level is in “HOT”
range on the level gauge. If the fluid
level is lower, add the specified fluid
from the fill hole. If the fluid level is
higher, drain the fluid from the drain
hole.
4. If the fluid level is checked in cold con-
dition (fluid temperature 68~86°F), add
the fluid to the “COLD” line and then
recheck the fluid level according to the
above step 2.
HJM5044
HOT
COLD
Page 218 of 273
6
DO-IT-YOURSELF MAINTENANCE
14
CHECKING THE BRAKES
!
G120B01A-AATChecking the Brake Fluid Level
WARNING:Use caution when handling brake fluid. It
can damage your vision if it gets into
your eyes. It will also damage your
vehicle's paint if spilled on it and not
removed immediately.
!
WARNING:
The cooling fan is controlled by engine
coolant temperature and may some-
times operate even when the engine is
not running. Use extreme caution when
working near the blades of the cooling
fan, so that you are not injured by a
rotating fan blade. As the engine coolant
temperature decreases, the fan will au-
tomatically shut off. This is a normal
condition.
G120A01A-AAT
CAUTION:
Because brakes are essential to the
safe operation of the car, it is suggested
that they be checked and inspected by
your Hyundai dealer. The brakes should
be checked and inspected for wear at
those intervals specified in the vehicle
maintenance schedule in Section 5.
!
G120C02A-AATRecommended Brake FluidUse only hydraulic brake fluid conforming
to DOT 3 or DOT 4 specifications in your
braking system. Follow the instructions
printed on the container.
Page 219 of 273

6
DO-IT-YOURSELF MAINTENANCE
15
G120D01A-AATTo Check the Fluid LevelThe fluid level in the brake fluid reservoir
should be checked periodically. The level
should be between the "MIN" and "MAX"
marks on the side of the reservoir. If the
level is at or below the "MIN" mark, care-
fully add fluid to bring it up to "MAX". Do not
overfill.
HJM5007
!
G120E02A-AATAdding Brake Fluid
WARNING:Handle brake fluid carefully. It can dam-
age your vision if it gets into your eyes.
Use only DOT 3 or DOT 4 specification
fluid from a sealed container. Do not
allow the fluid can or reservoir to remain
open any longer than required. This will
prevent entry of dirt and moisture which
can damage the brake system and cause
improper operation.
To add brake fluid, first wipe away any dirt
then unscrew the fluid reservoir cap. Slowly
pour the recommended fluid into the res-
ervoir. Do not overfill. Carefully replace the
cap on the reservoir and tighten.
HJM5007
CHECKING THE CLUTCH FLUIDG130A01A-AATTo Check the Clutch FluidThe clutch fluid level in the master cylinder
should be checked when performing other
under hood services. The system should
be checked for leakage at the same time.
Check to make certain that the clutch fluid
level is always between the "MAX" and
"MIN" level markings on the fluid reservoir.
Fill as required. Fluid loss indicates a leak
in the clutch system which should be in-
spected and repaired immediately. Con-
sult your Hyundai dealer.
Page 220 of 273
6
DO-IT-YOURSELF MAINTENANCE
16
!
G130B02A-AATTo Replace the FluidRecommended brake fluid conforming to
DOT 3 or DOT 4 specification should be
used. The reservoir cap must be fully tight-
ened to avoid contamination from foreign
matter or moisture.NOTE:Do not allow any other liquids to contami-
nate the brake fluid. Seal damage will
result.
WARNING:
Use caution when handling brake fluid. It
can damage your vision if you get it in
your eyes. It will also damage your
vehicle's paint if spilled on it and not
removed immediately.
AIR CONDITIONING CARE
!
G140A01A-AATKeeping the Condenser CleanThe air conditioning condenser (and en-
gine radiator) should be checked periodi-
cally for accumulation of dirt, dead insects,
leaves, etc. These can interfere with maxi-
mum cooling efficiency. When removing
such accumulations, brush or hose them
away carefully to avoid bending the cool-
ing fans.
G140B01A-AATChecking the Air Conditioning Op-
eration1. Start the engine and let it run at a fast idle
for several minutes with the air condi-
tioning set at the maximum cold setting.
2. If the air coming out of the in-dash vents
is not cold, have the air conditioning
system inspected by your Hyundai
dealer.
CAUTION:
Running the air conditioning system for
extended periods of time with a low re-
frigerant level may damage the com-
pressor.
Page 227 of 273
6
DO-IT-YOURSELF MAINTENANCE
23
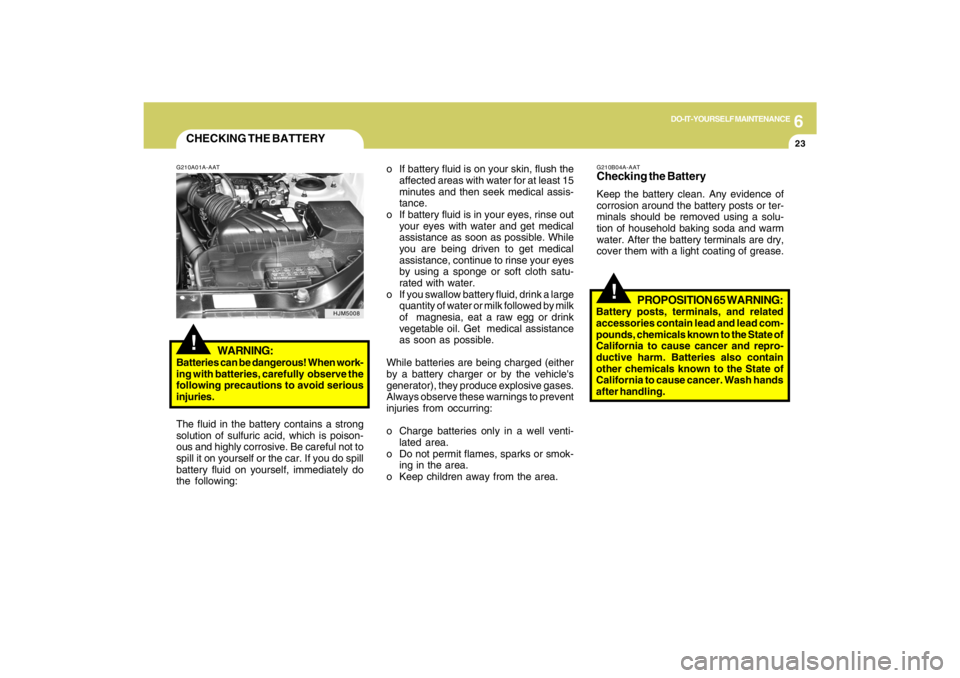
CHECKING THE BATTERY!
G210A01A-AAT
WARNING:
Batteries can be dangerous! When work-
ing with batteries, carefully observe the
following precautions to avoid serious
injuries.
The fluid in the battery contains a strong
solution of sulfuric acid, which is poison-
ous and highly corrosive. Be careful not to
spill it on yourself or the car. If you do spill
battery fluid on yourself, immediately do
the following:
HJM5008
!
G210B04A-AATChecking the BatteryKeep the battery clean. Any evidence of
corrosion around the battery posts or ter-
minals should be removed using a solu-
tion of household baking soda and warm
water. After the battery terminals are dry,
cover them with a light coating of grease. o If battery fluid is on your skin, flush the
affected areas with water for at least 15
minutes and then seek medical assis-
tance.
o If battery fluid is in your eyes, rinse out
your eyes with water and get medical
assistance as soon as possible. While
you are being driven to get medical
assistance, continue to rinse your eyes
by using a sponge or soft cloth satu-
rated with water.
o If you swallow battery fluid, drink a large
quantity of water or milk followed by milk
of magnesia, eat a raw egg or drink
vegetable oil. Get medical assistance
as soon as possible.
While batteries are being charged (either
by a battery charger or by the vehicle's
generator), they produce explosive gases.
Always observe these warnings to prevent
injuries from occurring:
o Charge batteries only in a well venti-
lated area.
o Do not permit flames, sparks or smok-
ing in the area.
o Keep children away from the area.
PROPOSITION 65 WARNING:
Battery posts, terminals, and related
accessories contain lead and lead com-
pounds, chemicals known to the State of
California to cause cancer and repro-
ductive harm. Batteries also contain
other chemicals known to the State of
California to cause cancer. Wash hands
after handling.
Page 228 of 273
6
DO-IT-YOURSELF MAINTENANCE
24
G220C01A-AATChecking Condenser Cooling FanThe condenser cooling fan should come
on automatically whenever the air condi-
tioning is in operation.G220B01A-AATChecking Engine Cooling FanThe engine cooling fan should come on
automatically if the engine coolant tem-
perature is high.CHECKING ELECTRIC COOLING
FANS!
G220A01A-AAT
WARNING:
The cooling fan is controlled by engine
coolant temperature and may some-
times operate even when the engine is
not running. Use extreme caution when
working near the blades of the cooling
fan, so that you are not injured by a
rotating fan blade. As the engine coolant
temperature decreases the fan will au-
tomatically shut off. This is a normal
condition.
If electrolyte gets on your skin,
thoroughly wash the contacted
area.
If you feel a pain or a burning
sensation, get medical atten-
tion immediately.
Wear eye protection when
charging or working near a bat-
tery.
Always provide ventilation
when working in an enclosed
space.
o When lifting a plastic-cased battery,
excessive pressure on the case may
cause battery acid to leak, resulting in
personal injury. Lift with a battery
carrier or with your hands on opposite
corners.
o Never attempt to charge the battery
when the battery cables are con-
nected.
o The electrical ignition system works
with high voltage.
Never touch these components with
the engine running or the ignition
switched on.
!
WARNING:
!
WARNING:Always read the following in-
structions carefully when han-
dling a battery.
Keep lighted cigarettes and all
other flames or sparks away
from the battery.
Hydrogen, which is a highly
combustible gas, is always
present in battery cells and
may explode if ignited.
Keep batteries out of the reach
of children because batteries
contain highly corrosive SUL-
FURIC ACID. Do not allow bat-
tery acid to contact your skin,
eyes, clothing or paint finish.
If any electrolyte gets into your
eyes, flush your eyes with
clean water for at least 15 min-
utes and get immediate medi-
cal attention. If possible, con-
tinue to apply water with a
sponge or cloth until medical
attention is received.
Page 230 of 273
6
DO-IT-YOURSELF MAINTENANCE
26
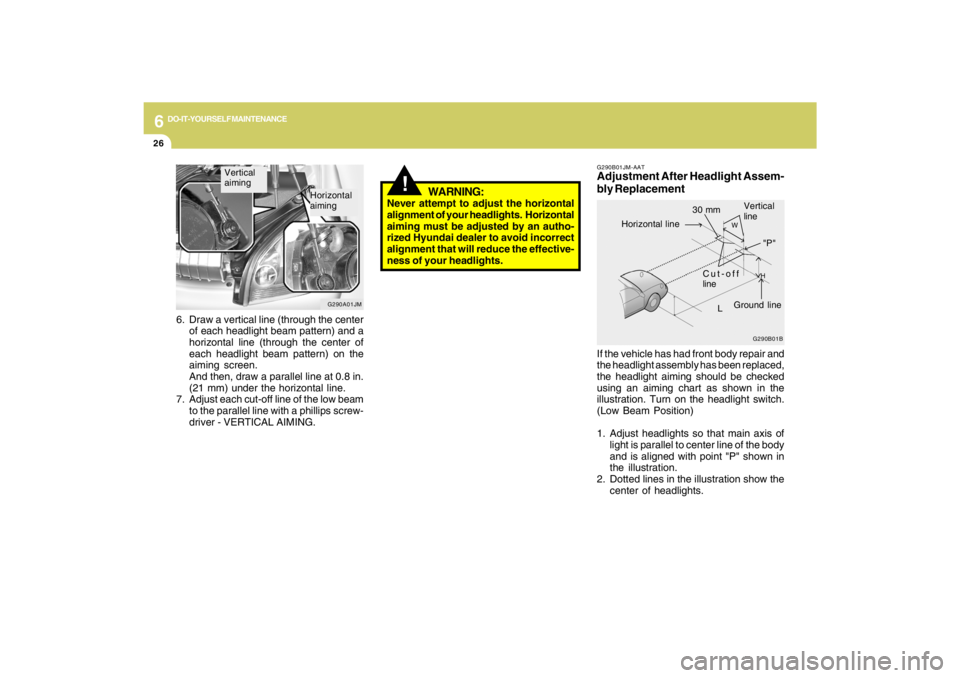
G290B01JM-AATAdjustment After Headlight Assem-
bly ReplacementIf the vehicle has had front body repair and
the headlight assembly has been replaced,
the headlight aiming should be checked
using an aiming chart as shown in the
illustration. Turn on the headlight switch.
(Low Beam Position)
1. Adjust headlights so that main axis of
light is parallel to center line of the body
and is aligned with point "P" shown in
the illustration.
2. Dotted lines in the illustration show the
center of headlights.
G290B01B
L
W
H
Cut-off
line
Ground line
"P" Horizontal line
Vertical
line
30 mm
!
WARNING:
Never attempt to adjust the horizontal
alignment of your headlights. Horizontal
aiming must be adjusted by an autho-
rized Hyundai dealer to avoid incorrect
alignment that will reduce the effective-
ness of your headlights.
6. Draw a vertical line (through the center
of each headlight beam pattern) and a
horizontal line (through the center of
each headlight beam pattern) on the
aiming screen.
And then, draw a parallel line at 0.8 in.
(21 mm) under the horizontal line.
7. Adjust each cut-off line of the low beam
to the parallel line with a phillips screw-
driver - VERTICAL AIMING.
G290A01JM
Vertical
aiming
Horizontal
aiming