2009 HYUNDAI TUCSON recommended oil
[x] Cancel search: recommended oilPage 159 of 273

2
DRIVING YOUR HYUNDAI
24
C160K01A-AATCarry Emergency EquipmentDepending on the severity of the weather
where you drive your car, you should carry
appropriate emergency equipment. Some
of the items you may want to carry include
tire chains, tow straps or chains, flashlight,
emergency flares, sand, a shovel, jumper
cables, a window scraper, gloves, ground
cloth, coveralls, a blanket, etc.
C160H02A-AATUse Approved Window Washer Anti-
Freeze in SystemTo keep the water in the window washer
system from freezing, add an approved
window washer anti-freeze solution in
accordance with instructions on the con-
tainer. Window washer anti-freeze is avail-
able from Hyundai dealers and most auto
parts outlets. Do not use engine coolant or
other types of anti-freeze as these may
damage the paint finish.
C160G01A-AATTo Keep Locks from FreezingTo keep the locks from freezing, squirt an
approved de-icer fluid or glycerine into the
key opening. If a lock is covered with ice,
squirt it with an approved de-icing fluid to
remove the ice. If the lock is frozen inter-
nally, you may be able to thaw it out by
using a heated key. Handle the heated key
with care to avoid injury.
C160J01A-AATDon't Let Ice and Snow Accumulate
UnderneathUnder some conditions, snow and ice can
build up under the fenders and interfere
with the steering. When driving in severe
winter conditions where this may happen,
you should periodically check underneath
the car to be sure the movement of the front
wheels and the steering components is
not obstructed.
C160I01A-AATDon't Let Your Parking Brake FreezeUnder some conditions your parking brake
can freeze in the engaged position. This
is most likely to happen when there is an
accumulation of snow or ice around or
near the rear brakes or if the brakes are
wet. If there is a risk the parking brake may
freeze, apply it only temporarily while you
put the gear selector lever in "P" (auto-
matic) or in first or reverse gear (manual
transaxle) and block the rear wheels so the
car cannot roll. Then release the parking
brake.
C160F01A-AATCheck Spark Plugs and Ignition
SystemInspect your spark plugs as described in
Section 6 and replace them if necessary.
Also check all ignition wiring and compo-
nents to be sure they are not cracked, worn
or damaged in any way.C160E01A-AATChange to "Winter Weight" Oil if
NecessaryIn some climates it is recommended that a
lower viscosity "winter weight" oil be used
during cold weather. See Section 9 for
recommendations. If you aren't sure what
weight oil you should use, consult your
Hyundai dealer.
Page 196 of 273
5
VEHICLE MAINTENANCE REQUIREMENTS2
F010C01A-AATSpecified Scheduled ProceduresThese are the procedures such as inspec-
tions, adjustments and replacements that
are listed in the maintenance charts start-
ing on page 5-4. These procedures must
be performed at the intervals shown in the
maintenance schedule to assure that your
warranty remains in effect. Although it is
strongly recommended that they be per-
formed by the trained technicians at your
Hyundai dealer, these procedures may be
performed at any qualified service facility.
It is suggested that genuine Hyundai ser-
vice parts be used for any required repairs
or replacements. Other parts of equivalent
quality such as engine oil, engine coolant,
manual or auto transaxle oil, brake fluid
and so on which are not supplied by
Hyundai Motor Company or its distributor
may be used without affecting your war-
ranty coverage but you should always be
sure these are equivalent to the quality of
the original Hyundai parts. Your Owner's
Handbook provides further information
about your warranty coverage.
F010A01A-AATService RequirementsTo ensure that you receive the greatest
number of miles of satisfying operation
from your Hyundai, certain maintenance
procedures must be performed. Although
careful design and engineering have re-
duced these to a minimum, those that are
required are of the utmost importance.
It is your responsibility to have these main-
tenance procedures performed to comply
with the terms of the warranties covering
your new Hyundai. The Owner's Hand-
book supplied with your new vehicle pro-
vides further information about these war-
ranties.
F010B01A-AATMaintenance RequirementsThe maintenance required for your
Hyundai can be divided into three main
areas:
o Specified scheduled procedures
o General checks
o Do-it-yourself maintenance
MAINTENANCE INTERVALS
Page 202 of 273

5
VEHICLE MAINTENANCE REQUIREMENTS8
F070D01A-AATo Manual Transaxle OilInspect the manual transaxle oil according
to the maintenance schedule.NOTE:If the oil level is low, check for possible
leaks before adding oil. Do not overfill.
F070C01A-AATo CoolantThe coolant should be changed at the
intervals specified in the maintenance
schedule.F060E01A-AATo Timing BeltInspect all parts related to the timing belt for
damage and deformation. Replace any
damaged parts immediately.F060J01A-AATo Spark PlugsMake sure to install new spark plugs of the
correct heat range.F060H01A-AATo Air Cleaner FilterA Genuine Hyundai air cleaner filter is
recommended when the filter is replaced.
F060G01A-AATo Vapor Hose and Fuel Filler CapThe vapor hose and fuel filler cap should
be inspected at those intervals specified in
the maintenance schedule. Make sure that
a new vapor hose or fuel filler cap is cor-
rectly replaced.F065F01O-AATo Crankcase Ventilation HoseInspect the surface of hose for evidence of
heat and/or mechanical damage. Hard
and brittle rubber, cracking, tears, cuts,
abrasions, and excessive swelling indi-
cate deterioration. Particular attention
should be paid to examine that hose sur-
face nearest to high heat sources, such as
the exhaust manifold.
Inspect the hose routing to assure that the
hose does not come in contact with any
heat source, sharp edges or moving com-
ponent which might cause heat damage or
mechanical wear. Inspect all hose con-
nections, such as clamps and couplings,
to make sure they are secure, and that no
leaks are present. Hose should be re-
placed immediately if there is any evi-
dence of deterioration or damage.
F070E06A-AATo Automatic Transaxle FluidThe fluid level should be in the “HOT”
range of the dipstick, after the engine and
transaxle are at normal operating tem-
perature. Check the automatic transaxle
fluid level with the engine running and the
transaxle in neutral, with the parking brake
properly applied. Use HYUNDAI GENU-
INE ATF SP III, DIAMOND ATF SP III, SK
ATF SP III or other brands meeting the SP
III specification approved by Hyundai Motor
Co. when adding or changing fluid. Using
the wrong ATF may result in damage to the
ATM.
Page 209 of 273
6
DO-IT-YOURSELF MAINTENANCE
5
CHECKING THE ENGINE OILG030A01A-AATEngine oil is essential to the performance
and service of the engine. It is suggested
that you check the oil level at least once a
week in normal use and more often if you
are on a trip or driving in severe conditions.
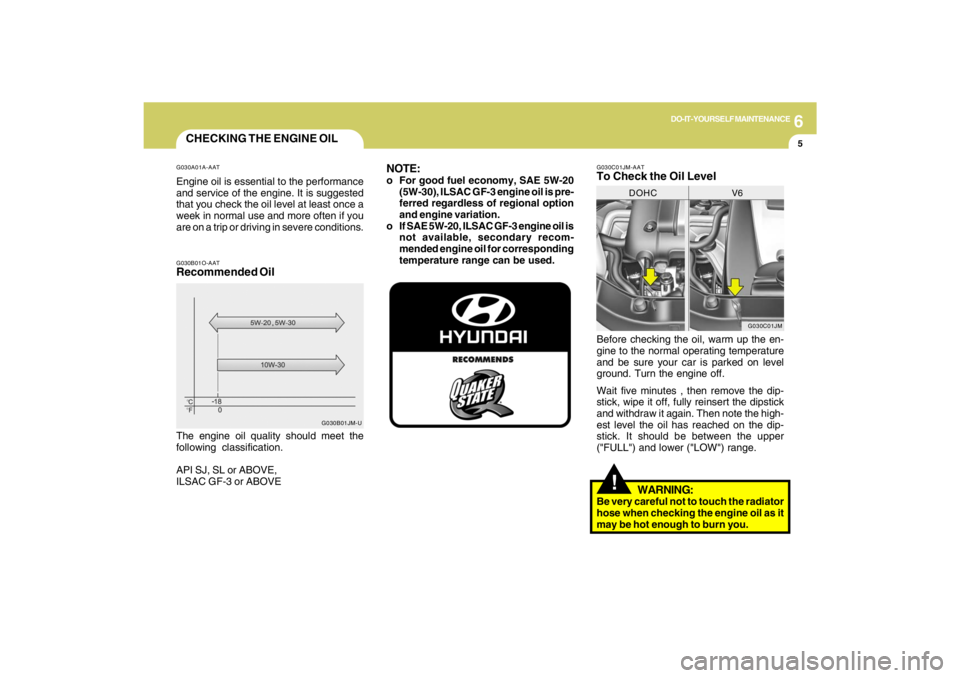
G030C01JM-AATTo Check the Oil LevelBefore checking the oil, warm up the en-
gine to the normal operating temperature
and be sure your car is parked on level
ground. Turn the engine off.
Wait five minutes , then remove the dip-
stick, wipe it off, fully reinsert the dipstick
and withdraw it again. Then note the high-
est level the oil has reached on the dip-
stick. It should be between the upper
("FULL") and lower ("LOW") range.
G030C01JM
DOHC V6
!
WARNING:
Be very careful not to touch the radiator
hose when checking the engine oil as it
may be hot enough to burn you.
G030B01O-AATRecommended OilThe engine oil quality should meet the
following classification.
API SJ, SL or ABOVE,
ILSAC GF-3 or ABOVE
G030B01JM-U
NOTE:o For good fuel economy, SAE 5W-20
(5W-30), ILSAC GF-3 engine oil is pre-
ferred regardless of regional option
and engine variation.
o If SAE 5W-20, ILSAC GF-3 engine oil is
not available, secondary recom-
mended engine oil for corresponding
temperature range can be used.
Page 211 of 273
6
DO-IT-YOURSELF MAINTENANCE
7
6. Install a new oil filter in accordance with
the instructions on the carton or on the
filter itself. Do not over-tighten. (Tight-
ening torque : 1.2 ~ 1.6 kgf.m) Be sure
that the mounting surface on the engine
is clean and that the old gasket is re-
moved completely. Lubricate the new
gasket on the filter with clean engine oil
before installation.
7. Remove the engine oil level dipstick.
8. Refill the crankcase with the recom-
mended engine oil. Refer to the speci-
fication in chapter 9 for engine oil ca-
pacity.
!
PROPOSITION 65 WARNING:
This product contains a chemical known
to the State of California to cause can-
cer. Used engine oil may cause irritation
or cancer of the skin if left in contact with
the skin for prolonged periods of time.
Used engine oil contains chemicals that
have caused cancer in laboratory ani-
mals. Always protect your skin by wash-
ing your hands thoroughly with soap and
warm water as soon as possible after
handling used oil.
!
WARNING:
Be very careful when draining the en-
gine oil as it may be hot enough to burn
you! 2. Open the hood and remove the engine
oil filler cap.
3. Slide underneath the car and loosen
the drain plug by turning it counter-
clockwise with a wrench of the proper
size. Be sure that a drain pan is in
position to catch the oil as it drains out,
then remove the drain plug.
4. When the oil has stopped draining, re-
place the drain plug using a new washer
and retighten by turning it clockwise.
Oil pan drain plug tightening torque:
3.5 ~ 4.5 kgf.m (2.7L)
4.0 ~ 4.5 kgf.m (2.0L)
5. Remove the oil filter by turning it coun-
terclockwise with a oil filter wrench of
the proper size. A certain amount of oil
will come out when you remove the
filter. So be sure to have your drain pan
in place underneath it.
CAUTION:
Slowly pour the recommended oil using
by a funnel. Do not overfill! Engine dam-
age may occur if overfilled.
!
9. Start the engine and check to be sure no
oil is leaking from the drain plug or oil
filter.
10. Shut off the engine and recheck the oil
level.
NOTE:Always dispose of used engine oil in an
environmentally acceptable manner. It
is suggested that it be placed in a sealed
container and taken to a service station
for reclamation. Do not pour the oil on the
ground or put it in with the household
trash.
Page 215 of 273
6
DO-IT-YOURSELF MAINTENANCE
11
G090A01JM
FILLING THE WASHER RESER-
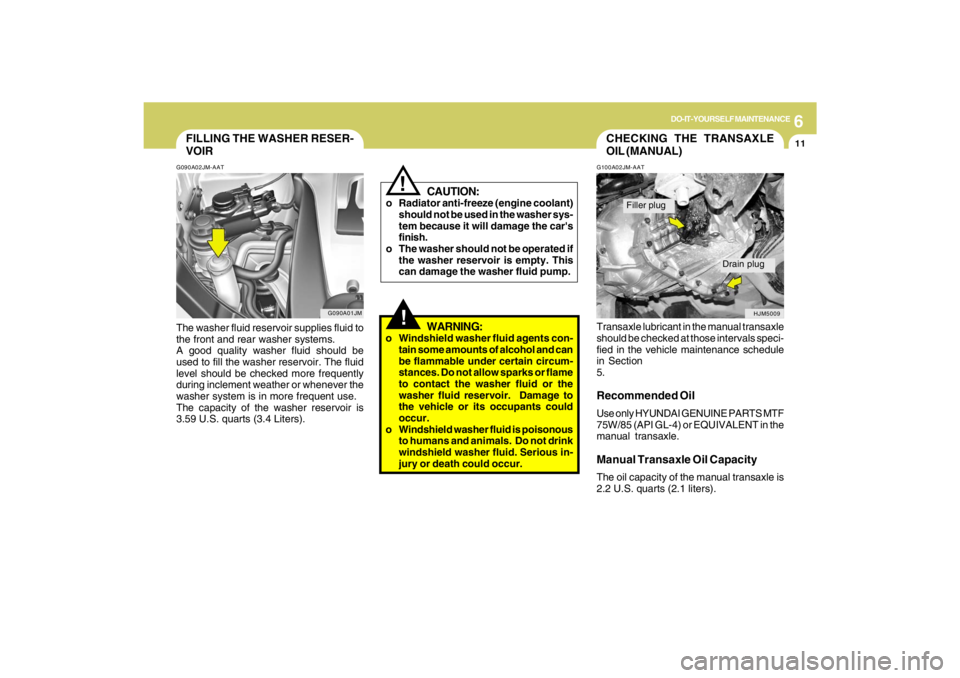
VOIRG090A02JM-AATThe washer fluid reservoir supplies fluid to
the front and rear washer systems.
A good quality washer fluid should be
used to fill the washer reservoir. The fluid
level should be checked more frequently
during inclement weather or whenever the
washer system is in more frequent use.
The capacity of the washer reservoir is
3.59 U.S. quarts (3.4 Liters).
CAUTION:
o Radiator anti-freeze (engine coolant)
should not be used in the washer sys-
tem because it will damage the car's
finish.
o The washer should not be operated if
the washer reservoir is empty. This
can damage the washer fluid pump.
!!
WARNING:
o Windshield washer fluid agents con-
tain some amounts of alcohol and can
be flammable under certain circum-
stances. Do not allow sparks or flame
to contact the washer fluid or the
washer fluid reservoir. Damage to
the vehicle or its occupants could
occur.
o Windshield washer fluid is poisonous
to humans and animals. Do not drink
windshield washer fluid. Serious in-
jury or death could occur.
CHECKING THE TRANSAXLE
OIL (MANUAL)G100A02JM-AATTransaxle lubricant in the manual transaxle
should be checked at those intervals speci-
fied in the vehicle maintenance schedule
in Section
5.Recommended OilUse only HYUNDAI GENUINE PARTS MTF
75W/85 (API GL-4) or EQUIVALENT in the
manual transaxle.Manual Transaxle Oil CapacityThe oil capacity of the manual transaxle is
2.2 U.S. quarts (2.1 liters).
HJM5009
Filler plug
Drain plug
Page 216 of 273
6
DO-IT-YOURSELF MAINTENANCE
12
CHECKING THE TRANSAXLE
FLUID (AUTOMATIC)G110A01E-AATTransaxle fluid in the automatic transaxle
should be checked at those intervals speci-
fied in the vehicle maintenance schedule
in Section 5.NOTE:Automatic transaxle fluid is basically
red color. As driving distance increases,
the fluid color turns darkish red gradu-
ally. It is a normal condition and you
should not judge the need to replace
based upon the changing color.
You must replace the automatic
transaxle fluid in accordance with inter-
vals specified in the vehicle maintenance
schedule in section 5.
!
G110B05A-AATRecommended Fluid
Your Hyundai automatic transaxle is spe-
cially designed to operate with HYUNDAI
GENUINE ATF SP III, DIAMOND ATF SP III,
SK ATF SP III or other brands meeting the
SP III specification approved by Hyundai
Motor Co.. Damage caused by a
nonspecified fluid is not covered by your
new vehicle limited warranty.
CAUTION:
Use of aftermarket ATF additives may
cause damage to the automatic
transaxle.
Only use HYUNDAI GENUINE ATF SP III,
DIAMOND ATF SP III, SK ATF SP III or
other brands meeting the SP III specifi-
cation approved by Hyundai Motor Co..
If you are having your vehicle serviced
at a facility other than a Hyundai dealer,
verify that the correct ATF is used for
your vehicle.
!
WARNING:
It is always better to check the transaxle
oil level when the engine is cool or cold.
If the engine is hot, you should exercise
great caution to avoid burning yourself
on hot engine or exhaust parts.NOTE:It is recommended that the manual
transaxle fluid should be checked by an
authorized Hyundai dealer.
Page 229 of 273
6
DO-IT-YOURSELF MAINTENANCE
25
POWER STEERING FLUID
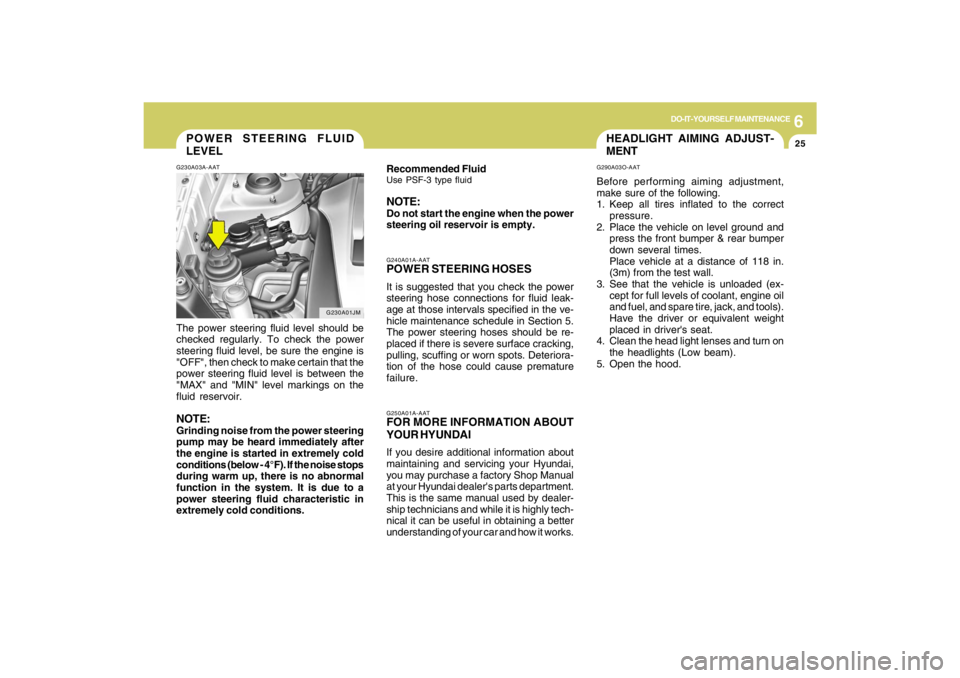
LEVELG230A03A-AATThe power steering fluid level should be
checked regularly. To check the power
steering fluid level, be sure the engine is
"OFF", then check to make certain that the
power steering fluid level is between the
"MAX" and "MIN" level markings on the
fluid reservoir.NOTE:Grinding noise from the power steering
pump may be heard immediately after
the engine is started in extremely cold
conditions (below - 4°F). If the noise stops
during warm up, there is no abnormal
function in the system. It is due to a
power steering fluid characteristic in
extremely cold conditions.
G230A01JM
HEADLIGHT AIMING ADJUST-
MENTG290A03O-AATBefore performing aiming adjustment,
make sure of the following.
1. Keep all tires inflated to the correct
pressure.
2. Place the vehicle on level ground and
press the front bumper & rear bumper
down several times.
Place vehicle at a distance of 118 in.
(3m) from the test wall.
3. See that the vehicle is unloaded (ex-
cept for full levels of coolant, engine oil
and fuel, and spare tire, jack, and tools).
Have the driver or equivalent weight
placed in driver's seat.
4. Clean the head light lenses and turn on
the headlights (Low beam).
5. Open the hood.
G250A01A-AATFOR MORE INFORMATION ABOUT
YOUR HYUNDAIIf you desire additional information about
maintaining and servicing your Hyundai,
you may purchase a factory Shop Manual
at your Hyundai dealer's parts department.
This is the same manual used by dealer-
ship technicians and while it is highly tech-
nical it can be useful in obtaining a better
understanding of your car and how it works.G240A01A-AATPOWER STEERING HOSESIt is suggested that you check the power
steering hose connections for fluid leak-
age at those intervals specified in the ve-
hicle maintenance schedule in Section 5.
The power steering hoses should be re-
placed if there is severe surface cracking,
pulling, scuffing or worn spots. Deteriora-
tion of the hose could cause premature
failure. Recommended FluidUse PSF-3 type fluidNOTE:Do not start the engine when the power
steering oil reservoir is empty.