2009 Hyundai Sonata fuel
[x] Cancel search: fuelPage 208 of 286
5
VEHICLE MAINTENANCE REQUIREMENTS
3
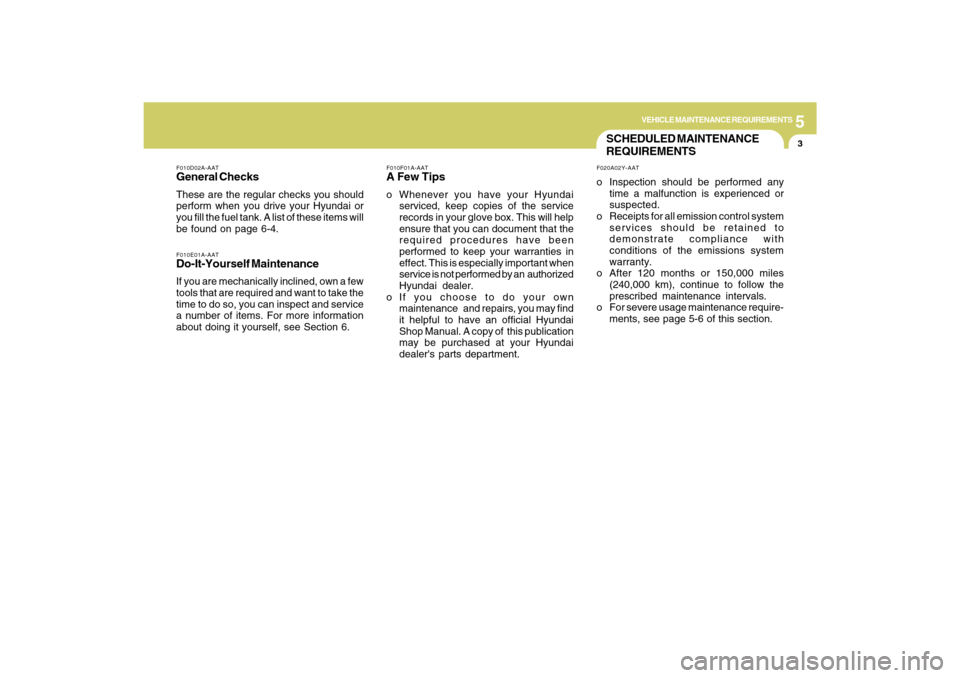
SCHEDULED MAINTENANCE
REQUIREMENTSF020A02Y-AATo Inspection should be performed any
time a malfunction is experienced or
suspected.
o Receipts for all emission control system
services should be retained to
demonstrate compliance with
conditions of the emissions system
warranty.
o After 120 months or 150,000 miles
(240,000 km), continue to follow the
prescribed maintenance intervals.
o For severe usage maintenance require-
ments, see page 5-6 of this section.
F010D02A-AATGeneral ChecksThese are the regular checks you should
perform when you drive your Hyundai or
you fill the fuel tank. A list of these items will
be found on page 6-4.F010E01A-AATDo-It-Yourself MaintenanceIf you are mechanically inclined, own a few
tools that are required and want to take the
time to do so, you can inspect and service
a number of items. For more information
about doing it yourself, see Section 6.
F010F01A-AATA Few Tipso Whenever you have your Hyundai
serviced, keep copies of the service
records in your glove box. This will help
ensure that you can document that the
required procedures have been
performed to keep your warranties in
effect. This is especially important when
service is not performed by an authorized
Hyundai dealer.
o If you choose to do your own
maintenance and repairs, you may find
it helpful to have an official Hyundai
Shop Manual. A copy of this publication
may be purchased at your Hyundai
dealer's parts department.
Page 209 of 286
5
VEHICLE MAINTENANCE REQUIREMENTS4
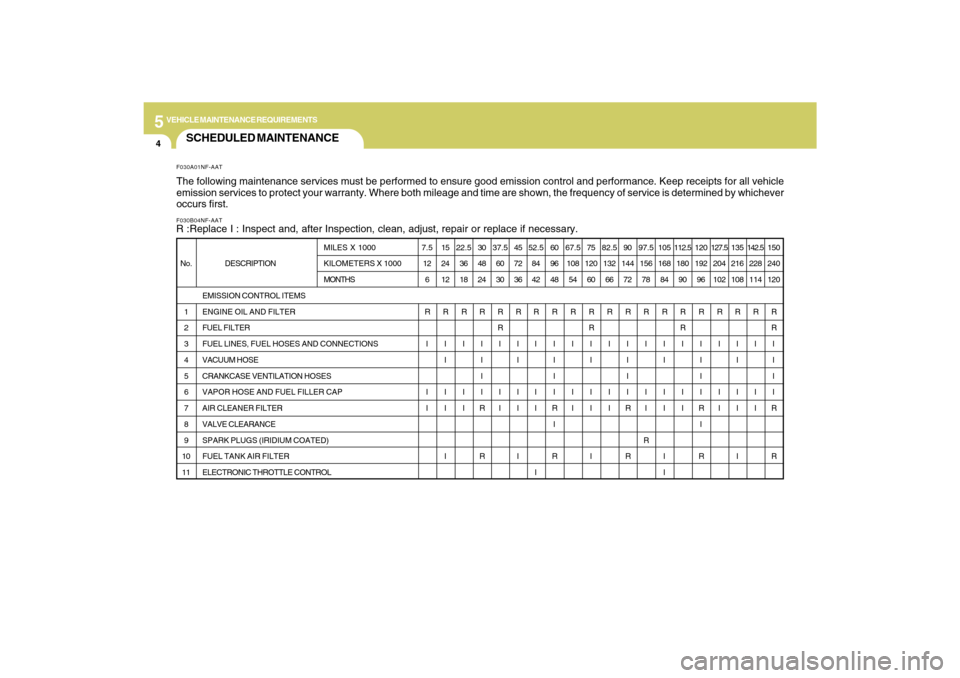
SCHEDULED MAINTENANCEF030B04NF-AATR :Replace I : Inspect and, after Inspection, clean, adjust, repair or replace if necessary.F030A01NF-AATThe following maintenance services must be performed to ensure good emission control and performance. Keep receipts for all vehicle
emission services to protect your warranty. Where both mileage and time are shown, the frequency of service is determined by whichever
occurs first.
DESCRIPTION
EMISSION CONTROL ITEMS
ENGINE OIL AND FILTER
FUEL FILTER
FUEL LINES, FUEL HOSES AND CONNECTIONS
VACUUM HOSE
CRANKCASE VENTILATION HOSES
VAPOR HOSE AND FUEL FILLER CAP
AIR CLEANER FILTER
VALVE CLEARANCE
SPARK PLUGS (IRIDIUM COATED)
FUEL TANK AIR FILTER
ELECTRONIC THROTTLE CONTROL No.
1
2
3
4
5
6
7
8
9
10
11MILES X 1000
KILOMETERS X 1000
MONTHS7.5
12
6
R
I
I
I15
24
12
R
I
I
I
I
I22.5
36
18
R
I
I
I30
48
24
R
I
I
I
I
R
R37.5
60
30
R
R
I
I
I45
72
36
R
I
I
I
I
I52.5
84
42
R
I
I
I
I60
96
48
R
I
I
I
I
R
I
R67.5
108
54
R
I
I
I75
120
60
R
R
I
I
I
I
I82.5
132
66
R
I
I
I90
144
72
R
I
I
I
I
R
R97.5
156
78
R
I
I
I
R105
168
84
R
I
I
I
I
I
I112.5
180
90
R
R
I
I
I120
192
96
R
I
I
I
I
R
I
R127.5
204
102
R
I
I
I135
216
108
R
I
I
I
I
I142.5
228
114
R
I
I
I150
240
120
R
R
I
I
I
I
R
R
Page 212 of 286
5
VEHICLE MAINTENANCE REQUIREMENTS
7
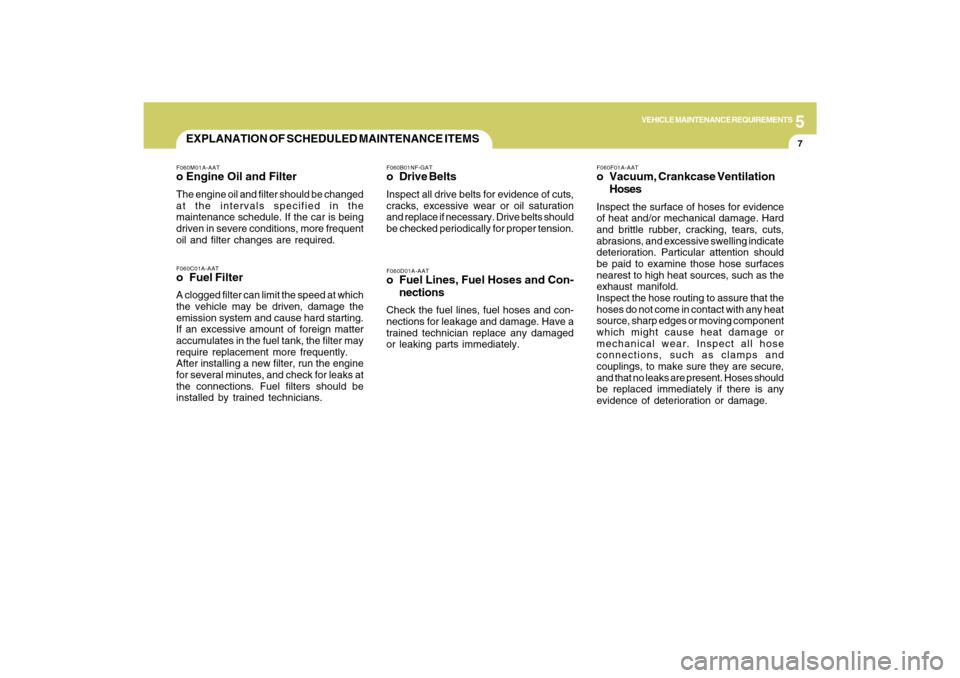
F060D01A-AATo Fuel Lines, Fuel Hoses and Con-
nectionsCheck the fuel lines, fuel hoses and con-
nections for leakage and damage. Have a
trained technician replace any damaged
or leaking parts immediately.F060B01NF-GATo Drive BeltsInspect all drive belts for evidence of cuts,
cracks, excessive wear or oil saturation
and replace if necessary. Drive belts should
be checked periodically for proper tension.
F060M01A-AATo Engine Oil and FilterThe engine oil and filter should be changed
at the intervals specified in the
maintenance schedule. If the car is being
driven in severe conditions, more frequent
oil and filter changes are required.F060C01A-AATo Fuel FilterA clogged filter can limit the speed at which
the vehicle may be driven, damage the
emission system and cause hard starting.
If an excessive amount of foreign matter
accumulates in the fuel tank, the filter may
require replacement more frequently.
After installing a new filter, run the engine
for several minutes, and check for leaks at
the connections. Fuel filters should be
installed by trained technicians.
F060F01A-AATo Vacuum, Crankcase Ventilation
HosesInspect the surface of hoses for evidence
of heat and/or mechanical damage. Hard
and brittle rubber, cracking, tears, cuts,
abrasions, and excessive swelling indicate
deterioration. Particular attention should
be paid to examine those hose surfaces
nearest to high heat sources, such as the
exhaust manifold.
Inspect the hose routing to assure that the
hoses do not come in contact with any heat
source, sharp edges or moving component
which might cause heat damage or
mechanical wear. Inspect all hose
connections, such as clamps and
couplings, to make sure they are secure,
and that no leaks are present. Hoses should
be replaced immediately if there is any
evidence of deterioration or damage.
EXPLANATION OF SCHEDULED MAINTENANCE ITEMS
Page 213 of 286
5
VEHICLE MAINTENANCE REQUIREMENTS8
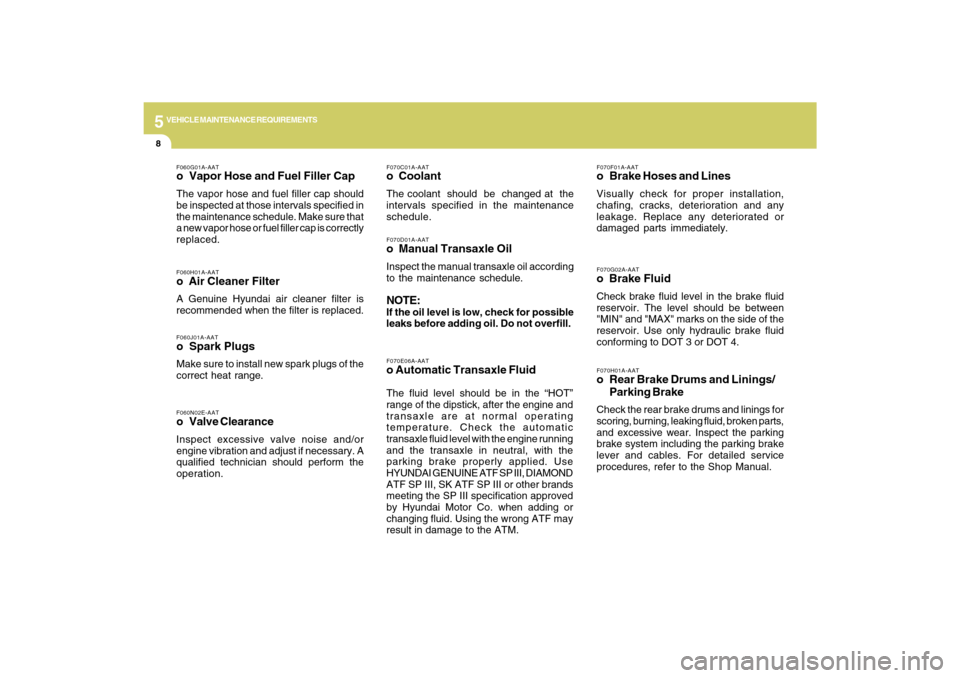
F070G02A-AATo Brake FluidCheck brake fluid level in the brake fluid
reservoir. The level should be between
"MIN" and "MAX" marks on the side of the
reservoir. Use only hydraulic brake fluid
conforming to DOT 3 or DOT 4.F070F01A-AATo Brake Hoses and LinesVisually check for proper installation,
chafing, cracks, deterioration and any
leakage. Replace any deteriorated or
damaged parts immediately.
F070E06A-AATo Automatic Transaxle FluidThe fluid level should be in the “HOT”
range of the dipstick, after the engine and
transaxle are at normal operating
temperature. Check the automatic
transaxle fluid level with the engine running
and the transaxle in neutral, with the
parking brake properly applied. Use
HYUNDAI GENUINE ATF SP III, DIAMOND
ATF SP III, SK ATF SP III or other brands
meeting the SP III specification approved
by Hyundai Motor Co. when adding or
changing fluid. Using the wrong ATF may
result in damage to the ATM.
F070H01A-AATo Rear Brake Drums and Linings/
Parking BrakeCheck the rear brake drums and linings for
scoring, burning, leaking fluid, broken parts,
and excessive wear. Inspect the parking
brake system including the parking brake
lever and cables. For detailed service
procedures, refer to the Shop Manual.
F070C01A-AATo CoolantThe coolant should be changed at the
intervals specified in the maintenance
schedule.
F060J01A-AATo Spark PlugsMake sure to install new spark plugs of the
correct heat range.F060H01A-AATo Air Cleaner FilterA Genuine Hyundai air cleaner filter is
recommended when the filter is replaced.F060G01A-AATo Vapor Hose and Fuel Filler CapThe vapor hose and fuel filler cap should
be inspected at those intervals specified in
the maintenance schedule. Make sure that
a new vapor hose or fuel filler cap is correctly
replaced.
F070D01A-AATo Manual Transaxle OilInspect the manual transaxle oil according
to the maintenance schedule.NOTE:If the oil level is low, check for possible
leaks before adding oil. Do not overfill.
F060N02E-AATo Valve ClearanceInspect excessive valve noise and/or
engine vibration and adjust if necessary. A
qualified technician should perform the
operation.
Page 220 of 286
6
DO-IT-YOURSELF MAINTENANCE
5
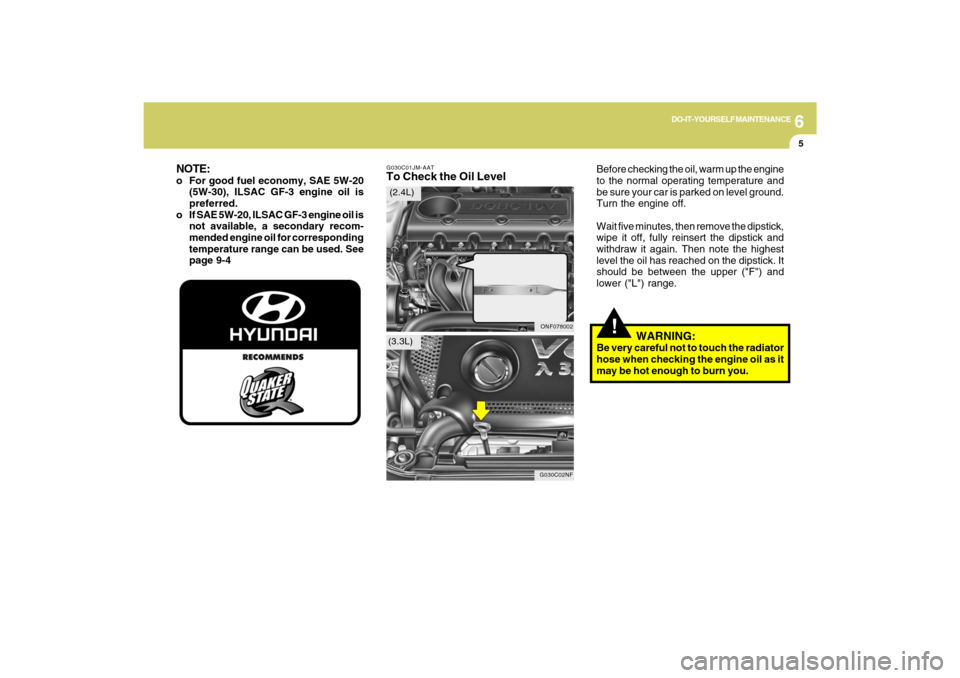
G030C01JM-AATTo Check the Oil Level
Before checking the oil, warm up the engine
to the normal operating temperature and
be sure your car is parked on level ground.
Turn the engine off.
Wait five minutes, then remove the dipstick,
wipe it off, fully reinsert the dipstick and
withdraw it again. Then note the highest
level the oil has reached on the dipstick. It
should be between the upper ("F") and
lower ("L") range.
!
WARNING:
Be very careful not to touch the radiator
hose when checking the engine oil as it
may be hot enough to burn you.
ONF078002
G030C02NF
(2.4L)
(3.3L)
NOTE:o For good fuel economy, SAE 5W-20
(5W-30), ILSAC GF-3 engine oil is
preferred.
o If SAE 5W-20, ILSAC GF-3 engine oil is
not available, a secondary recom-
mended engine oil for corresponding
temperature range can be used. See
page 9-4
Page 242 of 286
6
DO-IT-YOURSELF MAINTENANCE
27
FOR MORE INFORMATION
ABOUT YOUR HYUNDAIG250A01A-AATIf you desire additional information about
maintaining and servicing your Hyundai,
you may purchase a factory Shop Manual
at your Hyundai dealer's parts department.
This is the same manual used by
dealership technicians and while it is highly
technical it can be useful in obtaining a
better understanding of your car and how
it works.
HEADLIGHT AIMING ADJUST-
MENTG290A03O-AATBefore performing aiming adjustment,
make sure of the following.
1. Keep all tires inflated to the correct
pressure.
2. Place the vehicle on level ground and
press the front bumper & rear bumper
down several times.
Place vehicle at a distance of 118 in.
(3m) from the test wall.
3. See that the vehicle is unloaded (except
for full levels of coolant, engine oil and
fuel, and spare tire, jack, and tools).
Have the driver or equivalent weight
placed in driver's seat.
4. Clean the headlight lenses and turn on
the headlights (Low beam).
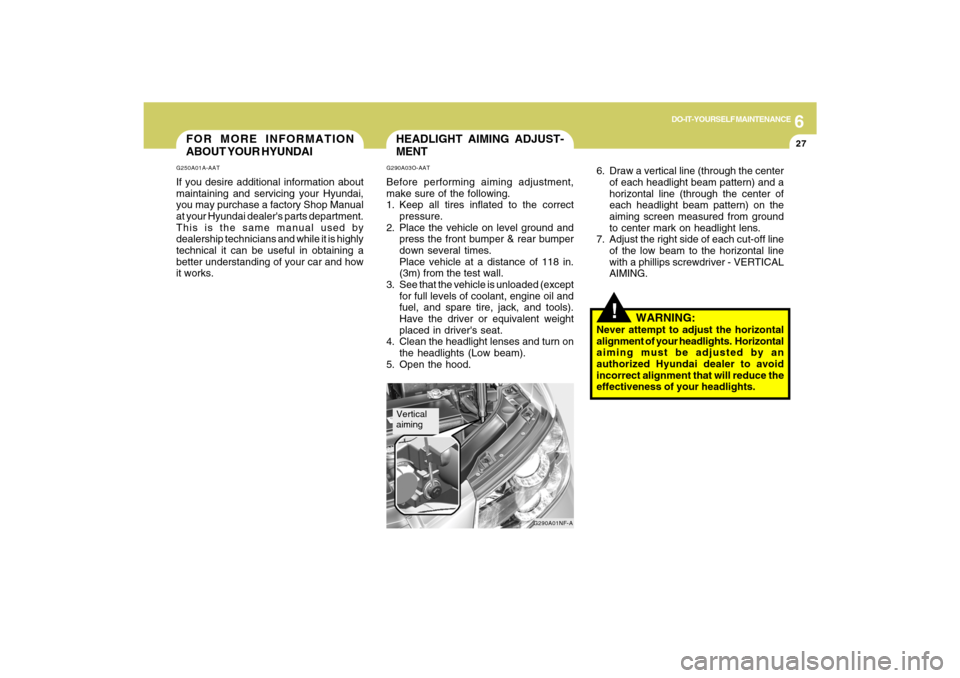
5. Open the hood.
G290A01NF-A
Vertical
aiming
!
6. Draw a vertical line (through the center
of each headlight beam pattern) and a
horizontal line (through the center of
each headlight beam pattern) on the
aiming screen measured from ground
to center mark on headlight lens.
7. Adjust the right side of each cut-off line
of the low beam to the horizontal line
with a phillips screwdriver - VERTICAL
AIMING.
WARNING:
Never attempt to adjust the horizontal
alignment of your headlights. Horizontal
aiming must be adjusted by an
authorized Hyundai dealer to avoid
incorrect alignment that will reduce the
effectiveness of your headlights.
Page 253 of 286
6
DO-IT-YOURSELF MAINTENANCE
38
1
2
3
4
5
6
7
8
9
10
11
12
13
14
15
16
17
18
19
20
21
22
23
24
HORN
TAIL
ECU
IG1
DRL
FR FOG
A/CON
F/PUMP
DIODE
ATM
STOP
H/LP LO RH
S/ROOF
H/LP WASHER
H/LP HI
ECU
SNSR.3
SNSR.1
SNSR.2
B/UP
IGN COIL
ECU (IG1)
H/LP LO
ABS
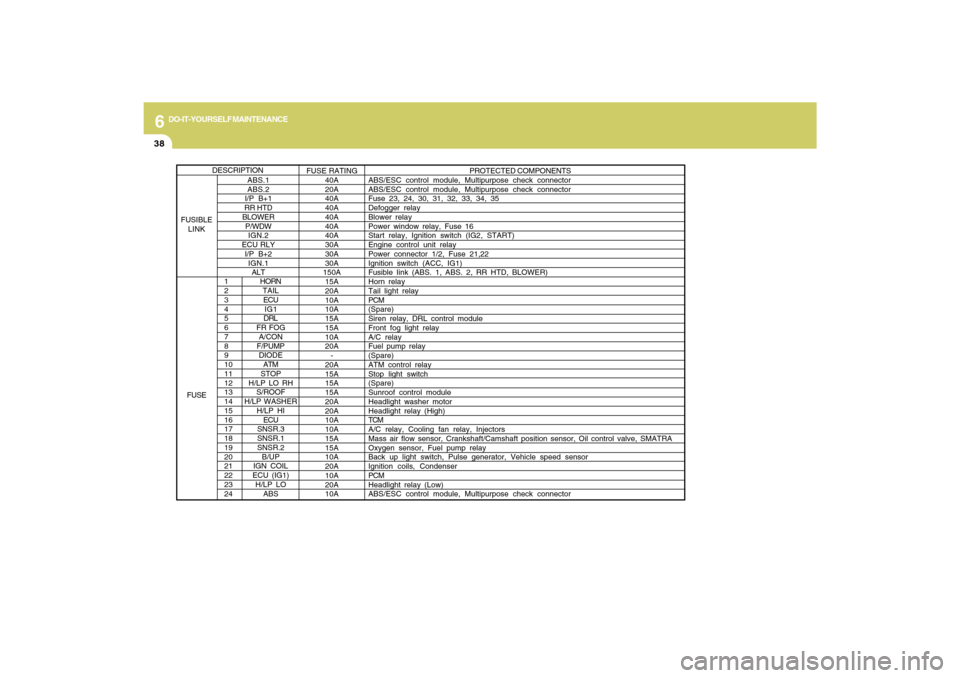
PROTECTED COMPONENTS
ABS/ESC control module, Multipurpose check connector
ABS/ESC control module, Multipurpose check connector
Fuse 23, 24, 30, 31, 32, 33, 34, 35
Defogger relay
Blower relay
Power window relay, Fuse 16
Start relay, Ignition switch (IG2, START)
Engine control unit relay
Power connector 1/2, Fuse 21,22
Ignition switch (ACC, IG1)
Fusible Iink (ABS. 1, ABS. 2, RR HTD, BLOWER)
Horn relay
Tail light relay
PCM
(Spare)
Siren relay, DRL control module
Front fog light relay
A/C relay
Fuel pump relay
(Spare)
ATM control relay
Stop light switch
(Spare)
Sunroof control module
Headlight washer motor
Headlight relay (High)
TCM
A/C relay, Cooling fan relay, Injectors
Mass air flow sensor, Crankshaft/Camshaft position sensor, Oil control valve, SMATRA
Oxygen sensor, Fuel pump relay
Back up light switch, Pulse generator, Vehicle speed sensor
Ignition coils, Condenser
PCM
Headlight relay (Low)
ABS/ESC control module, Multipurpose check connector
ABS.1
ABS.2
I/P B+1
RR HTD
BLOWER
P/WDW
IGN.2
ECU RLY
I/P B+2
IGN.1
ALTFUSE RATING
40A
20A
40A
40A
40A
40A
40A
30A
30A
30A
150A
15A
20A
10A
10A
15A
15A
10A
20A
-
20A
15A
15A
15A
20A
20A
10A
10A
15A
15A
10A
20A
10A
20A
10A
DESCRIPTION
FUSIBLE
LINK
FUSE
Page 255 of 286
6
DO-IT-YOURSELF MAINTENANCE
40
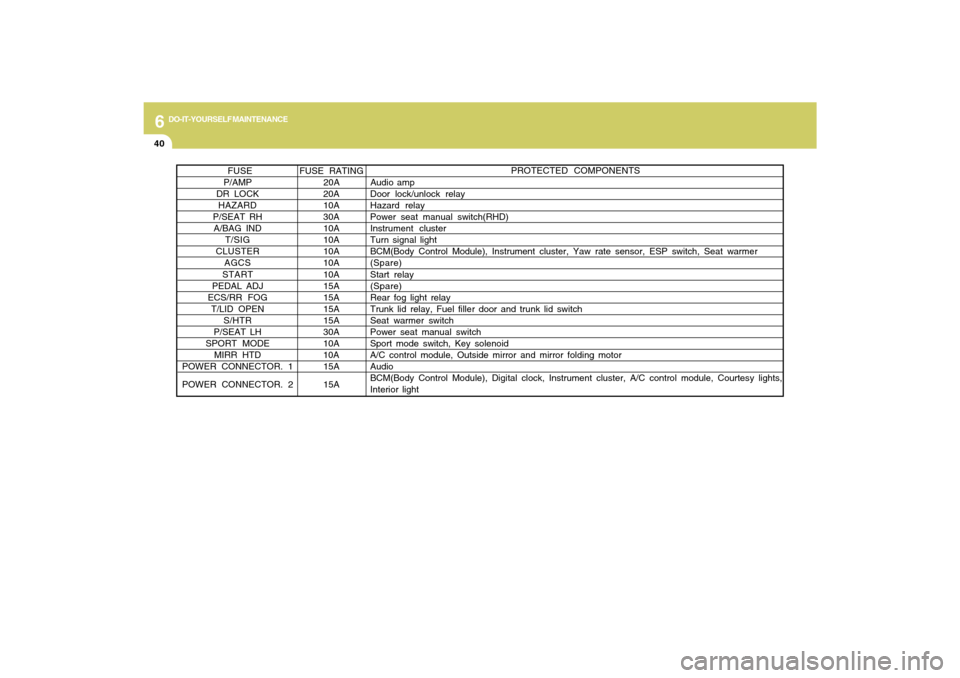
PROTECTED COMPONENTS
FUSE RATING FUSE
P/AMP 20A Audio amp
DR LOCK 20A Door lock/unlock relay
HAZARD 10AHazard relay
P/SEAT RH 30A Power seat manual switch(RHD)
A/BAG IND 10A Instrument cluster
T/SIG 10A Turn signal light
CLUSTER 10ABCM(Body Control Module), Instrument cluster, Yaw rate sensor, ESP switch, Seat warmer
AGCS 10A (Spare)
START 10A Start relay
PEDAL ADJ 15A(Spare)
ECS/RR FOG 15A Rear fog light relay
T/LID OPEN 15A Trunk lid relay, Fuel filler door and trunk lid switch
S/HTR 15A Seat warmer switch
P/SEAT LH 30A Power seat manual switch
SPORT MODE 10A Sport mode switch, Key solenoid
MIRR HTD 10A A/C control module, Outside mirror and mirror folding motor
POWER CONNECTOR. 115A Audio
POWER CONNECTOR. 2 15ABCM(Body Control Module), Digital clock, Instrument cluster, A/C control module, Courtesy lights,
Interior light