2009 Hyundai Santa Fe tow
[x] Cancel search: towPage 255 of 353

38WHAT TO DO IN AN EMERGENCY
Changing a tire with TPMS
If you have a flat tire, the Low Tire
Pressure and Position telltales will come
on. Have the flat tire repaired by an
authorized Hyundai dealer as soon as
possible or replace the flat tire with the
temporary spare tire. NEVER use a
puncture-repairing agent to repair and/
or inflate a low pressure tire. The tire
sealant can damage the tire pressure
sensor. If used, you will have to replace
the tire pressure sensor.
Each wheel is equipped with a tire
pressure sensor mounted inside the tire
behind the valve stem. You must use
TPMS specific wheels. It is recom-
mended that you always have your tires
serviced by an authorized Hyundai
dealer.
Even if you replace the low pressure tire
with the temporary spare tire, the Low
Tire Pressure and Position telltales will
remain on until the low pressure tire is
repaired and placed on the vehicle. NOTE:
o The TPMS malfunction indicator
may be illuminated if the vehicle
is moving around electric power
supply cables or radios transmit-
ter such as at police stations, gov-
ernment and public offices, broad-
casting stations, military installa-
tions, airports, or transmitting tow-
ers, etc. This can interfere with
normal operation of the Tire Pres-
sure Monitoring System (TPMS).
o The TPMS malfunction indicator
may be illuminated if some elec-
tronic devices, such as notebook
computer, are used in the vehicle.
This can interfere with normal
operation of the Tire Pressure
Monitoring System (TPMS).After you replace the low pressure tire
with the temporary spare tire, the TPMS
malfunction indicator may be illumi-
nated after a few minutes, because the
temporary spare tire does not have a
sensor.
Once the low pressure tire is re-inflated
to the recommended pressure and in-
stalled on the vehicle, the TPMS mal-
function indicator and the low tire pres-
sure and position telltales will extin-
guish within a few minutes.
If the indicators are not extinguished
after a few minutes, please visit an
authorized Hyundai dealer.
You may not be able identify a low tire
by simply looking at it. Always use a
good quality tire pressure gauge to
measure the tire's inflation pressure.
Please note that a tire that is hot (from
being driven) will have a higher pres-
sure measurement than a tire that is
cold (from sitting stationary for at least
3 hours and driven less than 1 mile
(1.6km) during that 3 hour period).
Page 257 of 353
310
WHAT TO DO IN AN EMERGENCY
!
!
4. As the temporary spare tire is spe-
cifically designed for your vehicle, it
should not be used on any other
vehicle.
5. The temporary spare tire should not
be used on any other wheels, nor
should standard tires, snow tires,
wheel covers or trim rings be used
with the temporary spare wheel. If
such use is attempted, damage to
these items or other car components
may occur.
6. The temporary spare tire pressure
should be checked once a month
while the tire is stored.
SPARE TIRE2. The spare tire should only be used
temporarily and should be returned
to the spare tire carrier as soon as
the original tire can be repaired or
replaced.
3. Continuous use at speeds of over 50
mph (80 km/h) is not recommended.D040A01CM-AATTemporary Spare Tire
The following instructions for the tem-
porary spare tire should be observed:
1. Check inflation pressure as soon as
practical after installing the spare
tire, and adjust to the specified pres-
sure. The tire pressure should be
periodically checked and maintained
at the specified pressure while the
tire is stored.
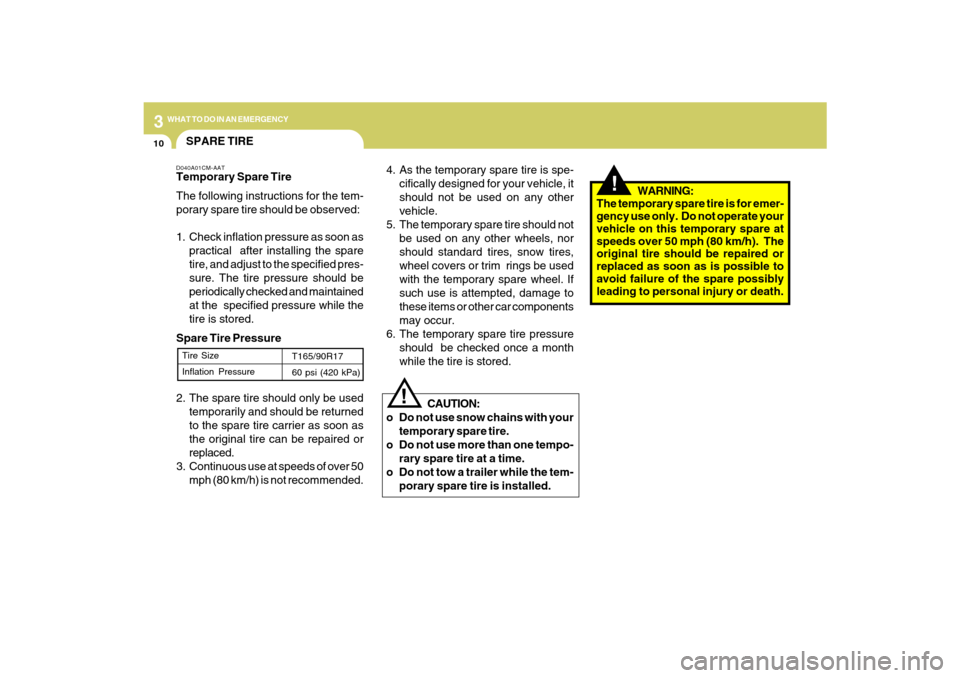
Spare Tire Pressure
CAUTION:
o Do not use snow chains with your
temporary spare tire.
o Do not use more than one tempo-
rary spare tire at a time.
o Do not tow a trailer while the tem-
porary spare tire is installed.Tire Size
Inflation PressureT165/90R17
60 psi (420 kPa)
WARNING:
The temporary spare tire is for emer-
gency use only. Do not operate your
vehicle on this temporary spare at
speeds over 50 mph (80 km/h). The
original tire should be repaired or
replaced as soon as is possible to
avoid failure of the spare possibly
leading to personal injury or death.
Page 264 of 353
3
WHAT TO DO IN AN EMERGENCY
17
D060J01CM-AATAfter Changing Wheels
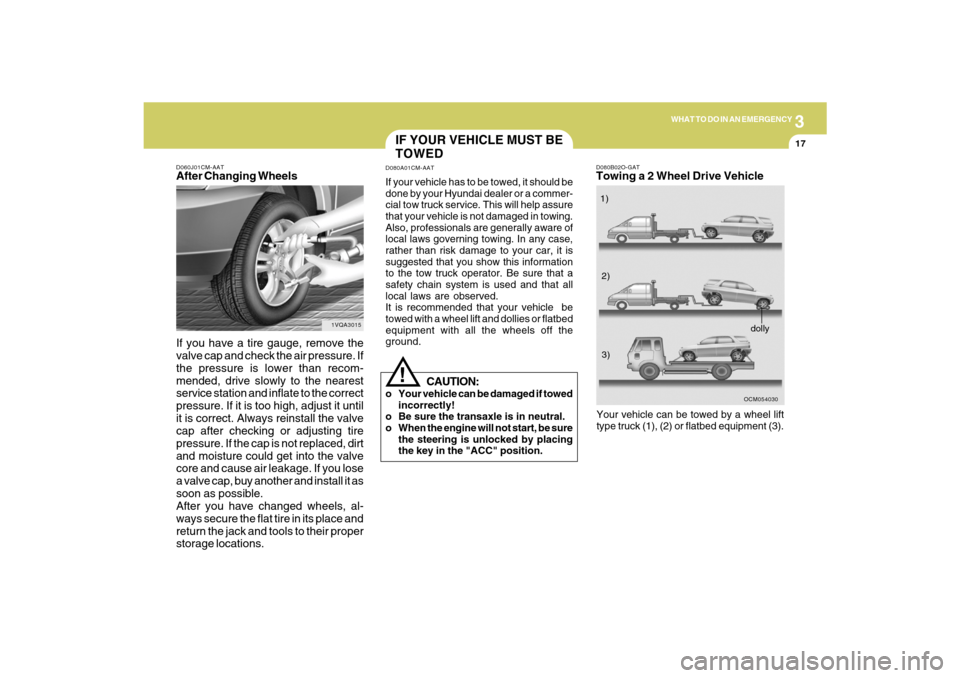
If you have a tire gauge, remove the
valve cap and check the air pressure. If
the pressure is lower than recom-
mended, drive slowly to the nearest
service station and inflate to the correct
pressure. If it is too high, adjust it until
it is correct. Always reinstall the valve
cap after checking or adjusting tire
pressure. If the cap is not replaced, dirt
and moisture could get into the valve
core and cause air leakage. If you lose
a valve cap, buy another and install it as
soon as possible.
After you have changed wheels, al-
ways secure the flat tire in its place and
return the jack and tools to their proper
storage locations.
1VQA3015
IF YOUR VEHICLE MUST BE
TOWEDD080A01CM-AATIf your vehicle has to be towed, it should be
done by your Hyundai dealer or a commer-
cial tow truck service. This will help assure
that your vehicle is not damaged in towing.
Also, professionals are generally aware of
local laws governing towing. In any case,
rather than risk damage to your car, it is
suggested that you show this information
to the tow truck operator. Be sure that a
safety chain system is used and that all
local laws are observed.
It is recommended that your vehicle be
towed with a wheel lift and dollies or flatbed
equipment with all the wheels off the
ground.
!
CAUTION:
o Your vehicle can be damaged if towed
incorrectly!
o Be sure the transaxle is in neutral.
o When the engine will not start, be sure
the steering is unlocked by placing
the key in the "ACC" position.
D080B02O-GATTowing a 2 Wheel Drive Vehicle
OCM054030
Your vehicle can be towed by a wheel lift
type truck (1), (2) or flatbed equipment (3).1)
2)
3)
dolly
Page 265 of 353
318
WHAT TO DO IN AN EMERGENCY
!
OCM054032
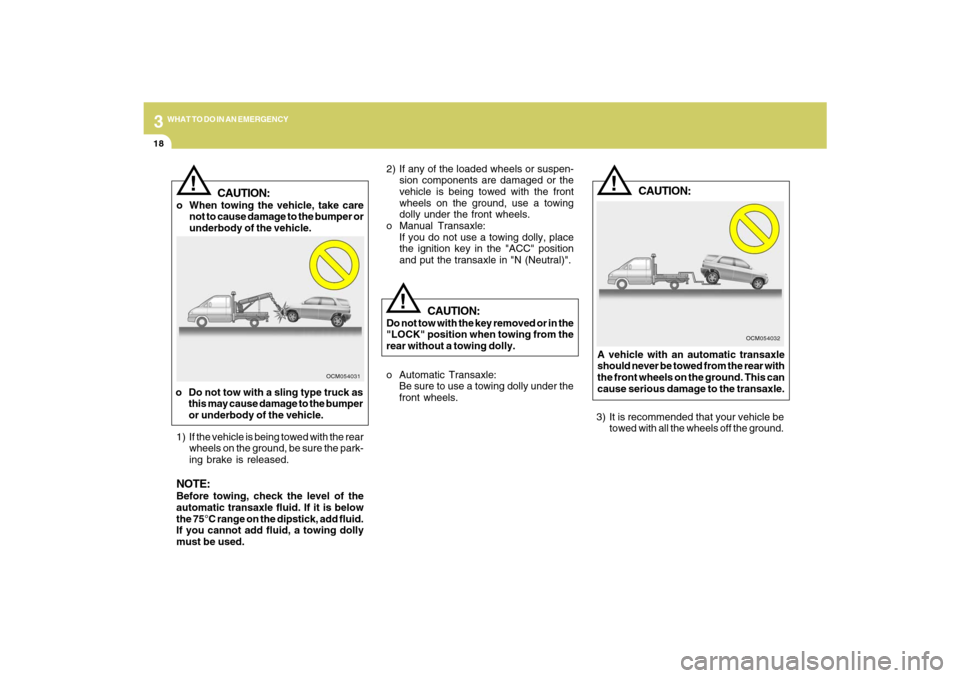
2) If any of the loaded wheels or suspen-
sion components are damaged or the
vehicle is being towed with the front
wheels on the ground, use a towing
dolly under the front wheels.
o Manual Transaxle:
If you do not use a towing dolly, place
the ignition key in the "ACC" position
and put the transaxle in "N (Neutral)".
CAUTION:
Do not tow with the key removed or in the
"LOCK" position when towing from the
rear without a towing dolly.
!
!
OCM054031
CAUTION:
o When towing the vehicle, take care
not to cause damage to the bumper or
underbody of the vehicle.
o Do not tow with a sling type truck as
this may cause damage to the bumper
or underbody of the vehicle.
1) If the vehicle is being towed with the rear
wheels on the ground, be sure the park-
ing brake is released.NOTE:Before towing, check the level of the
automatic transaxle fluid. If it is below
the 75°C range on the dipstick, add fluid.
If you cannot add fluid, a towing dolly
must be used.o Automatic Transaxle:
Be sure to use a towing dolly under the
front wheels.
CAUTION:
A vehicle with an automatic transaxle
should never be towed from the rear with
the front wheels on the ground. This can
cause serious damage to the transaxle.
3) It is recommended that your vehicle be
towed with all the wheels off the ground.
Page 266 of 353
3
WHAT TO DO IN AN EMERGENCY
19
D080B01CM-AATTowing a 4 Wheel Drive Vehicle
OCM054033dollydolly
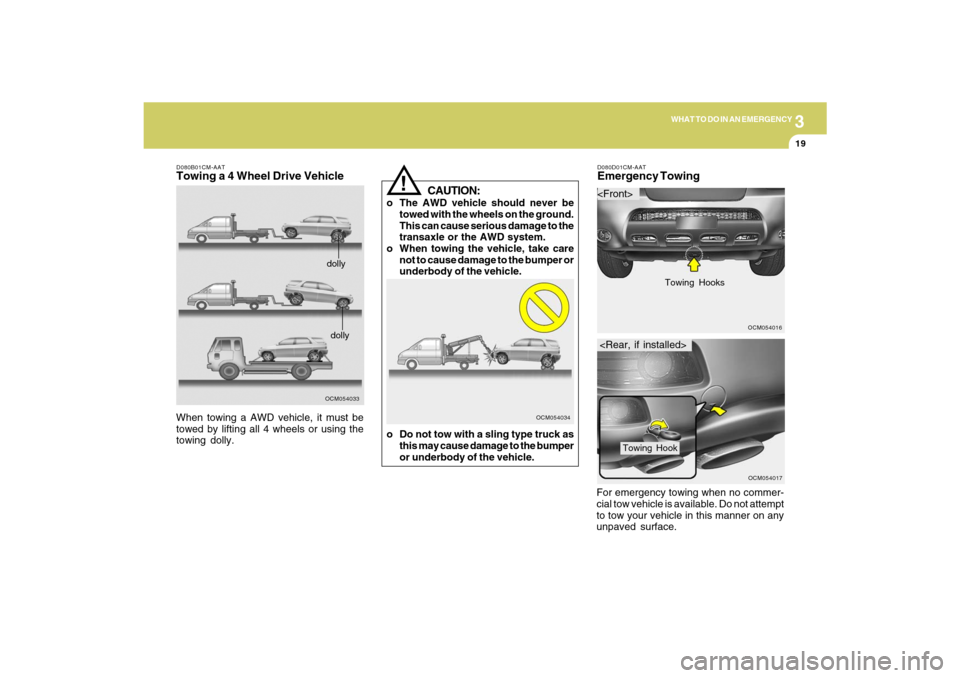
When towing a AWD vehicle, it must be
towed by lifting all 4 wheels or using the
towing dolly.
CAUTION:
o The AWD vehicle should never be
towed with the wheels on the ground.
This can cause serious damage to the
transaxle or the AWD system.
o When towing the vehicle, take care
not to cause damage to the bumper or
underbody of the vehicle.
!
OCM054034
o Do not tow with a sling type truck as
this may cause damage to the bumper
or underbody of the vehicle.
D080D01CM-AATEmergency Towing
OCM054016
OCM054017
Towing Hooks
Towing Hook
For emergency towing when no commer-
cial tow vehicle is available. Do not attempt
to tow your vehicle in this manner on any
unpaved surface.
Page 267 of 353
320
WHAT TO DO IN AN EMERGENCY
!
CAUTION:
If the car is being towed with all four
wheels on the ground, it can be towed
only from the front. Be sure that the
transaxle is in neutral. If your vehicle is
equipped with an automatic transaxle,
do not tow at speeds greater than 30 mph
(50 km/h) and for more than 15 miles (25
km).
Be sure the steering is unlocked by plac-
ing the key in the "ACC" position. A
driver must be in the towed vehicle to
operate the steering and brakes. (3)Attach a tow cable, chain or strap to the
towing hook on the rear bumper.
NOTE:o To avoid serious damage to your AWD
vehicle, limit the towing to 10 mph (15
km/h) and not for more than 1 mile (1.5
km) at ANY TIME.
o Before towing, check the level of the
automatic transaxle fluid. If it is below
the 75°C range on the dipstick, add
fluid. If you cannot add fluid, a towing
dolly must be used.
CAUTION:
If the Engine is not running, the power
assist for the brakes and steering will
not work so steering and braking will be
much harder than usual.
!
This could result in serious damage to your
car. Nor should towing be attempted if the
wheels, drive train, axles, steering or
brakes are damaged. Before towing, be
sure the transaxle is in neutral and the key
is in "ACC" (with the engine off) or in the
"ON" position (with the engine running). A
driver must be in the towed car to steer it
and operate the brakes.
CAUTION
It should be tightened firmly with your
fingers until there is no more play in the
towing hole. Towing hook is located in the
luggage compartment.
!
When using the rear towing hook
(1)To open the towing cover push it with
your finger.
(2)To mount the towing hook, rotate it clock-
wise.
Page 282 of 353
5
VEHICLE MAINTENANCE REQUIREMENTS
7
SEVERE DRIVING CONDITIONSA - Repeatedly driving short distance of
less than 5miles(8km) in normal tem-
perature or less than 10miles(16km) in
freezing temperature
B - Extensive engine idling or low speed
driving for long distances
C - Driving on rough, dusty, muddy, un-
paved, graveled or salt-spread roads
D - Driving in areas using salt or other
corrosive materials or in very cold
weather
E - Driving in sandy areas
F - More than 50% driving in heavy city
traffic during hot weather above 32°C
(90°F)
G - Driving in mountainous areas
H - Towing a Trailer, or using a camper, or
roof rack
I - Driving as a patrol car, taxi, other com-
mercial use or vehicle towing
J - Driving over 100 MPH(170 Km/h)
K - Frequently driving in stop-and-go con-
ditions
F060D01A-AATo Fuel Lines, Fuel Hoses and Con-
nectionsCheck the fuel lines, fuel hoses and con-
nections for leakage and damage. Have a
trained technician replace any damaged
or leaking parts immediately.F060B01A-AATo Drive BeltsInspect all drive belts for evidence of cuts,
cracks, excessive wear or oil saturation
and replace if necessary. Drive belts should
be checked periodically for proper tension
and adjusted as necessary.
F060M01A-AATo Engine Oil and FilterThe engine oil and filter should be changed
at the intervals specified in the mainte-
nance schedule. If the car is being driven
in severe conditions, more frequent oil and
filter changes are required.F060C01A-AATo Fuel FilterA clogged filter can limit the speed at which
the vehicle may be driven, damage the
emission system and cause hard starting.
If an excessive amount of foreign matter
accumulates in the fuel tank, the filter may
require replacement more frequently.
After installing a new filter, run the engine
for several minutes, and check for leaks at
the connections. Fuel filters should be
installed by trained technicians.EXPLANATION OF SCHEDULED
MAINTENANCE ITEMS
Page 303 of 353

6
DO-IT-YOURSELF MAINTENANCE
18
!
CAUTION:
When replacing a fusible link, never use
anything but a new fusible link with the
same or lower amperage rating. Never
use a piece of wire or a higher-rated
fusible link. This could result in serious
damage and create a fire hazard.
G200B02HP-AATReplacing Accessory Fuses
OCM054002
The fuse box for the lights and other elec-
trical accessories will be found low on the
dashboard on the driver's side. Inside the
box you will find a list showing the circuits
protected by each fuse.
If any of your car's lights or other electrical
accessories stop working, a blown(open)
fuse could be the reason. If the fuse has
burned out, you will see that the metal strip
inside the fuse has melted through. If you
suspect a blown fuse, follow this proce-
dure:1. Turn off the ignition and all other
switches.
2. Open the fuse box and examine each
fuse. Remove each fuse by pulling it
toward you (a small "fuse puller" tool is
contained in the relay and fuse box of
the engine room to simplify this opera-
tion).
3. Be sure to check all other fuses even if
you find one that appears to have burned
out.