2009 Hyundai Santa Fe tow
[x] Cancel search: towPage 121 of 353
1FEATURES OF YOUR HYUNDAI
110
!
CAUTION:
To prevent damage to the goods or the
vehicle, care should be taken when car-
rying fragile or bulky objects in the lug-
gage compartment.
!
WARNING:
Avoid eye injury. DO NOT overstretch.
The luggage net ALWAYS keep your
face and body out of its recoil path. DO
NOT use when the strap has visible signs
of wear or damage.
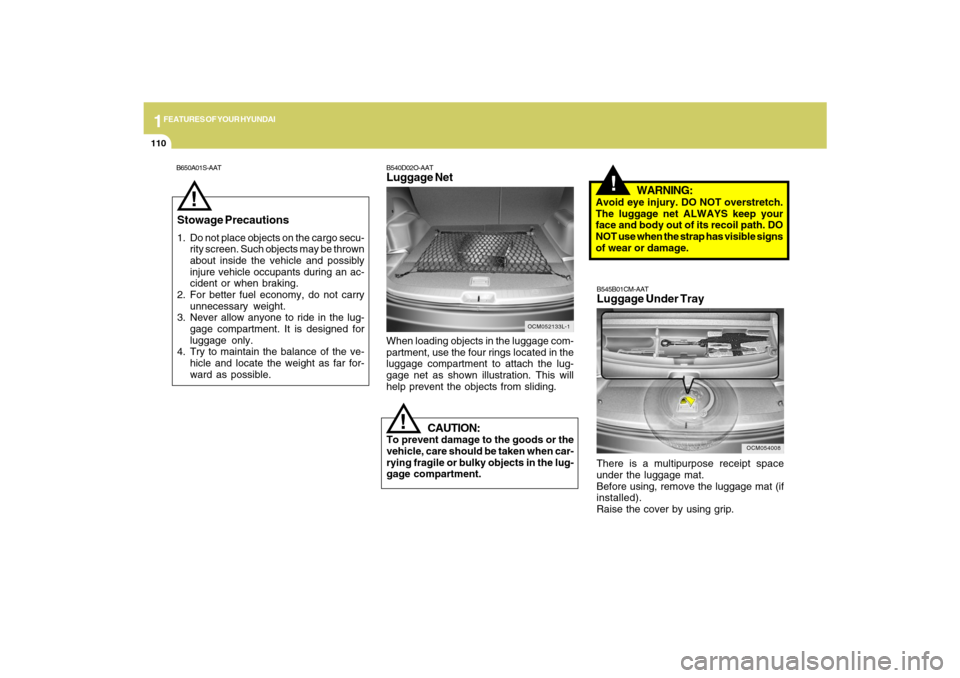
When loading objects in the luggage com-
partment, use the four rings located in the
luggage compartment to attach the lug-
gage net as shown illustration. This will
help prevent the objects from sliding.
OCM052133L-1
B540D02O-AATLuggage Net
Stowage Precautions
1. Do not place objects on the cargo secu-
rity screen. Such objects may be thrown
about inside the vehicle and possibly
injure vehicle occupants during an ac-
cident or when braking.
2. For better fuel economy, do not carry
unnecessary weight.
3. Never allow anyone to ride in the lug-
gage compartment. It is designed for
luggage only.
4. Try to maintain the balance of the ve-
hicle and locate the weight as far for-
ward as possible.
!
OCM054008
B545B01CM-AATLuggage Under TrayThere is a multipurpose receipt space
under the luggage mat.
Before using, remove the luggage mat (if
installed).
Raise the cover by using grip.
B650A01S-AAT
Page 129 of 353
1FEATURES OF YOUR HYUNDAI
118
B600B01NF-GATTilt and telescopic type
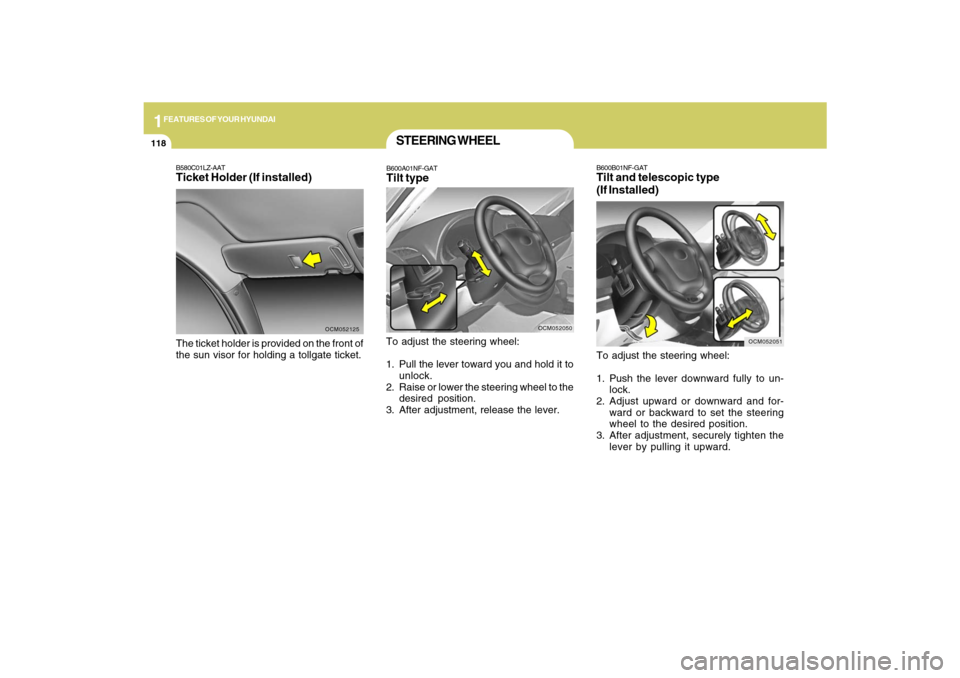
(If Installed)To adjust the steering wheel:
1. Push the lever downward fully to un-
lock.
2. Adjust upward or downward and for-
ward or backward to set the steering
wheel to the desired position.
3. After adjustment, securely tighten the
lever by pulling it upward.
OCM052051
B580C01LZ-AATTicket Holder (If installed)The ticket holder is provided on the front of
the sun visor for holding a tollgate ticket.
OCM052125
STEERING WHEELB600A01NF-GATTilt typeTo adjust the steering wheel:
1. Pull the lever toward you and hold it to
unlock.
2. Raise or lower the steering wheel to the
desired position.
3. After adjustment, release the lever.
OCM052050
Page 143 of 353
1FEATURES OF YOUR HYUNDAI
132
B740C01S-AATDehumidified HeatingFor dehumidified heating:
o Turn on the fan control switch.
o Turn on the air conditioning switch. The
air conditioning indicator light should
come on at the same time.
o Set the air intake control to the "Fresh"
mode (
).
o Set the air flow control to the "Face" (
).
o Adjust the fan control to the desired
speed.
o For more rapid action, set the fan at one
of the higher speeds.
o Adjust the temperature control to pro-
vide the desired amount of warmth.
AIR CONDITIONING SYSTEMB740A01A-AATAir Conditioning Switch
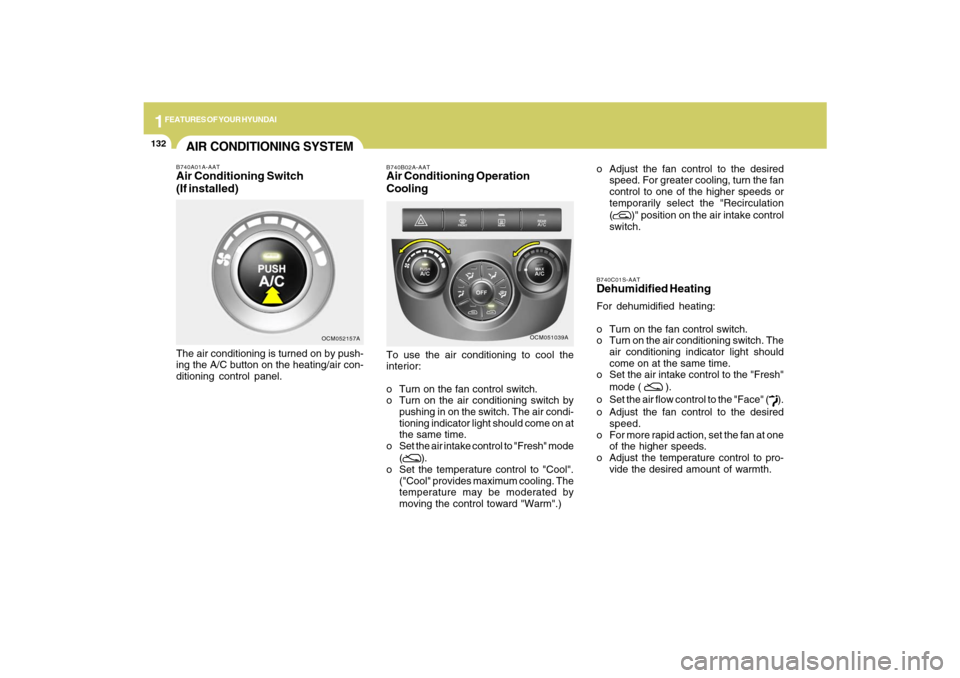
(If installed)The air conditioning is turned on by push-
ing the A/C button on the heating/air con-
ditioning control panel.
OCM052157A
OCM051039A B740B02A-AAT
Air Conditioning Operation
CoolingTo use the air conditioning to cool the
interior:
o Turn on the fan control switch.
o Turn on the air conditioning switch by
pushing in on the switch. The air condi-
tioning indicator light should come on at
the same time.
o Set the air intake control to "Fresh" mode
(
).
o Set the temperature control to "Cool".
("Cool" provides maximum cooling. The
temperature may be moderated by
moving the control toward "Warm".)o Adjust the fan control to the desired
speed. For greater cooling, turn the fan
control to one of the higher speeds or
temporarily select the "Recirculation
(
)" position on the air intake control
switch.
Page 155 of 353
1FEATURES OF YOUR HYUNDAI
144
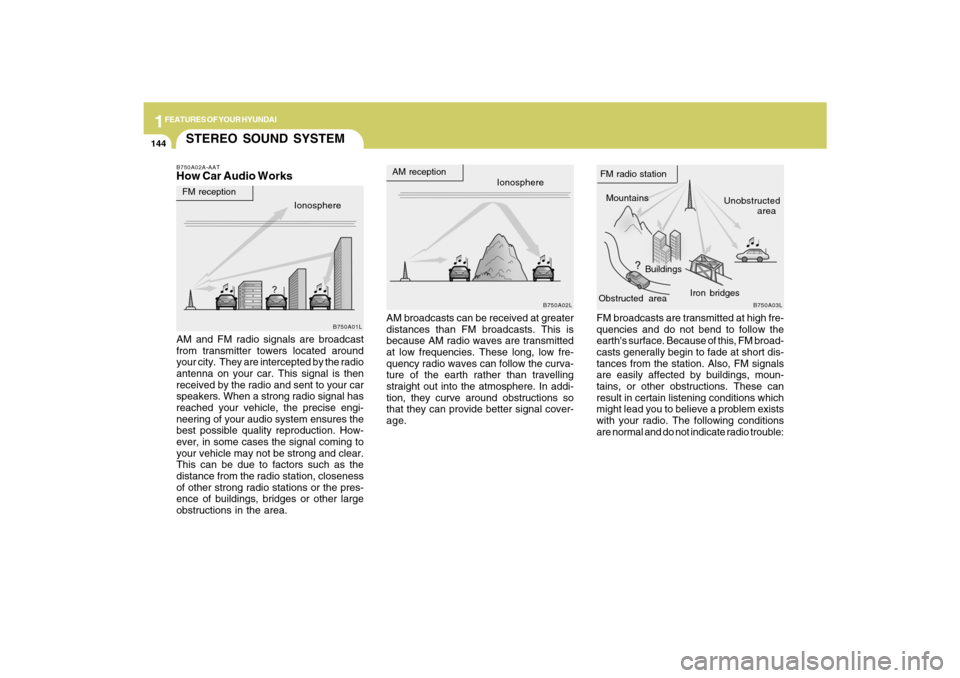
STEREO SOUND SYSTEMB750A02A-AATHow Car Audio Works
AM broadcasts can be received at greater
distances than FM broadcasts. This is
because AM radio waves are transmitted
at low frequencies. These long, low fre-
quency radio waves can follow the curva-
ture of the earth rather than travelling
straight out into the atmosphere. In addi-
tion, they curve around obstructions so
that they can provide better signal cover-
age. AM and FM radio signals are broadcast
from transmitter towers located around
your city. They are intercepted by the radio
antenna on your car. This signal is then
received by the radio and sent to your car
speakers. When a strong radio signal has
reached your vehicle, the precise engi-
neering of your audio system ensures the
best possible quality reproduction. How-
ever, in some cases the signal coming to
your vehicle may not be strong and clear.
This can be due to factors such as the
distance from the radio station, closeness
of other strong radio stations or the pres-
ence of buildings, bridges or other large
obstructions in the area.FM broadcasts are transmitted at high fre-
quencies and do not bend to follow the
earth's surface. Because of this, FM broad-
casts generally begin to fade at short dis-
tances from the station. Also, FM signals
are easily affected by buildings, moun-
tains, or other obstructions. These can
result in certain listening conditions which
might lead you to believe a problem exists
with your radio. The following conditions
are normal and do not indicate radio trouble:
Ionosphere
B750A02L
AM reception
Mountains
BuildingsUnobstructed
area FM radio station
B750A03L
Ionosphere FM reception
B750A01L
Obstructed areaIron bridges
Page 192 of 353
1
FEATURES OF YOUR HYUNDAI
181
FEATURES OF YOUR HYUNDAI
181181181181
Adjusting the LCD Display
Press the DISP button on the RSE control
panel to adjust the LCD display. To adjust
the brightness, select Brightness, then,
press the < REW (dimmer) or FWD >
(brighter) buttons. The next time the RSE
is turned on, the LCD display will return to
the brightness level it was adjusted to
when last used. Brightness can be ad-
justed regardless of whether the RSE is
playing an audio or video source.
While the RSE is playing a video signal,
press DISP and then press the
∧ ∧∧ ∧
∧ NEXT or
∨ ∨∨ ∨
∨ PREV buttons to cycle through other
LCD display adjustments including
SCREEN SIZE, CONTRAST, CHROMA
and HUE. With any of these settings dis-
played, press the < REW or FF > buttons to
adjust the settings.
To close the LCD display, pull the bottom
edge towards you and push it up until it
clicks and locks into the stow-away posi-
tion.
Cleaning the LCD Display
If the LCD display becomes dusty or dirty,
clean it by wiping gently with a soft, dry,
clean cloth. Do not use chemical cleanser
to clean the screen.Loading a Disc
To load a disc in the player, insert it part
way into the loading slot. The player will
automatically grip the disc and pull it the
rest of the way in.
Disc Protection
The player has an Auto-Reload Disc Pro-
tection feature to protect discs from acci-
dental damage. If a disc is not removed
within 12 seconds after being ejected, it
will be pulled back into the player. The disc
will not begin playing.
Audio via Vehicle Speakers
To hear the audio from the RSE through
the vehicle's speakers, the RSE must be
selected by the radio CD/AUX button in the
front of the vehicle. Regardless of whether
RSE audio is selected for the vehicle
speakers or not, when the RSE audio is
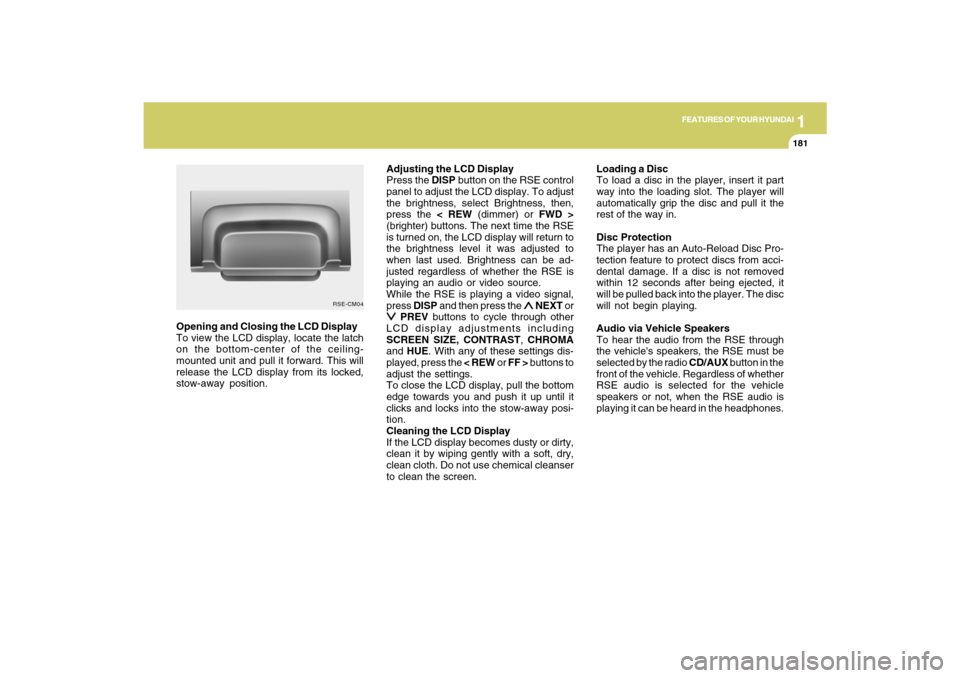
playing it can be heard in the headphones. Opening and Closing the LCD Display
To view the LCD display, locate the latch
on the bottom-center of the ceiling-
mounted unit and pull it forward. This will
release the LCD display from its locked,
stow-away position.
RSE-CM04
Page 211 of 353
DRIVING YOUR HYUNDAI
2
Engine Exhaust Can Be Dangerous! ............................ 2-2
Before Starting the Engine ............................................ 2-4
Key Positions ................................................................ 2-5
Starting ..........................................................................2-6
Manual Transaxle ......................................................... 2-7
Automatic Transaxle...................................................2-10
Anti-Lock Brake System (ABS) ..................................2-15
Electronic Stability Control (ESC)...............................2-15
Full-Time AWD Operation ...........................................2-17
AWD Lock System.....................................................2-20
Good Braking Practices..............................................2-21
Driving for Economy...................................................2-23
Winter Driving.............................................................2-24
Trailer or Vehicle Towing ............................................2-27
Trailer Connector........................................................2-31
Vehicle Load Limit.......................................................2-32
2
Page 229 of 353
2
DRIVING YOUR HYUNDAI
19
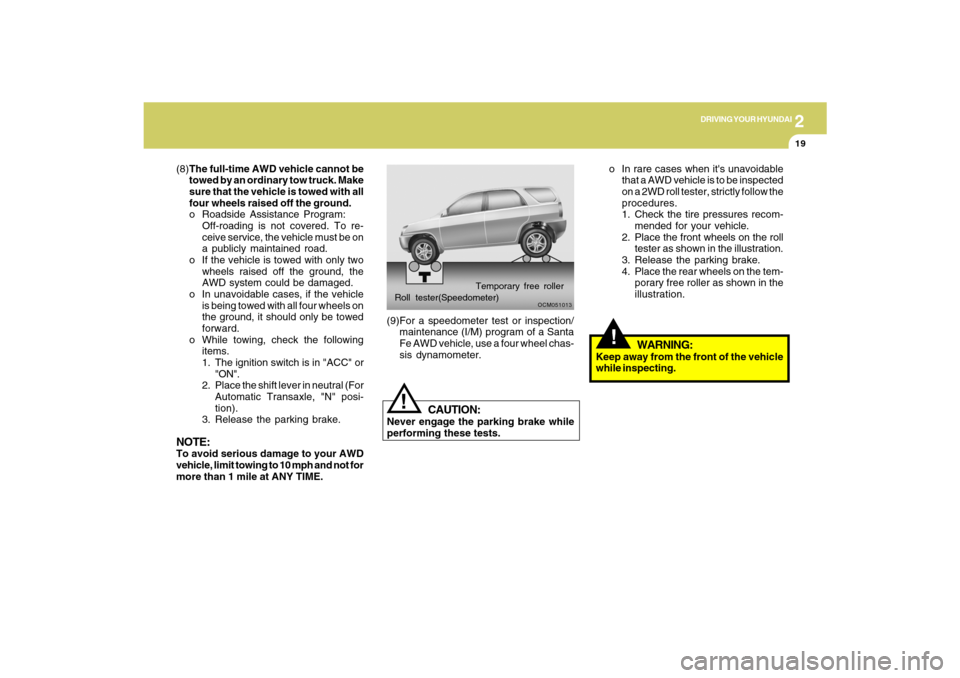
o In rare cases when it's unavoidable
that a AWD vehicle is to be inspected
on a 2WD roll tester, strictly follow the
procedures.
1. Check the tire pressures recom-
mended for your vehicle.
2. Place the front wheels on the roll
tester as shown in the illustration.
3. Release the parking brake.
4. Place the rear wheels on the tem-
porary free roller as shown in the
illustration.!
WARNING:
Keep away from the front of the vehicle
while inspecting.
OCM051013
Roll tester(Speedometer)Temporary free roller(9)For a speedometer test or inspection/
maintenance (I/M) program of a Santa
Fe AWD vehicle, use a four wheel chas-
sis dynamometer.
!
CAUTION:
Never engage the parking brake while
performing these tests. (8)The full-time AWD vehicle cannot be
towed by an ordinary tow truck. Make
sure that the vehicle is towed with all
four wheels raised off the ground.
o Roadside Assistance Program:
Off-roading is not covered. To re-
ceive service, the vehicle must be on
a publicly maintained road.
o If the vehicle is towed with only two
wheels raised off the ground, the
AWD system could be damaged.
o In unavoidable cases, if the vehicle
is being towed with all four wheels on
the ground, it should only be towed
forward.
o While towing, check the following
items.
1. The ignition switch is in "ACC" or
"ON".
2. Place the shift lever in neutral (For
Automatic Transaxle, "N" posi-
tion).
3. Release the parking brake.
NOTE:To avoid serious damage to your AWD
vehicle, limit towing to 10 mph and not for
more than 1 mile at ANY TIME.
Page 236 of 353
2
DRIVING YOUR HYUNDAI
26
!HIGHER SPEED MOTORINGC170A02A-AATPre-Trip Inspections1. Tires:
Adjust the tire inflation pressures to speci-
fication. Low tire inflation pressures will
result in overheating and possible failure
of the tires.
Avoid using worn or damaged tires which
may result in reduced traction or tire fail-
ure.NOTE:Never exceed the maximum tire infla-
tion pressure shown on the tires.
C160K01A-AATCarry Emergency EquipmentDepending on the severity of the weather
where you drive your car, you should carry
appropriate emergency equipment. Some
of the items you may want to carry include
tire chains, tow straps or chains, flashlight,
emergency flares, sand, a shovel, jumper
cables, a window scraper, gloves, ground
cloth, coveralls, a blanket, etc.C160J01A-AATDon't Let Ice and Snow Accumulate
UnderneathUnder some conditions, snow and ice can
build up under the fenders and interfere
with the steering. When driving in severe
winter conditions where this may happen,
you should periodically check underneath
the car to be sure the movement of the front
wheels and the steering components is
not obstructed.
WARNING:
o Underinflated or overinflated tires can
cause poor handling, loss of vehicle
control, and sudden tire failure lead-
ing to accidents, injuries, and even
death. Always check tires are prop-
erly inflated before driving. Refer to
pages 2-32 and 8-3 for proper tire
pressures and further information.
C160H02A-AATUse Approved Window Washer Anti-
Freeze in SystemTo keep the water in the window washer
system from freezing, add an approved
window washer anti-freeze solution in
accordance with instructions on the con-
tainer. Window washer anti-freeze is avail-
able from Hyundai dealers and most auto
parts outlets. Do not use engine coolant or
other types of anti-freeze as these may
damage the paint finish.C160I01A-AATDon't Let Your Parking Brake FreezeUnder some conditions your parking brake
can freeze in the engaged position. This is
most likely to happen when there is an
accumulation of snow or ice around or
near the rear brakes or if the brakes are
wet. If there is a risk the parking brake may
freeze, apply it only temporarily while you
put the gear selector lever in "P" (auto-
matic) or in first or reverse gear (manual
transaxle) and block the rear wheels so the
car cannot roll. Then release the parking
brake.