2009 Hyundai Santa Fe lock
[x] Cancel search: lockPage 32 of 269
1
FEATURES OF YOUR HYUNDAI
21
4. To return the seatback to its normal position, pull the seatback folding lever and reverse the above proce- dure.
When you return the seatback to itsupright position, always be sure it is locked into position by pulling and push-ing on the top of the seatback.
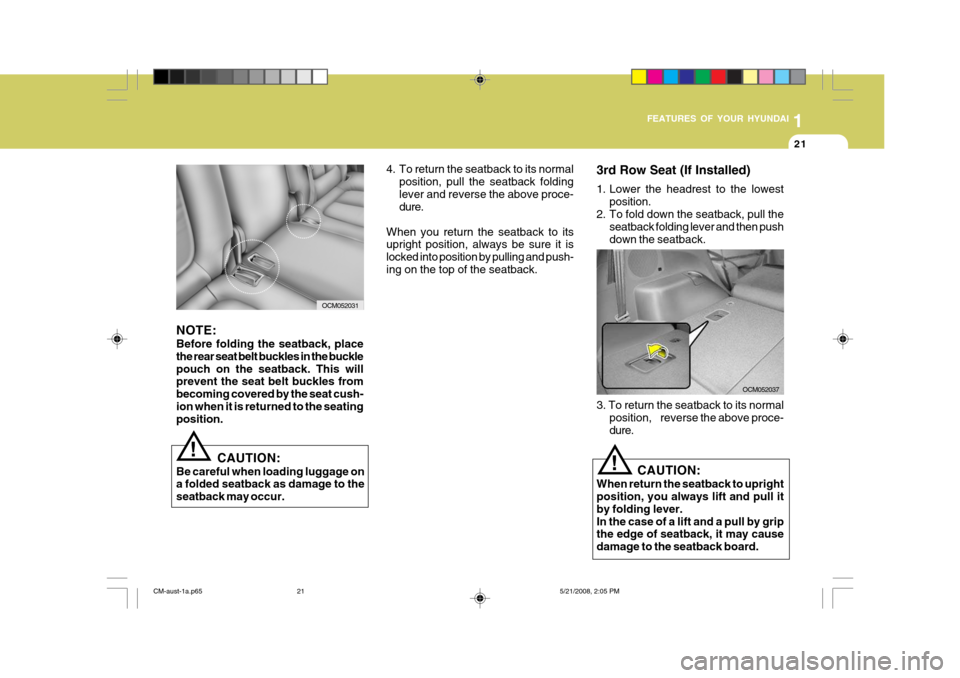
3. To return the seatback to its normalposition, reverse the above proce-dure.
OCM052037
NOTE: Before folding the seatback, place the rear seat belt buckles in the bucklepouch on the seatback. This will prevent the seat belt buckles from becoming covered by the seat cush-ion when it is returned to the seating position.
! CAUTION:
Be careful when loading luggage on a folded seatback as damage to the seatback may occur.
OCM052031 3rd Row Seat (If Installed)
1. Lower the headrest to the lowest
position.
2. To fold down the seatback, pull the seatback folding lever and then push down the seatback.
CAUTION:
When return the seatback to upright position, you always lift and pull it by folding lever.In the case of a lift and a pull by grip the edge of seatback, it may cause damage to the seatback board.
!
CM-aust-1a.p65 5/21/2008, 2:05 PM
21
Page 34 of 269
1
FEATURES OF YOUR HYUNDAI
23
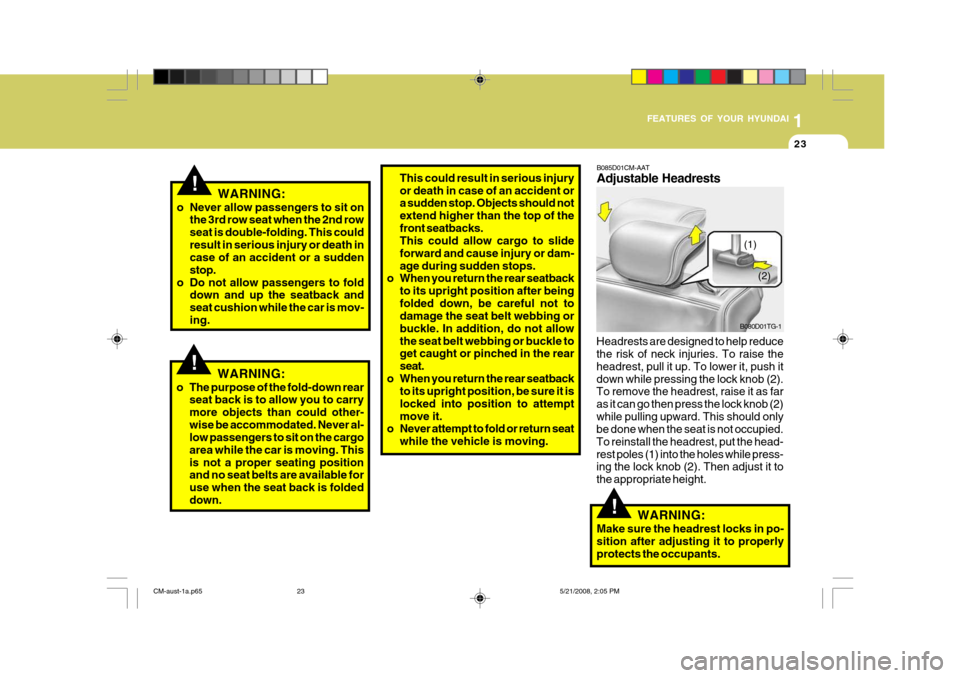
B085D01CM-AAT Adjustable Headrests
Headrests are designed to help reduce the risk of neck injuries. To raise the headrest, pull it up. To lower it, push itdown while pressing the lock knob (2). To remove the headrest, raise it as far as it can go then press the lock knob (2)while pulling upward. This should only be done when the seat is not occupied. To reinstall the headrest, put the head-rest poles (1) into the holes while press- ing the lock knob (2). Then adjust it to the appropriate height. B080D01TG-1
(1)
This could result in serious injury or death in case of an accident or a sudden stop. Objects should not extend higher than the top of thefront seatbacks. This could allow cargo to slide forward and cause injury or dam-age during sudden stops.
o When you return the rear seatback
to its upright position after beingfolded down, be careful not to damage the seat belt webbing or buckle. In addition, do not allowthe seat belt webbing or buckle to get caught or pinched in the rear seat.
o When you return the rear seatback to its upright position, be sure it islocked into position to attemptmove it.
o Never attempt to fold or return seat
while the vehicle is moving.!
!WARNING:
o The purpose of the fold-down rear seat back is to allow you to carry more objects than could other-wise be accommodated. Never al- low passengers to sit on the cargo area while the car is moving. Thisis not a proper seating position and no seat belts are available for use when the seat back is foldeddown. WARNING:
o Never allow passengers to sit on the 3rd row seat when the 2nd rowseat is double-folding. This couldresult in serious injury or death in case of an accident or a sudden stop.
o Do not allow passengers to fold down and up the seatback andseat cushion while the car is mov-ing.
!WARNING:
Make sure the headrest locks in po- sition after adjusting it to properly protects the occupants. (2)
CM-aust-1a.p65
5/21/2008, 2:05 PM
23
Page 37 of 269
1FEATURES OF YOUR HYUNDAI
26
!
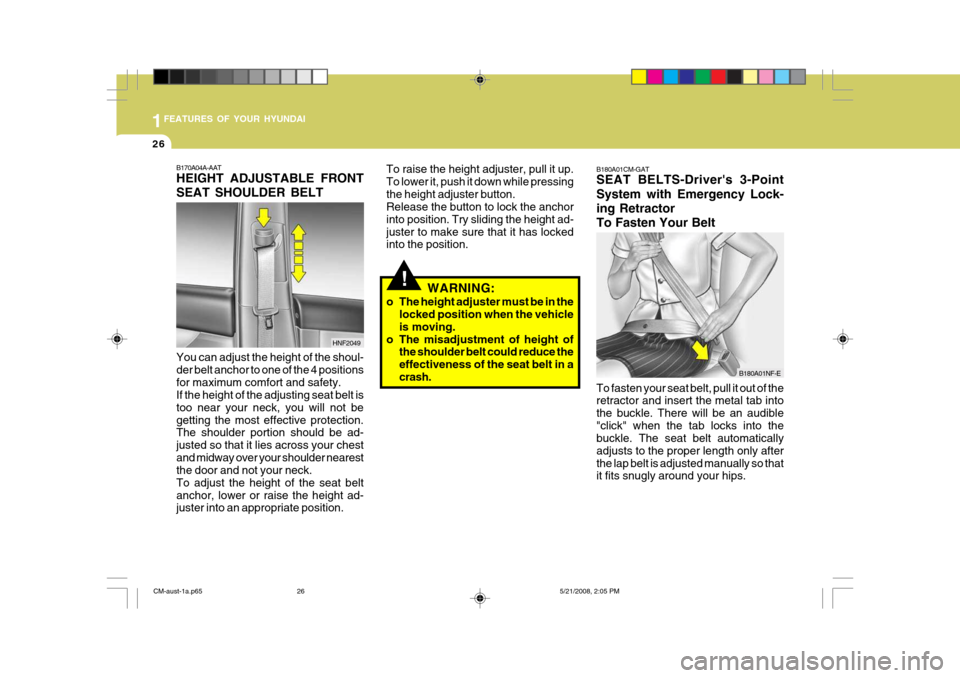
To raise the height adjuster, pull it up. To lower it, push it down while pressingthe height adjuster button. Release the button to lock the anchor into position. Try sliding the height ad-juster to make sure that it has locked into the position.
WARNING:
o The height adjuster must be in the locked position when the vehicle is moving.
o The misadjustment of height of the shoulder belt could reduce theeffectiveness of the seat belt in acrash. B180A01CM-GAT SEAT BELTS-Driver's 3-Point System with Emergency Lock- ing RetractorTo Fasten Your Belt To fasten your seat belt, pull it out of the retractor and insert the metal tab into the buckle. There will be an audible"click" when the tab locks into the buckle. The seat belt automatically adjusts to the proper length only afterthe lap belt is adjusted manually so that it fits snugly around your hips.
B170A04A-AAT HEIGHT ADJUSTABLE FRONT SEAT SHOULDER BELT You can adjust the height of the shoul- der belt anchor to one of the 4 positionsfor maximum comfort and safety. If the height of the adjusting seat belt is too near your neck, you will not begetting the most effective protection. The shoulder portion should be ad- justed so that it lies across your chestand midway over your shoulder nearest the door and not your neck. To adjust the height of the seat beltanchor, lower or raise the height ad- juster into an appropriate position.
HNF2049
B180A01NF-E
CM-aust-1a.p65
5/21/2008, 2:05 PM
26
Page 38 of 269
1
FEATURES OF YOUR HYUNDAI
27
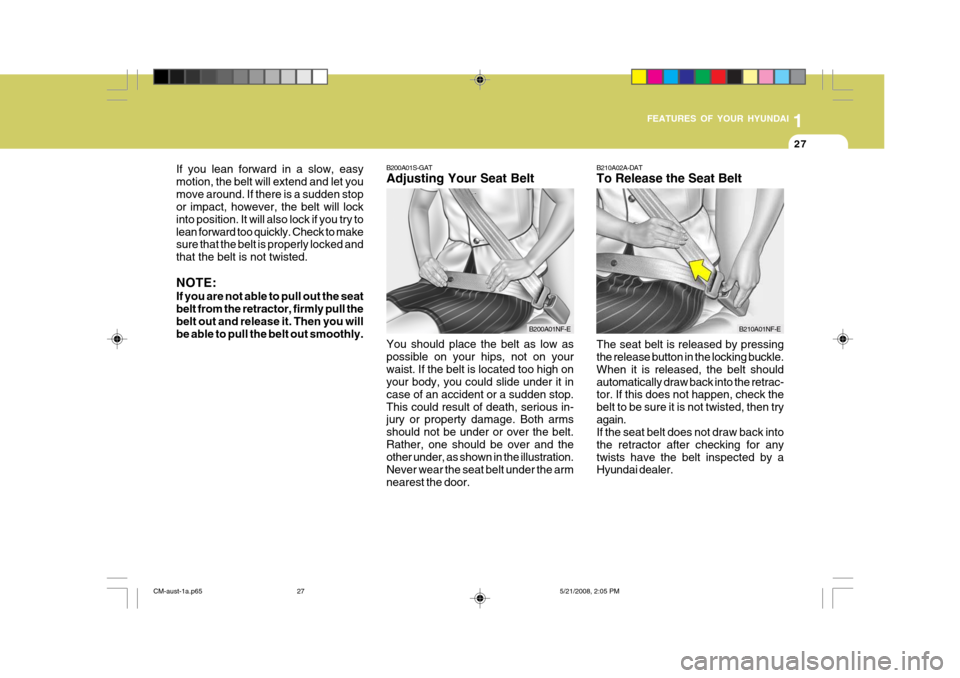
If you lean forward in a slow, easy motion, the belt will extend and let youmove around. If there is a sudden stop or impact, however, the belt will lock into position. It will also lock if you try tolean forward too quickly. Check to make sure that the belt is properly locked and that the belt is not twisted. NOTE: If you are not able to pull out the seat belt from the retractor, firmly pull the belt out and release it. Then you willbe able to pull the belt out smoothly. B200A01S-GAT Adjusting Your Seat Belt
B200A01NF-E
You should place the belt as low as possible on your hips, not on yourwaist. If the belt is located too high on your body, you could slide under it in case of an accident or a sudden stop.This could result of death, serious in- jury or property damage. Both arms should not be under or over the belt.Rather, one should be over and the other under, as shown in the illustration. Never wear the seat belt under the armnearest the door. B210A02A-DAT To Release the Seat Belt The seat belt is released by pressing the release button in the locking buckle. When it is released, the belt shouldautomatically draw back into the retrac- tor. If this does not happen, check the belt to be sure it is not twisted, then tryagain. If the seat belt does not draw back into the retractor after checking for anytwists have the belt inspected by a Hyundai dealer.B210A01NF-E
CM-aust-1a.p65
5/21/2008, 2:05 PM
27
Page 43 of 269
1FEATURES OF YOUR HYUNDAI
32
!WARNING:
To obtain maximum benefit from a pre-tensioner seat belt:
1. The seat belt must be worn cor- rectly.
2. The seat belt must be adjusted to the correct position.
NOTE:
o Both the driver's and front passenger's pre-tensioner seat belts will be activated in certainfrontal collisions. The pre- tensioner seat belts can be acti- vated with the airbags. The pre-tensioners will be activated even if the seat belts are not being worn at the time of the collision.
o When the pre-tensioner seat belts are activated, a loud noise may beheard and fine dust, which mayappear to be smoke, may be vis- ible in the passenger compart- ment. These are normal operatingconditions and are not hazard- ous.
B180B01O-D
Passenger's airbag
1
Driver's airbag
2
3
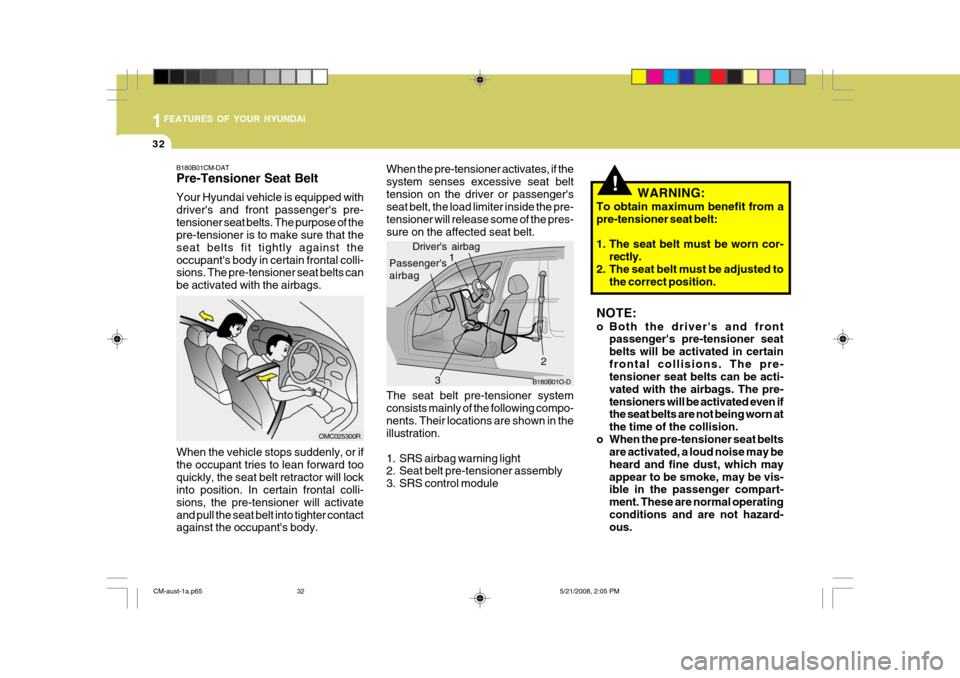
When the pre-tensioner activates, if the system senses excessive seat belttension on the driver or passenger's seat belt, the load limiter inside the pre- tensioner will release some of the pres-sure on the affected seat belt. The seat belt pre-tensioner system consists mainly of the following compo-nents. Their locations are shown in the illustration.
1. SRS airbag warning light
2. Seat belt pre-tensioner assembly
3. SRS control module
B180B01CM-DAT Pre-Tensioner Seat Belt Your Hyundai vehicle is equipped with driver's and front passenger's pre-tensioner seat belts. The purpose of the pre-tensioner is to make sure that the seat belts fit tightly against theoccupant's body in certain frontal colli- sions. The pre-tensioner seat belts can be activated with the airbags. When the vehicle stops suddenly, or if the occupant tries to lean forward tooquickly, the seat belt retractor will lock into position. In certain frontal colli- sions, the pre-tensioner will activateand pull the seat belt into tighter contact against the occupant's body.
OMC025300R
CM-aust-1a.p65
5/21/2008, 2:05 PM
32
Page 50 of 269
1
FEATURES OF YOUR HYUNDAI
39
!
OCM052211L
o The SRS can function only when
the ignition key is in the "ON" position. If the SRS is not working properly,(1) The SRS SRI does not come on when the ignition key is turnedto the "ON" position or after theengine is started.
(2) The SRS SRI blinks for a sec-
ond and remains on after illu-minating for about 6 seconds when the ignition key is turned to the "ON" position or after heengine is started.
(3) The SRS SRI illuminates while
driving.
If this occurs, have your vehicle immediately inspected by your Hyundai dealer.
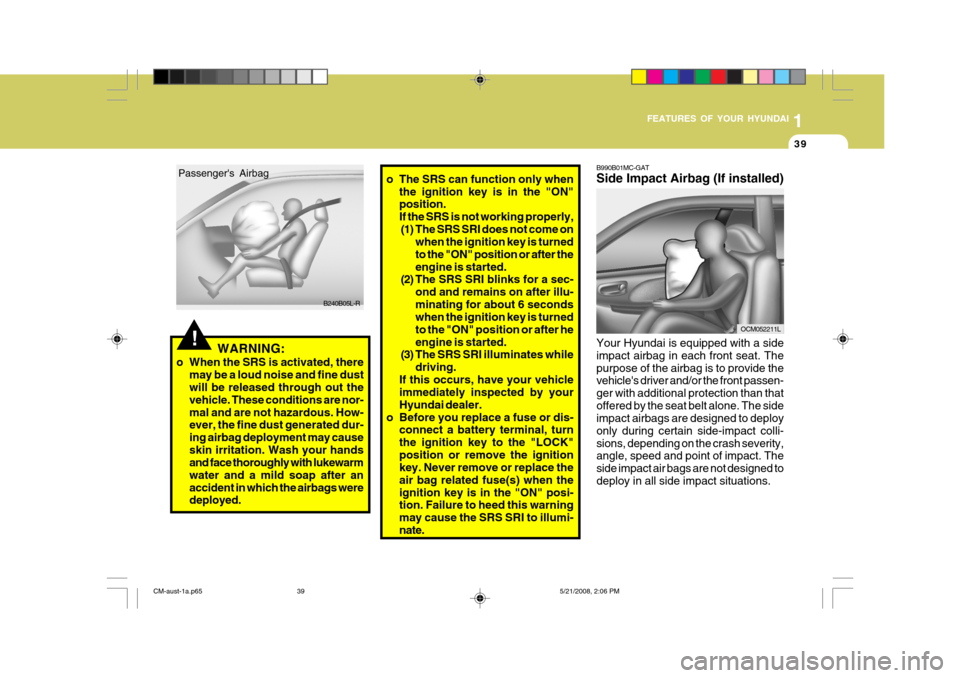
o Before you replace a fuse or dis- connect a battery terminal, turnthe ignition key to the "LOCK"position or remove the ignition key. Never remove or replace the air bag related fuse(s) when theignition key is in the "ON" posi- tion. Failure to heed this warning may cause the SRS SRI to illumi-nate. B990B01MC-GAT Side Impact Airbag (If installed) Your Hyundai is equipped with a side impact airbag in each front seat. Thepurpose of the airbag is to provide the vehicle's driver and/or the front passen- ger with additional protection than thatoffered by the seat belt alone. The side impact airbags are designed to deploy only during certain side-impact colli-sions, depending on the crash severity, angle, speed and point of impact. The side impact air bags are not designed todeploy in all side impact situations.
Passenger's Airbag
B240B05L-R
WARNING:
o When the SRS is activated, there may be a loud noise and fine dust will be released through out the vehicle. These conditions are nor-mal and are not hazardous. How- ever, the fine dust generated dur- ing airbag deployment may causeskin irritation. Wash your hands and face thoroughly with lukewarm water and a mild soap after anaccident in which the airbags were deployed.
CM-aust-1a.p65 5/21/2008, 2:06 PM
39
Page 51 of 269
1FEATURES OF YOUR HYUNDAI
40
!
OCM052212L
Side airbag sensor
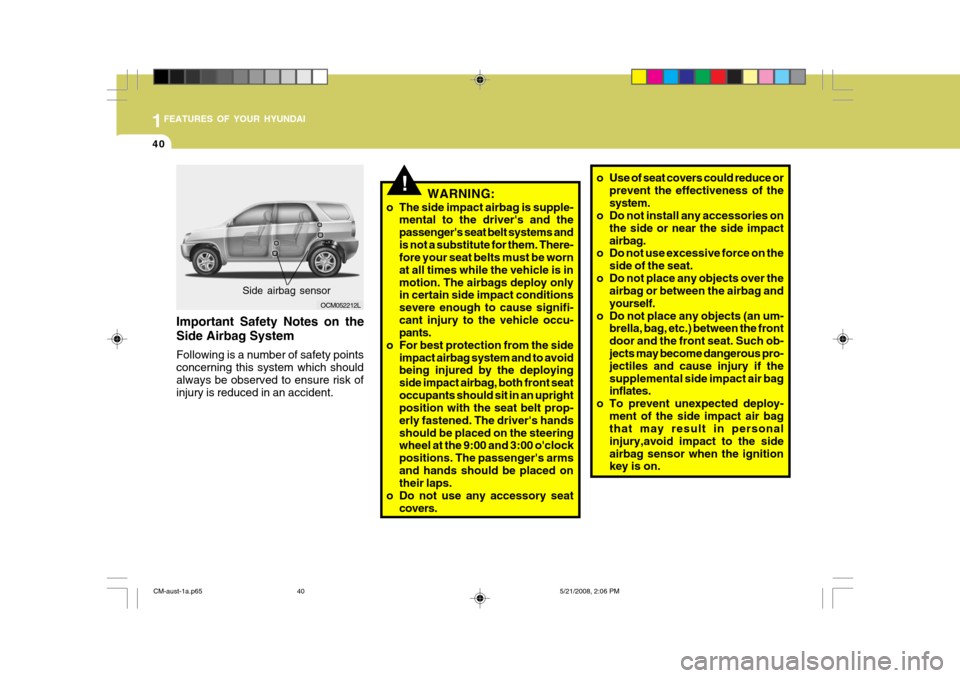
Important Safety Notes on the Side Airbag System Following is a number of safety points concerning this system which shouldalways be observed to ensure risk of injury is reduced in an accident. WARNING:
o The side impact airbag is supple- mental to the driver's and the passenger's seat belt systems andis not a substitute for them. There- fore your seat belts must be worn at all times while the vehicle is inmotion. The airbags deploy only in certain side impact conditions severe enough to cause signifi-cant injury to the vehicle occu- pants.
o For best protection from the side impact airbag system and to avoidbeing injured by the deploying side impact airbag, both front seatoccupants should sit in an upright position with the seat belt prop- erly fastened. The driver's handsshould be placed on the steering wheel at the 9:00 and 3:00 o'clock positions. The passenger's armsand hands should be placed on their laps.
o Do not use any accessory seat covers. o Use of seat covers could reduce or
prevent the effectiveness of the system.
o Do not install any accessories on
the side or near the side impactairbag.
o Do not use excessive force on the
side of the seat.
o Do not place any objects over the airbag or between the airbag andyourself.
o Do not place any objects (an um- brella, bag, etc.) between the frontdoor and the front seat. Such ob- jects may become dangerous pro- jectiles and cause injury if thesupplemental side impact air bag inflates.
o To prevent unexpected deploy-
ment of the side impact air bagthat may result in personal injury,avoid impact to the sideairbag sensor when the ignition key is on.
CM-aust-1a.p65 5/21/2008, 2:06 PM
40
Page 56 of 269
1
FEATURES OF YOUR HYUNDAI
45
1. Low Windshield Washer Fluid Level Warning Light
2. Malfunction Indicator Light (MIL)
3. Door/Tail Gate Open Display (If installed)
4. 4WD System Warning Light
5. 4WD Lock Indicator Light
6. Odometer / Tripmeter / Trip Computer (If installed)
7. Fuel Gauge
8. Low Fuel Warning Light
9. Seat Belt Warning Light (Driver's Side)
10. Parking Brake/Low Brake Fluid Level Warning Light 11.Charging System Warning Light
12. Coolant Temperature Gauge 13.Low Oil Pressure Warning Light 14.Supplemental Restraint (AirBag) System Service Reminder Indicator (SRI) 15.Tail Gate Open Warning Light 16.Door Ajar Warning Light
17. Automatic Transaxle Position Indicator Light (If installed)
18. High Beam Indicator Light
19. Cruise SET Indicator Light (If Installed) 20.Cruise Indicator Light (If installed)
21. ABS Service Reminder Indicator
22. Turn Signal Indicator Light
23. Speedometer
24. Electronic Stability Program (ESP) Indicator Light
(If Installed)
25. Immobiliser Warning Light
26. Tachometer
CM-aust-1a.p65 5/21/2008, 2:06 PM
45