Page 72 of 269
1
FEATURES OF YOUR HYUNDAI
61
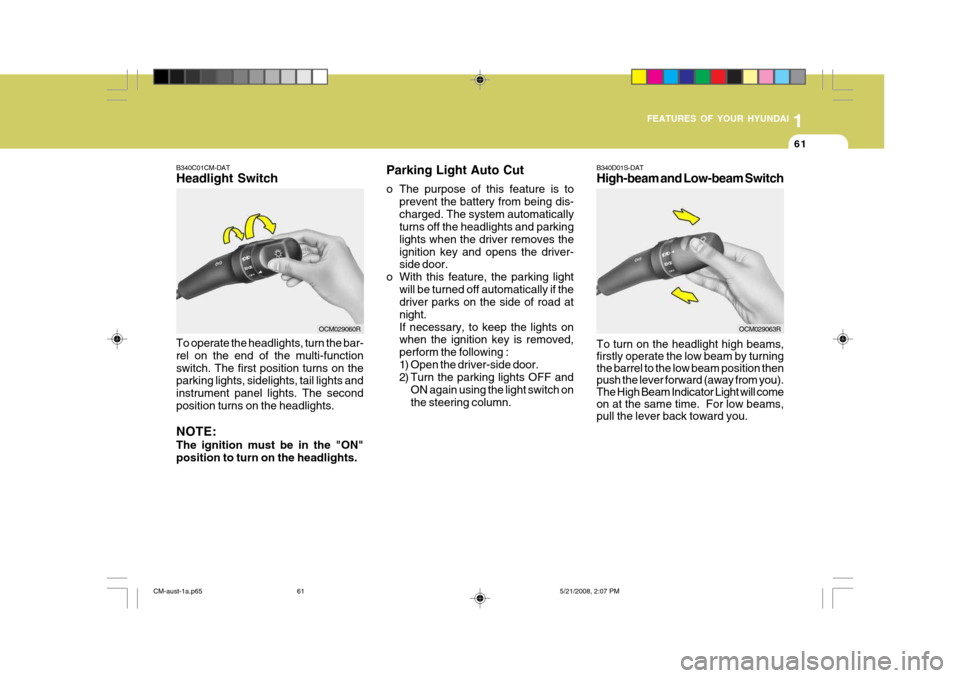
B340C01CM-DAT Headlight Switch To operate the headlights, turn the bar- rel on the end of the multi-functionswitch. The first position turns on the parking lights, sidelights, tail lights and instrument panel lights. The secondposition turns on the headlights. NOTE: The ignition must be in the "ON" position to turn on the headlights. Parking Light Auto Cut
o The purpose of this feature is to
prevent the battery from being dis- charged. The system automatically turns off the headlights and parking lights when the driver removes theignition key and opens the driver- side door.
o With this feature, the parking light will be turned off automatically if thedriver parks on the side of road at night.If necessary, to keep the lights on when the ignition key is removed, perform the following :
1) Open the driver-side door.
2) Turn the parking lights OFF andON again using the light switch on the steering column.
OCM029060R B340D01S-DAT High-beam and Low-beam Switch To turn on the headlight high beams, firstly operate the low beam by turning the barrel to the low beam position then push the lever forward (away from you). The High Beam Indicator Light will come on at the same time. For low beams, pull the lever back toward you.OCM029063R
CM-aust-1a.p65
5/21/2008, 2:07 PM
61
Page 75 of 269
1FEATURES OF YOUR HYUNDAI
64
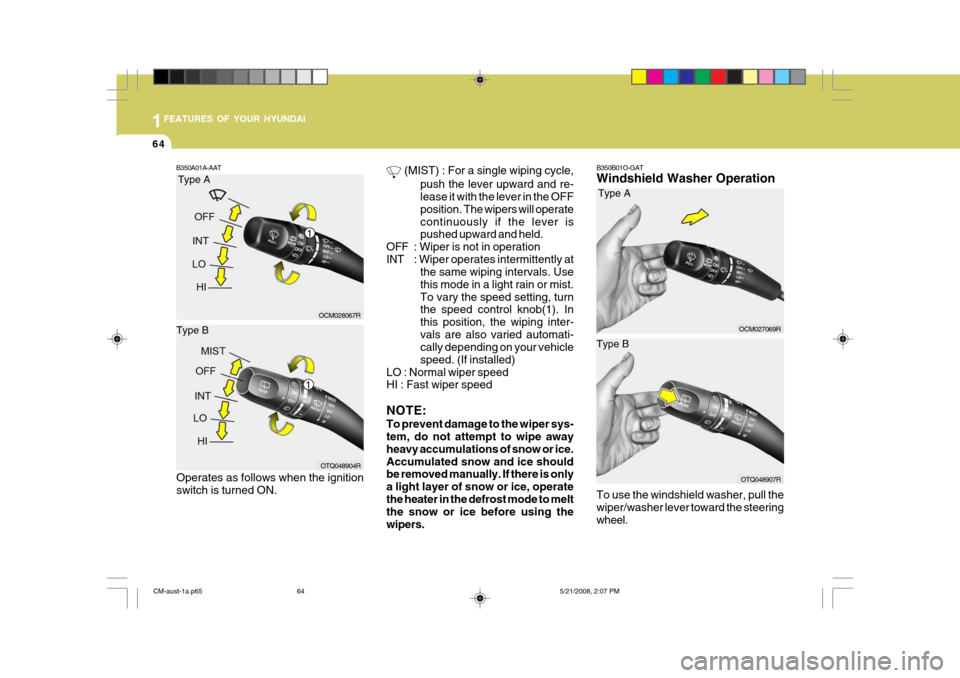
B350B01O-GAT Windshield Washer Operation To use the windshield washer, pull the wiper/washer lever toward the steeringwheel.
B350A01A-AAT
(MIST) : For a single wiping cycle,
push the lever upward and re- lease it with the lever in the OFF position. The wipers will operatecontinuously if the lever is pushed upward and held.
OFF : Wiper is not in operation
INT : Wiper operates intermittently at the same wiping intervals. Usethis mode in a light rain or mist.To vary the speed setting, turn the speed control knob(1). In this position, the wiping inter-vals are also varied automati- cally depending on your vehicle speed. (If installed)
LO : Normal wiper speed HI : Fast wiper speed NOTE: To prevent damage to the wiper sys- tem, do not attempt to wipe away heavy accumulations of snow or ice.Accumulated snow and ice should be removed manually. If there is only a light layer of snow or ice, operatethe heater in the defrost mode to melt the snow or ice before using the wipers.Type A
Type B
OCM028067R
OTQ048904R
Operates as follows when the ignition switch is turned ON.
Type A
Type B
OCM027069R
OTQ048907R
1
1
CM-aust-1a.p65 5/21/2008, 2:07 PM
64
Page 93 of 269
1FEATURES OF YOUR HYUNDAI
82
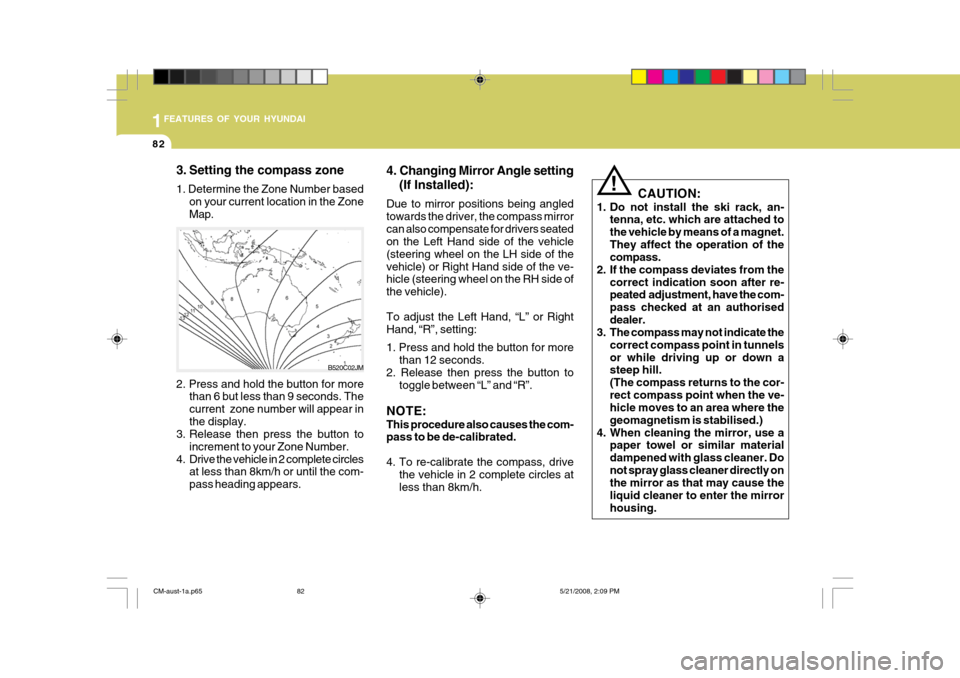
3. Setting the compass zone 1. Determine the Zone Number based
on your current location in the Zone Map.
2. Press and hold the button for more than 6 but less than 9 seconds. Thecurrent zone number will appear inthe display.
3. Release then press the button to
increment to your Zone Number.
4. Drive the vehicle in 2 complete circles at less than 8km/h or until the com-pass heading appears. B520C02JM
!
CAUTION:
1. Do not install the ski rack, an- tenna, etc. which are attached to the vehicle by means of a magnet.They affect the operation of the compass.
2. If the compass deviates from the
correct indication soon after re-peated adjustment, have the com- pass checked at an authoriseddealer.
3. The compass may not indicate the
correct compass point in tunnelsor while driving up or down a steep hill. (The compass returns to the cor-rect compass point when the ve- hicle moves to an area where the geomagnetism is stabilised.)
4. When cleaning the mirror, use a paper towel or similar materialdampened with glass cleaner. Donot spray glass cleaner directly on the mirror as that may cause the liquid cleaner to enter the mirrorhousing.
4. Changing Mirror Angle setting
(If Installed):
Due to mirror positions being angledtowards the driver, the compass mirrorcan also compensate for drivers seated on the Left Hand side of the vehicle (steering wheel on the LH side of thevehicle) or Right Hand side of the ve- hicle (steering wheel on the RH side of the vehicle). To adjust the Left Hand, “L” or Right Hand, “R”, setting: 1. Press and hold the button for more than 12 seconds.
2. Release then press the button to
toggle between “L” and “R”.
NOTE: This procedure also causes the com- pass to be de-calibrated.
4. To re-calibrate the compass, drive the vehicle in 2 complete circles at less than 8km/h.
CM-aust-1a.p65 5/21/2008, 2:09 PM
82
Page 94 of 269
1
FEATURES OF YOUR HYUNDAI
83PARKING BRAKE
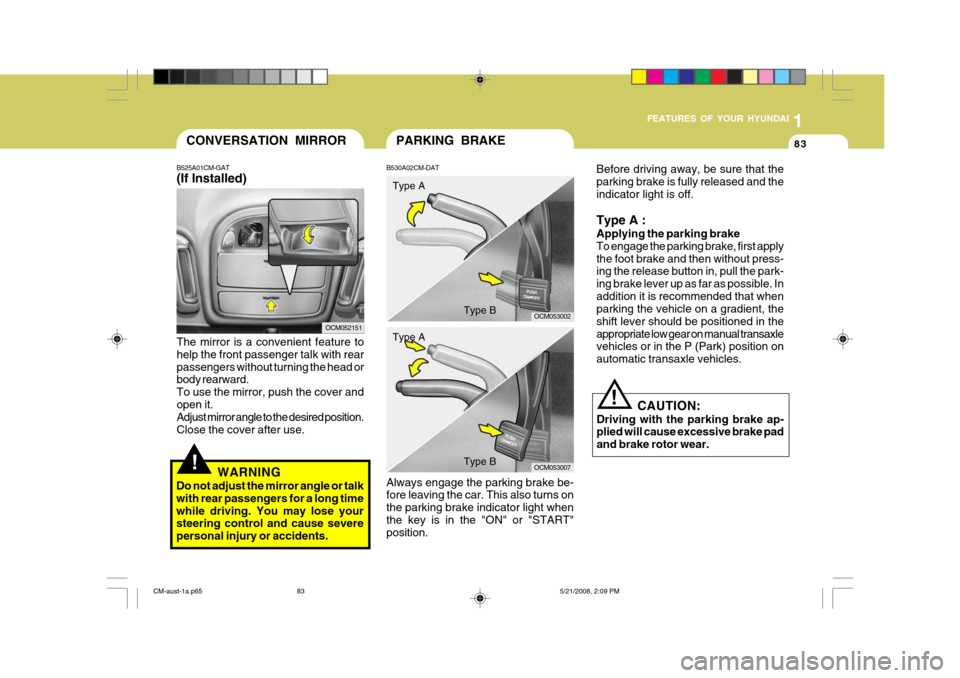
B530A02CM-DAT Always engage the parking brake be- fore leaving the car. This also turns on the parking brake indicator light whenthe key is in the "ON" or "START" position. Type A
Type B
Type AType B
OCM053002
OCM053007Before driving away, be sure that the parking brake is fully released and theindicator light is off. Type A : Applying the parking brake To engage the parking brake, first applythe foot brake and then without press- ing the release button in, pull the park- ing brake lever up as far as possible. Inaddition it is recommended that when parking the vehicle on a gradient, the shift lever should be positioned in theappropriate low gear on manual transaxle vehicles or in the P (Park) position on automatic transaxle vehicles.!
The mirror is a convenient feature to help the front passenger talk with rearpassengers without turning the head or body rearward. To use the mirror, push the cover andopen it. Adjust mirror angle to the desired position. Close the cover after use.
WARNING
Do not adjust the mirror angle or talkwith rear passengers for a long timewhile driving. You may lose your steering control and cause severe personal injury or accidents.
CONVERSATION MIRROR
B525A01CM-GAT (If Installed)
OCM052151
CAUTION:
Driving with the parking brake ap- plied will cause excessive brake pad and brake rotor wear.
!
CM-aust-1a.p65 5/21/2008, 2:09 PM
83
Page 103 of 269
1FEATURES OF YOUR HYUNDAI
92
B620A01S-AAT (If installed) A red light comes on when the front door is opened. The purpose of this light is to assist when you get in or out, and alsoto warn passing vehicles.FRONT DOOR EDGE WARNING LIGHT
HORN
B610B01A-DAT Press the centre hub of the steering wheel to sound the horn.
OCM052052
REAR SEAT ARM REST
B611A01Y-DAT The rear seat arm rest is located in the centre of the rear seat back.
OCM052035
OCM051027R
CM-aust-1a.p65 5/21/2008, 2:10 PM
92
Page 104 of 269
1
FEATURES OF YOUR HYUNDAI
93
!
CAUTION:
After adjusting the steering wheel, try moving it up and down to make sure it is locked in position.!
WARNING:
Do not attempt to adjust the steering wheel while driving as this may re-sult in loss of control of the vehicle and serious injury or death.
B600B01NF-GAT Tilt and telescopic type (If Installed)
To adjust the steering wheel:
1. Push the lever downward fully to
unlock.
2. Adjust upward or downward and for- ward or backward to set the steering wheel to the desired position.
3. After adjustment, securely tighten
the lever by pulling it upward. OCM052051R
STEERING WHEEL COLUMN
B600A01NF-GAT Tilt type
To adjust the steering wheel:
1. Pull the lever toward you and hold it to unlock.
2. Raise or lower the steering wheel to the desired position.
3. After adjustment, release the lever.
OCM052050R
CM-aust-1a.p65 5/21/2008, 2:10 PM
93
Page 108 of 269
1
FEATURES OF YOUR HYUNDAI
97
o Use the cruise control system only
when traveling on open highways in good weather.
o Do not use the cruise control when
it may not be safe to keep the carat a constant speed, for instance, driving in heavy or varying traffic, or on slippery (rainy, icy or snow-covered) or winding roads or over 6% up-hill or down-hill roads.
o Pay particular attention to the driv-
ing conditions whenever using thecruise control system.
o During cruise-control driving with a manual transaxle vehicle, do not shift into neutral without depress-ing the clutch pedal, since the engine will be overrevved. If this happens, depress the clutch pedalor release the cruise control ON/ OFF switch.
o During normal cruise control op-
eration, when the "SET" switch isactivated or reactivated after ap- plying the brakes, the cruise con-trol will energize after approxi- mately 3 seconds. This delay is normal.
!WARNING:
o Keep the cruise control ON/OFF switch off when not using the cruise control.
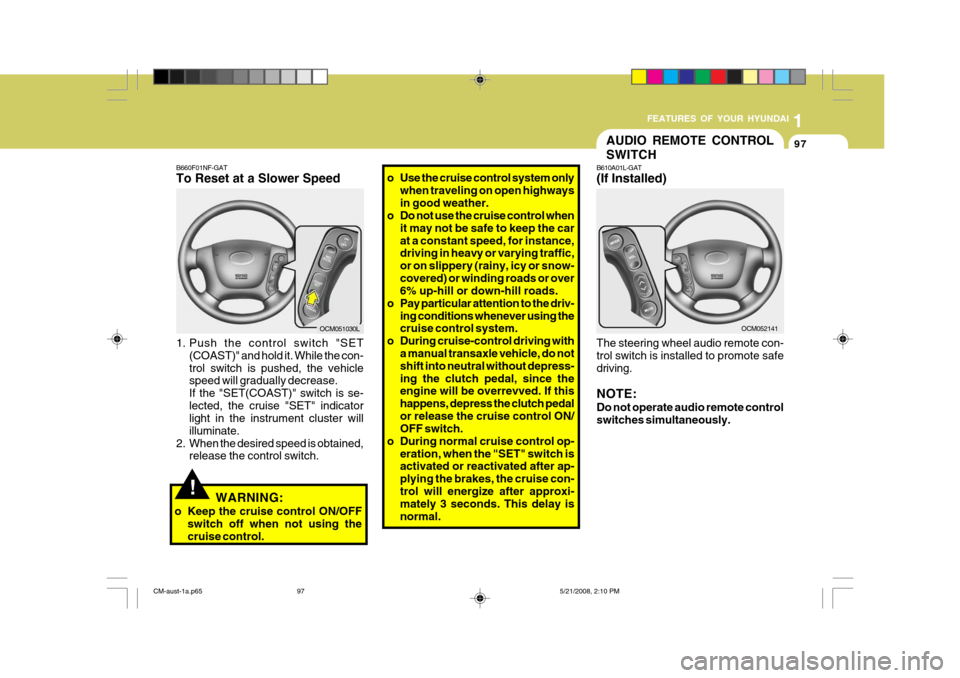
B660F01NF-GAT To Reset at a Slower Speed
1. Push the control switch "SET (COAST)" and hold it. While the con- trol switch is pushed, the vehicle speed will gradually decrease. If the "SET(COAST)" switch is se-lected, the cruise "SET" indicator light in the instrument cluster will illuminate.
2. When the desired speed is obtained, release the control switch.
OCM051030L
AUDIO REMOTE CONTROL SWITCH
B610A01L-GAT (If Installed) The steering wheel audio remote con- trol switch is installed to promote safedriving. NOTE: Do not operate audio remote control switches simultaneously. OCM052141
CM-aust-1a.p65
5/21/2008, 2:10 PM
97
Page 150 of 269
2
DRIVING YOUR HYUNDAI
5
!
KEY POSITIONS
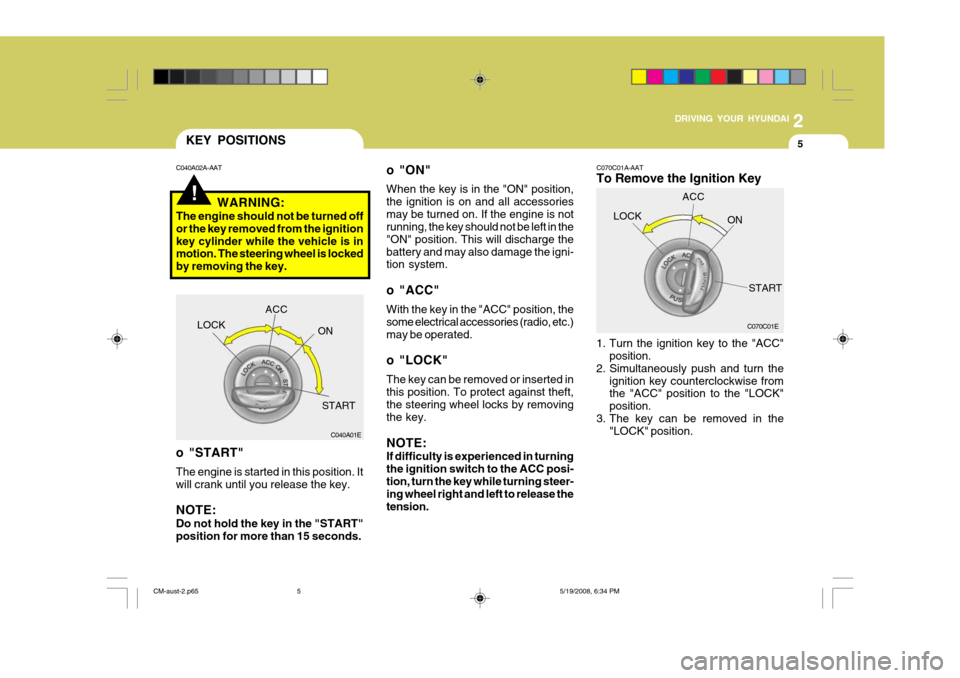
o "ON" When the key is in the "ON" position, the ignition is on and all accessoriesmay be turned on. If the engine is not running, the key should not be left in the "ON" position. This will discharge thebattery and may also damage the igni- tion system.
o "ACC" With the key in the "ACC" position, the some electrical accessories (radio, etc.)may be operated.
o "LOCK" The key can be removed or inserted in this position. To protect against theft, the steering wheel locks by removing the key. NOTE: If difficulty is experienced in turning the ignition switch to the ACC posi-tion, turn the key while turning steer- ing wheel right and left to release the tension. C070C01A-AAT To Remove the Ignition Key
1. Turn the ignition key to the "ACC"
position.
2. Simultaneously push and turn the
ignition key counterclockwise from the "ACC" position to the "LOCK" position.
3. The key can be removed in the "LOCK" position.
C040A02A-AAT
WARNING:
The engine should not be turned offor the key removed from the ignitionkey cylinder while the vehicle is in motion. The steering wheel is locked by removing the key.
o "START" The engine is started in this position. It will crank until you release the key. NOTE: Do not hold the key in the "START" position for more than 15 seconds. C040A01E
LOCK
ACC
ON
START C070C01E
LOCK
ACC
ON
START
CM-aust-2.p65 5/19/2008, 6:34 PM
5