Page 246 of 303
727
Maintenance
G180202AFD-UK
Rear window wiper blade (if equipped)
1. Raise the wiper arm and pull out the wiper blade assembly. 2. Install the new blade assembly by
inserting the centre part into the slot in
the wiper arm until it clicks into place.
3. Make sure the blade assembly is installed firmly by trying to pull it slight-
ly.
To prevent damage to the wiper arms or
other components, have a HYUNDAI
authorised repairer replace the wiper
blade. G190100AUN
For best battery service
Keep the battery securely mounted.
Keep the battery top clean and dry.
Keep the terminals and connections
clean, tight, and coated with petroleum
jelly or terminal grease.
Rinse any spilled electrolyte from the battery immediately with a solution of
water and baking soda.
If the vehicle is not going to be used for an extended time, disconnect the bat-
tery cables.
BATTERY
OTQ077022OEN076019OEN076018
Page 247 of 303
Maintenance
28
7
(Continued)
The electrical ignition system
works with high voltage. Never
touch these components with theengine running or the ignition
switched on.
Failure to follow the above warn-
ings can result in serious bodily
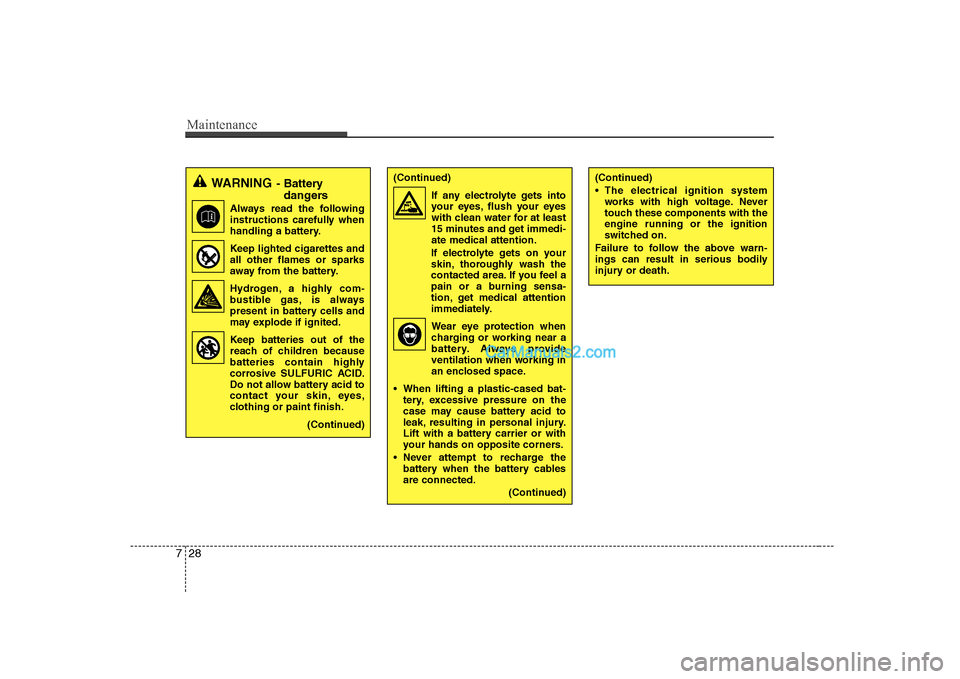
injury or death.WARNING - Battery
dangers
Always read the following
instructions carefully when
handling a battery.
Keep lighted cigarettes and all other flames or sparks
away from the battery.
Hydrogen, a highly com- bustible gas, is always
present in battery cells and
may explode if ignited.
Keep batteries out of the
reach of children because
batteries contain highly
corrosive SULFURIC ACID.
Do not allow battery acid to
contact your skin, eyes,
clothing or paint finish.
(Continued)(Continued)If any electrolyte gets intoyour eyes, flush your eyes
with clean water for at least
15 minutes and get immedi-ate medical attention.
If electrolyte gets on your
skin, thoroughly wash the
contacted area. If you feel a
pain or a burning sensa-
tion, get medical attention
immediately.
Wear eye protection whencharging or working near a
battery. Always provide
ventilation when working in
an enclosed space.
When lifting a plastic-cased bat- tery, excessive pressure on the
case may cause battery acid to
leak, resulting in personal injury.
Lift with a battery carrier or with
your hands on opposite corners.
Never attempt to recharge the battery when the battery cablesare connected.
(Continued)
Page 248 of 303
729
Maintenance
G190200AUN-UK
Battery recharging
Your vehicle has a maintenance-free,
calcium-based battery.
If the battery becomes discharged in ashort time (because, for example, the
headlights or interior lights were left on
whilst the vehicle was not in use),
recharge it by slow charging (trickle)
for 10 hours.
If the battery gradually discharges because of high electric load whilst the
vehicle is being used, recharge it at 20-
30A for two hours.
G190300ATQ Reset items
Items should be reset after the battery
has been discharged or the battery hasbeen disconnected.
Climate control system (See section 4)
Clock (See section 4)
Audio (See section 4)(Continued)
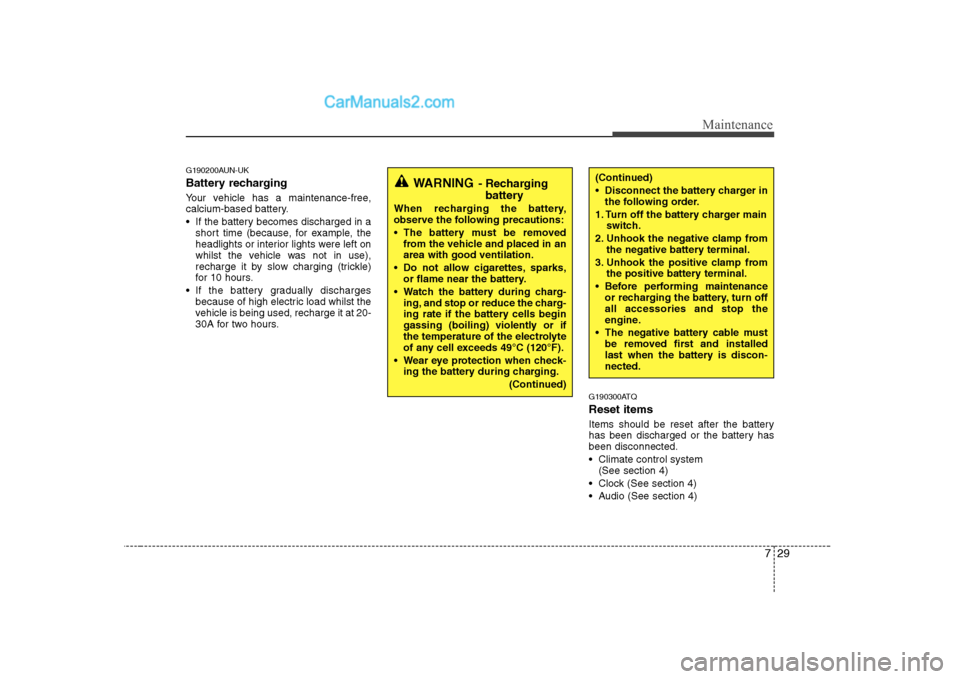
Disconnect the battery charger in the following order.
1. Turn off the battery charger main switch.
2. Unhook the negative clamp from the negative battery terminal.
3. Unhook the positive clamp from the positive battery terminal.
Before performing maintenance or recharging the battery, turn off all accessories and stop the
engine.
The negative battery cable must be removed first and installed
last when the battery is discon-nected.WARNING - Recharging
battery
When recharging the battery,
observe the following precautions:
The battery must be removed from the vehicle and placed in an area with good ventilation.
Do not allow cigarettes, sparks, or flame near the battery.
Watch the battery during charg- ing, and stop or reduce the charg-
ing rate if the battery cells begin
gassing (boiling) violently or if
the temperature of the electrolyte
of any cell exceeds 49°C (120°F).
Wear eye protection when check- ing the battery during charging.
(Continued)
Page 254 of 303
735
Maintenance
G200700BUN-UK Wheel replacement
When replacing the metal wheels for
any reason, make sure the new
wheels are equivalent to the original
factory units in diameter, rim widthand offset.G200800AUN-UK
Tyre traction
Tyre traction can be reduced if you
drive on worn tyres, tyres that are
improperly inflated or on slippery
road surfaces. Tyres should be
replaced when tread wear indicators
appear. To reduce the possibility of
losing control, slow down whenever
there is rain, snow or ice on the road.
G200900AUN-UK
Tyre maintenance In addition to proper inflation, correct wheel alignment helps to decrease
tyre wear. If you find a tyre is worn
unevenly, have your repairer checkthe wheel alignment.
When you have new tyres installed,
make sure they are balanced. This
will increase vehicle ride comfort and
tyre life. Additionally, a tyre should
always be rebalanced if it is removedfrom the wheel.G201000AUN-UK
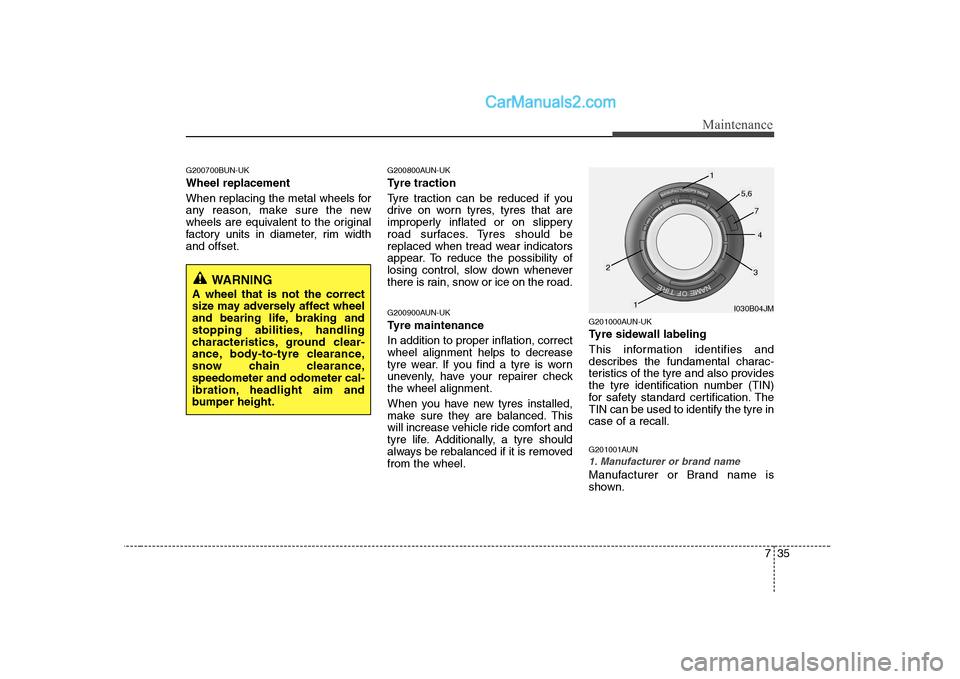
Tyre sidewall labeling
This information identifies and
describes the fundamental charac-
teristics of the tyre and also provides
the tyre identification number (TIN)
for safety standard certification. TheTIN can be used to identify the tyre incase of a recall.
G201001AUN
1. Manufacturer or brand name
Manufacturer or Brand name is
shown.
WARNING
A wheel that is not the correct
size may adversely affect wheel
and bearing life, braking and
stopping abilities, handling
characteristics, ground clear-
ance, body-to-tyre clearance,
snow chain clearance,speedometer and odometer cal-
ibration, headlight aim and
bumper height.
I030B04JM
1
1
23
4
5,6
7
Page 255 of 303
Maintenance
36
7
G201002AEN-UK
2. Tyre size designation
A tyre’s sidewall is marked with a tyre
size designation. You will need this
information when selecting replace-
ment tyres for your car. The following
explains what the letters and num-
bers in the tyre size designationmean.
Example tyre size designation:
(These numbers are provided as an
example only; your tyre size designa-
tor could vary depending on your
vehicle.) P245/65R17 105T
P - Applicable vehicle type (tyres
marked with the prefix “P’’ are
intended for use on passenger
cars or light trucks; however, not
all tyres have this marking).
245 - Tyre width in millimeters.
65 - Aspect ratio. The tyre’s section height as a percentage of its width.
R - Tyre construction code (Radial).
17 - Rim diameter in inches. 105 - Load Index, a numerical code
associated with the maximum
load the tyre can carry.
T - Speed Rating Symbol. See the speed rating chart in this section
for additional information.
Wheel size designation
Wheels are also marked with impor-
tant information that you need if you
ever have to replace one. The follow-
ing explains what the letters and
numbers in the wheel size designa-tion mean.
Example wheel size designation: 7.0JX17
7.0 - Rim width in inches. J - Rim contour designation.
17 - Rim diameter in inches. Tyre speed ratings
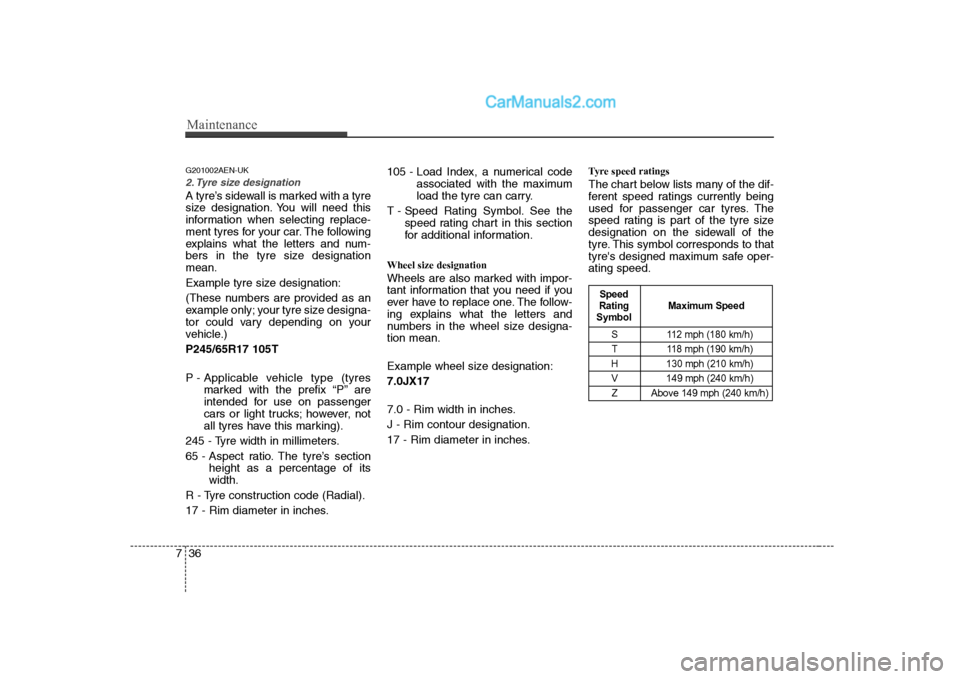
The chart below lists many of the dif-
ferent speed ratings currently being
used for passenger car tyres. The
speed rating is part of the tyre size
designation on the sidewall of the
tyre. This symbol corresponds to that
tyre's designed maximum safe oper-ating speed.
S 112 mph (180 km/h)
T 118 mph (190 km/h)
H 130 mph (210 km/h) V 149 mph (240 km/h) Z Above 149 mph (240 km/h)
Maximum Speed
Speed
Rating
Symbol
Page 258 of 303
739
Maintenance
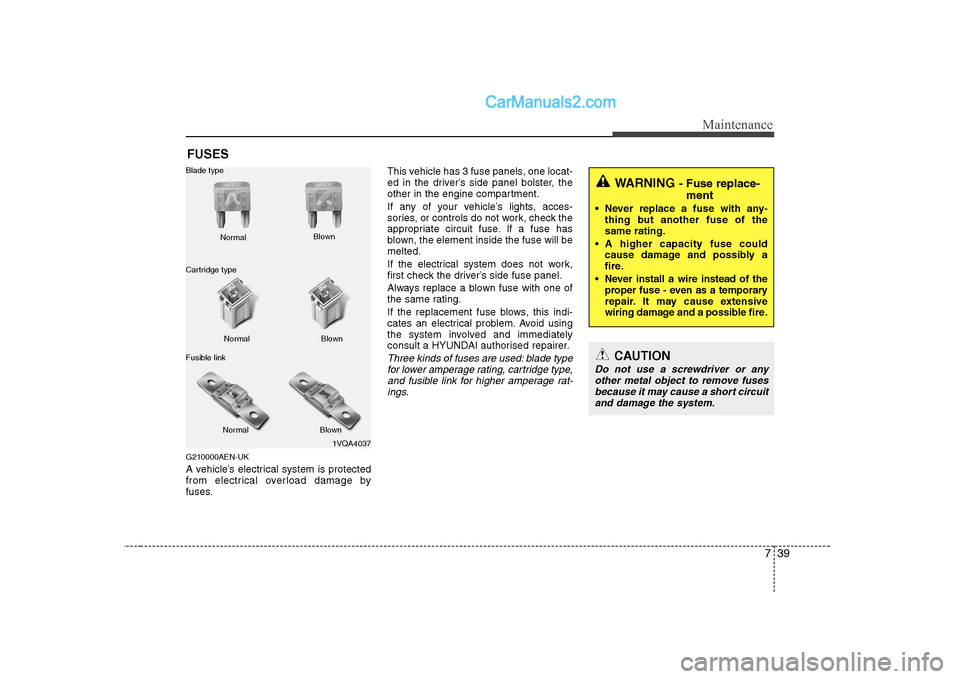
FUSES
G210000AEN-UK
A vehicle’s electrical system is protected
from electrical overload damage by
fuses. This vehicle has 3 fuse panels, one locat-
ed in the driver’s side panel bolster, the
other in the engine compartment.
If any of your vehicle’s lights, acces-
sories, or controls do not work, check the
appropriate circuit fuse. If a fuse has
blown, the element inside the fuse will bemelted.
If the electrical system does not work,
first check the driver’s side fuse panel.
Always replace a blown fuse with one of
the same rating.
If the replacement fuse blows, this indi-
cates an electrical problem. Avoid using
the system involved and immediately
consult a HYUNDAI authorised repairer.
Three kinds of fuses are used: blade type
for lower amperage rating, cartridge type,
and fusible link for higher amperage rat-ings.
1VQA4037
Normal
Normal
Blade type
Cartridge type
Fusible link Blown
Blown
Normal Blown
WARNING - Fuse replace-
ment
Never replace a fuse with any- thing but another fuse of the same rating.
A higher capacity fuse could cause damage and possibly a
fire.
Never install a wire instead of the proper fuse - even as a temporary
repair. It may cause extensive
wiring damage and a possible fire.
CAUTION
Do not use a screwdriver or any
other metal object to remove fusesbecause it may cause a short circuit and damage the system.
Page 259 of 303
Maintenance
40
7
G210100AFD-UK Instrument panel fuse replace- ment
1. Turn the ignition switch and all other
switches off.
2. Open the fuse panel cover. 3. Pull the suspected fuse straight out.
Use the removal tool provided in the
engine compartment fuse panel.
4. Check the removed fuse; replace it if it is blown.
Spare fuses are provided in the inner
fuse panel (or in the engine compart- ment fuse panel).
5. Push in a new fuse of the same rating, and make sure it fits tightly in the clips.
If it fits loosely, consult a HYUNDAI
authorised repairer.
If you do not have a spare, use a fuse of the same rating from a circuit you may not need for operating the vehicle, suchas the cigarette lighter fuse.
If the headlights or other electrical com-
ponents do not work and the fuses are
OK, check the fuse panel in the engine
compartment. If a fuse is blown, it mustbe replaced.
OTQ077041ROTQ077040R
Page 260 of 303
741
Maintenance
G210101AUN
Memory fuse
Your vehicle is equipped with a memory
fuse to prevent battery discharge if your
vehicle is parked without being operated
for prolonged periods. Use the following
procedures before parking the vehicle for
prolonged periods.
1. Turn off the engine.
2. Turn off the headlights and tail lights.
3. Open the driver’s side panel cover andpull up the memory fuse.
✽✽ NOTICE